Using and Customizing Templates in OpenOffice.org - Page 5
Using Label Wizard Templates
There are two basic types of label templates in OpenOffice.org: documents that already exist, and templates that are created for you based on selections you make in the label wizard. Using the wizard labels is a bit different. It's definitely a good idea to learn to use them, however; they provide two key features, mail merge and the ability to automatically update all labels in the sheet to match the first label. I won't talk about mail merge, since that's a big topic on its own, but I will go through how to do the automatic update, also known as synchronizing.
Creating a Label Using the Label Wizard
1. Choose File > New > Labels.
2. In the window that appears, select the page size and Avery number that you want.
3. If you want the same content to appear in every label, fill in that text in the blank field. (You can change and format it later.)
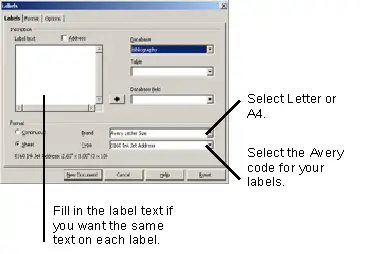
Note: If you want to make slight adjustments to the label, click the Format tab and change the measurements. However, this is an advanced task and you shouldn't have to do this.
4. Click the Options tab. If you want the text or formatting to be the same in all the labels, select the Synchronize option.
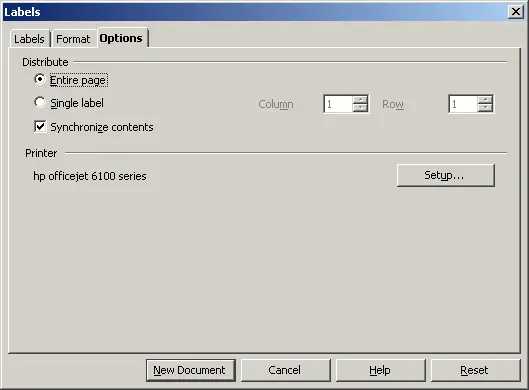
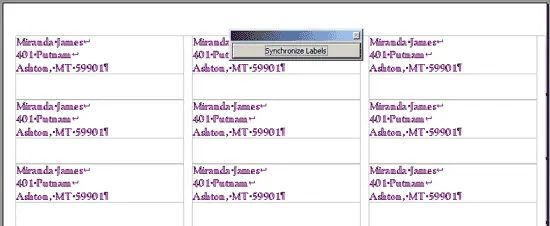
5. Click New Document. The label document will appear, and if you selected Synchronize, the Synchronize button will appear, as well.
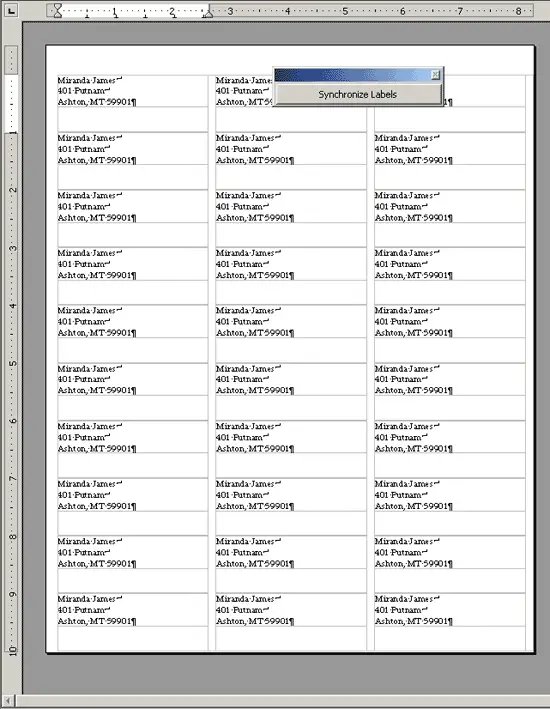
6. You're now ready to format, print, edit, or otherwise change the template.
Updating Labels Using the Synchronize Feature
Here's how the Synchronize feature works. It's very handy—you can use it to update the text or the formatting (or the graphics) in the first label so that all other labels match.
1. Make the changes you want in the first cell. Change the formatting as you would normally in a text document, change the content, or (as in the next procedure) add a graphic.
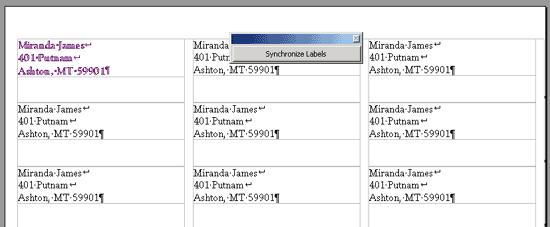
2. Click the Synchronize Labels button.
3. All the labels will be updated to match the first one.
- creating in the wizard
- using synchronize
- saving as a template with File > Templates > Save to put in the category with the others
Saving a Wizard Template as a Standard Template
Going through the Wizard to create labels each time is a bit more work than just opening an existing template. However, there is that handy Synchronize feature. What do you do to reduce the labor associated with the wizard labels? Just save the template the wizard creates in the same location as your other templates.
1. Create a template as you would normally, through the wizard.
2. Do any additional formatting once you have created the template.
3. Choose File > Templates > Save.
4. In the Templates window that appears, type a name for the template, and a category.
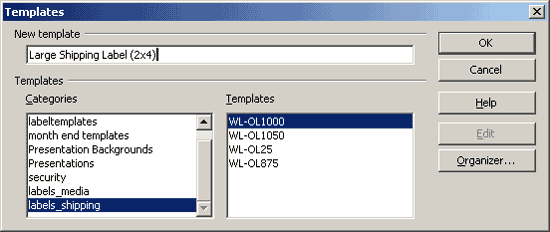
Note: To create a new category, click Organizer. In the left-hand list, right-click on an existing category and select New. Immediately type the name of the new category. Click Close to go back to the Templates window.
5. Click OK.
You can now use the template the same way you use any other template. Choose File > New > Templates and Documents, select the Templates category, and just double-click the template you want.

