The Perfect Desktop - Slackware 12 - Page 2
3 Post Installation Configuration
In this section we will create your user account for every day computing. Then we'll enable basic security, setup audio, create the locate database, start X, and personalize KDE.adduser:
Generally people don't run root as their main account. So we're going to create a new user for everyday use. When you need root access you will be able to use the su command. It's risky using the root account as your daily account because it's very easy to run a command and accidentally break your system.
In the terminal we create your new user account by running
adduser
Enter a login name for your new user and press Enter:
Accept the default for User ID and press Enter:
Accept the default for Initial group and press Enter:
Important! Do not accept the default value for Additional groups.
Add the following group names to Additional groups:
cdrom, audio, video, plugdev, scanner
Additional groups will now look like the screenshot below. Press Enter to continue:
Accept the default Home directory by pressing Enter:
Accept the default Shell and press Enter:
Press Enter for Expiry date:
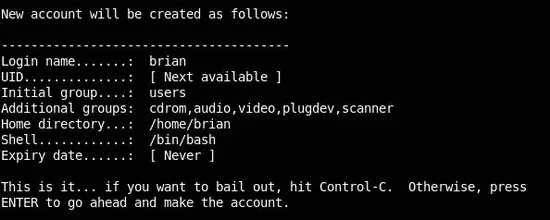
If all the information below is correct press Enter:
Slackware creates the new account:
Additional information can be added or press Enter to accept the defaults:
Create a password for your new user. Again, you will need to enter it twice. That completes the Account setup:
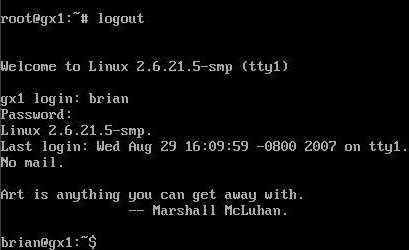
To confirm your new account is working correctly logout as root and login with your new username and password. In Slackware 12 notice how the prompt changes from # to $ signifying we're not logged in as root anymore.
Basic Security Configuration:
Type su at the command line and press Enter:
su
Type the password for root and press Enter:
It is beyond the scope of this tutorial and my knowledge to talk about security in depth. Please refer to other sources for more information such as LinuxSecurity.com, the CERT Coordination Center, and look at nmap since it's already installed on your system. With that in mind I include the steps below that I take to secure my PC. I use a hardware firewall with NAT and I setup tcpwrappers. I don't use a software firewall but later you will have the opportunity to install a software firewall named Guarddog. You may be interested in doing a free Internet security checkup at ShieldsUP! after setting up your security.
Change your directory to the /etc directory.
cd /etc
If you haven't used tab completion before it's good to know because it speeds up your typing. Hit the Tab key after entering a few letters of a file name or command and tab completion will automatically fill in the rest.
Before working with a configuration file I always create a backup. To create a backup use the copy command named cp.
The three files that we are going to edit are located in /etc. They are hosts.deny, hosts.allow and inetd.conf.
Make a copy of hosts.allow and press Enter.
cp hosts.allow hosts.allow.BAK
Make a copy of hosts.deny and press Enter.
cp hosts.deny hosts.deny.BAK
Make a copy of inetd.conf and press Enter.
cp inetd.conf inetd.conf.BAK
Now that we have backups of those files we're ready to edit them. I usually use the vi editor and many of the screenshots are taken while using vi. Pico is less esoteric and may be easier for you to use.
The hosts.deny file shown below is how it should look after you edit it. Edit hosts.deny by adding the text ALL : ALL and then save the file and exit.
To use pico to edit the hosts.deny file simply type
pico hosts.deny
# hosts.deny    This file describes the names of the hosts which are
#               *not* allowed to use the local INET services, as decided
#               by the '/usr/sbin/tcpd' server.
#
# Version:      @(#)/etc/hosts.deny     1.00    05/28/93
#
# Author:       Fred
ALL : ALL
# End of hosts.deny.
By adding ALL : ALL you deny access to everyone. We will poke holes in hosts.deny by editing hosts.allow next.
To use pico to edit the hosts.allow file simply type,
pico hosts.allow
The edited hosts.allow is shown below:
#
# hosts.allow   This file describes the names of the hosts which are
#               allowed to use the local INET services, as decided by
#               the '/usr/sbin/tcpd' server.
#
# Version:      @(#)/etc/hosts.allow    1.00    05/28/93
#
# Author:
#
#
ALL : 127.0.0.1
ALL : 192.168.1.
# End of hosts.allow.
By adding the line ALL : 127.0.0.1 we are allowing this machine (a.k.a. localhost) access to the services on this machine.
By adding the line ALL : 192.168.1. we allow access from all machines in our LAN.
The dot following 192.168.1. isn't a typo. It represents the numbers 0-254.
The # is a comment and means to ignore all text that follows on the same line.
Lastly, we will edit inetd.conf and place a # in front of everything except auth:
Type
pico inetd.conf
Place a # in front of time, time and comsat:
Leave the Ident service as is. Don't place a # in front of auth. Save the file and exit:
Audio Configuration:
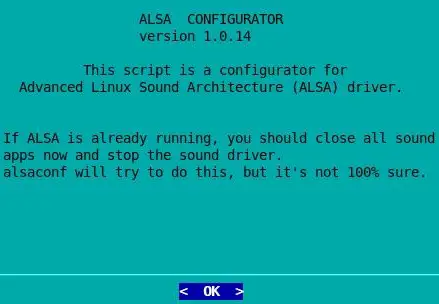
alsaconf is a simple shell script which tries to detect the sound cards on your system and then writes a suitable configuration file for ALSA.
Type,
alsaconf
and press Enter:
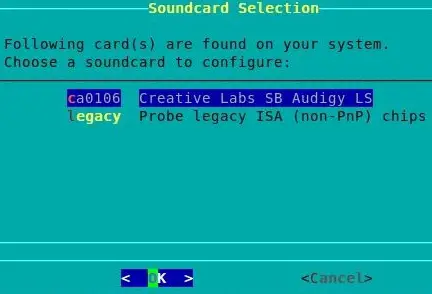
ALSA searches for your sound cards:
If you're not sure which card to choose refer back to your hardware notes.
Select your card and press Enter:
Select Yes and press Enter:
Press Enter:
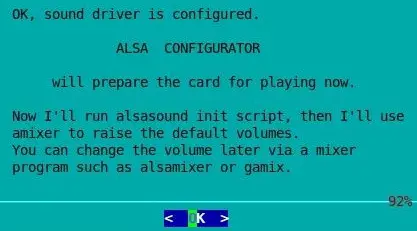
After the sound driver is configured the program exits:
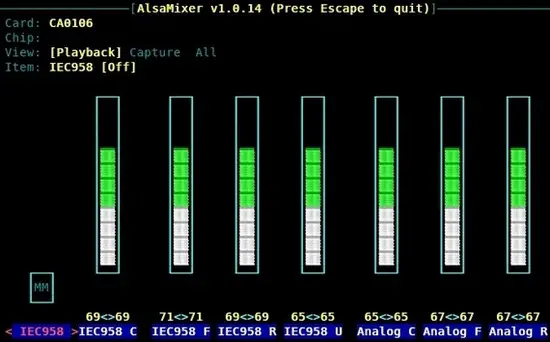
Now use alsamixer to configure the levels.
Type
alsamixer
and press Enter:
Configure your settings with the LEFT, RIGHT, UP, and DOWN arrow keys. Press the escape key when finished:
To store your settings type
alsactl store
and press Enter:
Your sound card should now be configured for your system. Your sound card can be reconfigured at any time by rerunning the above commands when when logged in as root.
Create the searchable database of the filesystem:
To search for files you can use the following commands; which, whereis, find, and slocate. Before using slocate for the first time we'll need to create its database named slocate.db.Change your current directory to /var/lib/slocate.
cd /var/lib/slocate/
If you type ls you'll see that there is no slocated.db file.
We will create the slocate.db file by typing the following command and pressing Enter:
updatedb
This may take several minutes to run. When the update is complete the program exits and you're returned to the command prompt. If you type ls again you'll see that slocate.db was created:
Start X:
Slackware 12 uses the X Window System from X.Org. X provides the graphical user interface for Linux. X can be difficult to configure and troubleshooting X is beyond the scope of this tutorial. If you have a problem starting X please visit http://www.slackware.com/config/x.php for configuration assistance. As long as you have a VESA compatible graphics card then X should start. If you have an ATI or NVIDIA graphics card please see the vendor specific documentation so that you may use their drivers.Don't Start X as root. If you're at the root prompt type exit and press Enter:
Type startx and press Enter:
[*Author's Note Start. Added April 27, 2008...
If X does not start please look at:
- "Slackware Linux Essentials - The Official Guide To Slackware Linux", created by David Cantrell, Logan Johnson & Chris Lumens. Chapter 6 covers X Configuration. http://slackbook.org/
- "Slackware Linux Basics For Slackware Linux 12.0" by Daniël de Kok. Chapter 16 covers X Configuration. http://www.slackbasics.org/
- Visit http://www.linuxquestions.org/ and click Linux Forums->Linux Distributions->Slackware
...Author's Note Ends*]
The KDE Personalizer Wizard:
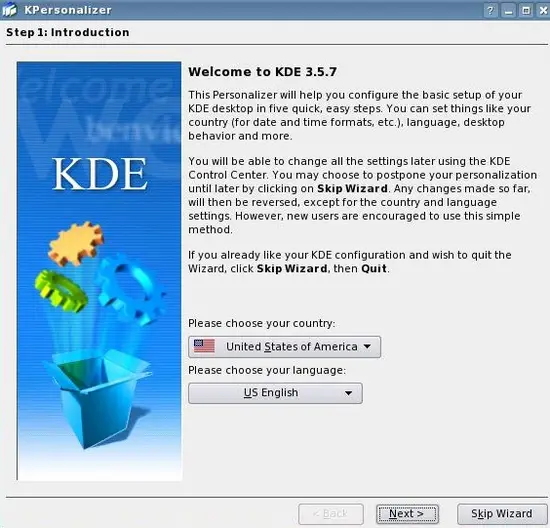
Choose your country and language and click Next:Click Next:
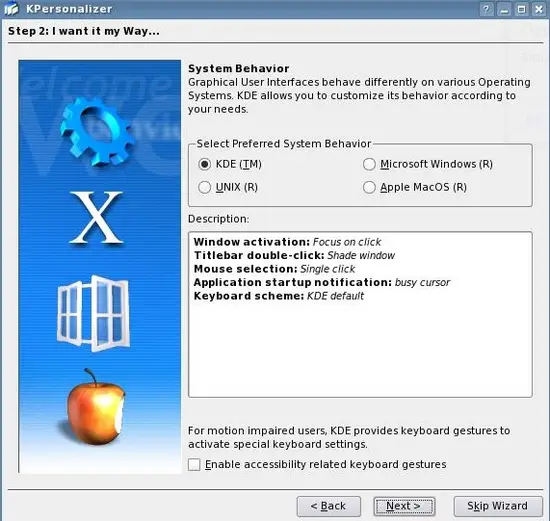
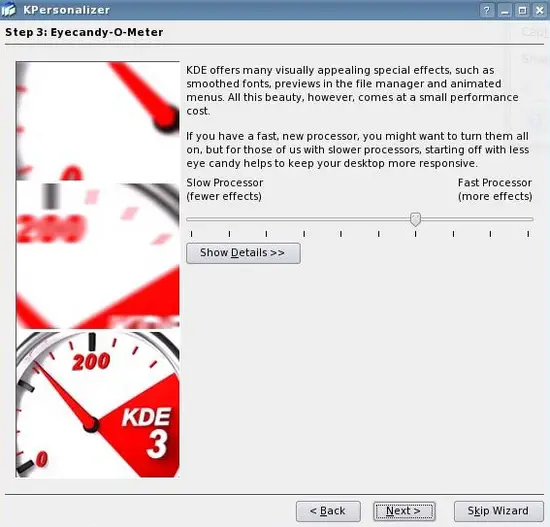
Set the level of detail and click Next:
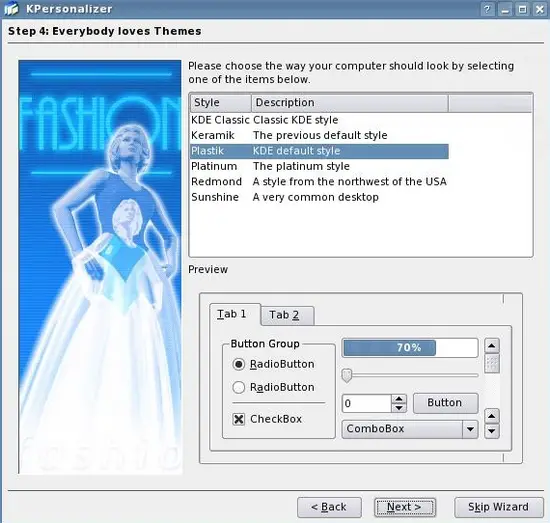
Select a theme and click Next:
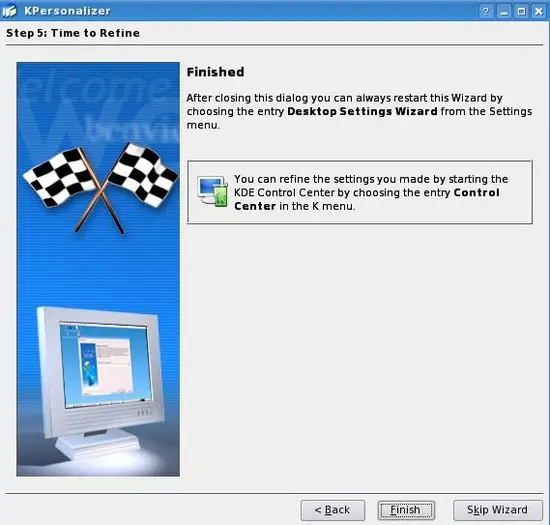
Click Finish:
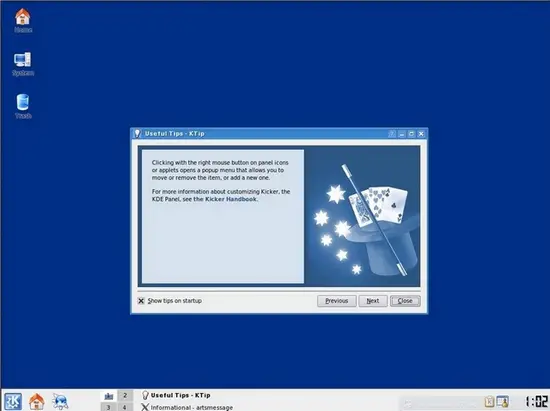
Here is your new KDE desktop:
Now the base system is ready to be used.

