There is a new version of this tutorial available for Ubuntu 16.04 (Xenial Xerus).
This tutorial exists for these OS versions
- Ubuntu 16.04 (Xenial Xerus)
- Ubuntu 15.10 (Wily Werewolf)
- Ubuntu 15.04 (Vivid Vervet)
- Ubuntu 14.10 (Utopic Unicorn)
- Ubuntu 14.04 LTS (Trusty Tahr)
- Ubuntu 13.10 (Saucy Salamander)
On this page
Installing Apache2 With PHP5 And MySQL Support On Ubuntu 10.10 (LAMP)
Version 1.0
Author: Falko Timme
Follow me on Twitter
LAMP is short for Linux, Apache, MySQL, PHP. This tutorial shows how you can install an Apache2 webserver on an Ubuntu 10.10 server with PHP5 support (mod_php) and MySQL support.
I do not issue any guarantee that this will work for you!
1 Preliminary Note
In this tutorial I use the hostname server1.example.com with the IP address 192.168.0.100. These settings might differ for you, so you have to replace them where appropriate.
I'm running all the steps in this tutorial with root privileges, so make sure you're logged in as root:
sudo su
2 Installing MySQL 5
First we install MySQL 5 like this:
aptitude install mysql-server mysql-client
You will be asked to provide a password for the MySQL root user - this password is valid for the user [email protected] as well as [email protected], so we don't have to specify a MySQL root password manually later on:
New password for the MySQL "root" user: <-- yourrootsqlpassword
Repeat password for the MySQL "root" user: <-- yourrootsqlpassword
3 Installing Apache2
Apache2 is available as an Ubuntu package, therefore we can install it like this:
aptitude install apache2
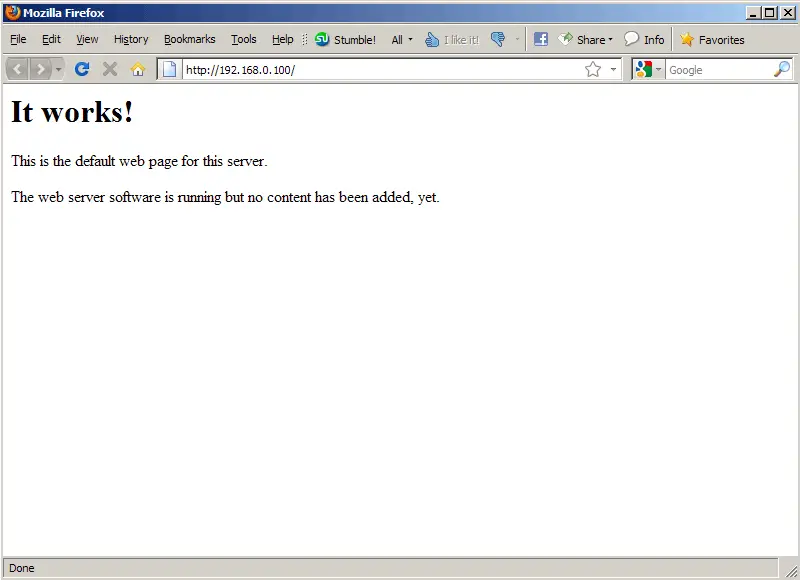
Now direct your browser to http://192.168.0.100, and you should see the Apache2 placeholder page (It works!):
Apache's default document root is /var/www on Ubuntu, and the configuration file is /etc/apache2/apache2.conf. Additional configurations are stored in subdirectories of the /etc/apache2 directory such as /etc/apache2/mods-enabled (for Apache modules), /etc/apache2/sites-enabled (for virtual hosts), and /etc/apache2/conf.d.
4 Installing PHP5
We can install PHP5 and the Apache PHP5 module as follows:
aptitude install php5 libapache2-mod-php5
We must restart Apache afterwards:
/etc/init.d/apache2 restart
5 Testing PHP5 / Getting Details About Your PHP5 Installation
The document root of the default web site is /var/www. We will now create a small PHP file (info.php) in that directory and call it in a browser. The file will display lots of useful details about our PHP installation, such as the installed PHP version.
vi /var/www/info.php
<?php phpinfo(); ?> |
Now we call that file in a browser (e.g. http://192.168.0.100/info.php):
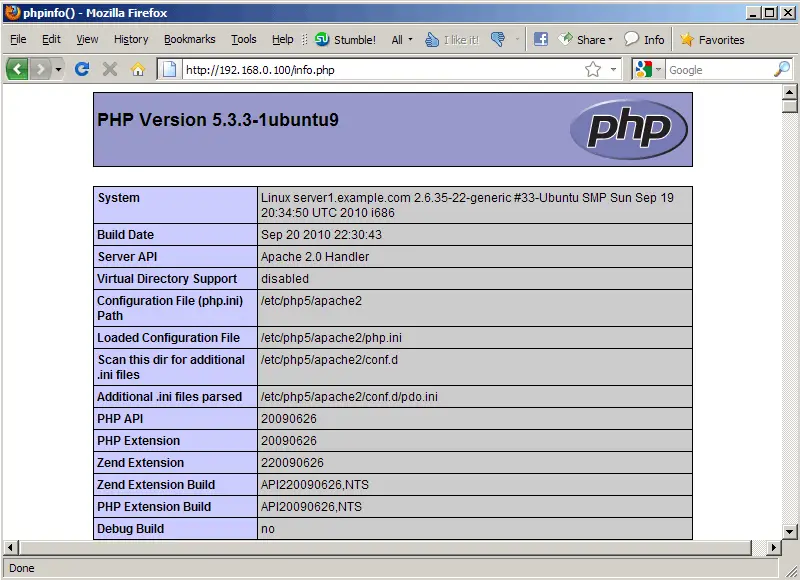
As you see, PHP5 is working, and it's working through the Apache 2.0 Handler, as shown in the Server API line. If you scroll further down, you will see all modules that are already enabled in PHP5. MySQL is not listed there which means we don't have MySQL support in PHP5 yet.
6 Getting MySQL Support In PHP5
To get MySQL support in PHP, we can install the php5-mysql package. It's a good idea to install some other PHP5 modules as well as you might need them for your applications. You can search for available PHP5 modules like this:
aptitude search php5
Pick the ones you need and install them like this:
aptitude install php5-mysql php5-curl php5-gd php5-idn php-pear php5-imagick php5-imap php5-mcrypt php5-memcache php5-mhash php5-ming php5-ps php5-pspell php5-recode php5-snmp php5-sqlite php5-tidy php5-xmlrpc php5-xsl php5-json
Now restart Apache2:
/etc/init.d/apache2 restart
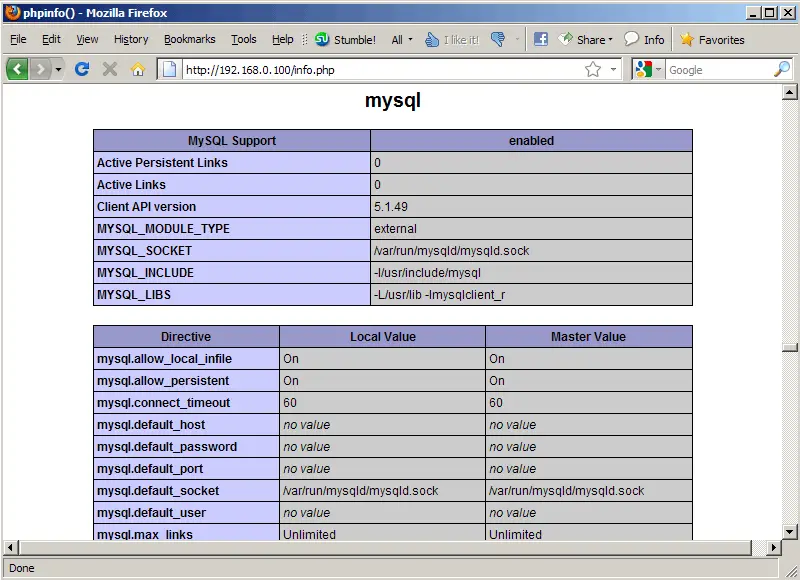
Now reload http://192.168.0.100/info.php in your browser and scroll down to the modules section again. You should now find lots of new modules there, including the MySQL module:
7 phpMyAdmin
phpMyAdmin is a web interface through which you can manage your MySQL databases. It's a good idea to install it:
aptitude install phpmyadmin
You will see the following questions:
Web server to reconfigure automatically: <-- apache2
Configure database for phpmyadmin with dbconfig-common? <-- No
Afterwards, you can access phpMyAdmin under http://192.168.0.100/phpmyadmin/:
8 Links
- Apache: http://httpd.apache.org/
- PHP: http://www.php.net/
- MySQL: http://www.mysql.com/
- Ubuntu: http://www.ubuntu.com/
- phpMyAdmin: http://www.phpmyadmin.net/
Suggested articles
40 Comment(s)
Comments
could these all applications running automatically when i turn on my ubuntu ??
How to install joomla on ubuntu server 9.10 everyone can tell me step by step how to install it, thank's
Hi,
Thank you very much, it helped me a lot ;)
Best Regards
Great tutorial you have there.
I did follow your tutorial, but it seems that whenever I run "http://localhost/phpmyadmin" on my browser, it's now working. The installation went fine, do you have any idea how can I fix this?
Huge thanks.
You may need to add an Alias and <Directory> section to /etc/apache2/sites-enabled/000-default to get phpmyadmin working, that's what I did.
This is a great tutorial, worked first time, thanks.
see this. It worked fine for me
http://ubuntuforums.org/archive/index.php/t-1601999.html
I have created a basic control panel to help non-commandline users to easily access their LAMP settings -- See the details here....
http://github/paulhomebus/Lamp-Control-Panel
sudo apt-get install lamp-server^
Great tutorial. I'm a newbie to Linux and am trying to get rid of my windows servers. This is a great first step for to learning. Worked the first time. Thank you.
This is a very nice tutorial and it works great for me but some things are missing.
if phpmyadmin doesn't work. use
sudo ln -s /usr/share/phpmyadmin /var/www/
and if you can access to the /var/www to copy info.php use:
cd /var
sudo chmod 777 www
that's all. Thank it really helps me.
and sorry for me english. is not my native language.
Thanks for this tip, I couldn't find a solution for this problem
sudo chmod 777 www is very unsecured. Basically you will be giving out permissions to the entire universe. Try a different command.
chmod 777 defined as:
| chmod 777 file | change the permissions of the file file to read, write, and execute for all. |
*notice write, and execute for all are in bold.
This should do the trick:
sudo chown -R username /var/www
sudo chmod -R 755 /var/www
Replace username to the username you'd like to give permission to. To add multiple users to chown:
sudo chown -R username1:username2:username3 /var/www
can i use this guide on desktop edition?
Great article. Many Thanks
thank you for the tutorial. that's all very usefull
very well boys ........on Ubuntu 10.10 I do it all using just "synaptic", instaling mysql-server, apache2, php5, php5-mysql, phpmyadmin ..... thanks a lot ....
Thanks for a great tutorial i have used this as a lazy way to install a development server for some time now.
There is however one thing i feel it could use and that is to add ruby/ror and to state how to make it purely a dev server.
Easy just work in me VPS !
I used in me VPS ubuntu 10.10 in installation not checked any from that server packgates !
Me normal user of ubuntu not noob not expert but that easy maked in 5 minits !
Great document... well done.
i am deepak more from india
the documentaion ais step by step and i have used as per instructed it work fine
thanks you
http://127.0.0.100/ to view the placeholder page if at first you don't succeed.
It is http://127.0.0.1 not 127.0.0.100
first, i say if that is good tutorial, i've done it and it works.
so, i have trouble on phpmyadmin, and i tried to resolve it from some sources, and i done everything but don't works.
the trouble is in the bottom of phpmyadmin...
it says :
"The additional features for working with linked tables have been deactivated. To find out why click here."
so, how can i fix it.
Sorry if my english so bad, because i'm from indonesia.
Thanks for the nice tutorial....
Thank you. That was a superb tutorial. Very clear and concise. Got my LAMP up and running perfectly.
Very good tutorial. I've got the whole thing working on Ubuntu 10.10. Thanks
Thanks for the help! I have been trying to connect a PSP script to a MySQL SB on my new server and thanks to this tutorial realized I didn't have the most up to date php5-mysql installed on my system!
Thanks again!
Hello Falko!
Thank you so much for this tutorial!
It helped me a lot!
Great Work!
This tutorial help me a lot in installation
Not to be a pest but LAMP has a more expansive meaning than just Linux Apache MySQL PHP. In fact the P in LAMP originally only stood for Perl and Python back in the CGI and mod_perl and mod_python as the superior Internet scripting solutions days. It can be a little weird to hear people say LAMP and know that they are only talking about PHP. The L can stand for almost any posix operating system like Linux SunOS FreeBSD OSX etc The A can stand for Apache Nginx Lighttpd etc The M can stand for MySQL PostgreSQL etc The P can stand for Perl PHP Python etc Sometimes the definition is extended even further with the WAMP one click installs.
Thank you for this huge explanation (Ctrl+D). :-)
Anyway I have to type http://localhost/info.php instead of http://192.168.0.100/info.php (cause 192... it just doesn't work).
"In this tutorial I use the hostname server1.example.com with the IP address 192.168.0.100. These settings might differ for you, so you have to replace them where appropriate."
Probably, you have different IP. run ifconfig and look somewhere eth0.
Very good guide, I followed step by step every think worked well.
Now I'll be looking for installation Joomla
Bravo !!! Very Nice Falko :)
Thank you very much.
This worked wonderfully. I only bumped into 1 error where I could not pull up phpmyadmin on Ubuntu Server 11.10. I ran the following command to properly pull up the page:
sudo ln -s /usr/share/phpmyadmin /var/www
that fixed mine too thx :O
Thank you much, very easy to do, runs great!
http://103.6.220.135/
I have pointed a sub domain to this IP address, but it is not showing the webpage.
http://cube.luxoom.cn/
What would be the issue?
tnx tnx tnx very very tnx tnx tnxtnx tnx tnxtnx tnx tnx its best & very good article tnx
Thank you! Very helpful
English |
Deutsch


