The Perfect Desktop - Part 1: Fedora Core 6 - Page 3
This tutorial exists for these OS versions
On this page
3 Update The System
After the new reboot, log in with your username and password:
This is how your new Fedora Core 6 desktop looks like:
Most probably after a few moments a pop up will come up saying Security Updates Available. Of course, we want to update our system, so we click on Apply Updates:
For the update we need superuser privileges, so we must type in the root password:
Afterwards, the package updater starts and retrieves update information:
Then it shows us all packages that are available for update. Typically we will select all packages and click on Apply updates:
The updater resolves all dependencies (additional packages that need to be installed). Of course we accept these dependencies by clicking on Continue:
Afterwards the updater downloads all packages. Depending on how many packages have to be updated and their size this can take some time:
It is possible that the updater asks you to import keys of packages. These keys are used to verify the integrity of the downloaded packages. Sometimes there are keys that the system doesn't know yet. As we are only using Fedora package repositories for the downloads until now, we assume that the unknown keys are ok and click on Import key:
After the download of the packages has finished, the Package updater installs the downloaded packages (and therefore updates the old packages):
The updater will tell you when a reboot is needed (for example, if the kernel has been updated). Click on Reboot now to perform the reboot:
4 Change The Screen Resolution (Optional)
It is possible that your Fedora desktop uses a lower screen resolution than would be possible. Normally you can adjust the screen resolution under System > Preferences > Screen Resolution, but it's possible that you don't find your desired screen resolution there, although you know that your hardware supports it (this happened to me when I prepared this tutorial in a VMware virtual machine: my desktop had a resolution of 800x600 pixels and wouldn't let me choose a higher one, although I knew this was possible).
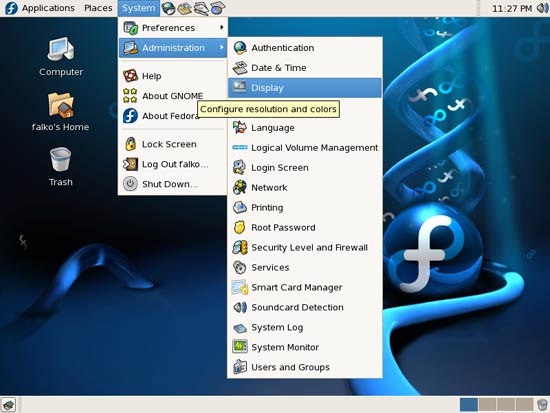
If this happens, go to System > Administration > Display:
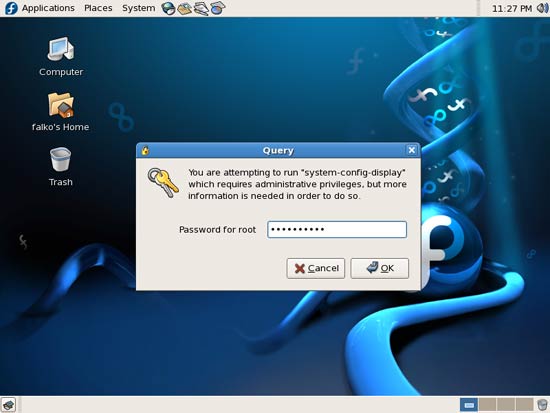
Type in the root password:
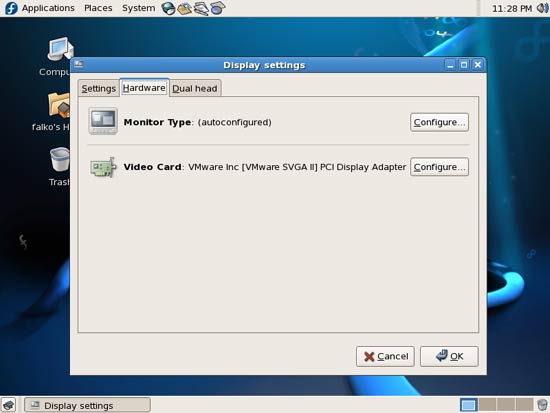
Then go to the Hardware tab and click on the Configure... button right to Monitor Type:
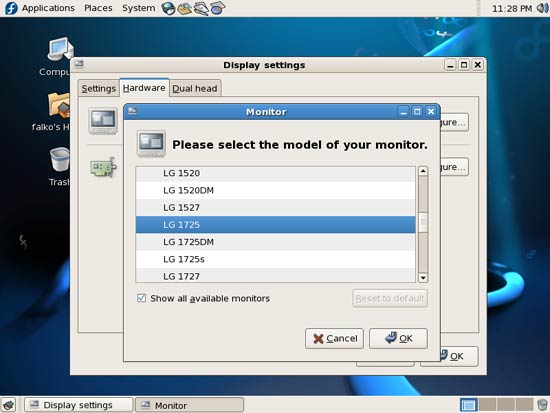
Select your monitor model (if you're in a VMware virtual machine, the model doesn't seem to matter - just choose one):
Then open a terminal window under Applications > Accessories > Terminal:
Type in
su
and specify the root password. Then run
gedit /etc/X11/xorg.conf
to edit the /etc/X11/xorg.conf file in a text editor. A text editor will open with that file. Search for the "Screen" section and go to the Modes line. There you add your desired screen resolution (e.g. "1024x768") and click on Save. Afterwards you can close the text editor.
Afterwards we must log out of our current session for the changes to take effect, so we go to System > Log Out...:
Then log in again, and you should find that your desktop now has your desired screen resolution:


