ISP Server Setup - OpenSUSE 10 - Page 4
2 Installing And Configuring The Rest Of The System
Now I can login on the console and enable the SSH daemon:
chkconfig --add sshd
/etc/init.d/sshd start
Now I can login remotely with an SSH Client like Putty and make the 2nd part of the installation.
Configure Additional IP Addresses
If you want to add more IP addresses to your system, simply run
yast2
The YaST Control Center will pop up. Go to Network Devices -> Network Card. The next steps are the same as during the network setup in the installation.
Setting The Hostname
echo server1.example.com > /etc/hostname
/bin/hostname -F /etc/hostname
Adding Installation Sources
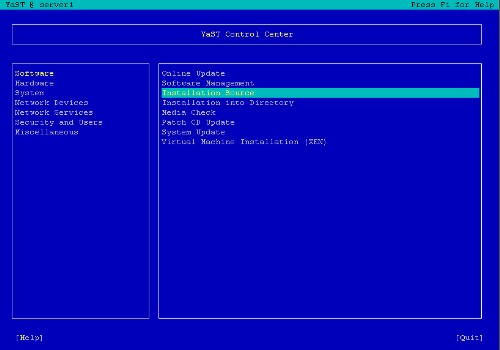
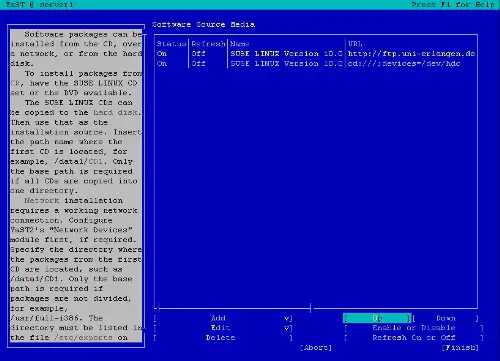
To make package installation easier, I will add a network installation source. If you want to install all packages from CD / DVD, you can skip this step. Start yast2:
yast2
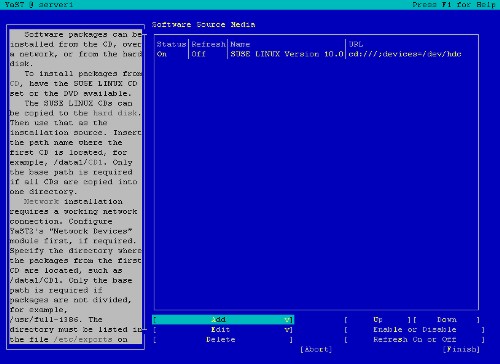
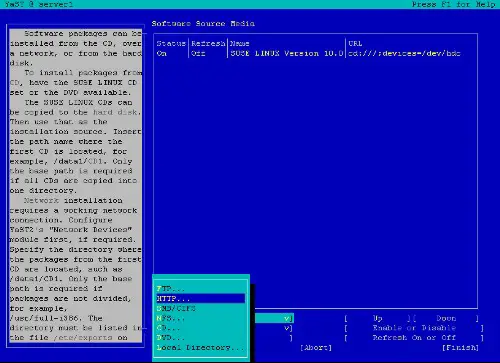
Select Installation Source, then Add and enter a mirror near you. You can find a list of mirrors here: http://www.opensuse.org/Mirrors_Development_Build.
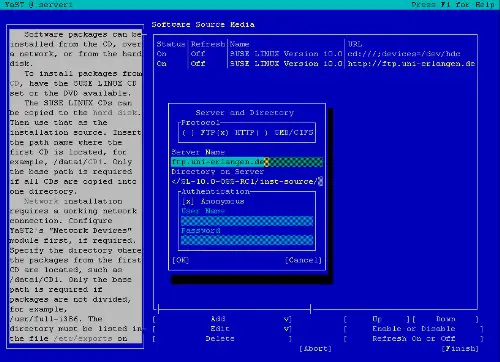
I selected this http mirror ( yes, it is an http mirror even though the URL starts with ftp :-) ):
ftp.uni-erlangen.de/pub/mirrors/opensuse/distribution/SL-10.0-OSS/inst-source
Then change the order of the installation sources, so that your new source is at the top. Then select Finish and Quit.
Install Some Software
yast -i findutils readline libgcc glibc-devel findutils-locate gcc flex lynx compat-readline4 db-devel wget
If you're on a 64-bit system (only then!), you must also install openssl-devel-32bit:
yast -i openssl-devel-32bit
Quota
yast -i quota
Edit /etc/fstab to look like this (I added ,usrquota,grpquota to partition /dev/sda3 (mount point /; your device name might be /dev/hda2 or similar) and to /dev/sda4 (mount point /var)):
/dev/sda3 / ext3 acl,user_xattr,usrquota,grpquota 1 1 |
Then run:
touch /aquota.user /aquota.group
chmod 600 /aquota.*
mount -o remount /
touch /var/aquota.user /var/aquota.group
chmod 600 /var/aquota.*
mount -o remount /var
quotacheck -avugm
You will get this warning when running quotacheck the first time. Don't worry about it.
quotacheck: WARNING - Quotafile //aquota.user was probably truncated. Can't save quota settings...
quotacheck: WARNING - Quotafile //aquota.group was probably truncated. Can't save quota settings...
Then run:
quotaon -avug
DNS-Server
yast -i bind bind-chrootenv bind-devel bind-utils
chkconfig --add named
/etc/init.d/named start
Bind will run in a chroot jail under /var/lib/named.
MySQL
yast -i mysql mysql-client mysql-shared perl-DBD-mysql perl-DBI perl-Data-ShowTable mysql-devel
chkconfig --add mysql
/etc/init.d/mysql start
Now check that networking is enabled. Run
netstat -tap
It should show a line like this:
tcp 0 0 *:mysql *:* LISTEN 6621/mysqld |
If it does not, edit /etc/my.cnf, comment out the option skip-networking:
# Don't listen on a TCP/IP port at all. This can be a security enhancement, |
and restart your MySQL server:
/etc/init.d/mysql restart
Run
mysqladmin -u root password yourrootsqlpassword
mysqladmin -h server1.example.com -u root password yourrootsqlpassword
to set a password for the user root (otherwise anybody can access your MySQL database!).
Postfix With SMTP-AUTH And TLS
yast -i cyrus-sasl cyrus-sasl-crammd5 cyrus-sasl-digestmd5 cyrus-sasl-gssapi cyrus-sasl-otp cyrus-sasl-plain cyrus-sasl-saslauthd
chkconfig --add saslauthd
/etc/init.d/saslauthd start
mkdir /etc/postfix/ssl
cd /etc/postfix/ssl/
openssl genrsa -des3 -rand /etc/hosts -out smtpd.key 1024
chmod 600 smtpd.key
openssl req -new -key smtpd.key -out smtpd.csr
openssl x509 -req -days 3650 -in smtpd.csr -signkey smtpd.key -out smtpd.crt
openssl rsa -in smtpd.key -out smtpd.key.unencrypted
mv -f smtpd.key.unencrypted smtpd.key
openssl req -new -x509 -extensions v3_ca -keyout cakey.pem -out cacert.pem -days 3650
postconf -e 'mydomain = example.com'
postconf -e 'myhostname = server1.$mydomain'
postconf -e 'smtpd_sasl_local_domain ='
postconf -e 'smtpd_sasl_auth_enable = yes'
postconf -e 'smtpd_sasl_security_options = noanonymous'
postconf -e 'broken_sasl_auth_clients = yes'
postconf -e 'smtpd_recipient_restrictions = permit_sasl_authenticated,permit_mynetworks,check_relay_domains'
postconf -e 'inet_interfaces = all'
postconf -e 'alias_maps = hash:/etc/aliases'
postconf -e 'smtpd_tls_auth_only = no'
postconf -e 'smtp_use_tls = yes'
postconf -e 'smtpd_use_tls = yes'
postconf -e 'smtp_tls_note_starttls_offer = yes'
postconf -e 'smtpd_tls_key_file = /etc/postfix/ssl/smtpd.key'
postconf -e 'smtpd_tls_cert_file = /etc/postfix/ssl/smtpd.crt'
postconf -e 'smtpd_tls_CAfile = /etc/postfix/ssl/cacert.pem'
postconf -e 'smtpd_tls_loglevel = 1'
postconf -e 'smtpd_tls_received_header = yes'
postconf -e 'smtpd_tls_session_cache_timeout = 3600s'
postconf -e 'tls_random_source = dev:/dev/urandom'
To enable tls connections in postfix, edit /etc/postfix/master.cf and uncomment the line:
#tlsmgr unix - - n 1000? 1 tlsmgr
|
Now restart Postfix:
/etc/init.d/postfix restart
To see if SMTP-AUTH and TLS work properly now run the following command:
telnet localhost 25
After you have established the connection to your postfix mail server type
ehlo localhost
If you see the lines
250-STARTTLS
and
250-AUTH
then everything is fine.
Type
quit
to return to the system's shell.
Courier-IMAP/Courier-POP3
I want to use a POP3/IMAP daemon that has Maildir support. That's why I use Courier-IMAP and Courier-POP3.
yast -i courier-imap fam-server courier-authlib expect tcl
chkconfig --add fam
chkconfig --add courier-authdaemon
chkconfig --add courier-pop
chkconfig --add courier-imap
/etc/init.d/courier-pop start
/etc/init.d/courier-imap start
If you do not want to use ISPConfig, configure Postfix to deliver emails to a user's Maildir*:
postconf -e 'home_mailbox = Maildir/'
postconf -e 'mailbox_command ='
/etc/init.d/postfix restart
*Please note: You do not have to do this if you intend to use ISPConfig on your system as ISPConfig does the necessary configuration using procmail recipes. But please go sure to enable Maildir under Management -> Settings -> EMail in the ISPConfig web interface.

