How to Install Ruby on Rails on Ubuntu 18.04 LTS
This tutorial exists for these OS versions
- Ubuntu 24.04 (Noble Numbat)
- Ubuntu 22.04 (Jammy Jellyfish)
- Ubuntu 20.04 (Focal Fossa)
- Ubuntu 18.04 (Bionic Beaver)
- Ubuntu 16.04 (Xenial Xerus)
On this page
- Prerequisites
- What we will do?
- Step 1 - Install RVM (Ruby Version Manager)
- Step 2 - Setup Ruby Latest Version
- Step 3 - Install Nodejs
- Step 4 - Configure Ruby Gem
- Step 5 - Install Ruby on Rails
- Step 6 - Setup PostgreSQL Database for Rails Development
- Step 7 - Create Your First App with Rails and PostgreSQL
Ruby on Rails (RoR) is an open source web application framework, published under the MIT License. It is a server-side web application framework that follows the MVC (Model-View-Controller) concept.
Rails are providing default structures for the database, web service, and web pages. More than 3000 developers have contributed code to the Rails framework and there are many well-known applications based on Rails, such as Github, Airbnb, Soundcloud etc.
In this tutorial, I will show you the steps to install Ruby on Rails on Ubuntu 18.04 LTS. We will show you how to install and configure Rails with a PostgreSQL database, and how to create a new first project with Rails.
Prerequisites
- Ubuntu 18.04 LTS
- Root privileges
What we will do?
- Install RVM (Ruby Version Manager)
- Setup Ruby
- Install Nodejs
- Configure Ruby Gem
- Install Ruby on Rails
- Setup PostgreSQL Database for Rails Development
- Create Your First App with Rails and PostgreSQL
Step 1 - Install RVM (Ruby Version Manager)
RVM (Ruby Version Manager) is a command-line tool based on Bash and Ruby to manage the ruby installation. RVM allows you to install and configure multiple ruby versions on one system.
The first step we will do is to install the rvm packages using the installer script.
Add the rvm key to the server.
gpg --keyserver hkp://keys.gnupg.net --recv-keys 409B6B1796C275462A1703113804BB82D39DC0E3 \
7D2BAF1CF37B13E2069D6956105BD0E739499BDB
Install the rvm stable version by running the command below.
curl -sSL https://get.rvm.io | bash -s stable --ruby
The command will automatically install packages required, and install the latest stable rvm version.
After the installation is complete, run the following command.
source /usr/local/rvm/scripts/rvm
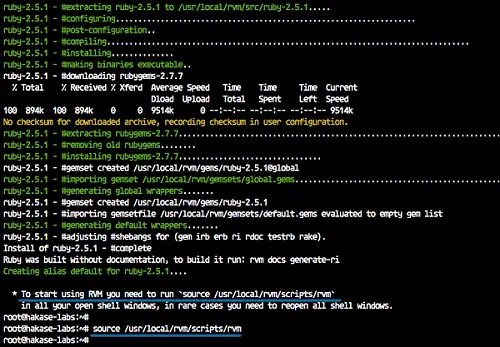
Now you can use the rvm command to manage the ruby version.
rvm version
Step 2 - Setup Ruby Latest Version
The latest version of ruby at this day is Ruby 2.5.1, and it will be automatically installed during the rvm installation, when there is no ruby package on the system.
In this step, we will set up the default ruby version on the Ubuntu system.
Update the rvm to the latest stable version.
rvm get stable --autolibs=enable
usermod -a -G rvm root
Now check all available ruby versions.
rvm list known
And you will get a lot of available versions of ruby - install the latest stable version Ruby 2.5.1 using the rvm command as shown below.
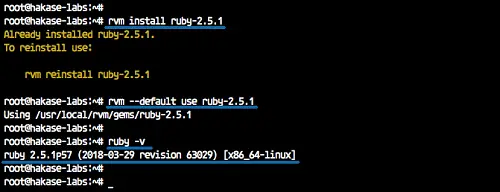
rvm install ruby-2.5.1
After all installation is complete, make the ruby 2.5.1 as a default version on the Ubuntu system.
rvm --default use ruby-2.5.1
Check the Ruby version.
ruby -v
Now you will see ruby 2.5.1 is default ruby version on the Ubuntu 18.04 system.
Step 3 - Install Nodejs
Ruby on Rails requires a JavaScript runtime to compile the Rails asset pipeline. And for the Rails development on Ubuntu Linux, it's best to install and using Nodejs as the Javascript runtime.
Add the nodejs nodesource repository to the system.
curl -sL https://deb.nodesource.com/setup_10.x | sudo -E bash -
Install the latest version nodejs 10 and some additional packages using the apt command below.
sudo apt install -y nodejs
sudo apt install gcc g++ make
The nodejs 10 has been installed on Ubuntu 18.04 system.
Step 4 - Configure Ruby Gem
RubyGems is a Ruby Package Manager, coming with the gem command-line tool. It's automatically installed when we install Ruby on the system.
Update gem to the latest version and check it.
gem update --system
gem -v
Note:
This is optional, we can disable gem to install documentation on every ruby package installation. Simply by adding the configuration to the '.gemrc' configuration file.
echo "gem: --no-document" >> ~/.gemrc
Step 5 - Install Ruby on Rails
In this tutorial, we will be using the latest stable Ruby on Rails 5.2.0. We will install Rails using the gem ruby package manager.
Install Ruby on Rails 5.2.0 using the command below.
gem install rails -v 5.2.0
After the installation is complete, check the rails version.
rails -v
And following should the result.
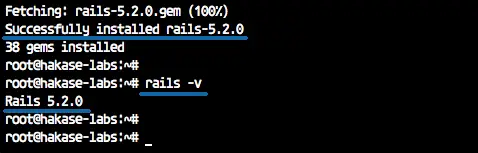
Ruby on Rails 5.2.0 has been installed on Ubuntu 18.04 LTS.
Step 6 - Setup PostgreSQL Database for Rails Development
By default, Ruby on Rails is using the SQLite database. It supports many databases system, including MySQL, SQLite, and PostgreSQL. And for this guide, we will be using PostgreSQL.
Install the PostgreSQL database using the apt command below.
sudo apt install postgresql postgresql-contrib libpq-dev -y
After all installation is complete, start the Postgres service and enable it to launch everytime at system boot.
systemctl start postgresql
systemctl enable postgresql
Next, we will configure a password for the Postgres user, and create a new user for the Rails installation.
Login to the 'postgres' user and run the Postgres shell.
su - postgres
psql
Change the Postgres password using the query below.
\password postgres
Type your password and the password for postgres user has been added.
Now we will create a new role for our rails installation. We will create a new role named 'rails_dev' with the privilege of creating the database and with the password 'aqwe123'.
Run the Postgres query below.
create role rails_dev with createdb login password 'aqwe123';
Now check all available roles on the system.
\du
And you will get the 'rails_dev' role on the list.
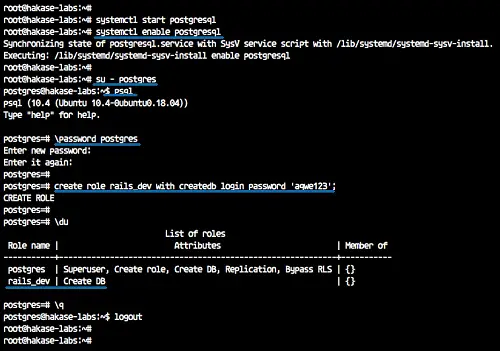
PostgreSQL installation and configuration for Rails Development has been completed.
Step 7 - Create Your First App with Rails and PostgreSQL
Ruby on Rails provides a command-line 'rails' for bootstrapping our first rails application.
Create a new project 'myapp' with default database 'PostgreSQL' by running rails command below.
rails new myapp -d postgresql
Now you will see the 'myapp' directory, go to that directory and edit the database configuration file 'database.yml' using vim editor.
cd myapp/
vim config/database.yml
There are different configuration sections for each setup - Development, Testing, and Production.
In the development section, uncomment those line and change the value as below.
username: rails_dev
password: aqwe123
host: localhost
port 5423
For the testing section, paste those configurations under the testing section.
  host: localhost
  port: 5432
  username: rails_dev
  password: aqwe123
Save and exit.
Now generate the database and make sure there is no error.
rails db:setup
rails db:migrate
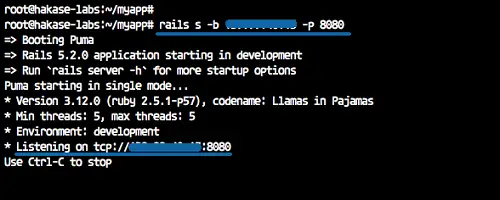
When all setup is complete, start the default puma rails web server using the command below.
rails s -b 192.168.1.10 -p 8080
The first rails project will be running on the IP address '192.168.1.10' with port 8080.
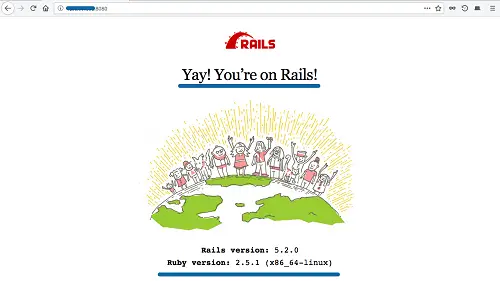
Open your web browser and type the server IP address on the address bar.
You will get the default rails project homepage as below.
Next, we will test to create simple CRUD with PostgreSQL database on rails.
Run the rails command below.
rails g scaffold Post title:string body:text
rake db:migrate
Run the puma web server again.
rails s -b 192.168.1.10 -p 8080
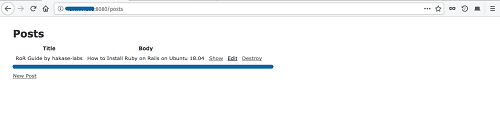
And open the web browser with the URL below.
http://192.168.1.10:8080/posts/
Now you will get the simple CRUD form.
And following is my result after creating a simple post.
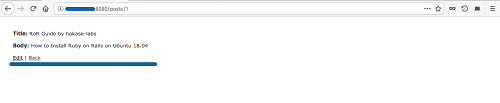
Ruby on Rails installation with PostgreSQL database on Ubuntu 18.04 LTS has been completed successfully.

