How to Install Ruby on Rails on Ubuntu 22.04
This tutorial exists for these OS versions
- Ubuntu 24.04 (Noble Numbat)
- Ubuntu 22.04 (Jammy Jellyfish)
- Ubuntu 20.04 (Focal Fossa)
- Ubuntu 18.04 (Bionic Beaver)
- Ubuntu 16.04 (Xenial Xerus)
On this page
Ruby on Rails or RoR is a free and open-source web application framework written in Ruby and released under the MIT license. Rails is a full-stack web framework for easily building enterprise-grade applications. Rails shipped with different tools that allow developers easily to create both frontend and backend applications. Ruby on Rails also has built-in security features such as protection for common attacks like SQL injection, XSS, and CSRF.
Ruby on Rails provides a default structure for the database, rendering HTML templates, a web service, and a web page. It follows the model-view-controller (MVC) architecture and also uses well-known design philosophies such as Don't Repeat Yourself (DRY), Convention over Configuration (CoC), and active records pattern. Ruby on Rails was designed to be fast and easy to use and learn, some notable sites developed with Rails such as Twitch, Airbnb, Github, Soundcloud, etc.
In this tutorial, we will show you how to install Ruby on Rails on an Ubuntu 22.04 server. You will also learn how to start a new project/application using Ruby on Rails and also using PostgreSQL as the database for your Rails application.
Prerequisite
- An Ubuntu 22.04 machine
- A non-root user with root privileges
- A PostgreSQL server is installed on your Ubuntu machine. In this example, you will be using PostgreSQL as the main database for Ruby on Rails.
Installing Packages Dependencies
Before you start installing Rails, you will need to install some basic package dependencies for the Rails development, this includes yarn and the nodejs.
Now let's start to install the basic package gnupg2, apt-transport-https, and curl to your Ubuntu machine using the below command.
sudo apt install gnupg2 apt-transport-https curl
Next, run the following command to add the Nodesource repository for installing the Nodejs package. The default here you will be installing the latest LTS version of Nodejs v16.
curl -sL https://deb.nodesource.com/setup_lts.x | sudo -E bash -
Now add the GPG key and repository for the Yarn package. Yarn is a modern package manager for Nodejs, an alternative for npm or node package manager.
curl -sS -o /etc/apt/trusted.gpg.d/yarn.gpg https://dl.yarnpkg.com/debian/pubkey.gpg
echo "deb https://dl.yarnpkg.com/debian/ stable main" | sudo tee /etc/apt/sources.list.d/yarn.list
Now update and refresh all available repositories using the following command.
sudo apt update
Lastly, you can install some package dependencies using the apt command below. This will install some basic packages which include the build-essentials that will be used for installing Ruby on your Ubuntu machine.
sudo apt install git-core zlib1g-dev build-essential libssl-dev libreadline-dev libyaml-dev libsqlite3-dev sqlite3 libxml2-dev libxslt1-dev libcurl4-openssl-dev software-properties-common libffi-dev nodejs yarn
Input Y to confirm the installation and press ENTER to continue. Now the installation will begin.
Setting up Rbenv
Now you will be installing Rbenv, the Ruby environment management for your application. Using rbenv, allows you to specify the Ruby version for your applications, which is powerful for the development environment. And also, Rbenv is more simple and more solid than other Ruby management such as RVM.
Rbenv is an extensible of Ruby management for your development environment. Extensible through Rbenv plugins.
To set up Rbenv, you need to log in to your user using the below command. This example uses the username 'alice' for the Rails development environment.
su - alice
Clone the Rbenv to the ~/.rbenv directory using the git command below.
git clone https://github.com/rbenv/rbenv.git ~/.rbenv
To activate Rbenv, add the configuration to the ~/.bashrc file using the following command. Then reload your bash session.
echo 'export PATH="$HOME/.rbenv/bin:$PATH"' >> ~/.bashrc
echo 'eval "$(rbenv init -)"' >> ~/.bashrc
source ~/.bashrc
Next, you will also need the Rbenv plugin named ruby-build. This plugin allows you to install any version of Ruby virtually from the source.
Clone the ruby-build plugin using the below command.
git clone https://github.com/rbenv/ruby-build.git ~/.rbenv/plugins/ruby-build
Now activate the ruby-build plugin and reload your bash session using the below command.
echo 'export PATH="$HOME/.rbenv/plugins/ruby-build/bin:$PATH"' >> ~/.bashrc
source ~/.bashrc
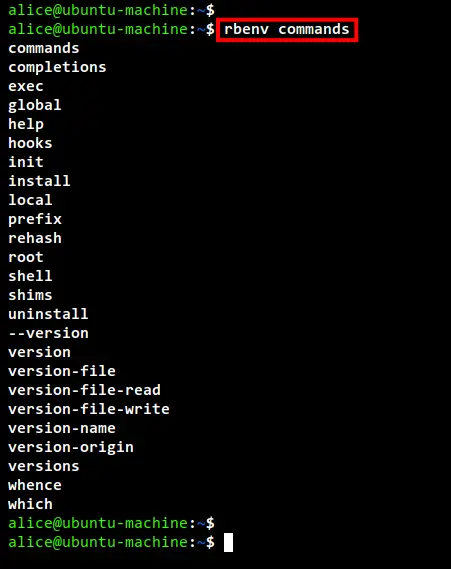
You have now completed the Rbenv configuration. You can use the following command to verify your Rbenv installation. This command will show all available options/commands for Rbenv.
rbenv commands
Below you can see the list of available commands.
Installing Ruby with Rbenv
After you have successfully installed Rbenv with the ruby-build plugin, now you will be installing Ruby for the Rails development.
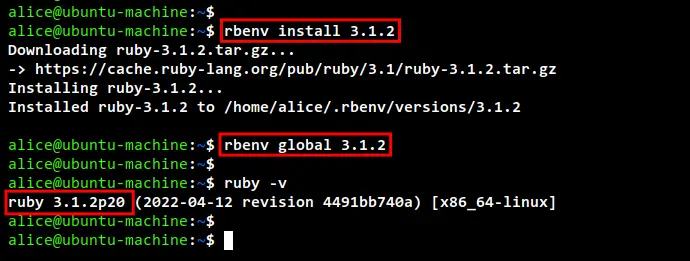
Install the latest stable version of Ruby v3.1.2 to your system using the rbenv command below.
rbenv install 3.1.2
This command will install the Ruby v3.1.2 from the source to your development environment. The commands install here are part of the ruby-build plugin.
Next, run the rbenv command below to set up the default Ruby v3.1.2 as the default version for your application.
rbenv global 3.1.2
Check and verify the Ruby version on your environment using the following command.
ruby -v
Below you can see the screenshot of Ruby 3.1.2 installed on your environment.
Lastly, you will also need to install bunlder for your Rails development environment. You can install the bundler using the gem command below.
gem install bundler
Below is the output after the bundler is installed.
Installing Ruby on Rails
At this point, you have completed the installation of package dependencies for Ruby on Rails, this includes the Node.js, Yarn, and Ruby.
Now you will be installing Ruby on Rails on your Ubuntu system. In this example, you will be installing Rails v7.0.2.4 for your application development.
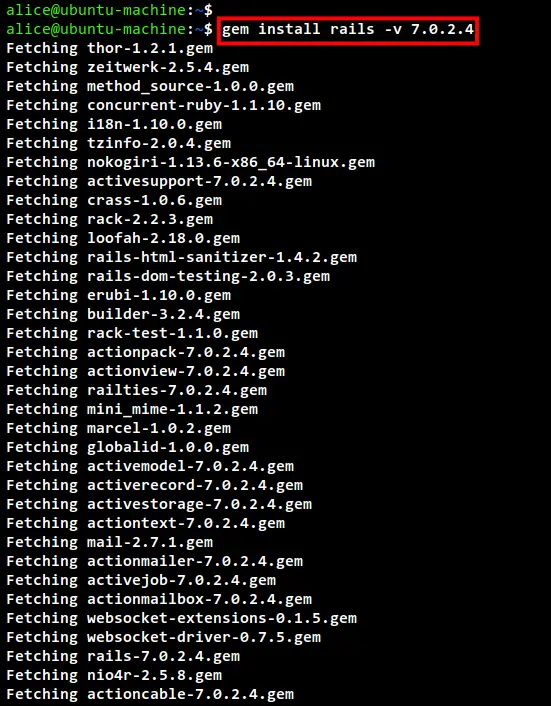
Run the gem command below to install Rails v7.0.2.4.
gem install rails -v 7.0.2.4
The command will takes time because there are so many additional Ruby gems that need to be installed. Below is the screenshot of the Rails installation.
After Rails installation is completed, run the below command to reload the Rbenv environment.
rbenv rehash
Lastly, you can check your Rails installation using the below command.
Checking the Rails version using the following command.
rails -v
Below you can see the version of Ruby on Rails installed on the Ubuntu machine.
Checking all available options of the Rails command.
rails help
Setting Up the Database
Before creating a new Rails project/application, you will need to decide which database you will be using for the project. In this example, you will be using PostgreSQL as the database for the Rails project application. So before you get started, make sure the PostgreSQL database server is installed on your Ubuntu machine.
First, install the libpq-dev package to your Ubuntu machine using the apt command below. This will automatically install the libpq5, which is the library that enables users or programs to connect and communicate with the PostgreSQL database server.
sudo apt install libpq-dev -y
After the PostgreSQL library installation is completed, run the following command to create a new PostgreSQL role for your application. In this example, you will be creating a role named 'alice', which is the same username of the Linux user that is currently used for the project.
sudo -u postgres createuser -S -d -r -P alice
Now you will be prompted to set up the password for the new role 'alice'. Input and repeat the password.
Below is the detailed option of the commands:
- -S - Disable superuser or admin of PostgreSQL for the new user.
- -d - Grant privileges to create a new database on the PostgreSQL server.
- -r - Grant privileges to create a role on the PostgreSQL server.
- -P - Enable password prompt configuration for the new user.
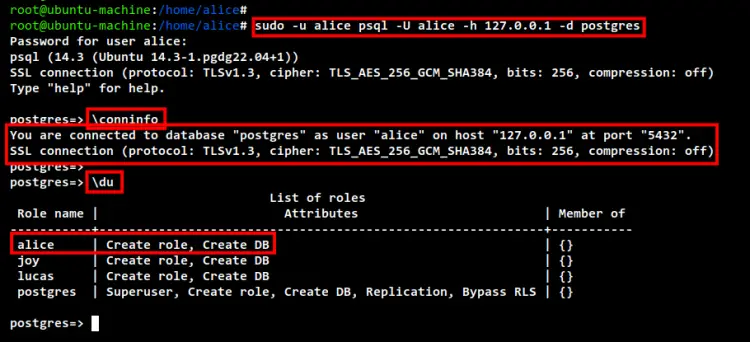
To verify the new PostgreSQL role, you can log in to the PostgreSQL shell using the below command.
sudo -u alice psql -U alice -h 127.0.0.1 -d postgres
Input the password for the PostgreSQL role alice.
Once you are connected to the PostgreSQL shell, run the following query to check the connection status.
\conninfo
Another query that you can also try to check is the list of available users on the PostgreSQL server.
\du
In the below screenshot you can see that you have successfully connected to the PostgreSQL server as the user 'alice'. And also you can see that user alice has two privileges, Create a role and Create DB.
Creating Project with Rails
Now it's time to create and start a new project with Ruby on Rails. In this example, you will be creating a new Ruby on Rails project named myapp with PostgreSQL as the default database.
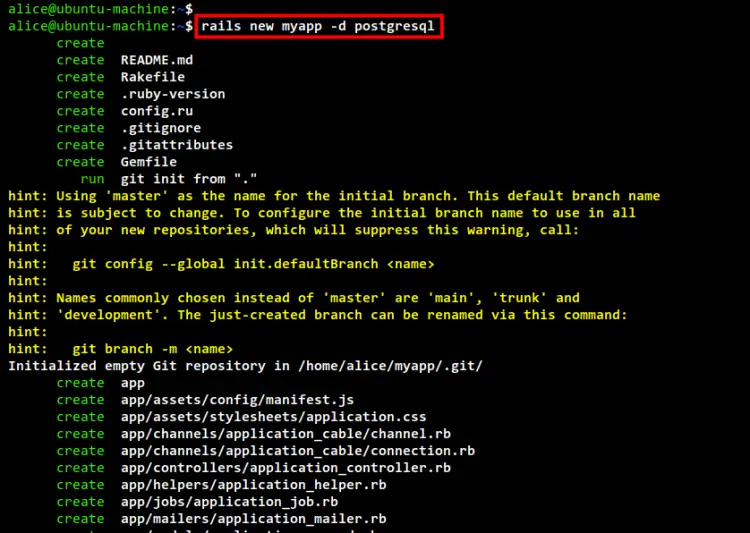
To create a new Rails project, you can run the rails command below. This command will generate the new fresh Rails project inside the directory myapp. The -d psotgresql option is to specify the database that you want to use, which is PostgreSQL.
rails new myapp -d postgresql
Below you can see the process of the Rails project being generated.
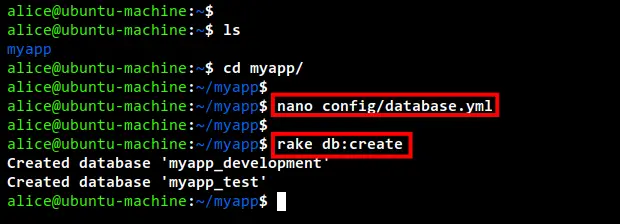
Now move to the directory myapp and edit the database configuration config/database.yml using nano editor.
cd myapp/
nano config/database.yml
Uncomment and change database credentials with your PostgreSQL details. In the below example, we will be using the PostgreSQL role named 'alice' with the password 'mypassword'. The privileges that you will need here are Create DB and Create role.
username: alice
password: mypassword
host: localhost
port 5432
Save and close the file when you are done.
Next, migrate the database for your Rails project using the below command. This will create and generate the PostgreSQL database for your application. And also, be sure you don't get any errors like authentication failure to the PostgreSQL. If you get an error about the authentication, check again your PostgreSQL user details.
rake db:create
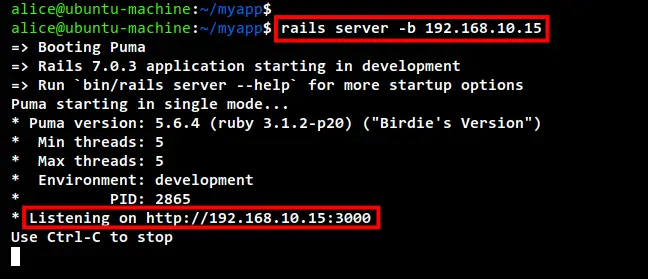
Lastly, run the rails command below to run your new Ruby on Rails project. The option -b 192.168.10.15 here is to specify the bind address that your project will be running. Be sure to change the IP address with the IP address of your Ubuntu machine.
rails server -b 192.168.10.15
In the below screenshot, you can see the Rails application is running on IP address 192.168.10.15 in the development mode with default TCP port 3000.
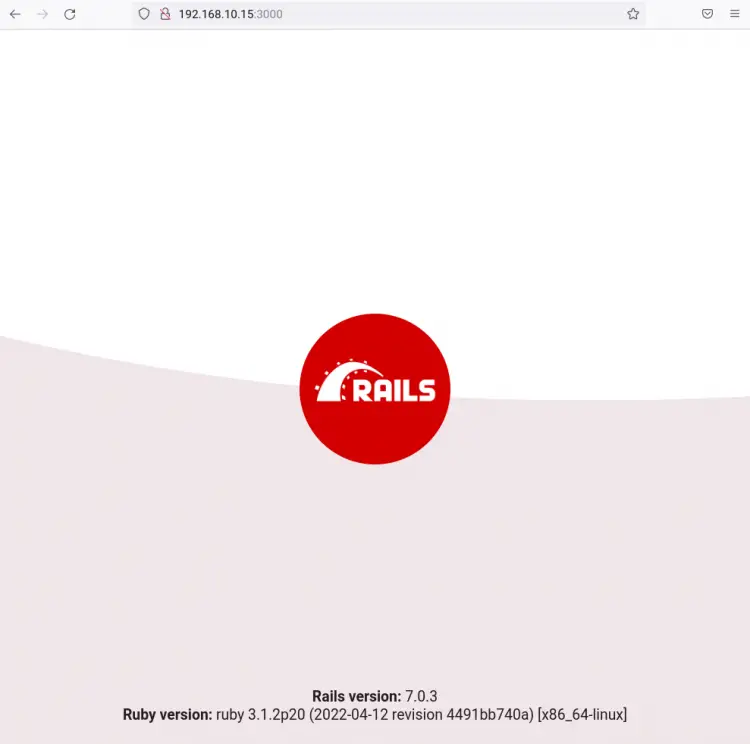
Now open your web browser and visit your Ubuntu machine IP address with port 3000 (for e.g here http://192.168.10.15:3000). And you will see the default index.html page of the Ruby on Rails project.
Conclusion
Congratulation! You have now learned how to install and configure Ruby on Rails on Ubuntu 22.04. You have also learned how to set up Rbenv for the Rails development and also learned how to install a specific Ruby version using Rbenv. Other important things that you have also learned here are to set up the PostgreSQL server for your Rails project, which includes installing the PostgreSQL library and setting up the PostgreSQL role for your Rails project.

