How to install the WiKID Strong Authentication Server - Community Edition
The WiKID Strong Authentication Server is a dual-source two-factor authentication system. PINs are encrypted on a software token and sent to the WiKID server. If the PIN is correct, the encryption valid and the account active, a one-time password is generated, encrypted and returned to the user's token where it is decrypted and presented for use with a network-based services. While there are a number of tutorials on how to combine WiKID's two-factor system a variety of systems (such as SSH, OpenVPN, Apache and SSL-VPNs), this is the first to address how to install the WiKID Server. We assume that you have already configured an RPM-based server. In general, it is best to have WiKID be the only service running on the server. This configuration will minimize potential security risks.
Additional information on the WiKID Strong Authentication Sytem can be found here.
Installing the WiKID Strong Authentication RPMs
Please note that with the 3.x versions we have moved the commands from generic "start" and "stop" to "wikidctl start", "wikidctl stop", "wikidctl setup" etc.
- Install Postgresql and related
su -c yum install postgresql postgresql-libs postgresql-jdbc postgresql-server postgresql-pl
- Download and install the JDK. NB: You must download the version 1.5 jdk rpm! It is available from Sun's web site
- Create a symlink to your java install in /opt, if there is not one already.
ln -s /usr/java/jdk1.x.x/ /opt/java
- Our replication package requires compat-libstdc++-296 (and it's not yet a dependency).
yum install compat-libstdc++-296
- The WiKID rpms require perl-libwww-perl, ntp and system-config-date
# yum install ntp system-config-date perl-libwww-perl
- Download the WiKID rpms from Sourceforge and install them. You will need both the wikid-server-community-3.0.0beta rpm and the wikid-utility rpm.
su -c rpm -ivh wikid-*
- Configure your box for WiKID:
# /opt/WiKID/sbin/wikidserver_config.sh
- Reboot or run:
#/opt/WiKID/conf/templates/wikid-firstboot.sh
- Setup the WiKID server. The WiKID token clients communicate with the WiKID via port 80 (https is not needed because the PINs and OTPs are asymmetrically encrypted, so you will need a routable IP address. If you are just testing, then just make sure that the PC running the client can get to the server.
/opt/WiKID/bin/wikidctl setup
- Once setup, start the server
- The script will pick up your existing network settings, walk you through them and create an SSL cert for the server.
/opt/WiKID/bin/wikidctl start
You may need to install the JCE Unlimited Strength Jurisdiction Policy Files to avoid the "Illegal Key Size error".
The primary administration interface of the WiKID Strong Authentication Server is via an HTML 3.2 compliant browser. This allows the server to be managed effectively from a wide range of platforms and network topologies. It also provides a low-bandwidth interface for ease of management from remote locations.
From a network-connected system, enter the URL address:
http://servername.domain.com/WiKIDAdmin/
Substitute your hosts Fully Qualified Domain Name (FQDN) for
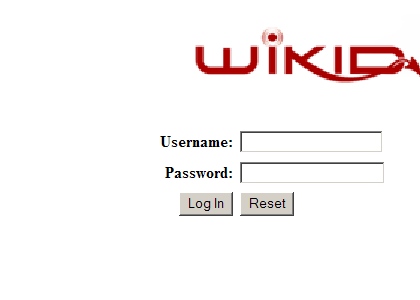
Figure 1 - Initial login screen
The default login credentials are:
Username: WiKIDAdmin (mixed-case)
Password: 2Factor (mixed-case)
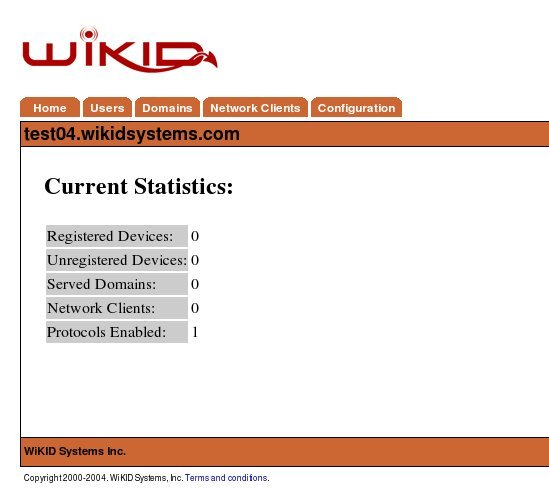
The main system status screen is shown upon successful login to the administration system as depicted in Figure 2. This screen provides summary information about the current stat of the system and the services it provides.
Figure 2 -Main Status Summary Screen
Each item is covered in greater detail later in this guide. In overview:
Registered Devices – This indicates the number of devices that are currently serviced by this server. These devices have completed the entire registration process and could successfully gain access to a secured resource.
Unregistered Devices – These devices have partially completed the setup process but have not completed the device to userid mapping. Unregistered devices are automatically purged from the system after 1 hour as specified in the RegCodeTTL paramater. This parameter can be changed in Configuration --> Set Parameters.
Served Domains – The number of distinct domains (server codes) configured for this server.
Network Clients – The number of systems that use this server for authentication. This includes both RADIUS systems and other protocols, such as wAuth.
Protocols Enabled – The number of protocol modules installed and activated on the server.
As we progress through this guide, we will periodically return to this status summary to note the changes in the values. This should provide a well founded understanding of the basic terms and concepts of the WiKID Authentication System.


