How to install the WiKID Strong Authentication Server - Community Edition - Page 4
Enabling a Protocol Module
Protocol modules enable the WiKID Strong Authentication Server to provide authentication services to various types of network clients. Currently, the Community Edition of the WiKID Strong Authentication Server provides support for LDAP, TACACS+ and wAuth.
The wAuth protocol is the native interface to the WiKID Strong Authentication Server. This protocol uses SSL and certificate authentication to allow distributed (or local) clients to communicate authentication data over an insecure network. The demonstration registration system (/opt/WiKID/tomcat/webapps/WiKIDAdmin/example.jsp or https://servername/WiKIDAdmin/exmample.jsp) uses a Java bean (wClient) to verify user authentication information. See this document on editing this file.
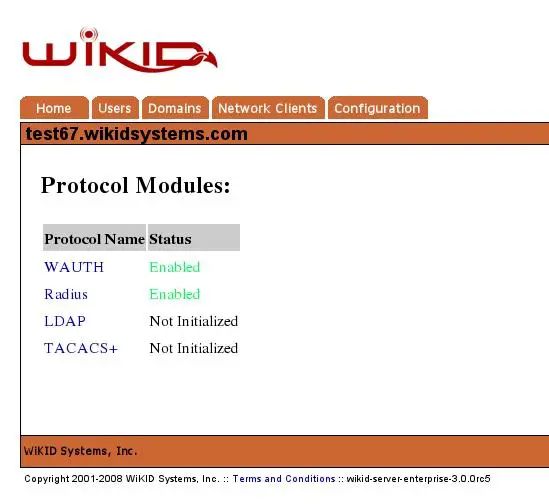
Select the [Protocol Modules] header option to begin the initialization. You will see a list of protocol modules available on this server, as in Figure 16.
Figure 16 – Un-initialized Protocols
Note: The wAuth protocol is enabled automatically as no other protocol will operate without it.
Enabling the LDAP Protocol
Click on the LDAP protocol on the Enable Protocols page to bring up the the Enable LDAP page. The required parameters for the LDA{ module are:
LDAP_wauth_host: IP address of the WiKID Server that will validate LDAP bind requests (always 127.0.0.1)
LDAP_wauth_kfile Location of the Network Client cert for LDAP access to the WiKID Server (usually /opt/WiKID/private/localhost.p12)
LDAP_wauth_pass Passphrase for the Network Client cert above.
LDAP_wauth_port Port the WiKID server is listening on (usually 8388) NB: LDAP will actually listen on port 10389
LDAP_wauth_server 12-digit code for the domain LDAP will check bind requests against
Once complete, click Update
Creating Network Clients
Network clients are systems that request one-time password validation from a WiKID Strong Authentication Server. These systems act in a proxy capacity, accepting questionable information from users and communicating with the WiKID Strong Authentication Server for validation. Network clients utilize one of the installed protocol modules. The protocol module must be installed, initialized and enabled before you can configure add a network client for it.
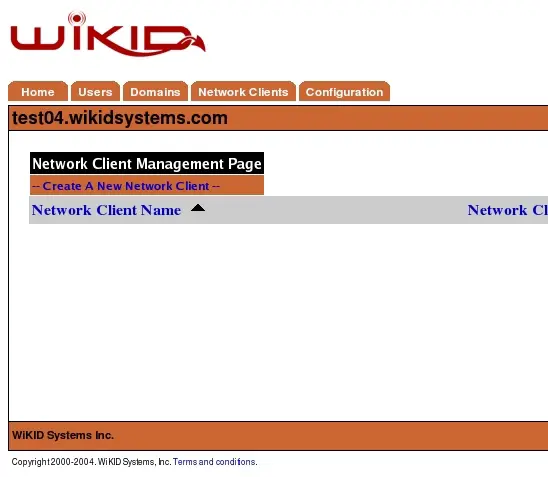
Each network client must be configured on the WiKID Strong Authentication Server before it will allow the client to request validation. For wAuth clients, this will require the generation of a certificate for the network client. The exception is the localhost client that is pre-installed by default. You may (and should) regenerate this certificate, as well as any remote client certificates, on a periodic basis. Figure 17 shows the initial network client screen.

Figure 17 - Initial Network Client Screen
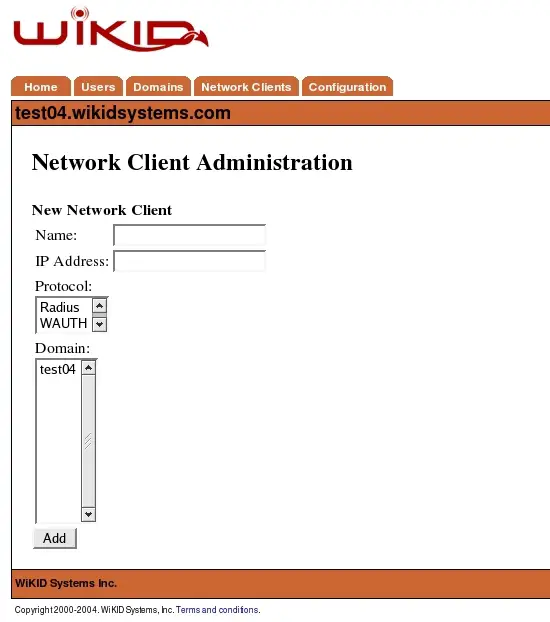
Select – Create new Network Client - to begin adding a network client. You will be presented with a screen similar to Figure 19 below.

Figure 18 - Network Client Properties Screen
These are the general network client properties. These values are required for each network client configured, regardless of the protocol selected. Property definitions are:
Name – The descriptive name of the server. This will be the primary display name in the administrative system and in system logs and reports. It is recommended that you use a combination of hostname, and WiKID domain for clarity.
IP Address – The IP address of the network client.
Protocol – The communications protocol used by this network client. Only protocols previously enabled will be available. The protocol selection will dictate the additional properties that must be defined for this client.
Domain – This is the WiKID authentication domain in which this client will request credential validation.
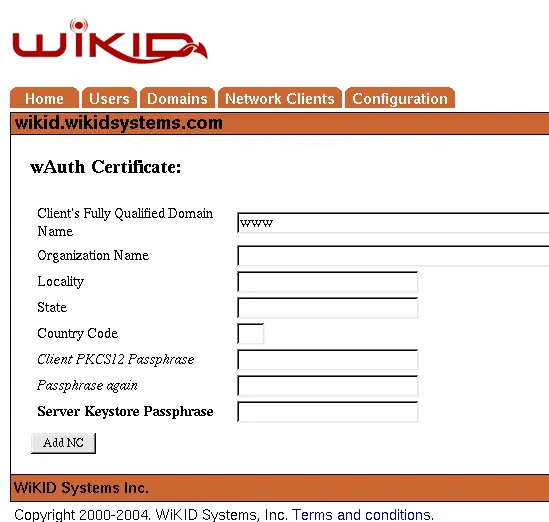
If you are creating a Wauth network client, you will need to create a Certificate for the network client. Complete the required information as shown in Figure 20. Note the the network doesn't require a routeable Fully Qualified Domain Name. It is acceptable to use a computer name or a nickname such as “www” or “extranet” rather than “vpn.wikidsystems.com” or “extranet.wikidsystems.com”.
Figure 19 – Creating a Certificate for a Wauth Network Client


