Installation Guide: CentOS 5.1 Desktop - Page 4
4 Basic Configuration
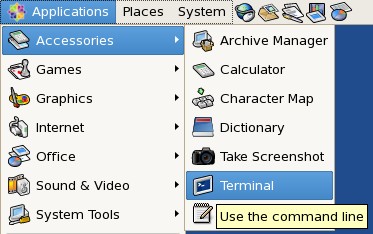
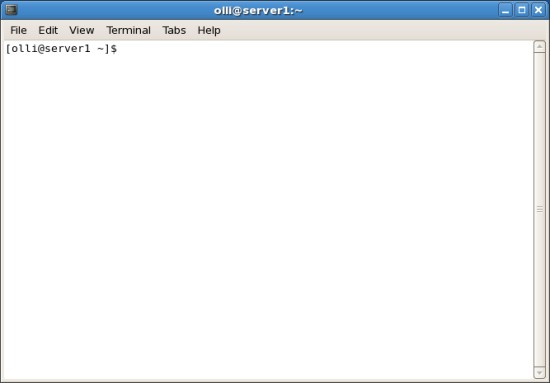
In various parts of this howto you have to switch to the root-account (within a terminal). The terminal is available in the gnome applications menu.
Enter the following to switch to the root-account:
su -
%rootpassword%
You can switch back to your user-account with:
exit
4.1 Yum Plugins & Yumex
Install some recommended packages to prevent problems with packages (broken/3rd party) and kernel-modules (root privileges needed):
yum install yumex yum-fastestmirror yum-skip-broken yum-kmod yum-kernel-module yum-priorities
Note: How to manage packages with yumex is described later at step 5.
After that we add priorities to the default repositories.
vi /etc/yum.repos.d/CentOS-Base.repo
Add a priority to each repository-entry - the content should look like this:
# CentOS-Base.repo
#
# This file uses a new mirrorlist system developed by Lance Davis for CentOS.
# The mirror system uses the connecting IP address of the client and the
# update status of each mirror to pick mirrors that are updated to and
# geographically close to the client.  You should use this for CentOS updates
# unless you are manually picking other mirrors.
#
# If the mirrorlist= does not work for you, as a fall back you can try the
# remarked out baseurl= line instead.
#
#
[base]
name=CentOS-$releasever - Base
mirrorlist=http://mirrorlist.centos.org/?release=$releasever&arch=$basearch&repo=os
#baseurl=http://mirror.centos.org/centos/$releasever/os/$basearch/
gpgcheck=1
gpgkey=http://mirror.centos.org/centos/RPM-GPG-KEY-CentOS-5
priority=1
#released updates
[updates]
name=CentOS-$releasever - Updates
mirrorlist=http://mirrorlist.centos.org/?release=$releasever&arch=$basearch&repo=updates
#baseurl=http://mirror.centos.org/centos/$releasever/updates/$basearch/
gpgcheck=1
gpgkey=http://mirror.centos.org/centos/RPM-GPG-KEY-CentOS-5
priority=1
#packages used/produced in the build but not released
[addons]
name=CentOS-$releasever - Addons
mirrorlist=http://mirrorlist.centos.org/?release=$releasever&arch=$basearch&repo=addons
#baseurl=http://mirror.centos.org/centos/$releasever/addons/$basearch/
gpgcheck=1
gpgkey=http://mirror.centos.org/centos/RPM-GPG-KEY-CentOS-5
priority=1
#additional packages that may be useful
[extras]
name=CentOS-$releasever - Extras
mirrorlist=http://mirrorlist.centos.org/?release=$releasever&arch=$basearch&repo=extras
#baseurl=http://mirror.centos.org/centos/$releasever/extras/$basearch/
gpgcheck=1
gpgkey=http://mirror.centos.org/centos/RPM-GPG-KEY-CentOS-5
priority=1
#additional packages that extend functionality of existing packages
[centosplus]
name=CentOS-$releasever - Plus
mirrorlist=http://mirrorlist.centos.org/?release=$releasever&arch=$basearch&repo=centosplus
#baseurl=http://mirror.centos.org/centos/$releasever/centosplus/$basearch/
gpgcheck=1
enabled=0
gpgkey=http://mirror.centos.org/centos/RPM-GPG-KEY-CentOS-5
priority=2
4.2 RPMforge
The RPMforge-repository provides many packages like multimedia applications and drivers.
4.2.1 Installation
Install the repository:
rpm -ivh http://apt.sw.be/redhat/el5/en/i386/RPMS.dag/rpmforge-release-0.3.6-1.el5.rf.i386.rpm
4.2.2 Priority
Now let's set a low priority (high number > 10) for this repository.
vi /etc/yum.repos.d/rpmforge.repo
Change the content that it looks like this:
# Name: RPMforge RPM Repository for Red Hat Enterprise 5 - dag
# URL: http://rpmforge.net/
[rpmforge]
name = Red Hat Enterprise $releasever - RPMforge.net - dag
#baseurl = http://apt.sw.be/redhat/el5/en/$basearch/dag
mirrorlist = http://apt.sw.be/redhat/el5/en/mirrors-rpmforge
#mirrorlist = file:///etc/yum.repos.d/mirrors-rpmforge
enabled = 1
protect = 0
gpgkey = file:///etc/pki/rpm-gpg/RPM-GPG-KEY-rpmforge-dag
gpgcheck = 1
priority=11
4.3 Remove Software
Before you are going to update the system for the first time you should check if there is software installed that you don't need, or rather that you want to replace with another software. The goal should be a clean system with only the programs installed that you really need.
Which programs you should deinstall or replace with others is up to you - you'll find a summary of already installed software at step 6 and a little assortment of additional software (including possible replacements for already installed software) at step 7.
You can simply deinstall software with the Yum Extender (yumex) - have a look at step 5.
4.4 Services
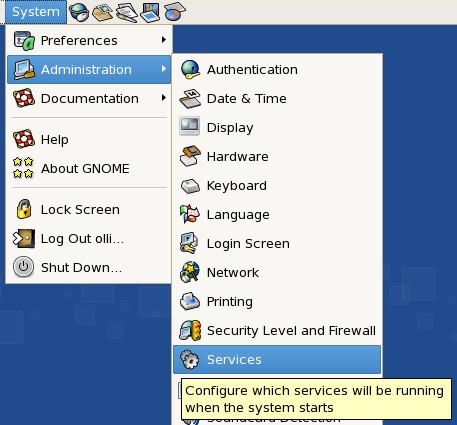
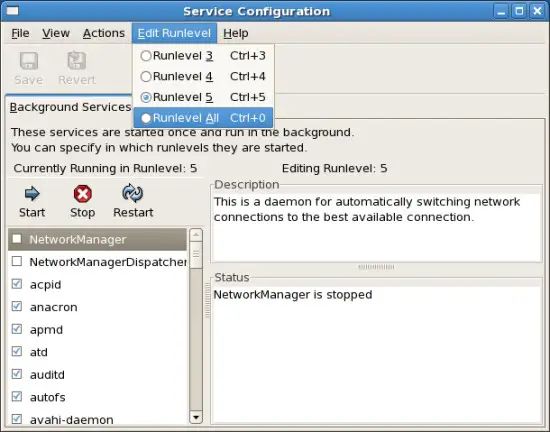
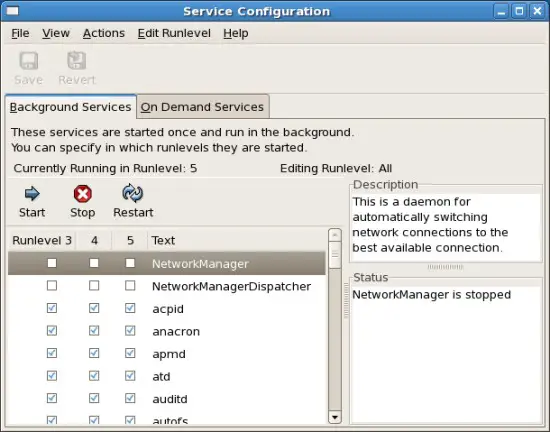
Some services are enabled by default on your system - maybe some of them are needless (depending on your hardware and your needs). The deactivation of needless services will save system resources, so it's worth to take a look on the service settings - they are available in the gnome system menu.
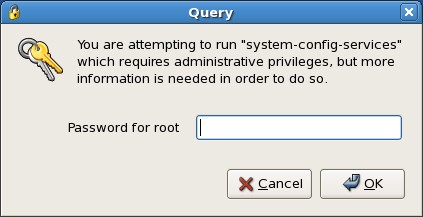
Enter the root password.
Select "Runlevel All".
4.4.1 Enable Services
- Network Manager
- Network Manager Dispatcher
4.4.2 Disable Services
- bluetooth (disable this service if there is no bluetooth device connected to your system)
- firstboot (this service is not longer needed)
- mdmonitor (disable this service if you haven't set up a RAID-system)
- pcscd (disbale this service if there is no smart-card device connected to your system)
- restorecond (disable this service if you deactivated SELinux)
- sshd (disable this service if you're not planning to connect to this computer via ssh/scp/sftp etc)
If you have a computer with a wlan-card I recommend to disable "network" in all runlevels - otherwise you'll have a long boot-time cause the system tries to allocate a dhcp-ip to this device (regardless of the configuration). The network manager will enable the network automatically after you've logged in.

