Using Built-in Policy Importer In Firewall Builder
| Author: [email protected] http://www.fwbuilder.org |
This article continues the series of articles on Fireall Builder, a graphical firewall configuration and management tool that supports many Open Source firewall platforms as well as Cisco IOS access lists and Cisco ASA (PIX). Firewall Builder was introduced on this site earlier with articles Getting Started With Firewall Builder, Using Built-In Revision Control In Firewall Builder, Using Built-in Policy Installer in Firewall Builder, Using Firewall Object In Firewall Builder.
This article demonstrates how you can import existing iptables or Cisco router configuration into Firewall Builder.
More information on Firewall Builder, pre-built binary packages and source code, documentation can be found on the project web site at http://www.fwbuilder.org/. Numerous examples of iptables, pf and other rules are available in Firewall Builder Users Guide. Follow Firewall Builder Project Blog for announcements and articles on all aspects of using Firewall Builder.
How to import existing iptables or Cisco router configuration into Firewall Builder
There are two ways to activate the feature: Main menu "File/Import Policy" or "Tools/Discovery Druid" and then choose option "Import configuration of a firewall or a router". Only import of iptables and Cisco IOS access lists is possible in the current version.
Importing existing iptables configuration
iptables config that the program can import is in the format of iptables-save. Script "iptables-save" is part of the standard iptables install and should be present on all Linux distribution. Usually this script is installed in /sbin/ . When you run this script, it dumps current iptables configuration to stdout. It reads iptables rules directly form the kernel rather than from some file, so what it dumps is what is really working right now. To import this into fwbuilder run the script to save configuration to a file
iptables-save > iptables_config.conf
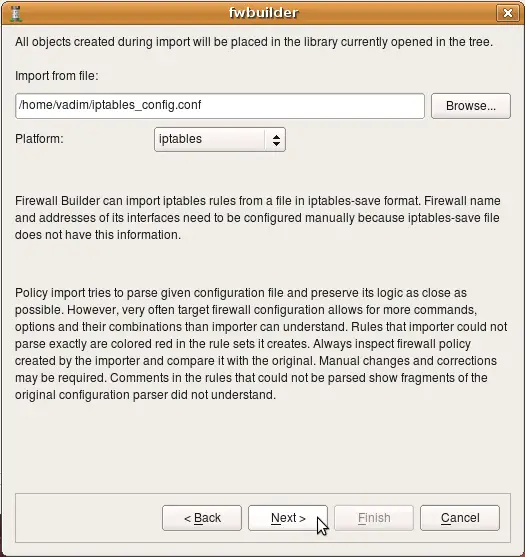
Then launch fwbuilder, activate "Import Policy" function and use "Browse" button in the dialog to find file iptables_config.conf. You also need to choose "iptables" in the drop-down menu "Platform".
If you do not choose iptables in the "Platform", the program will try to interpret the file using different parser and will fail. The program does not make any assumptions about the file name or extension and can not predict automatically what platform is the configuration being imported is for.
Importing iptables configuration created in FireStarter
The following example demonstrates import of iptables policy generated by Firestarter, another popular iptables configuration management program.
After the platform is selected and file name entered, click "Next" to start the process.
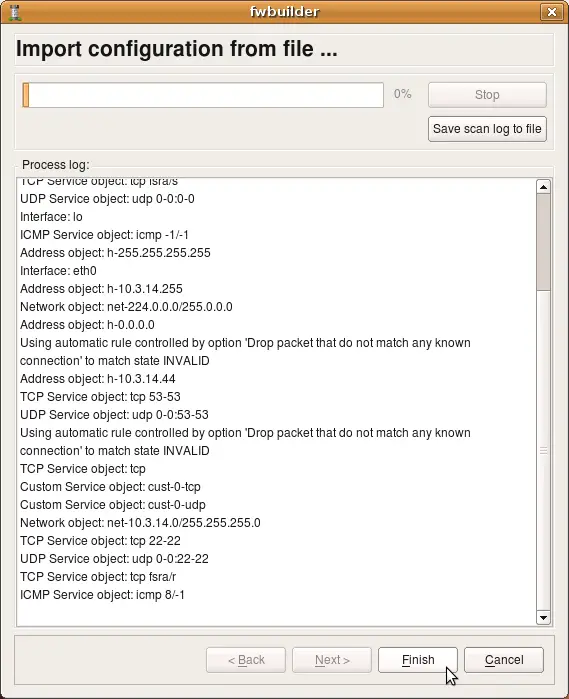
The program tries to interpret configuration file rule-by-rule and recreates its equivalent in fwbuilder. The progress window displays errors, if any, as well as some diagnostics that shows network and service objects created in the process. Note that user-defined iptables chains found in the configuration file will be re-created in fwbuilder as policy rule sets. The screenshot shows rulesets "LSI", "LSO", "OUTBOUND" being created. There were more but they did not fit in the output window. Address objects "h-10.3.14.10", "h-10.3.14.255" and few others have been created as well. Service objects "tcp fsra/s", "udp 0-0:0-0", "icmp -1/-1" and few others have also been created.
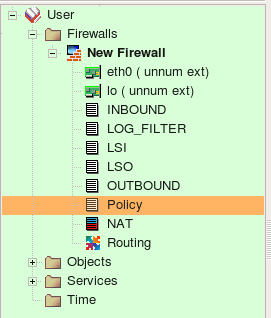
Note that the new firewall object created in the process has generic name "New Firewall". This is because iptables configuration file used for import does not have information about firewall machine name. It also does not have information about its interfaces, their names and addresses. The program can infer their names when it encounters "-i <interface>" or "-o <interface>" clause in the iptables configuration lines. It can not reliably detect their addresses though. You need to rename firewall object and add ip addresses to interfaces after the import manually.
Note also that only ipv4 part of the iptables configuration was imported. Currently, import of ipv6 iptables configuration is not supported.
Screenshot above demonstrates rule sets that the program created from the configuration it imported. Rule sets "INBOUND", "LOG_FILTER", "LSI", "LSO", "OUTBOUND", "Policy" are all of the type "Policy" and contain filtering rules. There were no NAT rules in the original configuration so the rule set "NAT" is created but is empty. Names of all policy rule sets match names of the iptables chains in the original configuration.
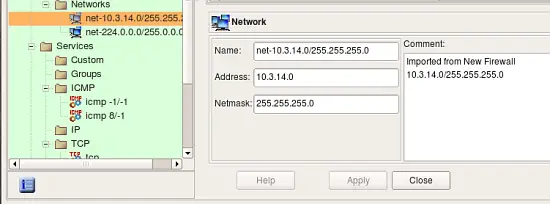
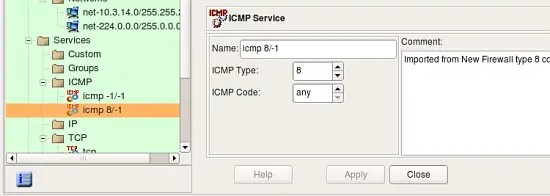
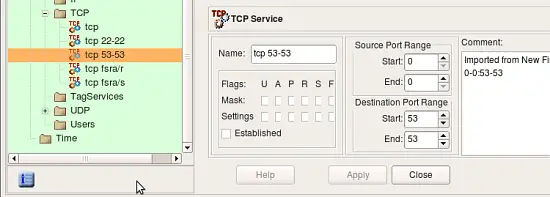
Screenshots above demonstrate address and service objects created by the program. It writes a comment in each object to remind that it was created automatically on import. Names of these objects are chosen automatically, you can rename objects to give them more meaningful names. Some of the objects created during import have the same properties as existing service and address objects from the Standard objects library. Currently the program does not cross-match them and just creates new objects, however in the future it may use standard objects instead.
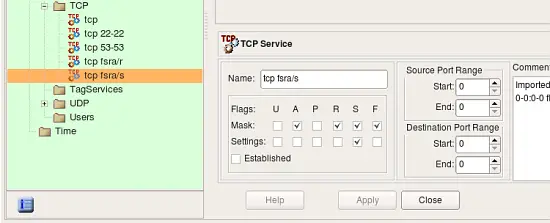
Some rules in the original iptables config used "--tcp-flags" parameter to match only certain combinations of tcp flags. Here is an example:
-A INPUT -s 10.3.14.10 -p tcp -m tcp ! --tcp-flags FIN,SYN,RST,ACK SYN -j ACCEPT
In order to be able to reproduce this rule, fwbuilder created special TCP service object with given combination of tcp mask and flags:
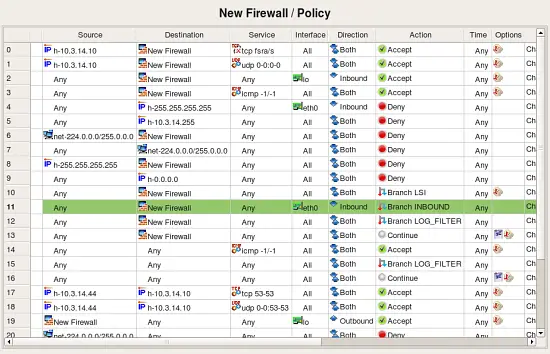
The follwoing screenshot demonstrates rules created in the main Policy rule set. These are the top iptables rules, some of them branch off to the other Policy rule sets. Some of the rules in the original policy did not match state (did not have clause "-m state --state NEW" or similar), these rules were created with the flag "stateless" turned on. In fwbuilder, this makes policy compiler generate iptables commands without "-m state --state NEW" clause which matches the original. These rules are marked with an icon that represents non-default rule options in the column "Options".

