How to Install CodeIgniter PHP Framework on Ubuntu 18.04 LTS
CodeIgniter is a free, open source and powerful PHP framework with a very small footprint, created by Rick Ellis in 2006. It is specially built for developers who need a simple and elegant toolkit to create full-featured web applications. It comes with lot's of features including, Light Weight, Active Record Database Support, Image Manipulation Library, Help supports, URI Routing, Model-View-Controller Based System and much more.
In this tutorial, we will learn how to install CodeIgniter on Ubuntu 18.04 LTS (Bionic Beaver) server.
Requirements
- A server running Ubuntu 18.04.
- A non-root user with root password is set up to your server.
Install Apache and PHP
CodeIgniter runs on Apache web server and written in PHP language, so you will need to install Apache and PHP to your system. First, install Apache web server with the following command:
sudo apt-get install apache2 -y
By default, the latest version of the PHP is not available in Ubuntu 18.04, so you will need to add the repository for that. You can add PHP repository with the following command:
sudo apt-get install python-software-properties -y
sudo add-apt-repository -y ppa:ondrej/php
Once the repository is updated, you can install PHP and other libraries with the following command:
sudo apt-get install libapache2-mod-php7.1 php7.1-common php7.1-xml php7.1-zip php7.1-mysql unzip wget -y
Next, start Apache web service and enable it to start on boot time:
sudo systemctl start apache2
sudo systemctl enable apache2
Install CodeIgniter
You can download the latest version of the CodeIgniter from Git repository using the following command:
wget https://github.com/bcit-ci/CodeIgniter/archive/3.1.5.zip
Once the download is completed, unzip the downloaded file with the following command:
unzip 3.1.5.zip
Copy the extracted directory to the Apache root directory and give proper permissions with the following command:
sudo cp -r CodeIgniter-3.1.5 /var/www/html/codeigniter
sudo chown -R www-data:www-data /var/www/html/codeigniter
sudo chmod -R 777 /var/www/html/codeigniter/
Next, create an apache virtual host directive for CodeIgniter.
sudo nano /etc/apache2/sites-available/codeigniter.conf
Add the following lines:
<VirtualHost *:80>
 ServerAdmin [email protected]
 DocumentRoot /var/www/html/codeigniter
 ServerName yourdomain.com
 <Directory /var/www/html/codeigniter/>
Options +FollowSymLinks
AllowOverride All
Order allow,deny
allow from all
 </Directory>
 ErrorLog /var/log/apache2/codeigniter-error_log
 CustomLog /var/log/apache2/codeigniter-access_log common
</VirtualHost>
Save and close the file, then enable virtual host file with the following command:
sudo a2ensite codeigniter
Finally, restart apache service to apply all the changes:
systemctl restart apache2
Access CodeIgniter
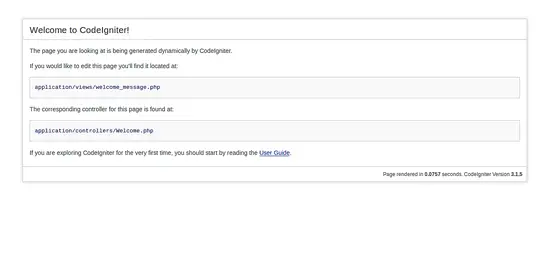
Open your web browser and type the URL http://yourdomain.com, you will be redirected to the CodeIgniter dashboard as shown on the following page:
Congratulations! you have successfully installed CodeIgniter on Ubuntu 18.04 LTS server.


