The Perfect Server - Ubuntu 15.10 (Wily Werewolf) with Apache, PHP, MySQL, PureFTPD, BIND, Postfix, Dovecot and ISPConfig 3 - Page 3
This tutorial exists for these OS versions
- Ubuntu 20.04 (Focal Fossa)
- Ubuntu 18.04 (Bionic Beaver)
- Ubuntu 17.10 (Artful Aardvark)
- Ubuntu 17.04 (Zesty Zapus)
- Ubuntu 16.10 (Yakkety Yak)
- Ubuntu 16.04 (Xenial Xerus)
On this page
15 Install Roundcube Webmail
To install Roundcube Webmail, run:
apt-get install roundcube roundcube-core roundcube-mysql roundcube-plugins roundcube-plugins-extra javascript-common libjs-jquery-mousewheel php-net-sieve tinymce
The installer will ask the following questions:
Configure database for roundcube with dbconfig-common? <-- Yes
Database type to be used by roundcube: <-- mysql
MySQL application password for roundcube: <-- Press enter
Password of the database's administrative user: <-- Enter your mysql root password here
Then edit the RoundCube apache configuration file.
nano /etc/apache2/conf-enabled/roundcube.conf
and remove the # in front of the first 2 alias lines, add the two other "Alias" statements and add the line "AddType application/x-httpd-php .php" right after the "<Directory /var/lib/roundcube>" line:
# Those aliases do not work properly with several hosts on your apache server
# Uncomment them to use it or adapt them to your configuration
Alias /roundcube/program/js/tiny_mce/ /usr/share/tinymce/www/
Alias /roundcube /var/lib/roundcube
Alias /webmail/program/js/tiny_mce/ /usr/share/tinymce/www/
Alias /webmail /var/lib/roundcube
[...]
<Directory /var/lib/roundcube>
AddType application/x-httpd-php .php
[...]
And restart apache
service apache2 restart
Then edit the RoundCube config.inc.php configuration file:
nano /etc/roundcube/config.inc.php
and change the default host to localhost:
$rcmail_config['default_host'] = 'localhost';
This prevents that Roundcube will show server name input field in the login form.
16. Install ISPConfig 3
To install ISPConfig 3 from the latest released version, do this:
cd /tmp
wget http://www.ispconfig.org/downloads/ISPConfig-3-stable.tar.gz
tar xfz ISPConfig-3-stable.tar.gz
cd ispconfig3_install/install/
The next step is to run
php -q install.php
This will start the ISPConfig 3 installer. The installer will configure all services like Postfix, Dovecot, etc. for you. A manual setup as required for ISPConfig 2 (perfect setup guides) is not necessary.
root@server1:/tmp/ispconfig3_install/install# php -q install.php
--------------------------------------------------------------------------------
_____ ___________ _____ __ _ ____
|_ _/ ___| ___ \ / __ \ / _(_) /__ \
| | \ `--.| |_/ / | / \/ ___ _ __ | |_ _ __ _ _/ /
| | `--. \ __/ | | / _ \| '_ \| _| |/ _` | |_ |
_| |_/\__/ / | | \__/\ (_) | | | | | | | (_| | ___\ \
\___/\____/\_| \____/\___/|_| |_|_| |_|\__, | \____/
__/ |
|___/
--------------------------------------------------------------------------------
>> Initial configuration
Operating System: 15.10 UNKNOWN
Following will be a few questions for primary configuration so be careful.
Default values are in [brackets] and can be accepted with <ENTER>.
Tap in "quit" (without the quotes) to stop the installer.
Select language (en,de) [en]: <-- ENTER
Installation mode (standard,expert) [standard]: <-- ENTER
Full qualified hostname (FQDN) of the server, eg server1.domain.tld [server1.example.com]: <-- ENTER
MySQL server hostname [localhost]: <-- ENTER
MySQL root username [root]: <-- ENTER
MySQL root password []: <-- yourrootsqlpassword
MySQL database to create [dbispconfig]: <-- ENTER
MySQL charset [utf8]: <-- ENTER
Generating a 4096 bit RSA private key
............................................................................++
.....................++
writing new private key to 'smtpd.key'
-----
You are about to be asked to enter information that will be incorporated
into your certificate request.
What you are about to enter is what is called a Distinguished Name or a DN.
There are quite a few fields but you can leave some blank
For some fields there will be a default value,
If you enter '.', the field will be left blank.
-----
Country Name (2 letter code) [AU]: <-- DE (your country code, in my case DE for Germany)
State or Province Name (full name) [Some-State]: <-- ENTER
Locality Name (eg, city) []: <-- Lueneburg (your city)
Organization Name (eg, company) [Internet Widgits Pty Ltd]: <-- ISPConfig UG (your company name)
Organizational Unit Name (eg, section) []: <-- ENTER
Common Name (e.g. server FQDN or YOUR name) []: <-- server1.example.com
Email Address []: <-- ENTER
Configuring Jailkit
Configuring Dovecot
Configuring Spamassassin
Configuring Amavisd
Configuring Getmail
Configuring Pureftpd
Configuring BIND
Configuring Apache
Configuring Vlogger
Configuring Apps vhost
Configuring Bastille Firewall
Configuring Fail2ban
Installing ISPConfig
ISPConfig Port [8080]: <-- ENTER
Do you want a secure (SSL) connection to the ISPConfig web interface (y,n) [y]: <-- ENTER
Generating RSA private key, 4096 bit long modulus
..........++
......++
e is 65537 (0x10001)
You are about to be asked to enter information that will be incorporated
into your certificate request.
What you are about to enter is what is called a Distinguished Name or a DN.
There are quite a few fields but you can leave some blank
For some fields there will be a default value,
If you enter '.', the field will be left blank.
-----
Country Name (2 letter code) [AU]: <-- DE (enter your country code, in my case DE for Germany)
State or Province Name (full name) [Some-State]: <-- ENTER
Locality Name (eg, city) []: <-- Lueneburg (your city)
Organization Name (eg, company) [Internet Widgits Pty Ltd]: <-- ISPConfig UG (name of your company)
Organizational Unit Name (eg, section) []: <-- ENTER
Common Name (e.g. server FQDN or YOUR name) []: <-- server1.example.com
Email Address []: <-- ENTER
Please enter the following 'extra' attributes
to be sent with your certificate request
A challenge password []: <-- ENTER
An optional company name []: <-- ENTER
writing RSA key
Configuring DBServer
Installing ISPConfig crontab
no crontab for root
no crontab for getmail
Restarting services ...
Installation completed.
root@server1:/tmp/ispconfig3_install/install#
The installer automatically configures all underlying services, so there is no manual configuration needed.
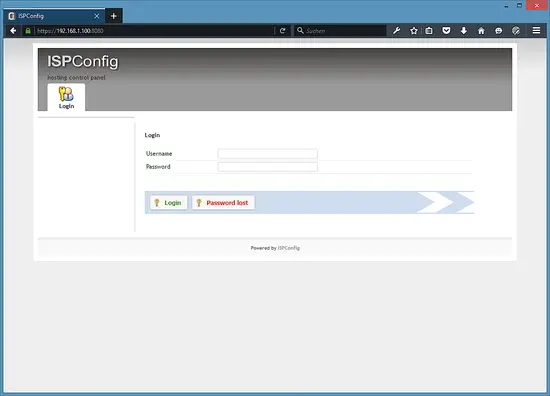
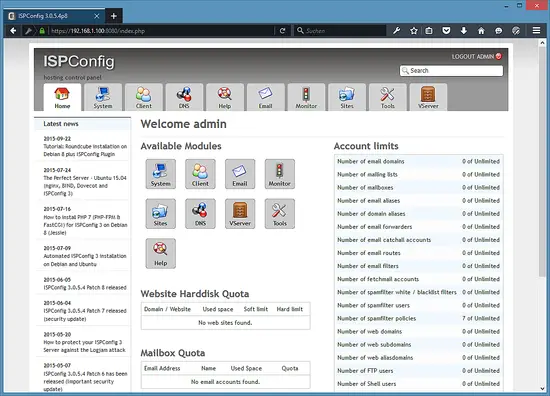
Afterward you can access ISPConfig 3 under http(s)://server1.example.com:8080/ or http(s)://192.168.1.100:8080/ (HTTP or HTTPS depends on what you chose during installation). Log in with the username admin and the password admin (you should change the default password after your first login):
The system is now ready to be used.
16.1 ISPConfig 3 Manual
In order to learn how to use ISPConfig 3, I strongly recommend to download the ISPConfig 3 Manual.
On more than 300 pages, it covers the concept behind ISPConfig (admin, resellers, clients), explains how to install and update ISPConfig 3, includes a reference for all forms and form fields in ISPConfig together with examples of valid inputs, and provides tutorials for the most common tasks in ISPConfig 3. It also lines out how to make your server more secure and comes with a troubleshooting section at the end.
17 Add Dkim support in ISPConfig
Dkim is a technology to digitally sign all outgoing emails. Dkim support will be integrated in ISPConfig 3.1, for the current ISPConfig 3.0.5.4p8 there is a backport of the Dkim functions available. In this step, I will show you how to install this patch.
Download the patch and run the installation script:
cd /tmp
wget blog.schaal-24.de/files/dkim-latest_ispconfig3.tar.gz
tar xfz dkim-latest_ispconfig3.tar.gz
cd dkim-patch
php -q install.php
Answer the questions of the installer:
Configure amavis? [ Y | n ]? <-- Press Enter to accept the default.
Directory for DKIM-Keys [ /var/lib/amavis/dkim ] <-- Press Enter to accept the default.
Configure postfix? [ Y | n ]? <-- Press Enter to accept the default.
Update databse? [ Y | n ]? <-- Press Enter to accept the default.
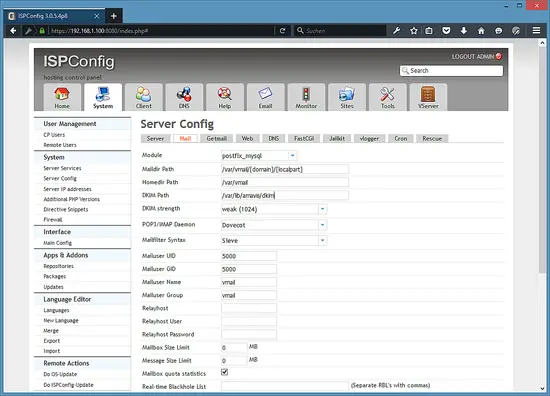
Login to ISPConfig and set the Dkim Path to "/var/lib/amavis/dkim" under System > Server Config > Mail and press "Save" to save the changes.
18. Additional Notes
18.1 OpenVZ
If the Ubuntu server that you've just set up in this tutorial is an OpenVZ container (virtual machine), you should do this on the host system (I'm assuming that the ID of the OpenVZ container is 101 - replace it with the correct VPSID on your system):
VPSID=101
for CAP in CHOWN DAC_READ_SEARCH SETGID SETUID NET_BIND_SERVICE NET_ADMIN SYS_CHROOT SYS_NICE CHOWN DAC_READ_SEARCH SETGID SETUID NET_BIND_SERVICE NET_ADMIN SYS_CHROOT SYS_NICE
do
  vzctl set $VPSID --capability ${CAP}:on --save
done
18.2 Virtual machine image download of this tutorial
This tutorial is available as ready to use virtual machine image in ovf/ova format that is compatible with VMWare and Virtualbox. The virtual machine image uses the following login details:
SSH / Shell Login
Username: administrator
Password: howtoforge
This user has sudo rights.
ISPConfig Login
Username: admin
Password: howtoforge
MySQL Login
Username: root
Password: howtoforge
The IP of the VM is 192.168.1.100, it can be changed in the file /etc/network/interfaces. Please change all the above passwords to secure the virtual machine.
19. Links
- Ubuntu: http://www.ubuntu.com/
- ISPConfig: http://www.ispconfig.org/


