How to monitor harddisk health with smartmontools on Ubuntu
On this page
In this article I will give you an overveiw on the smartmontools which is a set of applications that can test hard drives, automatically notify you when the failure rate rises and read the harddisk SMART statistics to detect failures early. I will cover installation, usage on the shell and the smartmon GNOME gui in this tutorial.
About smartmontools
The smartmontools package contains two utility programs (smartctl and smartd) to control and monitor storage systems using the Self-Monitoring, Analysis and Reporting Technology System (SMART) built into most modern ATA and SCSI harddisks. In many cases, these utilities will provide advanced warning of disk degradation and failure.
Installation
Starting with the installation. All you will need is a modern S.M.A.R.T. capable hard disk.
sudo apt-get install smartmontools
The above command will install smartmontools on your system. Now just to check if your drive is actually SMART type:
sudo smartctl -i /dev/sda
The above /sda can be replaced with your own hdd name /xyz or anything that is. It will be looking something like this:
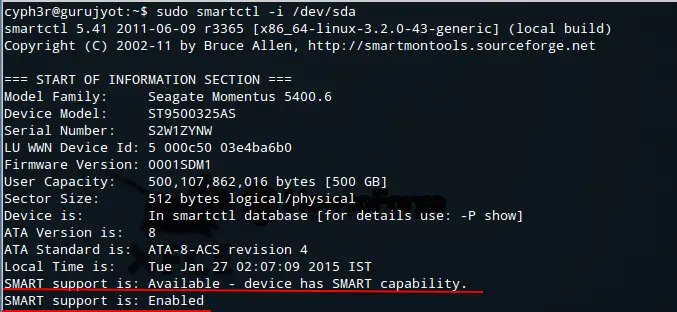
Make sure the last two lines of the output are alike. The image contains information about my hdd basically. Now lets enable SMART service.
sudo smartctl -s on /dev/sda
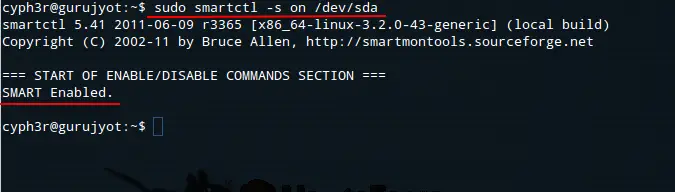
The above command will turn on the smart support, if already enabled it does nothing.
To check the complete SMART information for an IDE drive and SATA drive type:
sudo smartctl -a /dev/sda (for IDE drives)
sudo smartctl -a -d ata /dev/sda (for SATA drives)
You can check your hard drive's status by typing:
sudo smartctl -H /dev/sda
If the output shows any error you better run a backup!!!
Now having SMART enabled on your system, let'see how to work with it. The tool used to test your hard drive has three types of tests to perform. You can check all that info by typing:
sudo smartctl -c /dev/sda
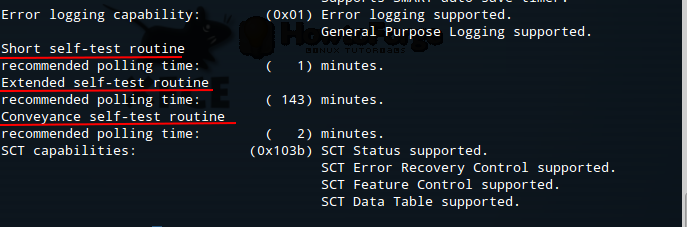
Short, Long and Conveyance you also see the time that it will take to complete all three test. You can stat with any test you feel like:
sudo smartctl -l long /dev/sda (for long test)
sudo smartctl -short /dev/sda (for short test)
sudo smartctl -conveyance /dev/sda (for conveyance test)
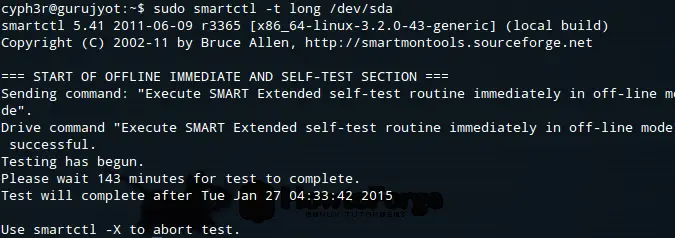
The above image is something taht is dislpayed after executing the command for the long test. The long test will take more time then anything else. All of the test runs in the background so there is no way you will be able to track the progress on your screen. You will have to type in commands for the output. If there are any errors while perfoming any of the above tests it means you shold get a backup of your sda as soon as possible. There might be chances of hard drive failure in the near future.
To get your test results you will have to type:
sudo smartctl -l selftest /dev/sda
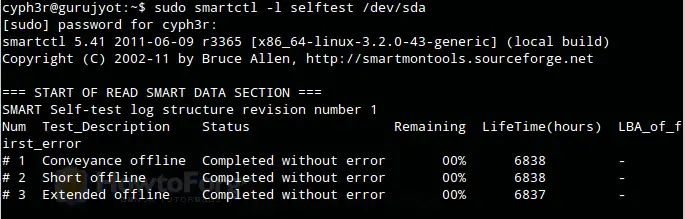
Here is a image how the test results look like. Although the results are quite clear, but if you have any problem understanding the output of smartctl you can check the man pages if you want by typing:
man 8 smartctl
man 8 smartd (for smartd output's)
After completing all of the above you can run smartmontools as Daemon on your system. So you won't have to perform all of the above actions daily. To do that go ahead and do the following:
sudo nano /etc/default/smartmontools
You can use any text editor you want, I'm using nano. Uncomment the following line:
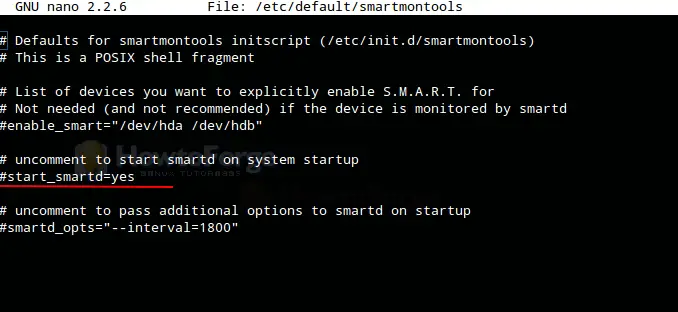
This will start smartmontools everytime with the system. Now to configure how SMART will scan the disk and what actions are to be taken if SMART returns any error:
sudo nano /etc/smartd.conf (and uncomment the marked line)
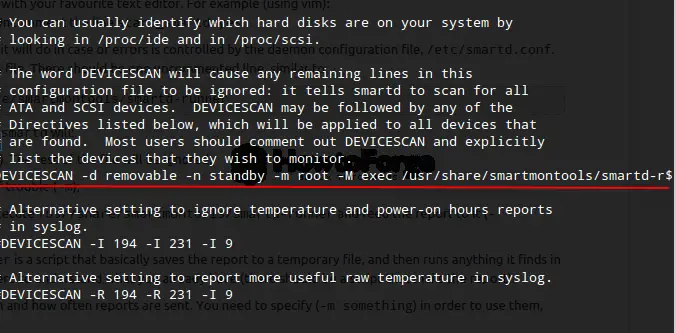
If DEVICESCAN doesn't possibly work on your system you may use /dev/sda or your hdd name instead of DEVICESCAN. Your added line will look like this:
/dev/sda -m root -M exec /usr/share/smartmontools/smartd-runner
In the above command -m root means that if an error occur's during the scan, it will sent the root an email report, but instead the -M exec will exec commands in /usr/share/smartmontools/smartd-runner. You may remove the -M exec part if your system doesn't have the smartd-runner file. The file smartd-runner performs quite a number of functions, including sending mail to the root, but it might have its own time specifications. If you want to add your own specifications you can do that too, here is an exampe how to do it:
DEVICESCAN -a -H -l error -l selftest -f -s(S/../.././02|L/../../6/03) -m root -M exec /usr/share/smartmontools/smartd-runner
Here is an explanation of the above:
( -a) This enables some common options. You almost certainly want to use it. To check the SMART health status (-H). To report increases in both SMART error logs (-l). To check for failure of any Usage Attributes (-f) . "-s (S/../.././02|L/../../6/03)" This schedules the short and long self-tests. In this example, the short self-test will run daily at 2:00 A.M. The long test will run on every Saturday at 3:00 A.M. For more information, see the smartd.conf man page.
If you would like to scan a particular drive you can do that by placing your drive name insead of /dev/sda. To check the man file of smart.conf type in:
man 5 smartd.conf
They also have a GUI version of this application which can be insalled by:
sudo apt-get install gsmartcontrol
Here are some images that you may find handy.
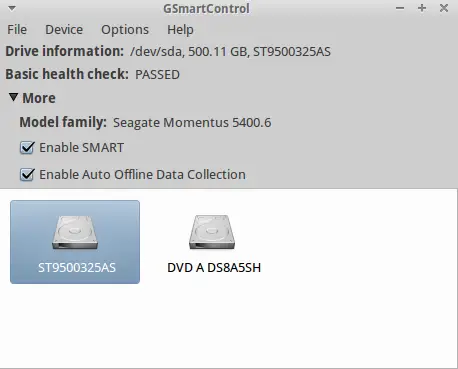
This is how the GUI looks like, right click on the drive and you can find some other options in it. 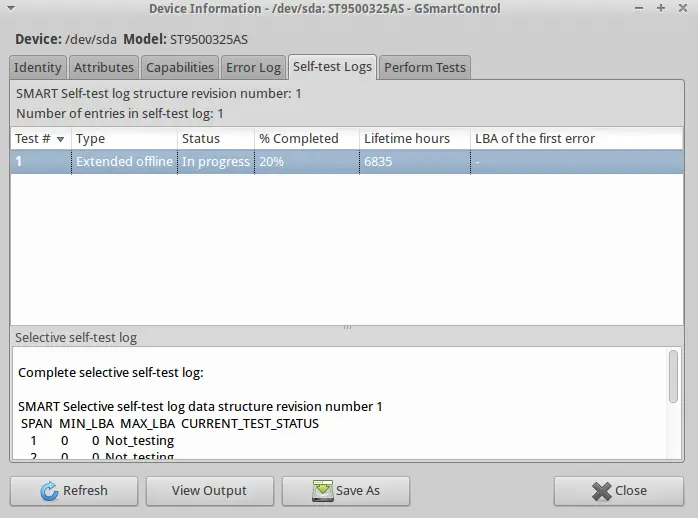
Go ahead and try it.

