How to split large audio files on Linux
It is often the case that we want to split an “one-piece” audio recording into smaller files. A live concert could be broken down into songs so that you can burn it on a CD, or an interview can be separated into thematic sections. Whatever the case, here are four different ways to do it:
Brasero
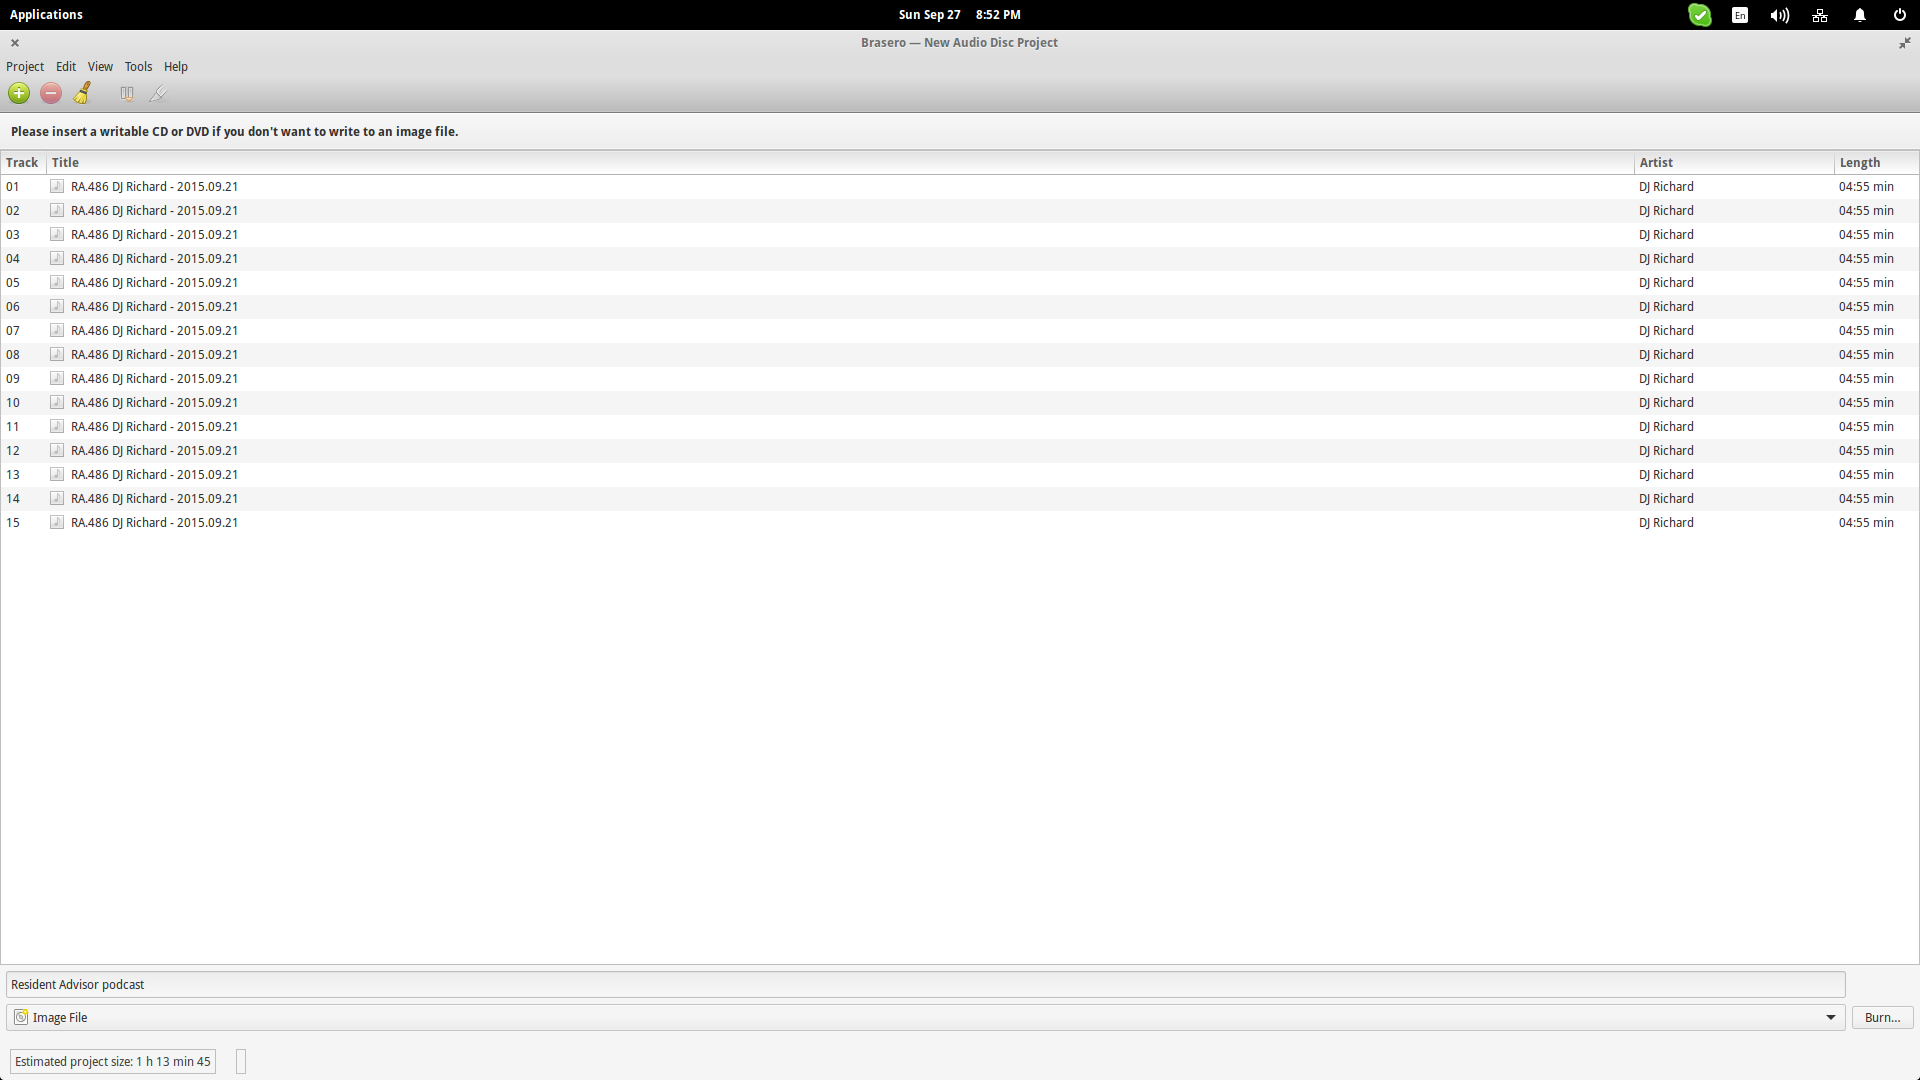
Brasero which is present in most Linux distributions that use the GNOME desktop environment is able to do the job just fine. I am using the latest podcast from Resident Advisor to demonstrate the splitting of an audio file that exceed one hour in length. You can add the file on the “new audio disk project” screen and then select it. After having done that, you may press the “cutter” icon located on the top.
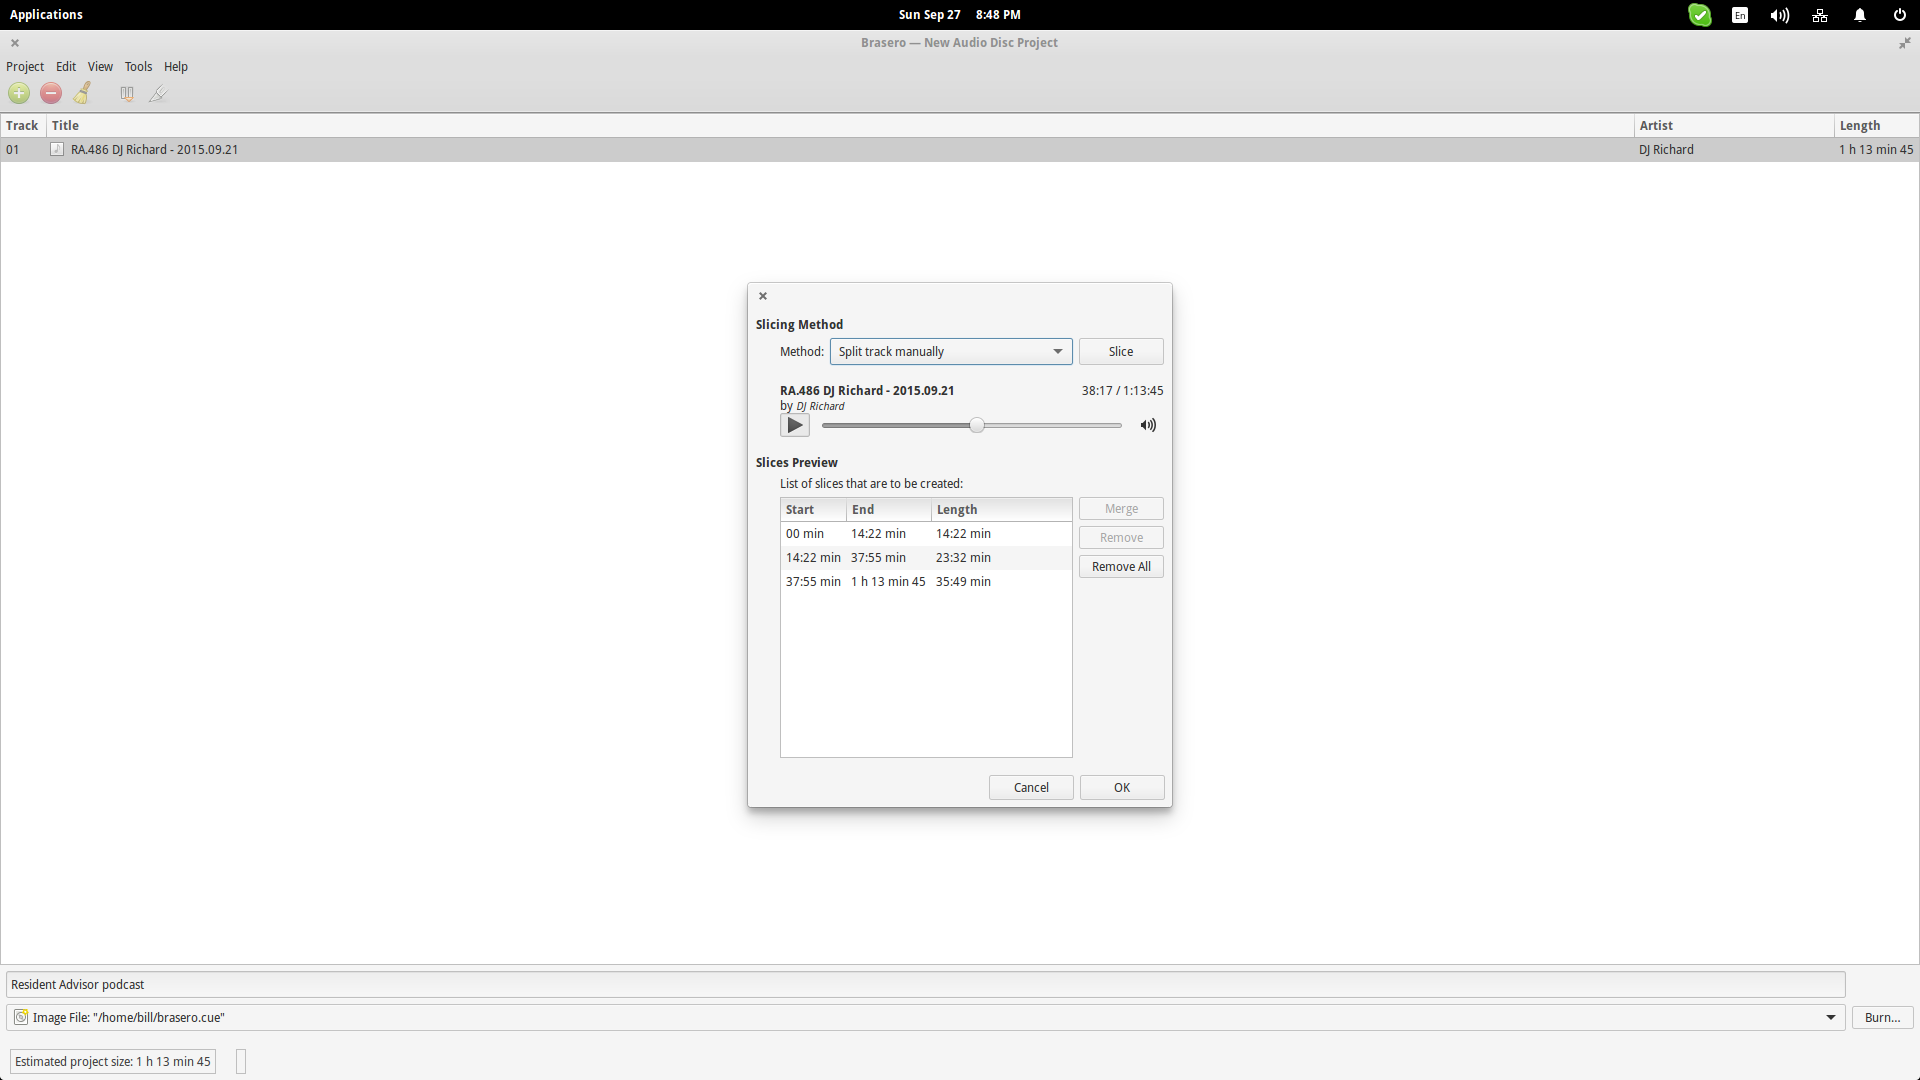
The slicer that opens up offers a set of options for the audio file splitting. You may use the playback feature to listen to the file and decide the slice points yourself, split tracks on a fixed number of length, split the file on a fixed number of parts, and finally let Brasero detect silence and auto-split the file (this may not work well in live recordings or DJ sessions where no silence is contained). You may toggle between those options by choosing them through the “Method” options menu.
If you're a KDE kind of guy, K3b offers a similar set of options for splitting audio files.
Mp3splt
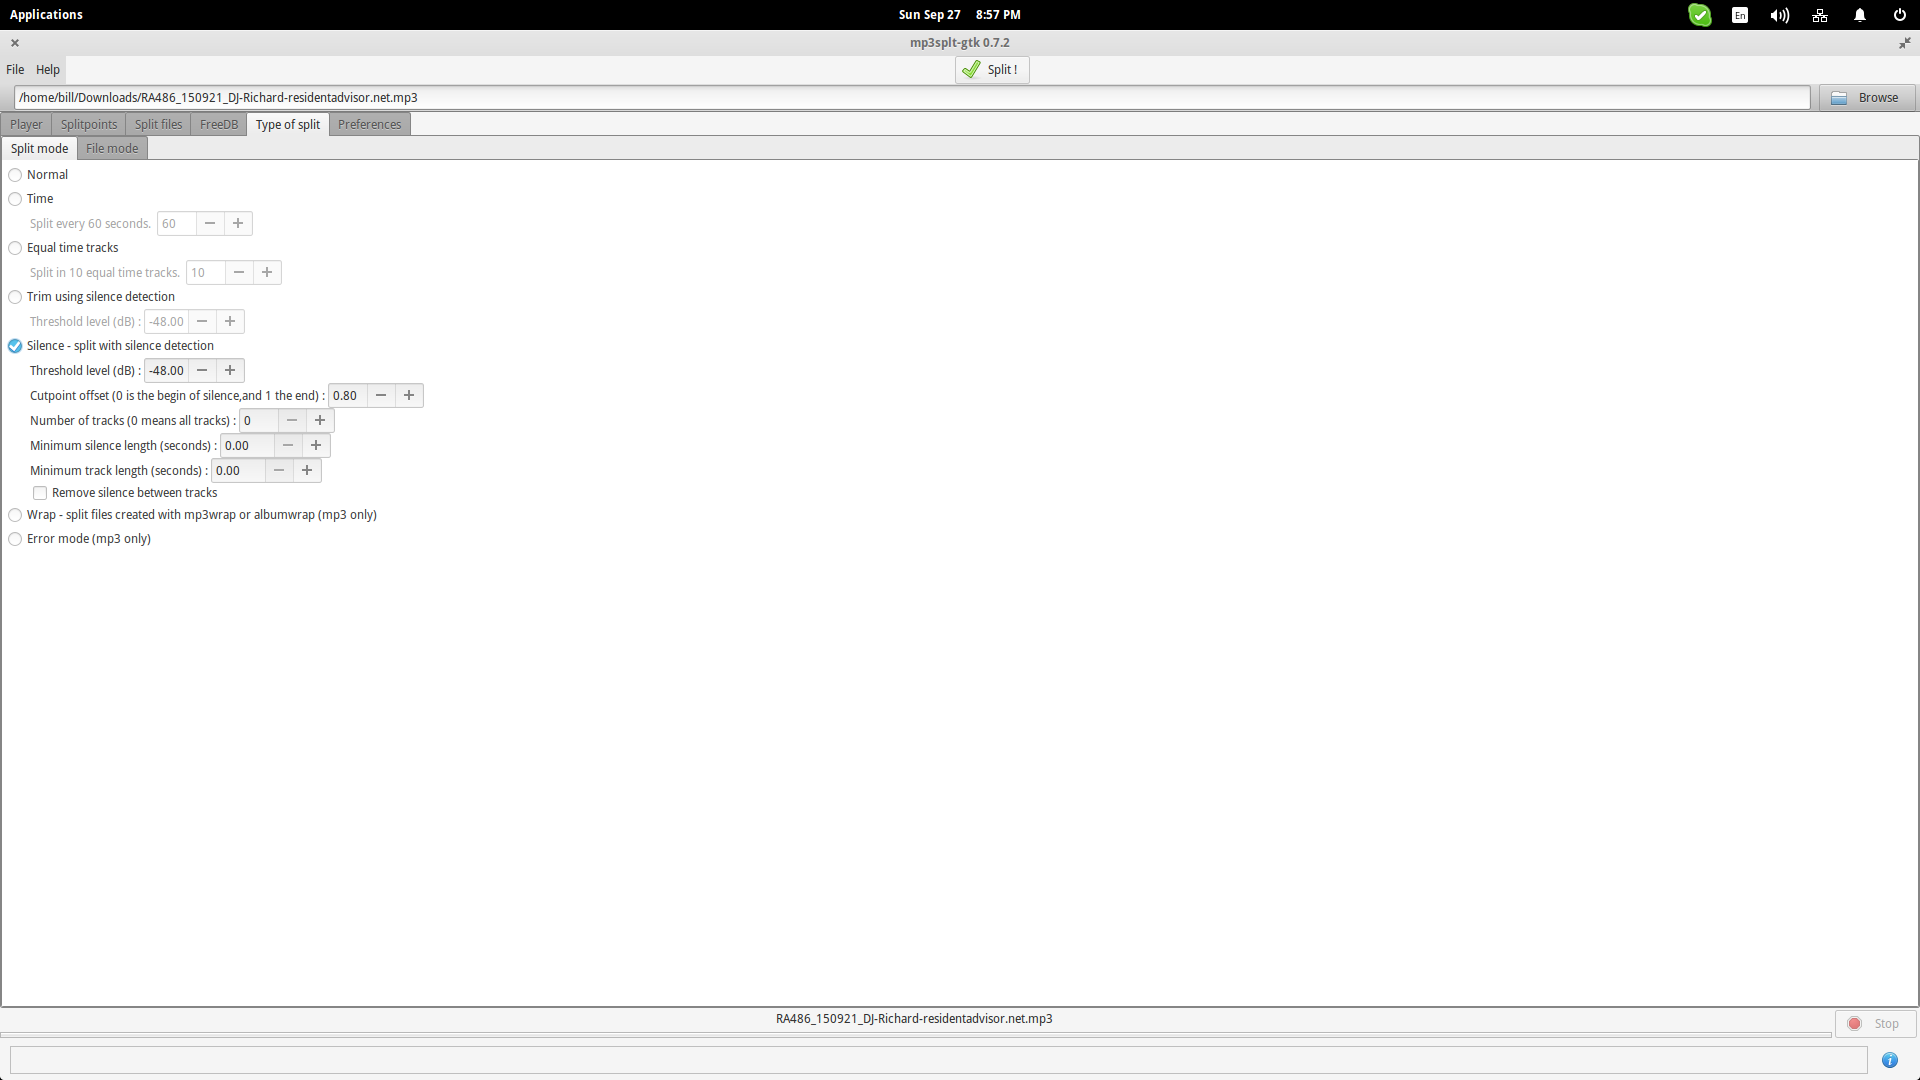
If Brasero's options aren't enough to achieve a good splitting, you can use Mp3splt which is a tool that offers a set of more advanced splitting options. Here are some examples on how to use Mp3splt meaningfully:
a.) If there are silence points in your audio file, but there is just too much noise for Brasero to detect them, you can hop onto the “Type of Split” tab of Mp3splt and set the Threshold level at a higher point. This will render silence points recognizable by the software.
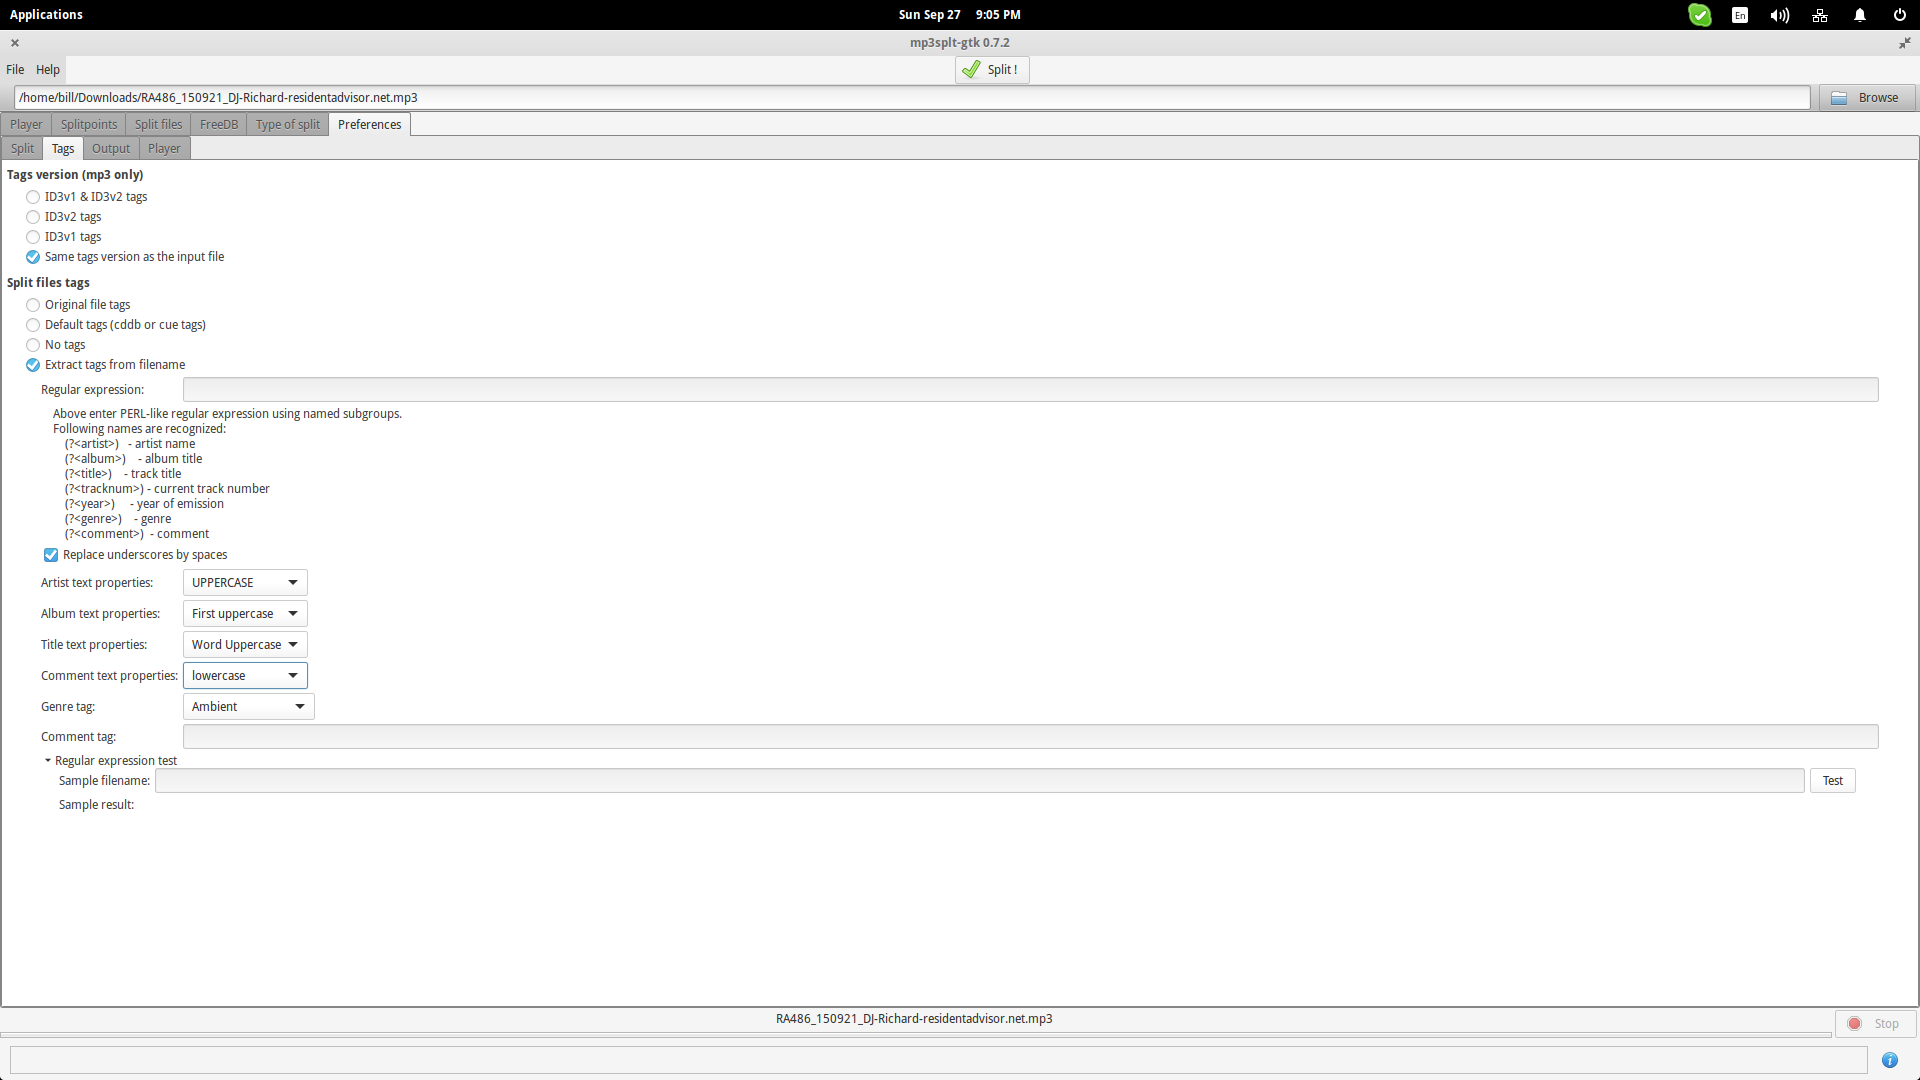
b.) Renaming every split file can be overwhelming, especially if the number of the resulting files is high. Mp3splt offers batch file naming with a good depth of options. These options can be found in the “Preferences > Tags” tab. I used the source file as the basis and set options in regards to the upper and lower-case letters for each element of the name. Through the same menu, a genre tag can be defined which is important for the identification of audio in large collections.
c.) If you are using Audacity to locate the silence points through the waveform, you can save the labels and import them to Mp3splt as splitting points by pressing “Ctrl+I”. The tool can also use the popular .cue and .cddb playlist files to import splitting points.
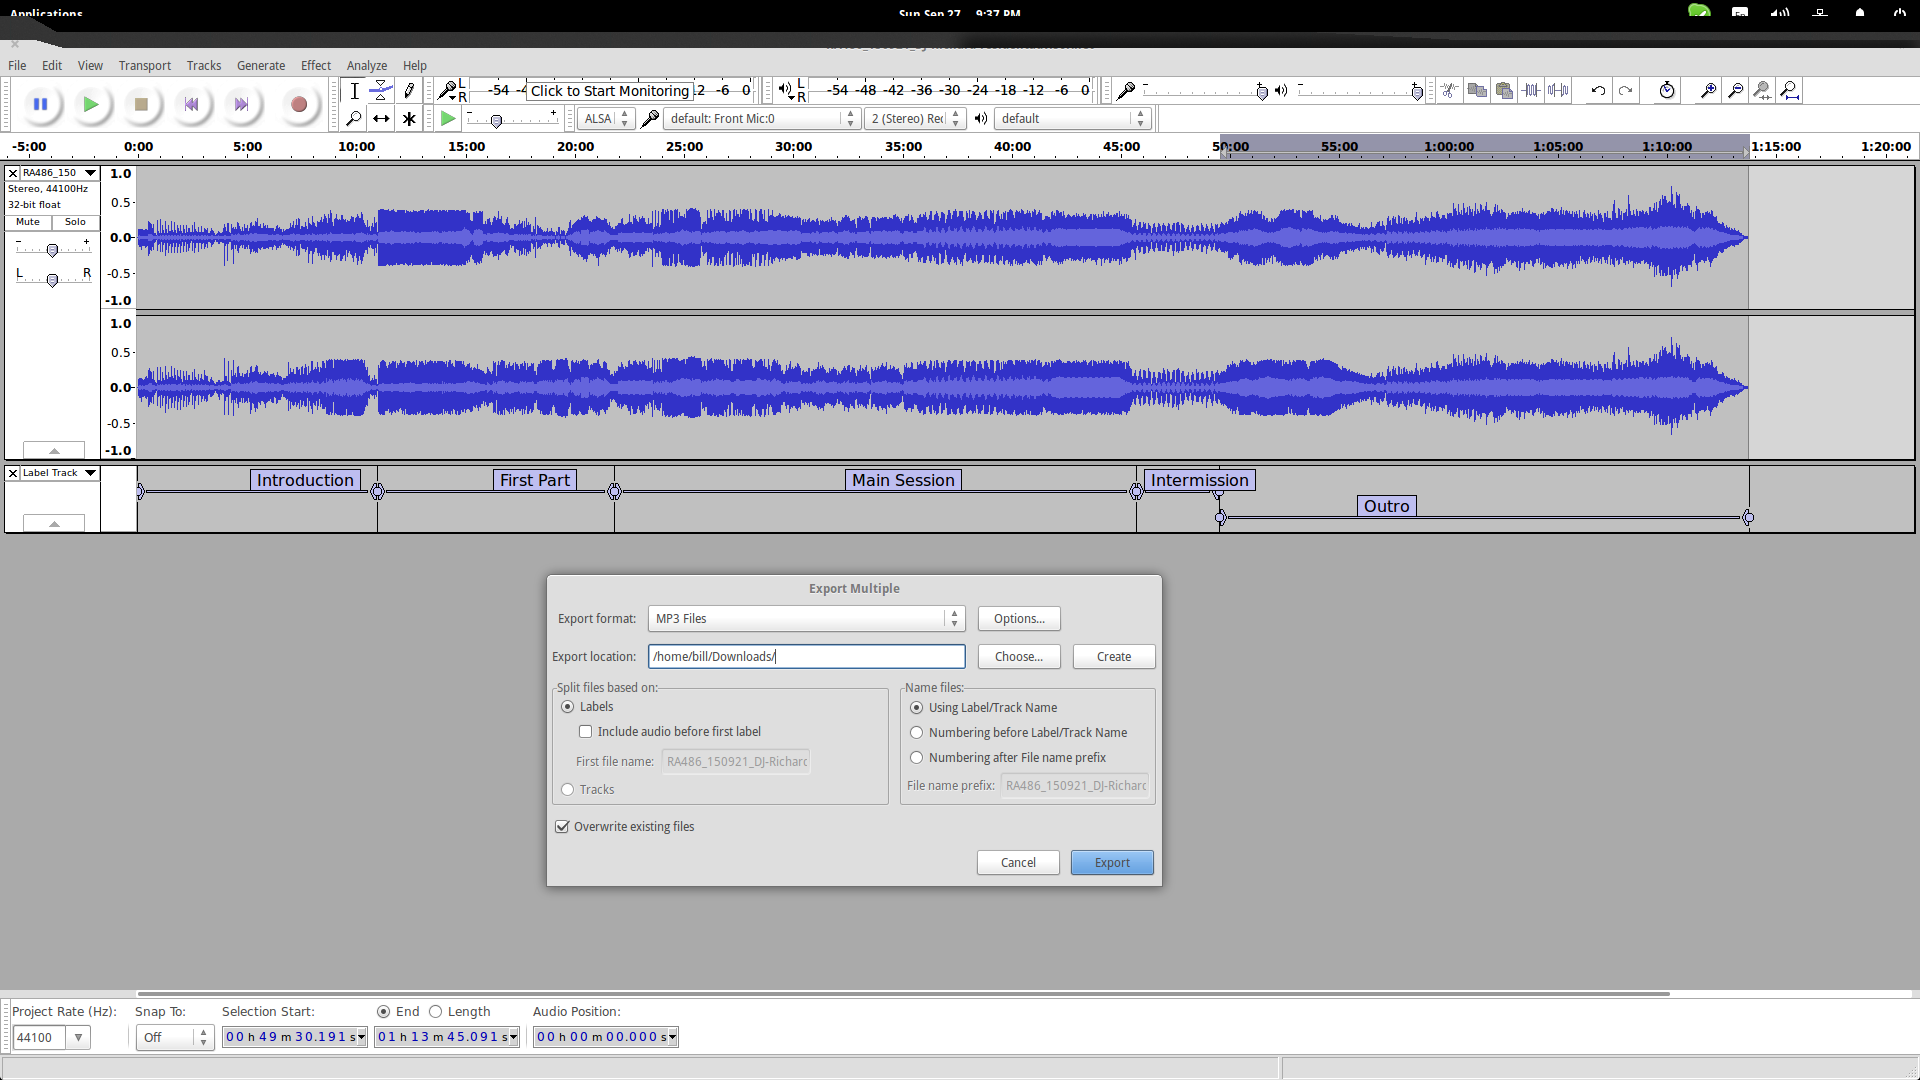
Audacity
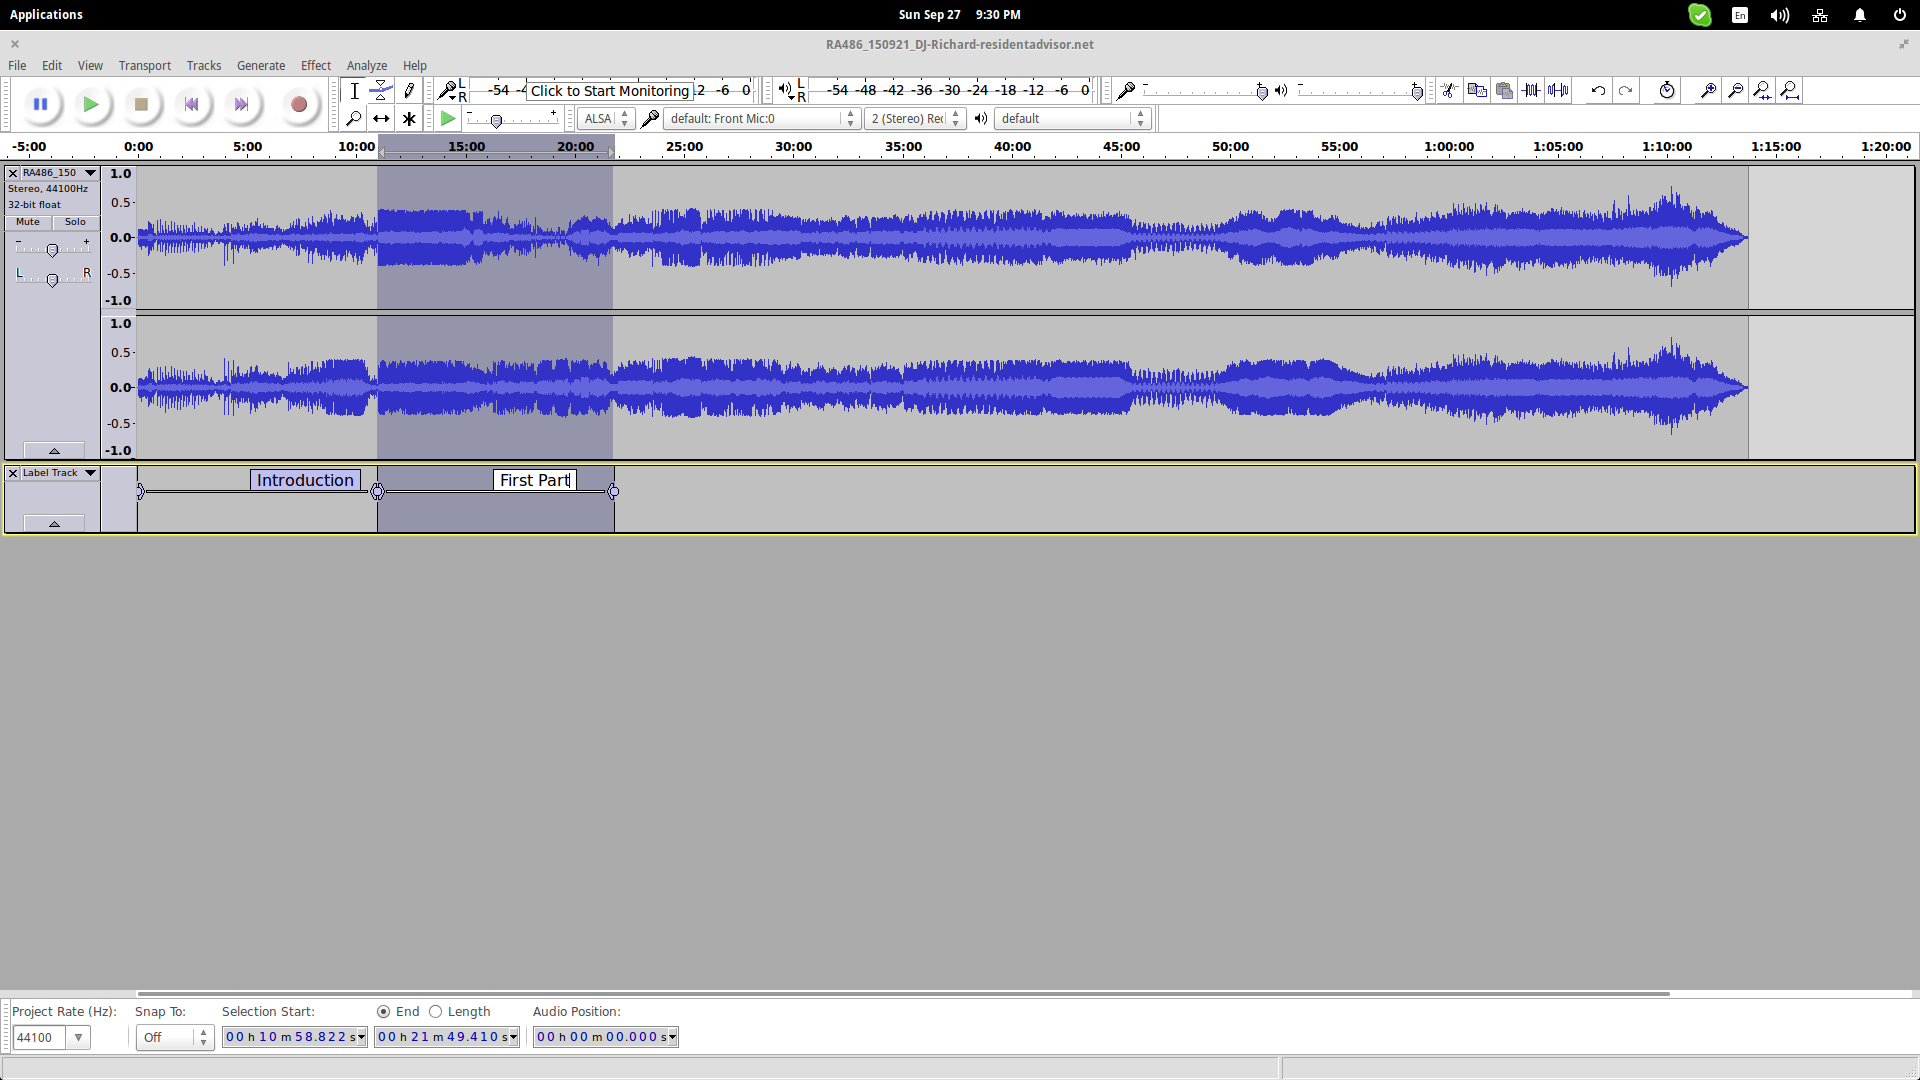
When it comes to audio files, there's (almost) nothing that you can't do with Audacity and splitting an audio file isn't an exception to this. Start by marking the different parts of the recording and adding labels to them. You can do this by choosing “Tracks > Add Label at Selection” on the top panel menu.
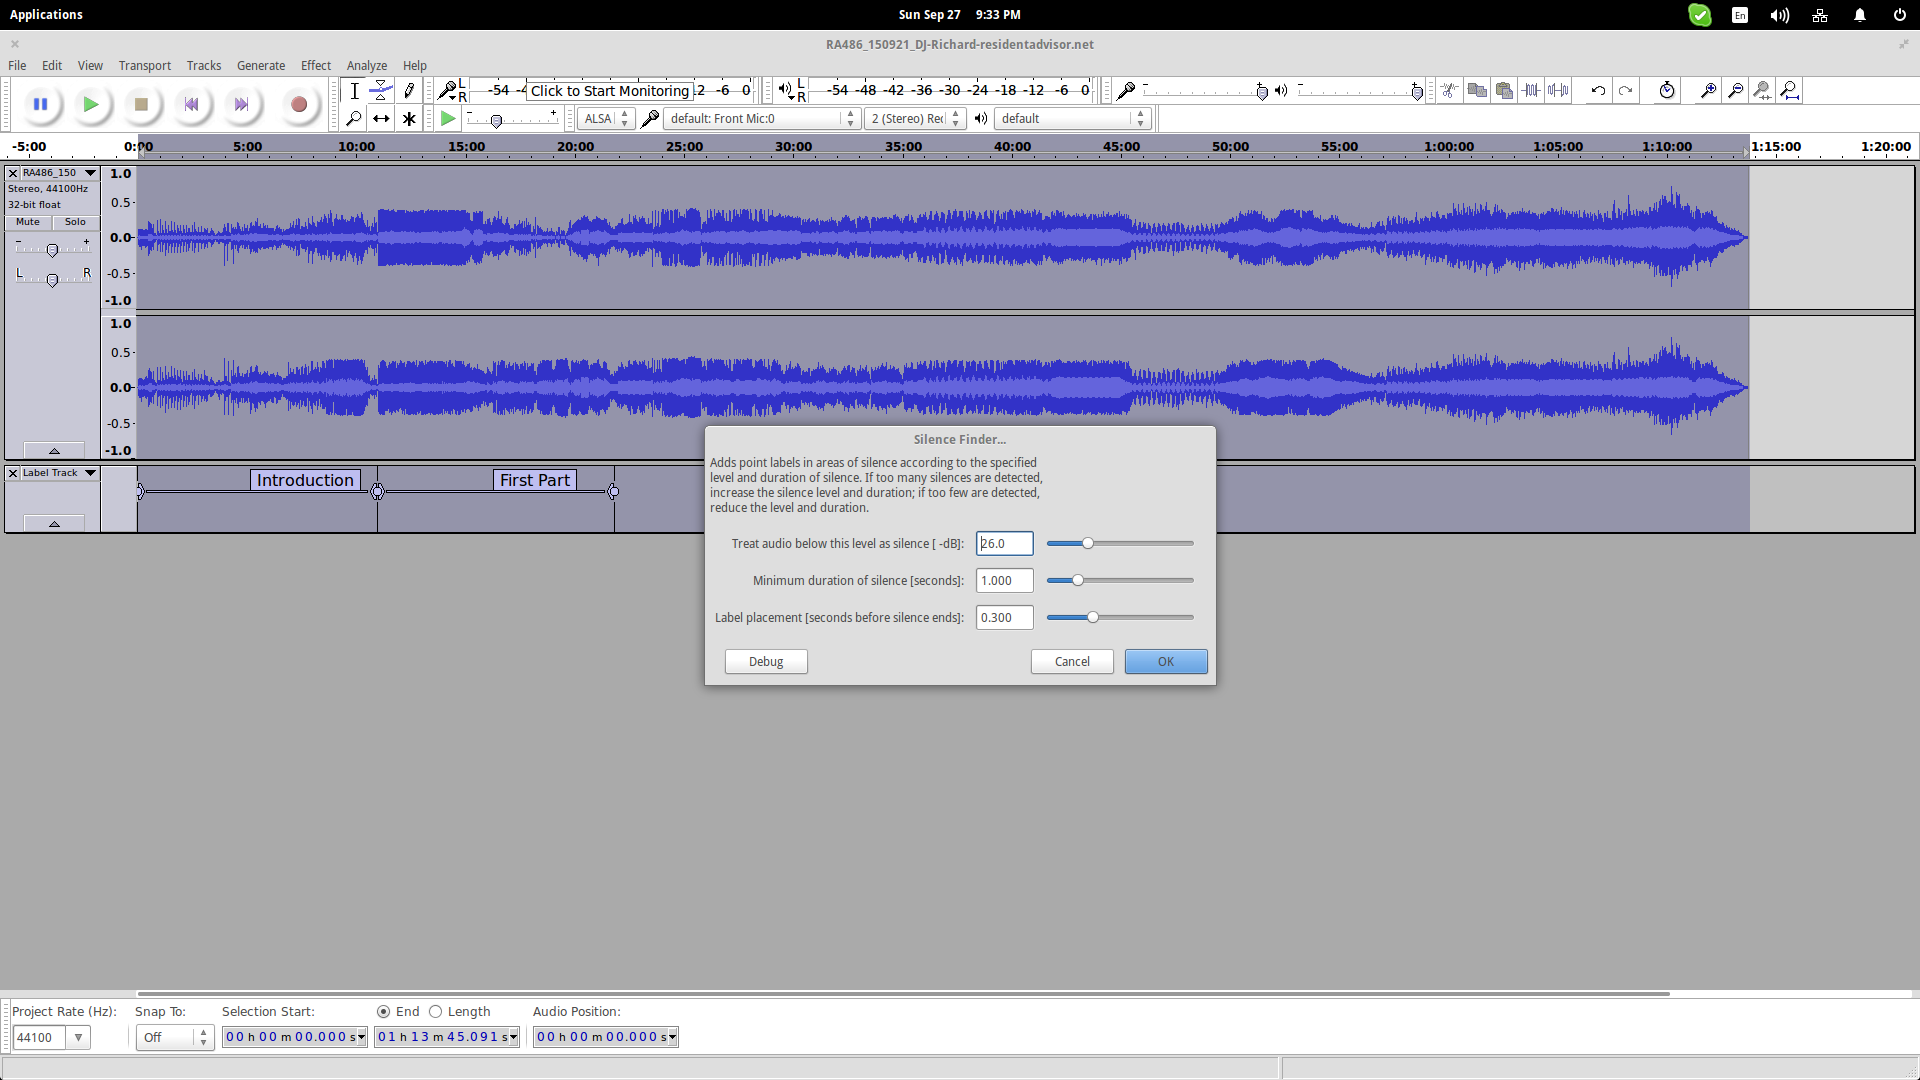
If you want some help into locating the end/start of songs, Audacity offers the ability to detect silence points as well. You may find this option on “Analyze > Silence Finder”. The tool offers good setup options such as the volume threshold and duration.
The final step is to export the individual files. Click on “File > Export Multiple” This will open up a new window from where you can choose the exported file format, location, labels type etc. After setting everything, press the “Export” button and you're done!