The Perfect Server - Ubuntu 14.04 (Apache2, PHP, MySQL, PureFTPD, BIND, Dovecot, ISPConfig 3) - Page 6
This tutorial exists for these OS versions
- Ubuntu 20.04 (Focal Fossa)
- Ubuntu 18.04 (Bionic Beaver)
- Ubuntu 17.10 (Artful Aardvark)
- Ubuntu 17.04 (Zesty Zapus)
- Ubuntu 16.10 (Yakkety Yak)
- Ubuntu 16.04 (Xenial Xerus)
On this page
21 Install SquirrelMail
To install the SquirrelMail webmail client, run
apt-get install squirrelmail
Then configure SquirrelMail:
squirrelmail-configure
We must tell SquirrelMail that we are using Dovecot-IMAP/-POP3:
SquirrelMail Configuration : Read: config.php (1.4.0)
---------------------------------------------------------
Main Menu --
1. Organization Preferences
2. Server Settings
3. Folder Defaults
4. General Options
5. Themes
6. Address Books
7. Message of the Day (MOTD)
8. Plugins
9. Database
10. Languages
D. Set pre-defined settings for specific IMAP servers
C Turn color on
S Save data
Q Quit
Command >> <-- D
SquirrelMail Configuration : Read: config.php
---------------------------------------------------------
While we have been building SquirrelMail, we have discovered some
preferences that work better with some servers that don't work so
well with others. If you select your IMAP server, this option will
set some pre-defined settings for that server.
Please note that you will still need to go through and make sure
everything is correct. This does not change everything. There are
only a few settings that this will change.
Please select your IMAP server:
bincimap = Binc IMAP server
courier = Courier IMAP server
cyrus = Cyrus IMAP server
dovecot = Dovecot Secure IMAP server
exchange = Microsoft Exchange IMAP server
hmailserver = hMailServer
macosx = Mac OS X Mailserver
mercury32 = Mercury/32
uw = University of Washington's IMAP server
gmail = IMAP access to Google mail (Gmail) accounts
quit = Do not change anything
Command >> <-- dovecot
SquirrelMail Configuration : Read: config.php
---------------------------------------------------------
While we have been building SquirrelMail, we have discovered some
preferences that work better with some servers that don't work so
well with others. If you select your IMAP server, this option will
set some pre-defined settings for that server.
Please note that you will still need to go through and make sure
everything is correct. This does not change everything. There are
only a few settings that this will change.
Please select your IMAP server:
bincimap = Binc IMAP server
courier = Courier IMAP server
cyrus = Cyrus IMAP server
dovecot = Dovecot Secure IMAP server
exchange = Microsoft Exchange IMAP server
hmailserver = hMailServer
macosx = Mac OS X Mailserver
mercury32 = Mercury/32
uw = University of Washington's IMAP server
gmail = IMAP access to Google mail (Gmail) accounts
quit = Do not change anything
Command >> dovecot
imap_server_type = dovecot
default_folder_prefix = <none>
trash_folder = Trash
sent_folder = Sent
draft_folder = Drafts
show_prefix_option = false
default_sub_of_inbox = false
show_contain_subfolders_option = false
optional_delimiter = detect
delete_folder = false
Press any key to continue... <-- press a key
SquirrelMail Configuration : Read: config.php (1.4.0)
---------------------------------------------------------
Main Menu --
1. Organization Preferences
2. Server Settings
3. Folder Defaults
4. General Options
5. Themes
6. Address Books
7. Message of the Day (MOTD)
8. Plugins
9. Database
10. Languages
D. Set pre-defined settings for specific IMAP servers
C Turn color on
S Save data
Q Quit
Command >> <-- S
SquirrelMail Configuration : Read: config.php (1.4.0)
---------------------------------------------------------
Main Menu --
1. Organization Preferences
2. Server Settings
3. Folder Defaults
4. General Options
5. Themes
6. Address Books
7. Message of the Day (MOTD)
8. Plugins
9. Database
10. Languages
D. Set pre-defined settings for specific IMAP servers
C Turn color on
S Save data
Q Quit
Command >> <-- Q
Now we will configure SquirrelMail so that you can use it from within your web sites (created through ISPConfig) by using the /squirrelmail or /webmail aliases. So if your website is www.example.com, you will be able to access SquirrelMail using www.example.com/squirrelmail or www.example.com/webmail.
SquirrelMail's Apache configuration is in the file /etc/squirrelmail/apache.conf, but this file isn't loaded by Apache because it is not in the /etc/apache2/conf-available/ directory. Therefore we create a symlink called squirrelmail.conf in the /etc/apache2/conf-available/ directory that points to /etc/squirrelmail/apache.conf and reload Apache afterwards:
cd /etc/apache2/conf-available/
ln -s ../../squirrelmail/apache.conf squirrelmail.conf
service apache2 reload
Now open /etc/apache2/conf.d/squirrelmail.conf...
vi /etc/apache2/conf-available/squirrelmail.conf
... and add the following lines to the <Directory /usr/share/squirrelmail></Directory> container that make sure that mod_php is used for accessing SquirrelMail, regardless of what PHP mode you select for your website in ISPConfig:
[...]
<Directory /usr/share/squirrelmail>
  Options FollowSymLinks
  <IfModule mod_php5.c>
    AddType application/x-httpd-php .php
    php_flag magic_quotes_gpc Off
    php_flag track_vars On
    php_admin_flag allow_url_fopen Off
    php_value include_path .
    php_admin_value upload_tmp_dir /var/lib/squirrelmail/tmp
    php_admin_value open_basedir /usr/share/squirrelmail:/etc/squirrelmail:/var/lib/squirrelmail:/etc/hostname:/etc/mailname
    php_flag register_globals off
  </IfModule>
  <IfModule mod_dir.c>
    DirectoryIndex index.php
  </IfModule>

  # access to configtest is limited by default to prevent information leak
  <Files configtest.php>
    order deny,allow
    deny from all
    allow from 127.0.0.1
  </Files>
</Directory>
[...]
|
Create the directory /var/lib/squirrelmail/tmp...
mkdir /var/lib/squirrelmail/tmp
... and make it owned by the user www-data:
chown www-data /var/lib/squirrelmail/tmp
Next we need to enable the squirrelmail with apache2.
a2enconf squirrelmail
Reload Apache again:
service apache2 reload
That's it already - /etc/apache2/conf-available/squirrelmail.conf defines an alias called /squirrelmail that points to SquirrelMail's installation directory /usr/share/squirrelmail.
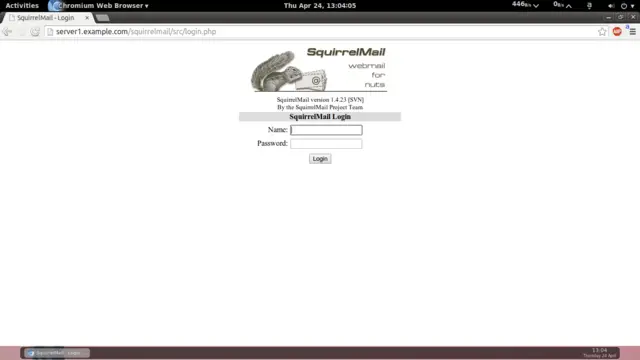
You can now access SquirrelMail from your web site as follows:
http://192.168.2.251/squirrelmail
http://www.example.com/squirrelmail
You can also access it from the ISPConfig control panel vhost (after you have installed ISPConfig, see the next chapter) as follows (this doesn't need any configuration in ISPConfig):
http://server1.example.com:8080/squirrelmail
If you'd like to use the alias /webmail instead of /squirrelmail, simply open /etc/apache2/conf-available/squirrelmail.conf...
vi /etc/apache2/conf-available/squirrelmail.conf
... and add the line Alias /webmail /usr/share/squirrelmail:
Alias /squirrelmail /usr/share/squirrelmail Alias /webmail /usr/share/squirrelmail [...] |
Then reload Apache:
service apache2 reload
Now you can access Squirrelmail as follows:
http:// 192.168.2.251/webmail
http://www.example.com/webmail
http://server1.example.com:8080/webmail (after you have installed ISPConfig, see the next chapter)
If you'd like to define a vhost like webmail.example.com where your users can access SquirrelMail, you'd have to add the following vhost configuration to /etc/apache2/conf-available/squirrelmail.conf:
vi /etc/apache2/conf-available/squirrelmail.conf
[...] <VirtualHost 1.2.3.4:80> DocumentRoot /usr/share/squirrelmail ServerName webmail.example.com </VirtualHost> |
Make sure you replace 1.2.3.4 with the correct IP address of your server. Of course, there must be a DNS record for webmail.example.com that points to the IP address that you use in the vhost configuration. Also make sure that the vhost webmail.example.com does not exist in ISPConfig (otherwise both vhosts will interfere with each other!).
Now reload Apache...
service apache2 reload
... and you can access SquirrelMail under http://webmail.example.com!
22. Optional: Script to cross-check the installations.
I have introduced a script here which will verify, whether you have made any typos error. This will verify that all the necessary installations are completed as per the tutorial. Script is as follows:
#!/bin/bash
###################################################################################################################################################
###################################################################################################################################################
#### #####
#### This script is created by Srijan Kishore to cross-check the complete installation of tutorial #####
#### #####
###################################################################################################################################################
###################################################################################################################################################

cd /tmp

###################################################################################################################################################
#### Installations done in Tutorial #####
###################################################################################################################################################

echo "amavisd-new
apache2
apache2-doc
apache2-suexec
apache2-utils
apt-listchanges
arj
autoconf
automake1.9
awstats
bind9
binutils
bison
build-essential
bzip2
cabextract
clamav
clamav-daemon
clamav-docs
daemon
debhelper
dnsutils
dovecot-imapd
dovecot-mysql
dovecot-pop3d
dovecot-sieve
fail2ban
flex
geoip-database
getmail4
imagemagick
jailkit
libapache2-mod-fastcgi
libapache2-mod-fcgid
libapache2-mod-php5
libapache2-mod-python
libapache2-mod-suphp
libauthen-sasl-perl
libclass-dbi-mysql-perl
libio-socket-ssl-perl
libio-string-perl
libnet-dns-perl
libnet-ident-perl
libnet-ldap-perl
libruby
libtool
lzop
mailman
mcrypt
memcached
mysql-client
mysql-server
nomarch
ntp
ntpdate
openssl
php5
php5-cgi
php5-cli
php5-common
php5-curl
php5-fpm
php5-gd
php5-imagick
php5-imap
php5-intl
php5-mcrypt
php5-memcache
php5-memcached
php5-ming
php5-mysql
php5-ps
php5-pspell
php5-recode
php5-snmp
php5-sqlite
php5-tidy
php5-xcache
php5-xmlrpc
php5-xsl
php-auth
phpmyadmin
php-pear
postfix
postfix-doc
postfix-mysql
rkhunter
spamassassin
squirrelmail
sudo
unzip
vlogger
webalizer
zip
zoo" > tutorial_install


##################################################################################################################################################
#### List of all packages installed by you on your server #####
##################################################################################################################################################

dpkg -l |grep ii| cut -d ' ' -f3 > server_installed

##################################################################################################################################################
#### Difference between the tutorial & your server's installation #####
##################################################################################################################################################

diff server_installed tutorial_install | grep ">" | cut -d ' ' -f2 > missing_packages

if [ $? -eq 0 ]

echo "You missed to install these packages
` cat missing_packages` "
then
echo "You need to install these packages. To install these packages you need to run the command apt-get install package_name"

echo " You can cross check the particular installation as follows:
dpkg -l | grep package_name | cut -d ' ' -f3

If it is showing the package_name then you can ignore the package."

else

echo "Congratulations you have installed all the packages successfully"

fi

rm -rf missing_packages server_installed tutorial_install
chmod +x ubuntu_package_check.sh
./ubuntu_package_check.sh
23. Install ISPConfig 3
To install ISPConfig 3 from the latest released version, do this:
cd /tmp
wget http://www.ispconfig.org/downloads/ISPConfig-3-stable.tar.gz
tar xfz ISPConfig-3-stable.tar.gz
cd ispconfig3_install/install/
The next step is to run
php -q install.php
This will start the ISPConfig 3 installer. The installer will configure all services like Postfix, Dovecot, etc. for you. A manual setup as required for ISPConfig 2 (perfect setup guides) is not necessary.
root@server1:/tmp/ispconfig3_install/install# php -q install.php
--------------------------------------------------------------------------------
_____ ___________ _____ __ _ ____
|_ _/ ___| ___ \ / __ \ / _(_) /__ \
| | \ `--.| |_/ / | / \/ ___ _ __ | |_ _ __ _ _/ /
| | `--. \ __/ | | / _ \| '_ \| _| |/ _` | |_ |
_| |_/\__/ / | | \__/\ (_) | | | | | | | (_| | ___\ \
\___/\____/\_| \____/\___/|_| |_|_| |_|\__, | \____/
__/ |
|___/
--------------------------------------------------------------------------------
>> Initial configuration
Operating System: 14.04 UNKNOWN
Following will be a few questions for primary configuration so be careful.
Default values are in [brackets] and can be accepted with <ENTER>.
Tap in "quit" (without the quotes) to stop the installer.
Select language (en,de) [en]: <-- ENTER
Installation mode (standard,expert) [standard]: <-- ENTER
Full qualified hostname (FQDN) of the server, eg server1.domain.tld [server1.example.com]: <-- ENTER
MySQL server hostname [localhost]: <-- ENTER
MySQL root username [root]: <-- ENTER
MySQL root password []: <-- yourrootsqlpassword
MySQL database to create [dbispconfig]: <-- ENTER
MySQL charset [utf8]: <-- ENTER
Generating a 4096 bit RSA private key
............................................................................++
.....................++
writing new private key to 'smtpd.key'
-----
You are about to be asked to enter information that will be incorporated
into your certificate request.
What you are about to enter is what is called a Distinguished Name or a DN.
There are quite a few fields but you can leave some blank
For some fields there will be a default value,
If you enter '.', the field will be left blank.
-----
Country Name (2 letter code) [AU]: <-- ENTER
State or Province Name (full name) [Some-State]: <-- ENTER
Locality Name (eg, city) []: <-- ENTER
Organization Name (eg, company) [Internet Widgits Pty Ltd]: <-- ENTER
Organizational Unit Name (eg, section) []: <-- ENTER
Common Name (e.g. server FQDN or YOUR name) []: <-- ENTER
Email Address []: <-- ENTER
Configuring Jailkit
Configuring Dovecot
Configuring Spamassassin
Configuring Amavisd
Configuring Getmail
Configuring Pureftpd
Configuring BIND
Configuring Apache
Configuring Vlogger
Configuring Apps vhost
Configuring Bastille Firewall
Configuring Fail2ban
Installing ISPConfig
ISPConfig Port [8080]: <-- ENTER
Do you want a secure (SSL) connection to the ISPConfig web interface (y,n) [y]: <-- ENTER
Generating RSA private key, 4096 bit long modulus
..........++
......++
e is 65537 (0x10001)
You are about to be asked to enter information that will be incorporated
into your certificate request.
What you are about to enter is what is called a Distinguished Name or a DN.
There are quite a few fields but you can leave some blank
For some fields there will be a default value,
If you enter '.', the field will be left blank.
-----
Country Name (2 letter code) [AU]: <-- ENTER
State or Province Name (full name) [Some-State]: <-- ENTER
Locality Name (eg, city) []: <-- ENTER
Organization Name (eg, company) [Internet Widgits Pty Ltd]: <-- ENTER
Organizational Unit Name (eg, section) []: <-- ENTER
Common Name (e.g. server FQDN or YOUR name) []: <-- ENTER
Email Address []: <-- ENTER
Please enter the following 'extra' attributes
to be sent with your certificate request
A challenge password []: <-- ENTER
An optional company name []: <-- ENTER
writing RSA key
Configuring DBServer
Installing ISPConfig crontab
no crontab for root
no crontab for getmail
Restarting services ...
Rather than invoking init scripts through /etc/init.d, use the service(8)
utility, e.g. service mysql restart
Since the script you are attempting to invoke has been converted to an
Upstart job, you may also use the stop(8) and then start(8) utilities,
e.g. stop mysql ; start mysql. The restart(8) utility is also available.
mysql stop/waiting
mysql start/running, process 2817
* Stopping Postfix Mail Transport Agent postfix
/usr/sbin/postconf: warning: /etc/postfix/main.cf: undefined parameter: virtual_mailbox_limit_maps
...done.
* Starting Postfix Mail Transport Agent postfix
postconf: warning: /etc/postfix/main.cf: undefined parameter: virtual_mailbox_limit_maps
postconf: warning: /etc/postfix/main.cf: undefined parameter: virtual_mailbox_limit_maps
postconf: warning: /etc/postfix/main.cf: undefined parameter: virtual_mailbox_limit_maps
postconf: warning: /etc/postfix/main.cf: undefined parameter: virtual_mailbox_limit_maps
postconf: warning: /etc/postfix/main.cf: undefined parameter: virtual_mailbox_limit_maps
postconf: warning: /etc/postfix/main.cf: undefined parameter: virtual_mailbox_limit_maps
/usr/sbin/postconf: warning: /etc/postfix/main.cf: undefined parameter: virtual_mailbox_limit_maps
/usr/sbin/postconf: warning: /etc/postfix/main.cf: undefined parameter: virtual_mailbox_limit_maps
/usr/sbin/postconf: warning: /etc/postfix/main.cf: undefined parameter: virtual_mailbox_limit_maps
/usr/sbin/postconf: warning: /etc/postfix/main.cf: undefined parameter: virtual_mailbox_limit_maps
/usr/sbin/postconf: warning: /etc/postfix/main.cf: undefined parameter: virtual_mailbox_limit_maps
/usr/sbin/postconf: warning: /etc/postfix/main.cf: undefined parameter: virtual_mailbox_limit_maps
/usr/sbin/postconf: warning: /etc/postfix/main.cf: undefined parameter: virtual_mailbox_limit_maps
/usr/sbin/postconf: warning: /etc/postfix/main.cf: undefined parameter: virtual_mailbox_limit_maps
/usr/sbin/postconf: warning: /etc/postfix/main.cf: undefined parameter: virtual_mailbox_limit_maps
/usr/sbin/postconf: warning: /etc/postfix/main.cf: undefined parameter: virtual_mailbox_limit_maps
/usr/sbin/postconf: warning: /etc/postfix/main.cf: undefined parameter: virtual_mailbox_limit_maps
/usr/sbin/postconf: warning: /etc/postfix/main.cf: undefined parameter: virtual_mailbox_limit_maps
/usr/sbin/postconf: warning: /etc/postfix/main.cf: undefined parameter: virtual_mailbox_limit_maps
/usr/sbin/postconf: warning: /etc/postfix/main.cf: undefined parameter: virtual_mailbox_limit_maps
/usr/sbin/postconf: warning: /etc/postfix/main.cf: undefined parameter: virtual_mailbox_limit_maps
/usr/sbin/postconf: warning: /etc/postfix/main.cf: undefined parameter: virtual_mailbox_limit_maps
...done.
Stopping amavisd: amavisd-new.
Starting amavisd: amavisd-new.
* Stopping ClamAV daemon clamd
...done.
* Starting ClamAV daemon clamd
...done.
Rather than invoking init scripts through /etc/init.d, use the service(8)
utility, e.g. service dovecot restart
Since the script you are attempting to invoke has been converted to an
Upstart job, you may also use the stop(8) and then start(8) utilities,
e.g. stop dovecot ; start dovecot. The restart(8) utility is also available.
dovecot stop/waiting
dovecot start/running, process 3962
* Restarting web server apache2
[Fri Apr 26 00:55:00 2013] [warn] NameVirtualHost *:443 has no VirtualHosts
[Fri Apr 26 00:55:00 2013] [warn] NameVirtualHost *:80 has no VirtualHosts
[Fri Apr 26 00:55:01 2013] [warn] NameVirtualHost *:443 has no VirtualHosts
[Fri Apr 26 00:55:01 2013] [warn] NameVirtualHost *:80 has no VirtualHosts
... waiting ...done.
Restarting ftp server: Running: /usr/sbin/pure-ftpd-mysql-virtualchroot -l mysql:/etc/pure-ftpd/db/mysql.conf -l pam -A -b -u 1000 -D -H -Y 1 -E -8 UTF-8 -O clf:/var/log/pure-ftpd/transfer.log -B
Installation completed.
root@server1:/tmp/ispconfig3_install/install#
The installer automatically configures all underlying services, so no manual configuration is needed.
You now also have the possibility to let the installer create an SSL vhost for the ISPConfig control panel, so that ISPConfig can be accessed using https:// instead of http://. To achieve this, just press ENTER when you see this question: Do you want a secure (SSL) connection to the ISPConfig web interface (y,n) [y]:.
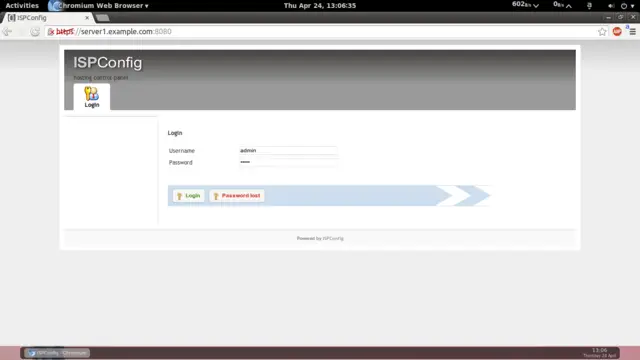
Afterwards you can access ISPConfig 3 under http(s)://server1.example.com:8080/ or http(s)://192.168.2.251:8080/ ( http or https depends on what you chose during installation). Log in with the username admin and the password admin (you should change the default password after your first login):
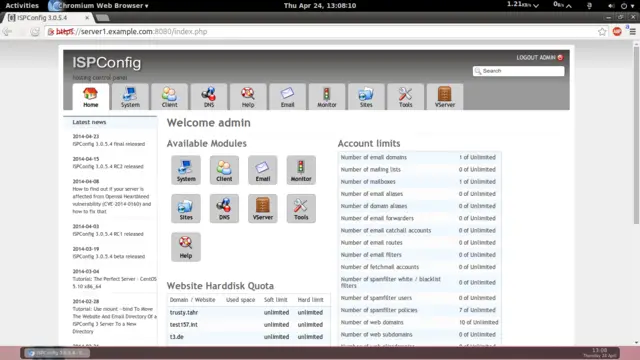
The system is now ready to be used.
ISPConfig 3 Manual
In order to learn how to use ISPConfig 3, I strongly recommend to download the ISPConfig 3 Manual.
On more than 300 pages, it covers the concept behind ISPConfig (admin, resellers, clients), explains how to install and update ISPConfig 3, includes a reference for all forms and form fields in ISPConfig together with examples of valid inputs, and provides tutorials for the most common tasks in ISPConfig 3. It also lines out how to make your server more secure and comes with a troubleshooting section at the end.
ISPConfig Monitor App For Android
With the ISPConfig Monitor App, you can check your server status and find out if all services are running as expected. You can check TCP and UDP ports and ping your servers. In addition to that you can use this app to request details from servers that have ISPConfig installed (please note that the minimum installed ISPConfig 3 version with support for the ISPConfig Monitor App is 3.0.3.3!); these details include everything you know from the Monitor module in the ISPConfig Control Panel (e.g. services, mail and system logs, mail queue, CPU and memory info, disk usage, quota, OS details, RKHunter log, etc.), and of course, as ISPConfig is multiserver-capable, you can check all servers that are controlled from your ISPConfig master server.
For download and usage instructions, please visit http://www.ispconfig.org/ispconfig-3/ispconfig-monitor-app-for-android/.
Additional Notes
OpenVZ
If the Ubuntu server that you've just set up in this tutorial is an OpenVZ container (virtual machine), you should do this on the host system (I'm assuming that the ID of the OpenVZ container is 101 - replace it with the correct VPSID on your system):
VPSID=101
for CAP in CHOWN DAC_READ_SEARCH SETGID SETUID NET_BIND_SERVICE NET_ADMIN SYS_CHROOT SYS_NICE CHOWN DAC_READ_SEARCH SETGID SETUID NET_BIND_SERVICE NET_ADMIN SYS_CHROOT SYS_NICE
do
  vzctl set $VPSID --capability ${CAP}:on --save
done
Links
- Ubuntu: http://www.ubuntu.com/
- ISPConfig: http://www.ispconfig.org/

