How to Manage Terraform State in an AWS S3 Bucket
In this article, we will see what a Terraform state is and how to manage it on an S3 Bucket. We will also see what "lock" is in Terraform and how to implement it. To implement this, we need to create an S3 Bucket and a DynamoDB Table on AWS.
Before proceeding, let's understand the basics of Terraform state and Lock.
- Terraform State (terraform.tstate file):
The state file contains information about what resources exist defined in the terraform config files. For example, if you have created an EC2 Instance using terraform config, then the state file contains info about the actual resource that was created on AWS. - S3 as a Backend to store the State file:
If we are working in a team, then it's good to store the terraform state file remotely so the people from the team can access it. In order to store state remotely we need two things: an s3 bucket to store the state file and a terraform s3 backend resource. - Lock:
If we store the state file remotely so that many people can access it, then we risk multiple people attempting to make changes to the same file at the exact same time. So we need to have a mechanism that will “lock” the state if its currently being used by other users. We can achieve this by creating a dynamoDB table for terraform to use.
Here, we will see all the steps right from creating an S3 Bucket manually, adding the required policy to it, creating DynamoDB Table using Terraform and configuring Terraform to use S3 as a Backend and DynamoDB to store the lock.
Pre-requisites
- Basic understanding of Terraform.
- Basic understanding of S3 Bucket.
- Terraform installed on your system.
- AWS Account (Create if you don’t have one).
- 'access_key' & 'secret_key' of an AWS IAM User. (Click here to learn to create an IAM user with 'access_key' & 'secret_key' on AWS, )
What we will do
- Create an S3 Bucket and Attach a Policy to it.
- Create a DynamoDB Table using Terraform
- Create an EC2 using the Terraform configuration files.
- Delete the created EC2 instance using Terraform.
Create an S3 Bucket and attach a Policy to it.
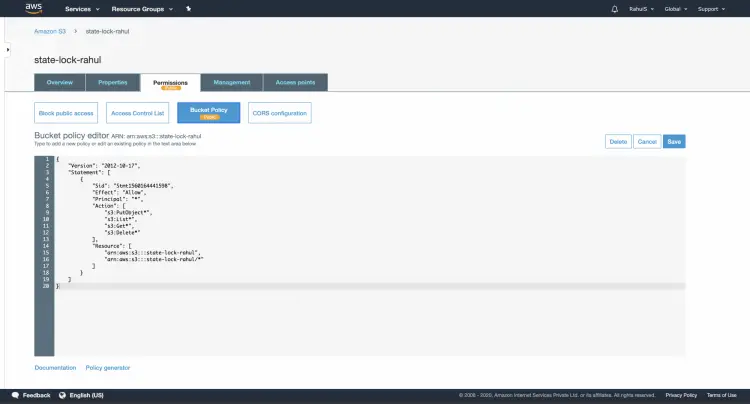
Click here to learn to create an S3 Bucket on AWS Account. Once you create a Bucket, attach the following Policy to it.
{
    "Version": "2012-10-17",
    "Statement": [
        {
            "Sid": "Stmt1560164441598",
            "Effect": "Allow",
            "Principal": "*",
            "Action": [
                "s3:PutObject*",
                "s3:List*",
                "s3:Get*",
                "s3:Delete*"
            ],
            "Resource": [
                "arn:aws:s3:::state-lock-rahul",
                "arn:aws:s3:::state-lock-rahul/*"
            ]
        }
    ]
}
Configure "AWS_ACCESS_KEY_ID" and "AWS_SECRET_ACCESS_KEY" so that you can access your account from the CLI.
Use the following command to export the values of "AWS_ACCESS_KEY_ID" and "AWS_SECRET_ACCESS_KEY
export AWS_ACCESS_KEY_ID=AKIAQ6GAIA5XC2XMMM7W
export AWS_SECRET_ACCESS_KEY=BqmubAkz1L2OOsxcvJLjl3usE0XIn5WNtY+Qaxfb
echo $AWS_ACCESS_KEY_ID
echo $AWS_SECRET_ACCESS_KEY
Once you have configured your credentials, you can simply test them by listing the buckets using the following command.
aws s3 ls
Create a DynamoDB Table using Terraform
Create 'variables.tf' which contains the declaration required variables.
vim variables.tf
variable "region" {
     description = "Region of AWS VPC"
}
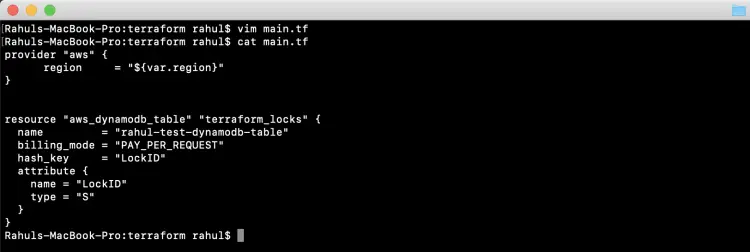
Create 'main.tf' which is responsible for creating a DynamoDB Table. This main.tf will read values of variables from variables.tf. This table will be used to store the lock.
provider "aws" {
      region     = "${var.region}"
}
resource "aws_dynamodb_table" "terraform_locks" {
  name         = "rahul-test-dynamodb-table"
  billing_mode = "PAY_PER_REQUEST"
  hash_key     = "LockID"
  attribute {
    name = "LockID"
    type = "S"
  }
}
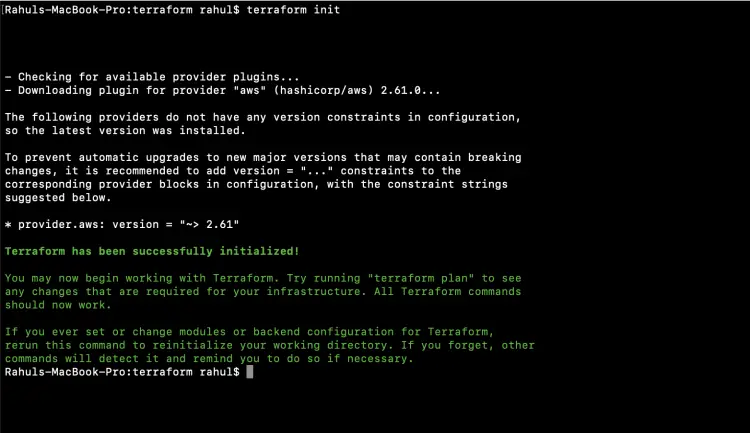
The first command to be used is 'terraform init'. This command downloads and installs plugins for providers used within the configuration. In our case it is AWS.
terraform init
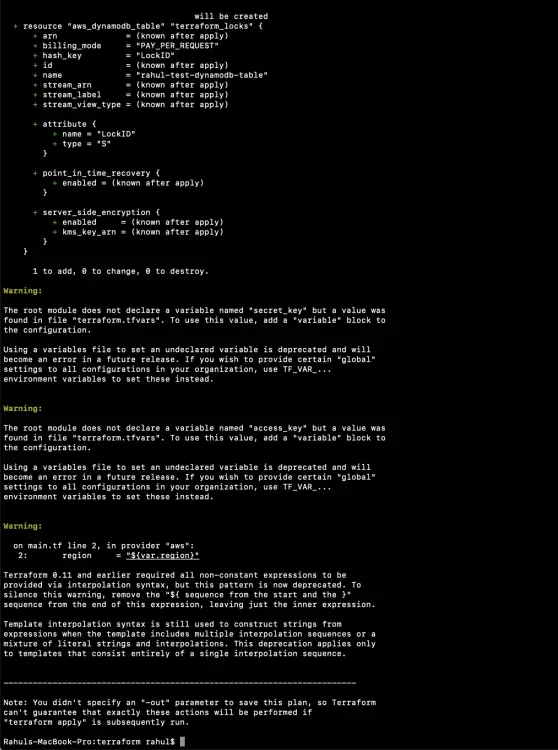
The second command to be used is 'terraform plan'. This command is used to see the changes that will take place on the infrastructure.
terraform plan
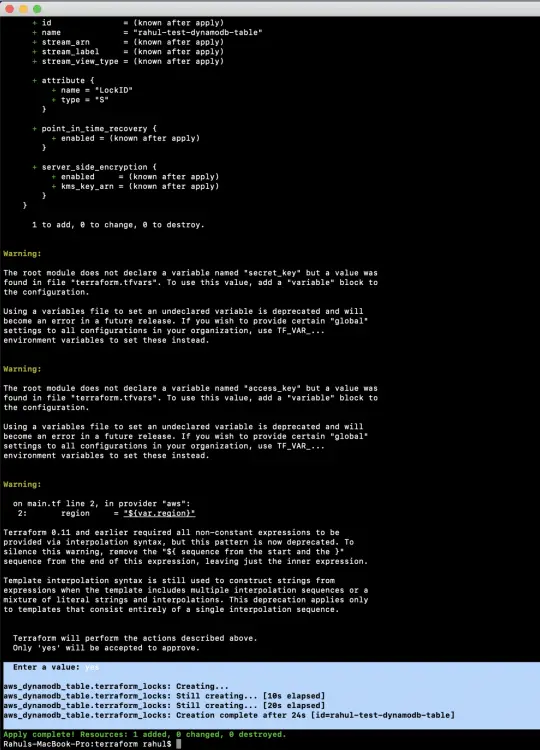
'terraform apply' command will create the resources on the AWS mentioned in the main.tf file. You will be prompted to provide your input to create the resources.
terraform apply
Now, you can go to DynamoDB Dashboard on the console to check if the Table has been created or not.
Till this point of time, we have created an S3 Bucket manually from the S3 Console and DynamoDB Table using Terraform. We have not configured the S3 Bucket as a Backend to store the state and DynamoDB Table to store the lock.
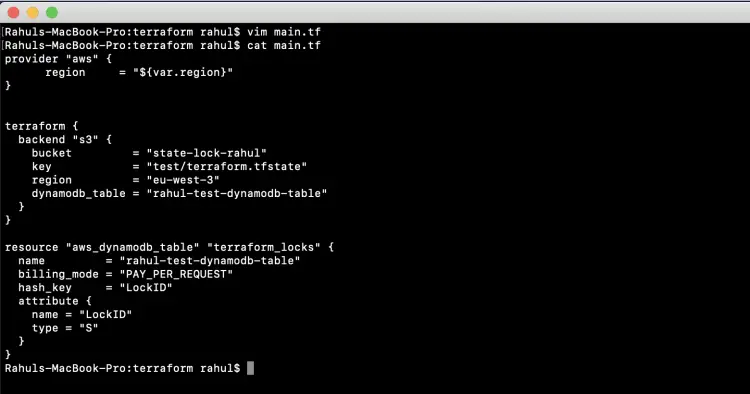
To achieve our goal, we have to modify our Terraform main.tf file. After modifying the code and executing it, our Pre-existing local state will be copied to S3 Backend.
Update our existing main.tf with the following code.
vim main.tf
provider "aws" {
      region     = "${var.region}"
}


terraform {
  backend "s3" {
    bucket         = "state-lock-rahul"
    key            = "test/terraform.tfstate"
    region         = "eu-west-3"
    dynamodb_table = "rahul-test-dynamodb-table"
  }
}


resource "aws_dynamodb_table" "terraform_locks" {
  name         = "rahul-test-dynamodb-table"
  billing_mode = "PAY_PER_REQUEST"
  hash_key     = "LockID"
  attribute {
    name = "LockID"
    type = "S"
  }
}
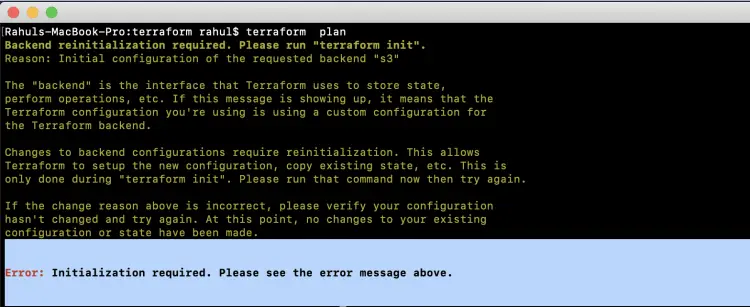
Now, if you try the "terraform plan" command to see what new resource will be created, the command will fail with the following error.
You will be asked to reinitialise the backend.
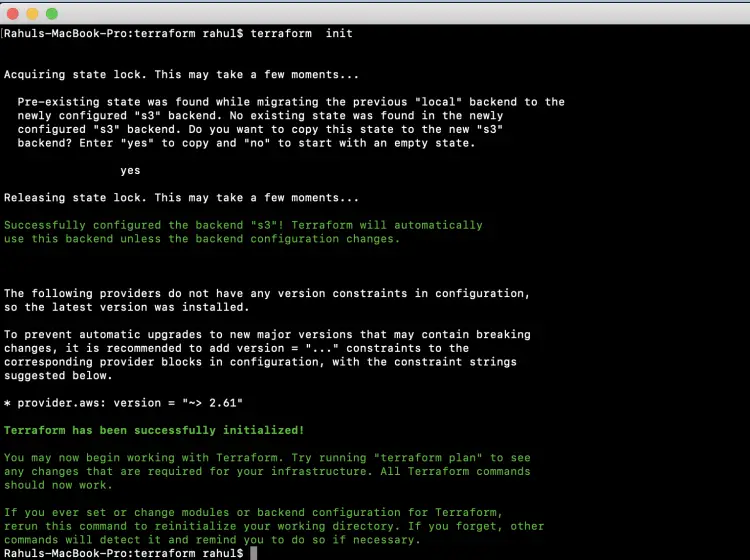
To reinitialise the backend, use the "terraform init" command. At this step, your local state file will be copied to S3 Bucket.
terraform init
You can observe the output as shown in the below screenshot after executing the "terraform init" command, Terraform has been enabled to use DynamoDb Table to acquire the lock. Once Locking is enabled, no two same operations on the same resource can be performed parallelly.
You can go to the S3 Dashboard from the AWS Console to see if the terraform.tfstate has been copied or not.
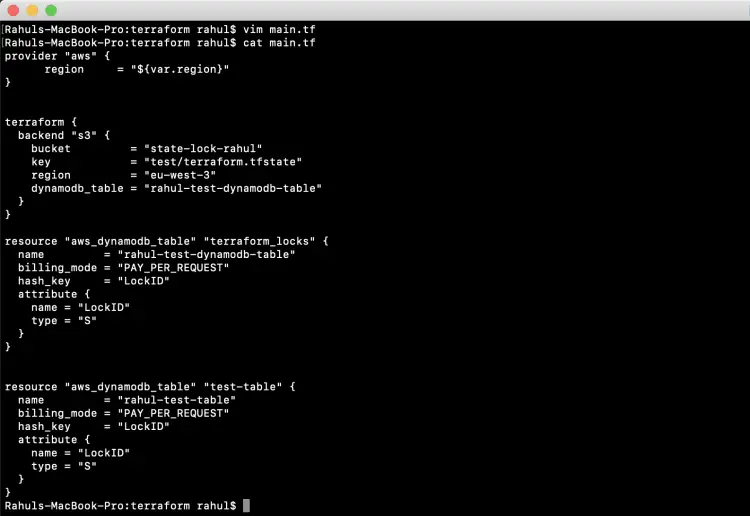
Now, again you can create a new resource and see the state will be stored on S3 Bucket. To create a new DynamoDB Test table, update the main.tf file with the following code.
vim main.tf
variable "region" {
     description = "Region of AWS VPC"
}

Rahuls-MacBook-Pro:terraform rahul$ cat main.tf
provider "aws" {
      region     = "${var.region}"
}


terraform {
  backend "s3" {
    bucket         = "state-lock-rahul"
    key            = "test/terraform.tfstate"
    region         = "eu-west-3"
    dynamodb_table = "rahul-test-dynamodb-table"
  }
}

resource "aws_dynamodb_table" "terraform_locks" {
  name         = "rahul-test-dynamodb-table"
  billing_mode = "PAY_PER_REQUEST"
  hash_key     = "LockID"
  attribute {
    name = "LockID"
    type = "S"
  }
}


resource "aws_dynamodb_table" "test-table" {
  name         = "rahul-test-table"
  billing_mode = "PAY_PER_REQUEST"
  hash_key     = "LockID"
  attribute {
    name = "LockID"
    type = "S"
  }
}
This time, there is no need to execute "terraform init" since there is no change in the Backend to the Provider.
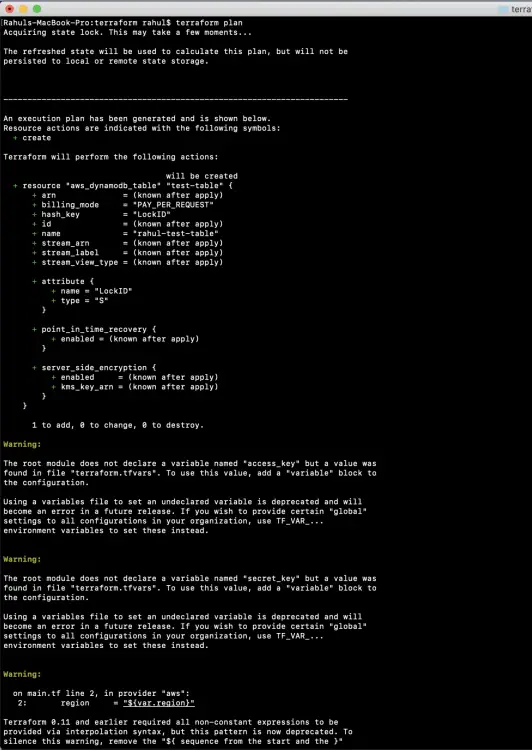
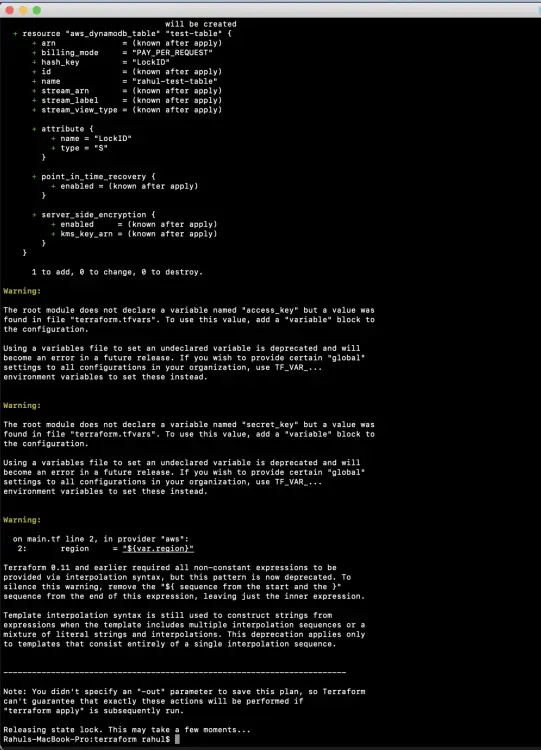
You can just use the "terraform plan" command to see what new resources will be created.
terraform plan
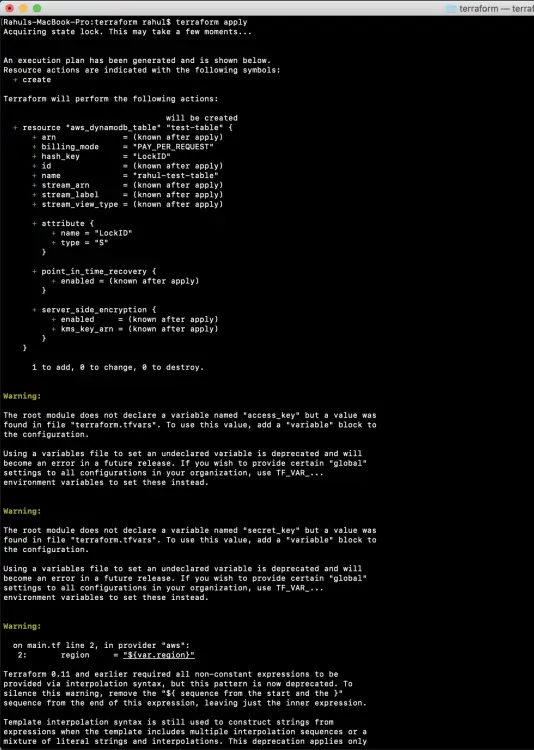
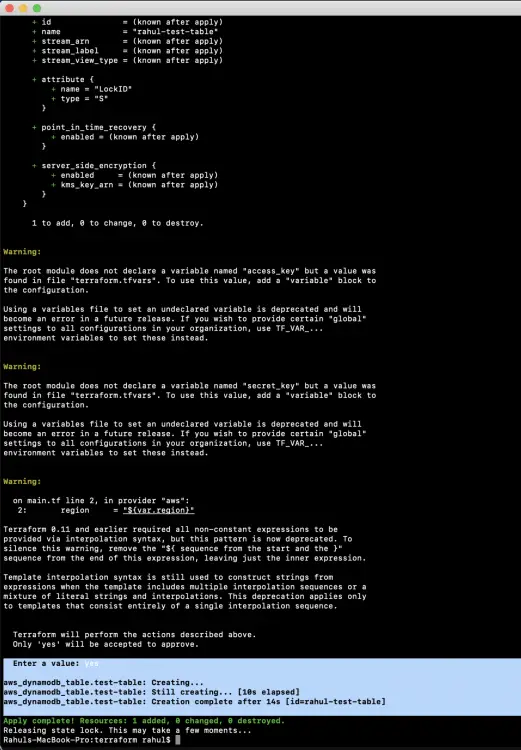
Now, execute the following command to create a new DynamoDb Test Table.
terraform apply
In the above screenshot, you can see that the Locking has been enabled, .tfstate file is being copied to S3.
Now, in the console you can see that the new table has been created
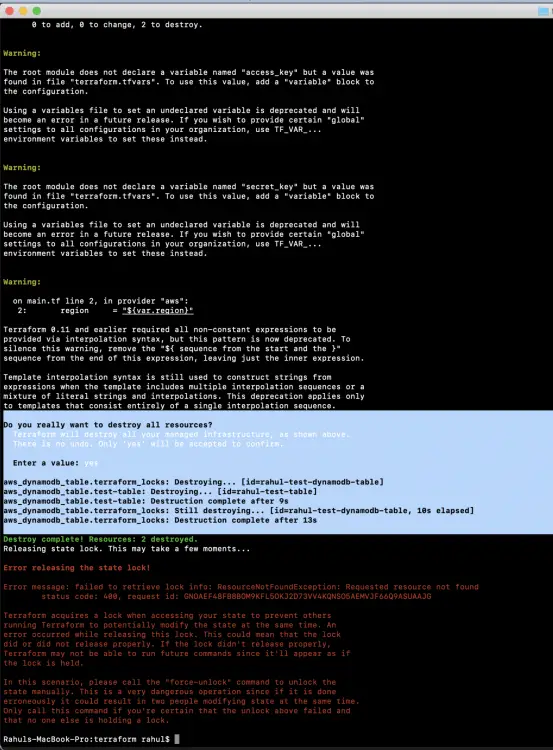
Now if you no longer require the resource you created using Terraform, use the following command to delete the resources.
terraform destroy
As soon as you delete the resources, you can see that the table which was being used for locking has also been deleted. If you do not need the S3 Bucket too, you can delete it from the console.
Conclusion
In this article, we learned about the necessity of using a remote state and locking in Terraform. We saw the steps to use S3 Bucket as a Backend to store the Terraform State and DynamoDb Table to enable the Locking.

