How to Install NodeBB with Nginx Proxy on Ubuntu 24.04 Server
This tutorial exists for these OS versions
- Ubuntu 24.04 (Noble Numbat)
- Ubuntu 22.04 (Jammy Jellyfish)
- Ubuntu 20.04 (Focal Fossa)
- Ubuntu 18.04 (Bionic Beaver)
On this page
NodeBB is an open-source, Node.js-based forum software that provides a modern and responsive solution for online communities. Running on Ubuntu Linux, NodeBB leverages the robustness and flexibility of the operating system to deliver high performance and scalability. It utilizes a combination of MongoDB or Redis for database management, making it capable of handling large volumes of user-generated content efficiently. NodeBB is known for its real-time notifications, seamless integration with various social media platforms, and extensive plugin ecosystem, allowing administrators to customize their forums to meet specific needs. Additionally, its mobile-first design ensures a consistent and engaging user experience across all devices. Ubuntu's stability and security features complement NodeBB, making it an ideal choice for hosting and managing dynamic online communities.
In this guide, you’ll learn how to install NodeBB on the Ubuntu 24.04 server with the MongoDB database and Nginx web server. You’ll also learn how to secure NodeBB with HTTPS through Certbot and Letsencrypt.
Prerequisites
To get started with this guide, make sure you have:
- An Ubuntu 24.04 server.
- A non-root user with administrator privileges.
- A domain name pointed to a server IP address.
Installing MongoDB server
NodeBB is written with Node.js and uses MongoDB as a database. To install NodeBB, you must install the MongoDB server on your system. In this section, you’ll install MongoDB server 7 on the Ubuntu 24.04 server.
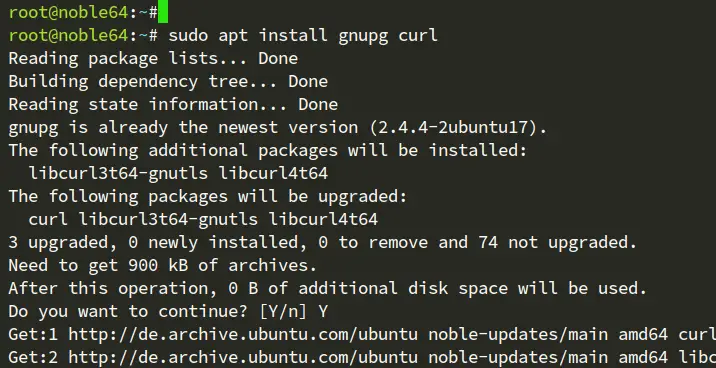
First, run the command below to install the gnupg and curl packages to your Ubuntu system.
sudo apt install gnupg curl
Now add the GPG key and repository for MongoDB using the command below. At this time, MongoDB 7.0 is only available for up to Ubuntu 22.04, so we’ll use this on our Ubuntu 24.04 server.
curl -fsSL https://www.mongodb.org/static/pgp/server-7.0.asc |
sudo gpg -o /usr/share/keyrings/mongodb-server-7.0.gpg
–dearmor
echo “deb [ arch=amd64,arm64 signed-by=/usr/share/keyrings/mongodb-server-7.0.gpg ] https://repo.mongodb.org/apt/ubuntu jammy/mongodb-org/7.0 multiverse” | sudo tee /etc/apt/sources.list.d/mongodb-org-7.0.list
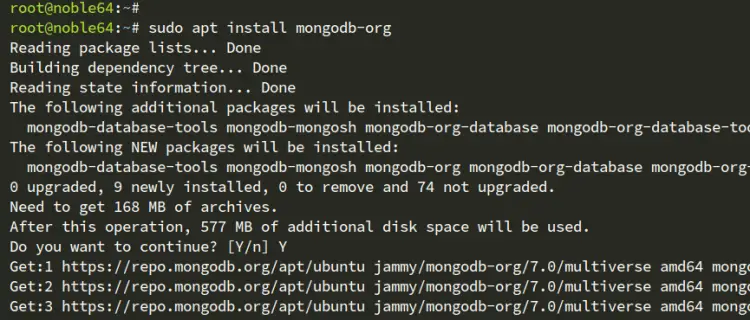
Next, run the following apt command to update your Ubuntu package index and install the mongodb-org package. Enter Y to confirm the installation.
sudo apt update
sudo apt install mongodb-org
After the installation is complete, run the systemctl command below to reload the systemd manager. This is because the new service file mongod has been added to your system.
sudo systemctl daemon-reload
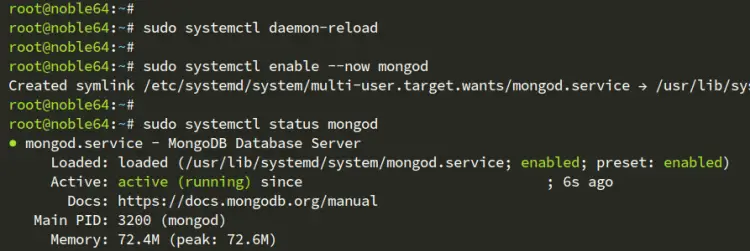
Now run the systemctl command below to start and enable the MongoDB mongod service. And then, check its status to ensure the mongod service is running.
sudo systemctl enable --now mongod
sudo systemctl status mongod
As you can see below, the mongod service is enabled and running.
Setting up MongoDB server and database for NodeBB
After you’ve installed the MongoDB server, you’ll enable authentication on MongoDB, create an admin user, and then create a new user and database for the NodeBB installation.
Log in to the MongoDB shell with the mongosh client command below.
mongosh
On the mongosh shell, switch to the admin database and create a new admin user for MongoDB. In this example, you’ll create a MongoDB user admin with the password MongoDBAdminPass. Make sure to change the user details with your information.
use admin
db.createUser( { user: “admin”, pwd: “MongoDBAdminPass”, roles: [ { role: “root”, db: “admin” } ] } )
After that, switch and create the database nodebb, and then create a new user nodebb with the password NodeBBPassword. The database and user nodebb will be used for the NodeBB installation.
use nodebb
db.createUser( { user: “nodebb”, pwd: “NodeBBPassword”, roles: [ { role: “readWrite”, db: “nodebb” }, { role: “clusterMonitor”, db: “admin” } ] } )
Now type quit() to exit from the mongosh shell.
quit()
Next, open the default MongoDB configuration /etc/mongod.conf with the following nano editor.
sudo nano /etc/mongod.conf
Uncommet the security option and change the authorization to enabled. This will enable authentication on your MongoDB server.
security:
  authorization: enabled
When finished, save the file and exit the editor.
Now run the systemctl command below to restart the mongod service and apply your changes. After the mongod service is restarted, the MongoDB authentication will be enabled.
sudo systemctl restart mongod
Run the mongosh command below to connect as user nodedbb to the database nodebb. Enter your password when prompted.
mongosh “mongodb://127.0.0.1:27017” --username nodebb --authenticationDatabase nodebb
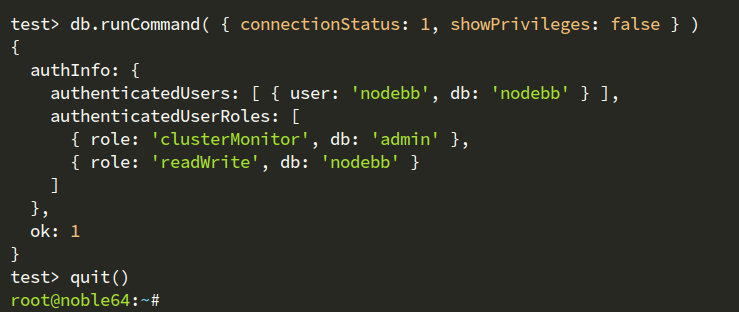
Now run the following queries to check your connection to the MongoDB server.
db.runCommand( { connectionStatus: 1, showPrivileges: false } )
Below, you’ve authenticated as a user nodebb to the database nodebb.
Type quit() to exit from the MongoDB shell.
Installing NodeBB
Now that you’ve configured the MongoDB server, you’ll install Node.js through the official Ubuntu repository, and then download and install NodeBB on your Ubuntu system.
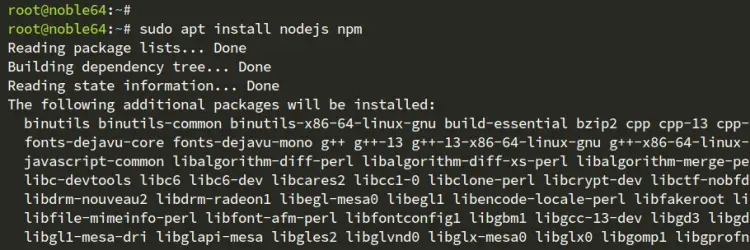
Before installing NodeBB, run the following apt command to install the Node.js and NPM package to your Ubuntu system. Enter Y to confirm the installation.
sudo apt install nodejs npm
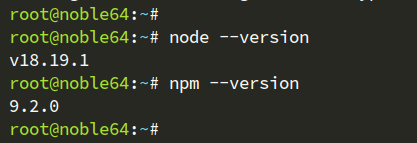
After the installation, check the Node.js and NPM versions with the following - You can see Node.js 18 and NPM 9 are installed.
node --version
npm --version
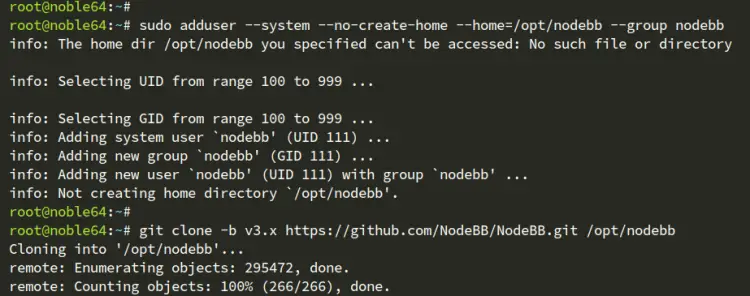
Now run the following command to create a new system user and group nodebb. This user will be used to run the NodeBB installation.
sudo adduser --system --no-create-home --home=/opt/nodebb --group nodebb
Run the git command below to download the NodeBB source code to the /opt/nodebb directory, and then change the ownership of it to the user nodebb.
git clone -b v3.x https://github.com/NodeBB/NodeBB.git /opt/nodebb
sudo chown -R nodebb:nodebb /opt/nodebb
Go to the /opt/nodebb directory and execute the nodebb setup command to start NodeBB installation.
cd /opt/nodebb
sudo su -s /bin/bash -c “./nodebb setup” nodebb
You’ll be asked about the following NodeBB configurations:
- Enter your domain name for NodeBB, such as forum.howtoforge.local.
- Press ENTER on the NodeBB secret configuration. Leave it as default.
- Enter no to disable anonymous access to the NodeBB.
- Select the MongoDB as the database.
- Enter your MongoDB database details in the format like mongodb://nodebb:[email protected]:27017/nodebb.
- Enter the new admin user and email address for NodeBB.
- Enter the password for your NodeBB admin user and repeat.
After the installation is complete, you will see an output NodeBB Setup Completed.
To run NodeBB from the command line, execute the following nodebb start command:
sudo su -s /bin/bash -c "./nodebb start" nodebb
To set the NodeBB process, use the nodebb stop command below.
sudo su -s /bin/bash -c "./nodebb stop" nodebb
Running NodeBB as a systemd service
In this guide, you’ll run NodeBB in the background as a systemd service. So now you’ll create a new service file for NodeBB, which makes it easier to manage NodeBB service through the systemctl utility.
Create a new systemd service file /etc/systemd/system/nodebb.service with the following nano editor.
sudo nano /etc/systemd/system/nodebb.service
Paste the following service file for NodeBB. In this example, you’ll run the nodebb service as a nodebb user.
[Unit]
Description=NodeBB
Documentation=https://docs.nodebb.org
After=system.slice multi-user.target mongod.service

[Service]
Type=simple
User=nodebb

StandardError=syslog
SyslogIdentifier=nodebb

Environment=NODE_ENV=production
WorkingDirectory=/opt/nodebb
ExecStart=/usr/bin/env node loader.js --no-silent --no-daemon
Restart=always

[Install]
WantedBy=multi-user.target
Save the file and exit the editor when done.
Now run the systemctl command below to reload the systemd manager and apply your changes.
sudo systemctl daemon-reload
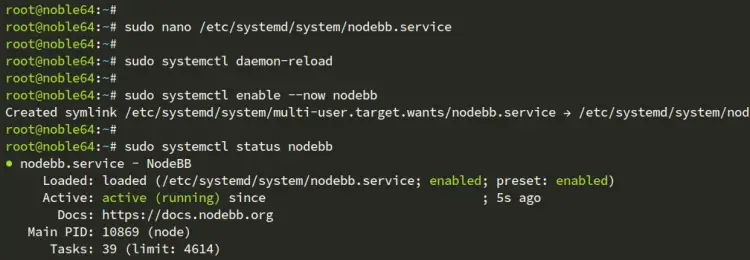
After that, start, enable, and verify the nodebb service with the following command.
sudo systemctl enable --now nodebb
sudo systemctl status nodebb
You can see below the nodebb service is running in the background as a systemd service.
Setting up Nginx as a reverse proxy
In this tutorial, you’ll be using the Nginx web server as a reverse proxy for NodeBB. So now you’ll install Nginx, and create a new server block for the reverse proxy. Make sure you have your domain name pointed to server IP address.
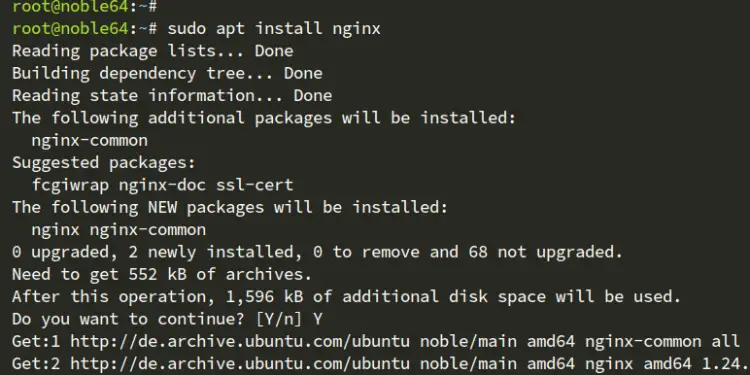
Install the Nginx web server to your system with the following apt install command.
sudo apt install nginx -y
Once the installation is complete, create a new server block configuration /etc/nginx/sites-available/nodebb with the nano editor.
sudo nano /etc/nginx/sites-available/nodebb
Insert the following configuration and make sure to change forum.howtoforge.local with your domain name. With this, you’ll set up a reverse proxy for NodeBB that running in the background on port 4567.
server {
 listen 80;

 server_name forum.howtoforge.local;

 location / {
 proxy_set_header X-Real-IP $remote_addr;
 proxy_set_header X-Forwarded-For $proxy_add_x_forwarded_for;
 proxy_set_header X-Forwarded-Proto $scheme;
 proxy_set_header Host $http_host;
 proxy_set_header X-NginX-Proxy true;

 proxy_pass http://127.0.0.1:4567;
 proxy_redirect off;

 # Socket.IO Support
 proxy_http_version 1.1;
 proxy_set_header Upgrade $http_upgrade;
 proxy_set_header Connection "upgrade";
 }
}
Save the file and exit the editor.
Now run the command below to activate the server block file nodebb and verify your Nginx configuration. If you’re correct and have proper Nginx configuration, you’ll see an output syntax is ok - test is successful.
sudo ln -s /etc/nginx/sites-available/nodebb /etc/nginx/sites-enabled/
sudo nginx -t
Lastly, run the systemctl command below to restart the Nginx service and apply your changes. Then, check the Nginx service status to ensure it is running.
sudo systemctl restart nginx
sudo systemctl status nginx
As you can see in the output below, the Nginx service is running.
Securing NodeBB with HTTPS
In this section, you’ll secure NodeBB with HTTPS through Certbot and Letsencrypt. Combined with Certbot and Nginx, you can set up automatic HTTPS on your web server.
Install certbot and python3-certbot-nginx packages with the following command:
sudo apt install certbot python3-certbot-nginx -y
Now run the certbot command below to generate SSL certificates and secure your NodeBB installation with HTTPS. Make sure to change the email address and domain name with your information.
sudo certbot --nginx --agree-tos --redirect --hsts --staple-ocsp --email [email protected] -d forum.howtoforge.local
After the process is completed, you’ll see your certificates in the /etc/letsencrypt/live/domain.com directory. And your NodeBB installation will be secured with HTTPS automatically.
Accessing NodeBB
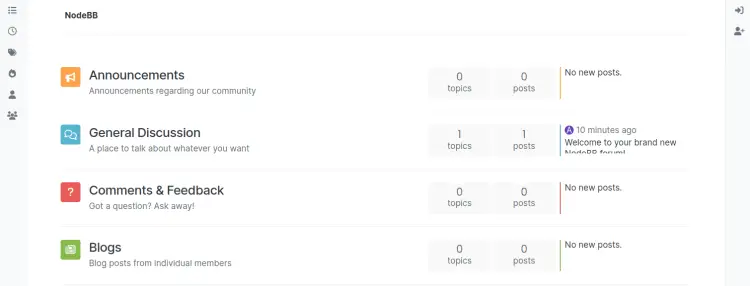
Open your NodeBB domain name such as https://forum.howtoforge.local using your web browser. If the installation is successful, you’ll see the default home page for NodeBB like the following:
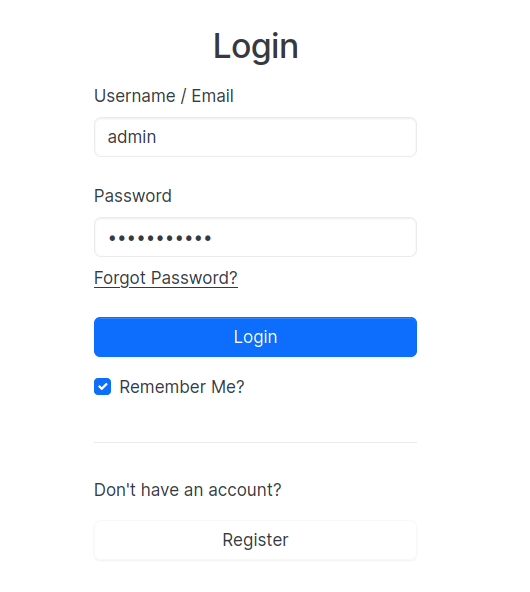
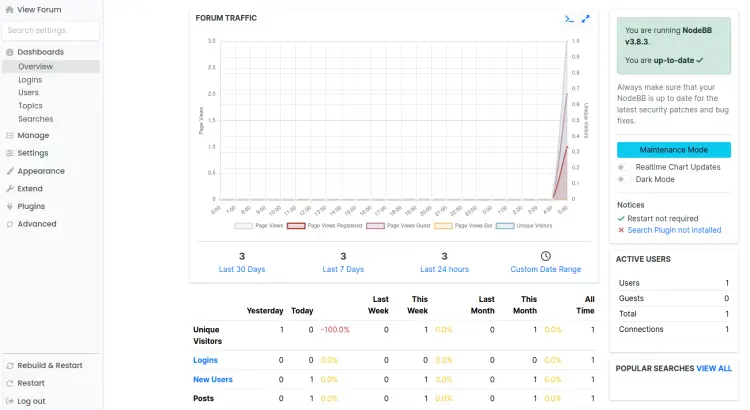
Click on the Login link and you’ll be prompted with the NodeBB login page. Then, enter your admin user and password, and click Login to confirm. If you have the correct credentials, you’ll see the following admin dashboard.
On the NodeBB admin settings, you’ll see the following:
Conclusion
Congratulations! You’ve installed open-source forum software NodeBB on an Ubuntu 24.04 server. You’ve NodeBB up and running with MongoDB as the database and Nginx as a reverse proxy. You’ve also secured NodeBB with HTTPS through Certbot and Letsencrypt. You can now add an SMTP server to set up registration and confirmation via email link.

