How to Install Wireguard VPN on Debian 11
This tutorial exists for these OS versions
- Debian 12 (Bookworm)
- Debian 11 (Bullseye)
On this page
Wireguard is a free and open-source VPN protocol alternative to IPSec, IKEv2, and OpenVPN. Wiruguard is designed for Linux and Unix operating systems. It runs on Linux kernel space, which makes the Wireguard faster and more reliable. Wireguard is used to create secure tunnel connections between two computers or more.
Wireguard aims to replace VPN protocols such as IPSec, IKEv2, and OpenVPN. Wireguard is lighter, faster, easy to set up, and more efficient. And at the same time, Wiregurad did not sacrifice the security aspect of the VPN protocol. Wireguard supports modern state-of-the-art cryptography like the Noise protocol framework, Curve25519, ChaCha20, Poly1305, BLAKE2, SipHash24, HKDF, and secure, trusted constructions.
Compared to other VPN protocols such as OpenVPN, IPSec, and IKEv2, wireguard is a new VPN protocol. Wireguard is released in 2015 by Jason A. Donenfeld as an alternative VPN protocol, It's merged to the Linux kernel v5.6 by Linus Torvalds in 2020, and in the same year, also ported to FreeBSD 13.
In this tutorial, you will install and set up a VPN server via Wireguard on Debian 11 servers. You'll set up a Wireguard VPN server with Debian 11 server, then set up a client machine to connect to the Wireguard VPN server.
As for the client machine, you can use any Linux distribution, but this example uses a Debian machine.
Prerequisites
To begin with this tutorial, you must have the following requirements:
- A Debian 11 server - This example uses a Debian server with hostname 'wireguard-server' and an external static IP address 'SERVER-IP'.
- A Linux machine that will be used as a client - You can use any Linux distribution, but this example uses a Debian machine with hostname 'client1'.
- A non-root user with sudo/root administrator privileges.
If all these requirements are ready, let's get started.
Installing Wireguard
Before installing Wireguard, run the below apt command to update and refresh your Debian package index.
sudo apt update
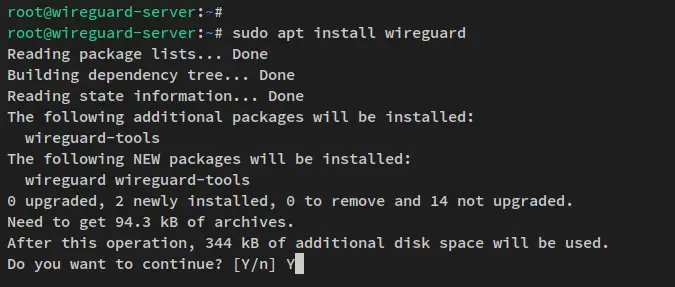
Once Debian repositories updated, run the below apt command to install the Wireguard package on your Debian server. This will also install the wireguard-tools package that will be used to manage your Wireguard server installation.
sudo apt install wireguard
When prompted for the confirmation, input y to confirm and press ENTER to proceed. Now the installation should begin.
With Wireguard installed on your server, you're ready to generate Public and Private keypair for the Wireguard server and client.
Generating Public/Private Key Pair
In this step, you'll generate a public and private key pair for the Wireguard server and the client machine. And this can be done via the 'wg' command line provided by the wireguard-tools package.
The key pair for the server will be used by the Wireguard server, and the client machine will use the keypair for the client. If you've multiple client machines, you need can generate multiple keypairs for your clients.
Generating Key Pair for Wireguard Server
Run the below 'wg genkey' command to generate the private key for the Wireguard server. Then, change the permission of the private key to '0400', which will disable read and write access for the group and others.
In this example, you'll generate the private key '/etc/wireguard/server.key'.
wg genkey | sudo tee /etc/wireguard/server.key
sudo chmod 0400 /etc/wireguard/server.key
You'll then receive an output random base64 key on your terminal screen.
Next, run the below command 'wg pubkey' to generate the new server public key to '/etc/wireguard/server.pub'. The server public key is derived from the server private key '/etc/wireguard/server.key'.
sudo cat /etc/wireguard/server.key | wg pubkey | sudo tee /etc/wireguard/server.pub
You'll then receive an output of a random base64 public key on your terminal.
Now that you have generated public and private key pairs for the Wireguard server. The private key is located at '/etc/wireguard/server.key', and the public key is located at '/etc/wireguard/server.pub'.
Run the below cat command to show and verify the generated keypair for the Wireguard server.
cat /etc/wireguard/server.key
cat /etc/wireguard/server.pub
Generating Key Pair for Client
For the client keypair, you can generate it on any machine (Wireguard server or client) with the wireguard-tools installed. In this step, you'll generate a client keypair from the Wireguard server.
The process for generating a key pair for the server and client is the same, using the 'wg genkey' command to generate the private key and using the 'wg pubkey' for generating the public key, which is derived from the private key.
Now run the below command to create a new directory '/etc/wireguard/clients'. This directory will be used to store client keypair.
mkdir -p /etc/wireguard/clients
Run the below 'wg genkey' command to generate the client private key to '/etc/wireguard/clients/client1.key'. Then, generate the client public key via the 'wg pubkey' command to '/etc/wireguard/clients/client1.pub'.
wg genkey | tee /etc/wireguard/clients/client1.key
cat /etc/wireguard/clients/client1.key | wg pubkey | tee /etc/wireguard/clients/client1.pub
Now that the client keypair is generated, the public key is located at '/etc/wireguard/clients/client1.pub' and the private key is '/etc/wireguard/clients/client1.key'. Run the below command to show and verify the generated keypair.
cat /etc/wireguard/clients/client1.key
cat /etc/wireguard/clients/client1.pub
Configuring Wireguard Server
You'll create a new configuration file for the Wireguard Server in this step. But before that, you must decide which subnets that you will be using for the Wireguard VPN server. You may also decide whether enable or disable IPv6 for your Wireguard VPN Server.
In this example, the Wireguard VPN server will have IP addresses with the subnet '10.8.0.2/24' and disable the IPv6 for the Wireguard VPN.
Create a new Wireguard config file '/etc/wireguard/wg0.conf' using the below nano editor command.
sudo nano /etc/wireguard/wg0.conf
First, add the following lines to the file to define the Wirguard server details. And be sure to change the 'PrivateKey' with the Wirguard server private key 'server.key'. With this, the Wireguard server interface will run on IP address '10.8.0.1', open the UDP port 51820 that is available for clients to connect, and the SaveConfig parameter will ensure any changes will be saved to the configuration file, even when the Wireguard interface is off.
[Interface]
# Wireguard Server private key - server.key
PrivateKey = SIybp8GHtKIPtHPBOQFP1kbQg4UCLCMyNIfCLBQR2EA=

# Wireguard interface will be run at 10.8.0.1
Address = 10.8.0.1/24

# Clients will connect to UDP port 51820
ListenPort = 51820

# Ensure any changes will be saved to the Wireguard config file
SaveConfig = true
Next, add the below lines to define the client peer connection. Change the 'PublicKey' parameter with the client public key 'client1.pub'. And the 'AllowedIPs' parameter will specify which Wireguard client allowed access to this peer. In this example, only clients with IP '10.8.0.2' will be allowed to access this peer connection. But, you can also allow the range of subnets such as '10.8.0.0/24'.
[Peer]
# Wireguard client public key - client1.pub
PublicKey = ENokvIsS2euXrmM4OVFHPmTdCZ4wfEIR/UHuGCW64lw=

# clients' VPN IP addresses you allow to connect
# possible to specify subnet ⇒ [10.8.0.0/24]
AllowedIPs = 10.8.0.2/24
Save the file and exit the editor when finished.
With the Wireguard server config file created and the client peer connection added, you'll next set up the port forwarding on the Weireguard server and set up the firewall to set up traffic routing.
Enable Port-Forwarding via /etc/sysctl.conf
In this step, you'll enable the port-forwarding on the Wireguard server via the file /etc/sysctl.conf'. You can enable port-forwarding for both IPv4 and IPv6 on the Wireguard guard server.
To start, open the config file '/etc/sysctl.conf' using the below nano editor command.
sudo nano /etc/sysctl.conf
Add the following lines to the file. This will enable port forwarding on your Wireguard server. You can use both for IPv4 and IPv6, or you can use IPv4 if you have IPv6 disabled on your Wireguard server.
# Port Forwarding for IPv4
net.ipv4.ip_forward=1

# Port forwarding for IPv6
net.ipv6.conf.all.forwarding=1
Save the file and exit the editor when finished.
Next, run the below sysctl command utility to apply the changes.
sudo sysctl -p
You'll receive an output like this - The port-forwarding should be enabled immediately.
With the Port-Forwarding enabled on the Wireguard server, you'll next set up the firewall that will route traffics of Wireguard clients to the specific network interface.
Configuring Firewall for Wireguard Server
In this step, you'll set up the firewall that will be used for the Wireguard server to route client connections to the proper network interface that will be used for accessing the internet. This also will allow Wireguard clients to access the internet via the specific interface on the Wireguard server.
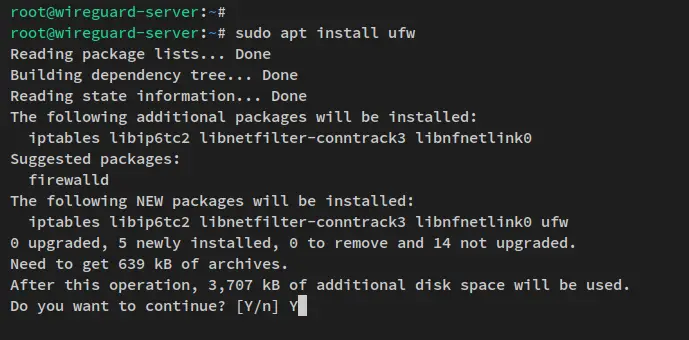
First, run the below apt command to install the ufw firewall package on your Debian server.
sudo apt install ufw
Input y when prompted and press ENTER to proceed.
After ufw is installed, run the below command to open the SSH service and enable the ufw firewall.
sudo ufw allow OpenSSH
sudo ufw enable
When prompted for confirmation to enable the ufw firewall, input y and press ENTER. The ufw firewall should now be running on your system and it's also enabled.
Now verify the ufw firewall status via the below command. You should receive an output such as 'Status: active', which means the ufw firewall status is running.
sudo ufw status
With the ufw firewall running, you'll next configure it to route Wireguard client connections to the specific network interface.
Now run the below command to check the default routing table interface on the Wireguard server. Mostly, this will detect an interface that is used for accessing the internet or where the public IP address is available on top of it.
ip route list default
You'll receive an output like this - This example is the interface eth0 is the default routing table for the Wireguard server. And this is the interface that is used for accessing the Internet. You may have a different interface name.
Next, open the Wireguard server config file '/etc/wireguard/wg0.conf' using the below nano editor command.
sudo nano /etc/wireguard/wg0.conf
Add the following lines to the '[Interface]' section.
[Interface]
...
....
PostUp = ufw route allow in on wg0 out on eth0
PostUp = iptables -t nat -I POSTROUTING -o eth0 -j MASQUERADE
PostUp = ip6tables -t nat -I POSTROUTING -o eth0 -j MASQUERADE
PreDown = ufw route delete allow in on wg0 out on eth0
PreDown = iptables -t nat -D POSTROUTING -o eth0 -j MASQUERADE
PreDown = ip6tables -t nat -D POSTROUTING -o eth0 -j MASQUERADE
Save the file and exit the editor when finished.
- The 'PostUp' parameter will be executed whenever the Wirguard server starts the VPN tunnel.
- The 'PreDown' parameter will be executed whenever the Wireguard server stops the VPN tunnel.
- The command 'ufw route allow in on wg0 out on eth0' allows forwarding traffic coming in the wg0 interface to the internet interface eth0.
- The command 'iptables -t nat -I POSTROUTING -o eth0 -j MASQUERADE' will enable masquerading and rewrites IPv4 traffic from the wg0 interface to make it appear like the direct connection from the Wireguard server.
- The command 'ip6tables -t nat -I POSTROUTING -o eth0 -j MASQUERADE' will enable masquerading and rewrites IPv46traffics from the wg0 interface to make it appear like the direct connection from the Wireguard server.
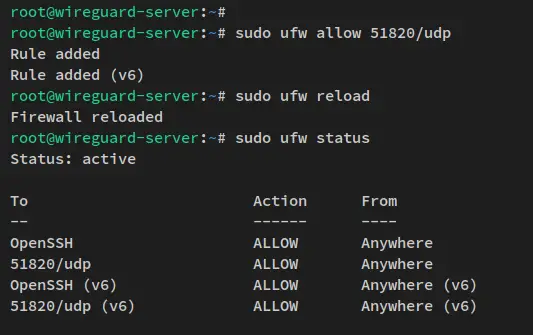
Now run the below ufw command to open the UDP port 51820 where clients will be connected.
sudo ufw allow 51820/udp
Lastly, run the below command to reload the ufw firewall and apply the changes. Then, verify the list of ufw rules via the below command.
sudo ufw reload
sudo ufw status
You'll receive an output like this screenshot - The UDP port 51820 that the Wireguard server will use for client connections added to the ufw firewall.
Now, you've enabled Port-Forwarding and configured the firewall on the Wireguard server. You're now ready to start the Wireguard server.
Starting Wireguard Server
In this step, you'll start and enable the Wireguard server. You'll also verify the Wireguard server and verify the wg0 interface that will be created by the Wireguard service.
Run the below systemctl command utility to start and enable the Wireguard service. The service '[email protected]' will create and enable the Wireguard interface 'wg0' on your Wireguard server.
sudo systemctl start [email protected]
sudo systemctl enable [email protected]
Now verify the Wireguard service via the below command.
sudo systemctl status [email protected]
You will receive an output similar to the following screenshot - The Wireguard service '[email protected]' is running and it's enabled. This also means that the 'wg0' interface is created and running.
Run the below command to verify the 'wg0' interface on your Wireguard server.
ip a show wg0
You should receive an output like this - The Wireguard interface wg0 gets an IP address '10.8.0.1', as described on the Wireguard config file '/etc/wireguard/wg0.conf'.
Additionally, you can also start and stop Wireguard via the 'wg-quick' command as below. The 'wg-quick up' command will start the Wireguard server, and the 'wg-quick down' will stop the Wireguard server.
sudo wg-quick up /etc/wireguard/wg0.conf
sudo wg-quick down /etc/wireguard/wg0.conf
With the Wireguard server running, you'll next set up the client machine and connect it to the Wireguard server.
Setting up Client Machine and Connect to Wireguard Server
In this step, you'll set up the client machine by installing the worguard-tools, creating new Wireguard configuration for the client, connect to the Wireguard VPN server, and lastly verify the connection and ensure that the client machine can reach internet and local VPN network.
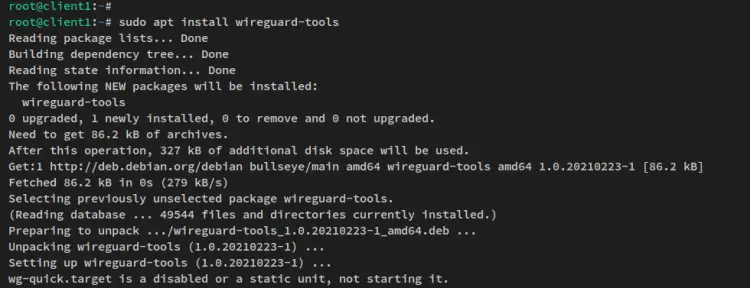
Install the 'wireguard-tools' package on the client machine. This uses a Debian as the client, so the APT command will be used.
sudo apt install wireguard-tools
The installation should automatically begin.
After the wireguard-tools are installed, create a new config file '/etc/wireguard/wg-client1.conf' using the below nano editor command.
sudo nano /etc/wireguard/wg-client1.conf
Add the following lines to the file.
[Interface]
# Define the IP address for the client - must be matched with wg0 on Wireguard Server
Address = 10.8.0.2/24

# specific DNS Server
DNS = 1.1.1.1

# Private key for the client - client1.key
PrivateKey = KPI59QH0jwc9wkUsW5Byci9ojXhz1322QXK52fQCE3E=

[Peer]
# Public key of the Wireguard server - server.pub
PublicKey = Qt6oRLtlfAR490lTNb2K8TlbpwADV1j8NX7D5HY38EM=

# Allow all traffic to be routed via Wireguard VPN
AllowedIPs = 0.0.0.0/0

# Public IP address of the Wireguard Server
Endpoint = SERVER-IP:51820

# Sending Keepalive every 25 sec
PersistentKeepalive = 25
Save and close the file when finished.
In the '[Interface]' section, you must define the following:
- The IP address of the client must be matched with the subnet of the Wireguard server. The Wireguard client will get the IP address '10.8.0.2' in this example.
- Specify the DNS server for the client.
- Change the 'PrivateKey' parameter with the client private key you've generated, 'client1.key'.
In the '[Peer]' section, you must add the following: - Wireguard server public key 'server.pub' to the PublicKey parameter.
- Specify 'AllowedIPs' to restrict access on the VPN peer, you can specify subnets of networks or just put 0.0.0.0/0 to tunnel all traffic over VPN.
- Specify the Endpoint parameter with the public IP address of the Wireguard server or use a domain name.
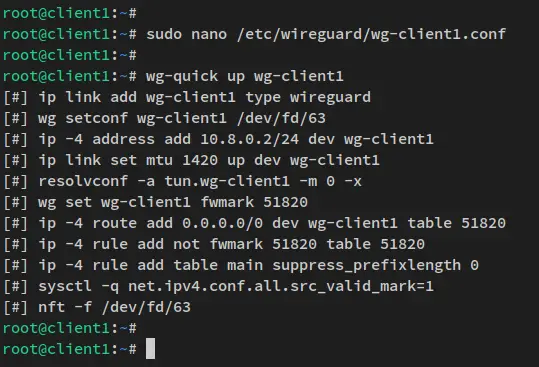
After the client configuration is created, run the below command to start Wireguard on the client machine.
wg-quick up wg-client1
You should receive an output similar to this screenshot - The new Wireguard interface 'wg-client1' will be created and the client machine should be connected to the Wireguard server that running on 'SERVER-IP:51820'.
Run the below command to verify the Wireguard interface 'wg-client1'.
ip a show wg-client1
You should receive an output like this - The wg-client1 interface is up with an IP address '10.8.0.2', which is part of the subnet of Wireguard server '10.8.0.0/24'.
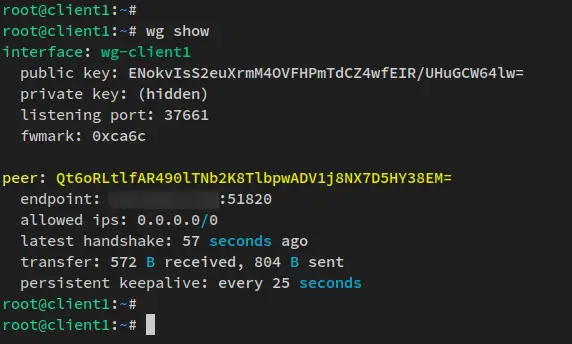
You can also verify the Wireguard connection via the 'wg show' command.
Run the below 'wg show' command on the client machine and you should receive an output like this.
wg show
If you're connected to the proper Wireguard server, you should see the Wirguard server IP address on the 'endpoint' section and see the Wirguard server public key 'server.pub'.
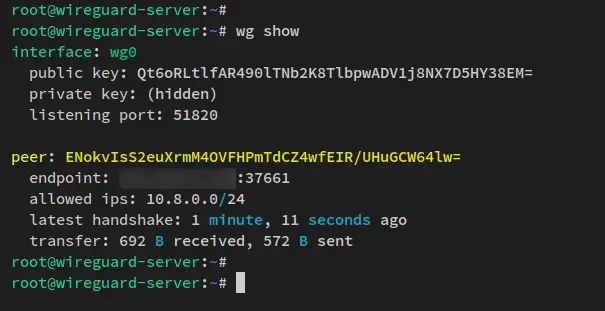
Now move to the Wireguard server and run the 'wg show' command.
wg show
You should receive an output similar to this - On the endpoint section, you'll see the client's public IP address, and on the peer section, you'll see the client public key 'client1.pub'.
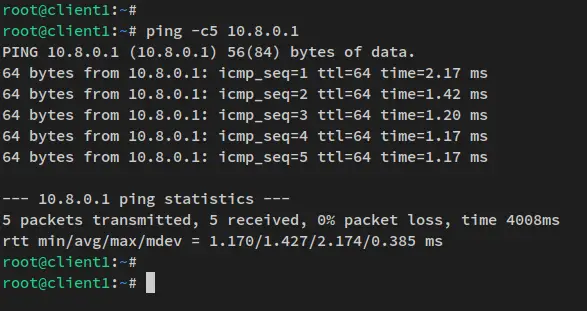
Lastly, run the below command to ensure that the client machine can access the internet or access the internal network subnet of the Wireguard VPN.
ping -c5 10.8.0.1
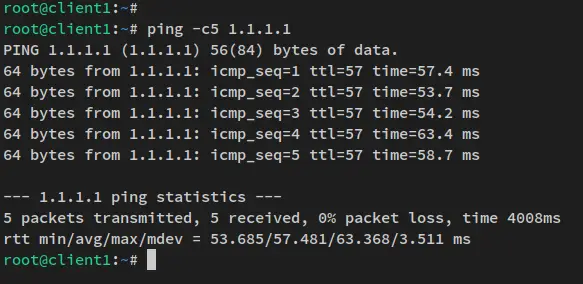
ping -c5 1.1.1.1
ping -c5 duckduckgo.com
Below is the output you should receive:
The client machine can connect to the Wireguard server with an IP address '10.8.0.1'.
The client machine can access the internet. All traffic is routed via the Wireguard server's public IP address.
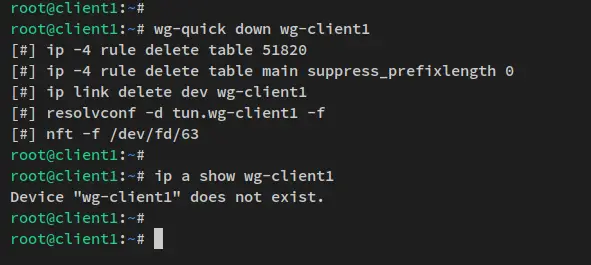
Now if you want to stop the Wrieguard on the client machine, you can run the 'wg-quick down' command below
wg-quick down wg-client1
You'll recieve the outpuit like this. Also, the interface wg-client1 will be disspear from the client machine.
Now you've configured the Wirguard VPN on the client machine. You've also verified the connection between the client machine to the Wireguard server.
Conclusion
In this tutorial, you have installed and configured Wireguard VPN on a Debian 11 server. You also have configured a Debian machine and successfully connected to the Wireguard VPN Server.
In detail, you've installed the Wireguard VPN package, generated key pair public and private key for both server and client, configured the UFW firewall to route VPN traffic to the specific network interface, and enabled the port forwarding via the /etc/sysctl.conf file.
With this in mind, you can now add more clients to your Wireguard VPN Server by generating another keypair for the client, defining the peer connection on the Wireguard server, then creating a new Wireguard config file that the client machine will use. To learn more about Wireguard, visit the official Wireguard documentation.

