How to Install Jenkins on Rocky Linux 9
Jenkins is an open-source automation tool for Continuous Integration/Continuous Delivery (CI/CD). is entirely written in Java with the support of more than 1000 plugins for building, deploying, and automating your project. Jenkins has become one of the leading automation tools that accelerate your development process through automation. Jenkins integrates development life-cycle processes such as build, document, test, package, stage, deploy, static analysis, and many more.
Jenkins supports multiple version control tools such as Git, Subversion, Mercurial, CVS, Perforce, and RTC. Also, it can execute Apache Ant, Apache Maven, shell scripts, and Windows batch commands. Jenkins has strong community supports with extensive documentation and a wiki, which makes Jenkins one of the most used automation CI/CD tool. Also, it offers many different tools, languages, and automation tasks to automate your development and deployment process.
In this tutorial, you will install and set up Jenkins with Apache/httpd reverse proxy on a Rocky Linux 9 server. You'll also secure Jenkins with SSL and firewalld. Lastly, you will create a simple Jenkins build.
Prerequisites
To begin, you will need the following requirements to complete this tutorial:
- A Rocky Linux server - This tutorial uses the latest Rocky Linux 9.
- A non-root user with sudo/root administrator privileges.
- A domain name pointed to a server IP address - This example uses the domain 'jenkins.howtoforge.local'
- SELinux configured with 'permissive' mode.
Installing Java OpenJDK
Jenkins is blad written in Java blah blah. In this step, you will install Java OpenJDK 11.
The default Rocky Linux repository provides multiple versions of Java OpenJDK. To install Jenkins, you can use Java OpenJDK 11 or 17. This example uses the java OpenJDK 11, run the dnf command below to install it.
sudo dnf install java-11-openjdk
Input y when prompted and press ENTER to proceed.
Once Java is installed, verify the Java version using the below command. You should get the Java OpenJDK 11 installed on your Rocky Linux.
java -version
Adding Jenkins Repository
Jenkins can be deployed on multiple environments, including standalone on such virtual machines or using container technology such as Docker and Kubernetes. For Linux distribution, you can install Jenkins via binary packages provided by the Jenkins repository.
Before adding the Jenkins repository, run the following dnf command to install the following packages.
sudo dnf install wget curl
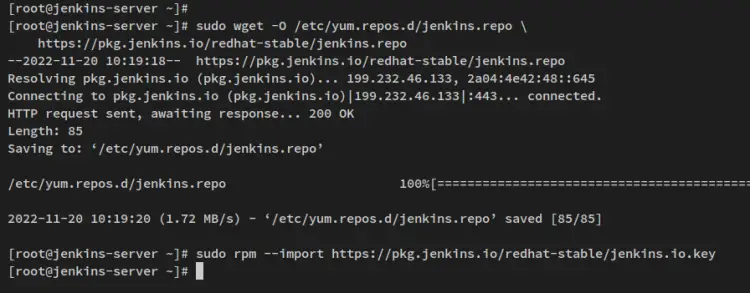
Then, download the Jenkins repository for the RHEL-based operating system via the wget command below. The repository will be stored at '/etc/yum.repos.d/jenkins.repo'.
sudo wget -O /etc/yum.repos.d/jenkins.repo \
    https://pkg.jenkins.io/redhat-stable/jenkins.repo
Next, import the GPG key of the Jenkins repository to your system using the below rpm command.
sudo rpm --import https://pkg.jenkins.io/redhat-stable/jenkins.io.key
Lastly, verify the list of the enabled repository on your system via the dnf command below.
sudo dnf repolist
You will receive an output that the Jenkins repository is available on your system, and you're ready to install Jenkins.
Installing Jenkins
With the repository added, you will now install Jenkins on your Rocky Linux server.
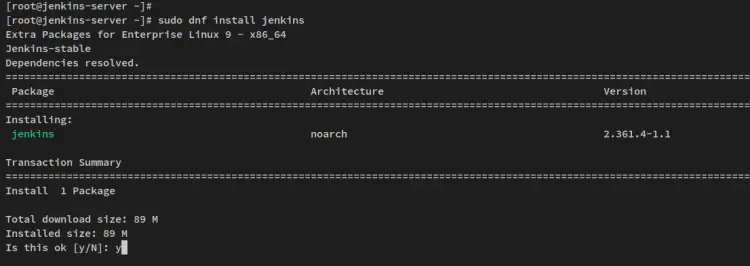
Run the following dnf command to install Jenkins.
sudo dnf install jenkins
When prompted, input y to confirm and press ENTER to proceed. And the Jenkins installation will begin. In the below output, you will install Jenkins v2.361, which is the latest stable version of jenkins (at the time of this writing).
Then, run the following systemctl command to reload the systemd manager after the Jenkins installation is finished. Upon installation, the 'jenkins' service will be created, and this command will apply the new service to your system.
sudo systemctl daemon-reload
Next, start and enable the 'jenkins' service via the systemctl command. Jenkins should now be running on your system, and it will automatically run during the startup or bootup.
sudo systemctl start jenkins
sudo systemctl enable jenkins
Lastly, verify Jenkins via the following systemctl command.
sudo systemctl status jenkins
You'll receive output similar to the following screenshot - The Jenkins service is running.
Now that Jenkins is running, you can start the initial configuration for Jenkins. But, you will set up and run Jenkins with Apache/httpd as a reverse proxy.
Installing and Configuring httpd as a Reverse Proxy
At this point, Jenkins is now accessible via TCP port 8080. To make Jenkins more user-friendly and secure, you will install and configure the Apache/httpd web server as a reverse proxy for your Jenkins.
Before you begin, ensure that you have the domain name pointed to your Rocky Linux IP address and also you have generated SSL certificates. You can use Self-signed certificates or use free SSL from Let'sencrypt.
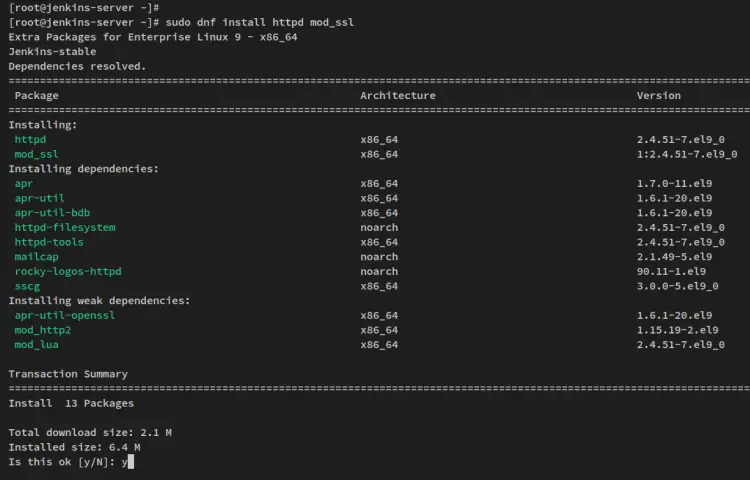
First, install the httpd web server and mod_ssl package via the dnf command below. Input y when prompted, then press ENTER to continue.
sudo dnf install httpd mod_ssl
The mod_ssl package requires you to set up a certificate for localhost. So, run the following command to generate a Self-signed certificate for localhost only.
Upon the process, you will be asked to input details information for SSL certificates. You can input your details and skip by pressing ENTER.
openssl req -newkey rsa:2048 -nodes -keyout /etc/pki/tls/private/localhost.key -x509 -days 365 -out /etc/pki/tls/certs/localhost.crt
After the httpd web server is installed, create a new virtual host configuration '/etc/httpd/conf.d/jenkins.conf' using the following nano editor command.
sudo nano /etc/httpd/conf.d/jenkins.conf
Add the below configuration to the file. This example uses the domain name 'jenkins.howtoforge.local' with SSL certificates from Letsencrypt. So, be sure to change the domain name and path of SSL certificates.
<VirtualHost *:80>
    ServerAdmin  webmaster@localhost
    Redirect permanent / https://jenkins.howtoforge.local/
</VirtualHost>

<VirtualHost *:443>
    SSLEngine On
    SSLCertificateFile /etc/letsencrypt/live/jenkins.howtoforge.local/fullchain.pem
    SSLCertificateKeyFile /etc/letsencrypt/live/jenkins.howtoforge.local/privkey.pem
    ServerAdmin  webmaster@localhost
    ProxyRequests     Off
    ProxyPreserveHost On
    AllowEncodedSlashes NoDecode
    <Proxy *>
        Order deny,allow
        Allow from all
    </Proxy>
    ProxyPass         /  http://localhost:8080/ nocanon
    ProxyPassReverse  /  http://localhost:8080/
    ProxyPassReverse  /  http://jenkins.howtoforge.local/
    RequestHeader set X-Forwarded-Proto "https"
    RequestHeader set X-Forwarded-Port "443"
</VirtualHost>
Save the file and close the editor when you are finished.
Next, run the below command to verify httpd configurations. If you get the output such as 'Syntax OK', it means that you have proper httpd configuration and you're ready to start the httpd service.
sudo apachectl configtest
Start and enable the httpd service via the systemctl command below.
sudo systemctl start httpd
sudo systemctl enable httpd
Verify the httpd service status using the below command. You should see the httpd service is running and enabled, which means the httpd will start automatically upon the bootup.
sudo systemctl status httpd
In this step, you installed the httpd web server, configured the httpd as a reverse proxy, and the secure HTTPS enabled. But to access your Jenkins installation, you still need to set up the firewalld on your Rocky Linux server.
Configuring Firewalld
Firewalld is the default firewall software on RHEL-based operating systems, including Rocky Linux. It's installed and running by default on Rocky Linux. You'll now set up the firewalld and open the HTTP and HTTPS service to allow access to Jenkins.
Run the following firewall-cmd command to add the HTTP and HTTPS services to the firewalld.
sudo firewall-cmd --add-service=http --permanent
sudo firewall-cmd --add-service=https --permanent
After that, reload the firewalld to apply new changes and verify the list of enabled services on firewalld.
sudo firewall-cmd --reload
sudo firewall-cmd --list-services
This will give the following output - Both HTTP and HTTPS services is added to the firewalld.
With the HTTP and HTTPS ports opened, you'll then start the initial installation and configuration of Jenkins via the web browser.
Jenkins Initial Configurations
Before starting the Jenkins initial configuration, run the following command to get the initial password for Jenkins. The initial admin password is required the first time when configuring Jenkins.
sudo cat /var/lib/jenkins/secrets/initialAdminPassword
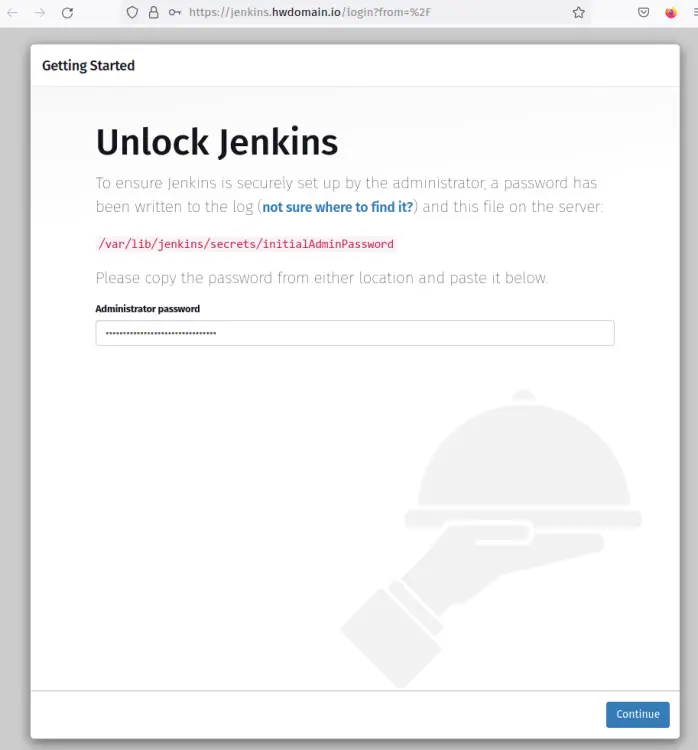
Now open the web browser and visit the domain name of your Jenkins installation (i.e: https://jenkins.howtoforge.local/).
On the first page, you will be asked for the Jenkins Initial Admin Password. Paste your Jenkins initial password and click 'Continue'.
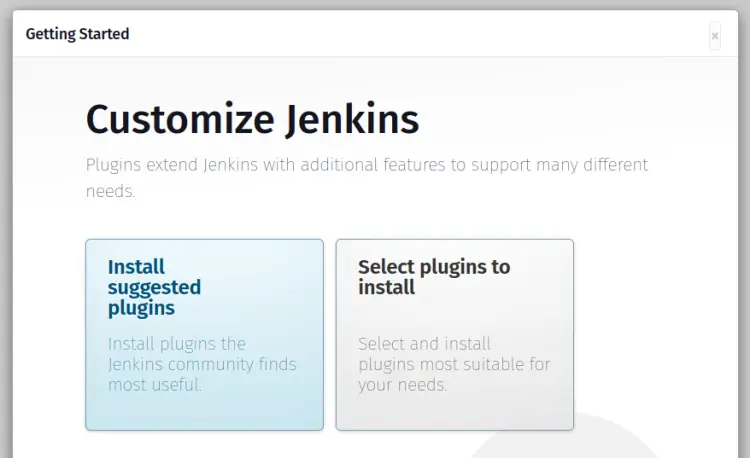
Now customize the Jenkins installation by installing some plugins. You can select plugins manually (for experts), or you can select the option 'install suggested plugins' to install recommended plugins by Jenkins.
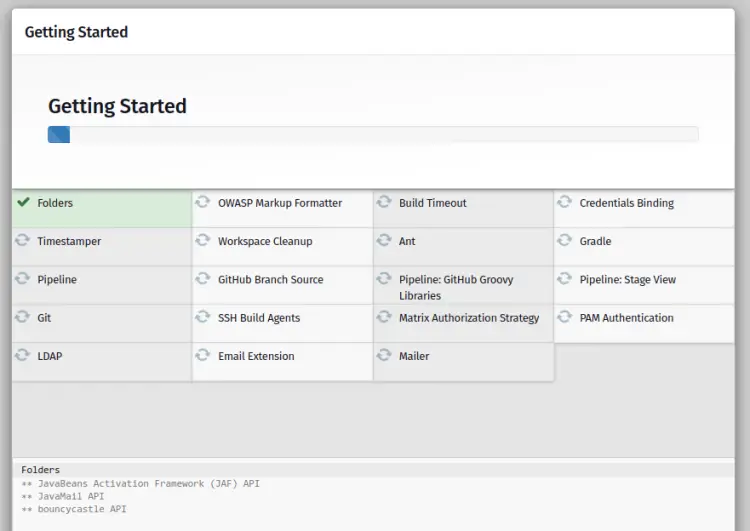
Jenkins plugin installation will now begin. All of those plugins will now be installed on your Jenkins.
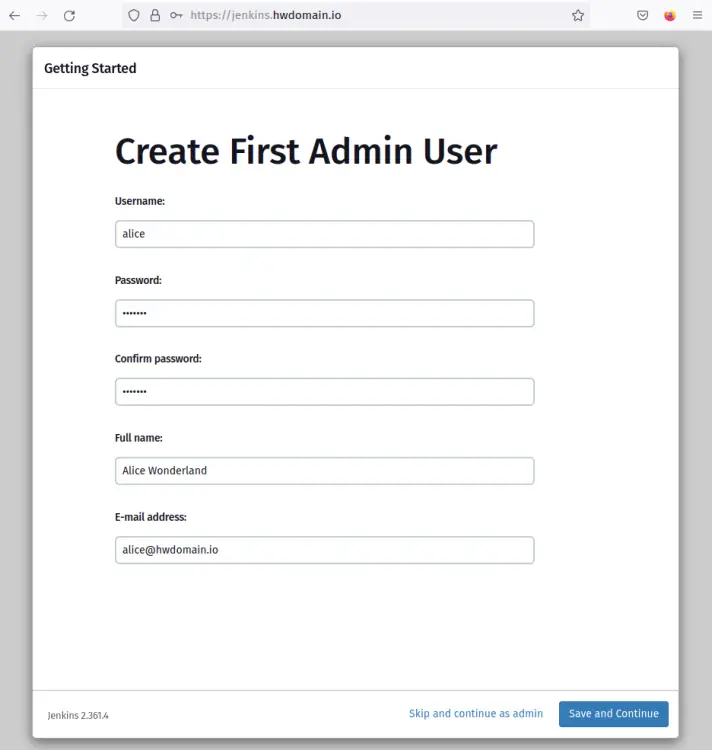
When the plugin installation is finished, you'll then set up the administrator user for Jenkins. Input details, user, email, and password for your Jenkins, and click 'Save and continue'.
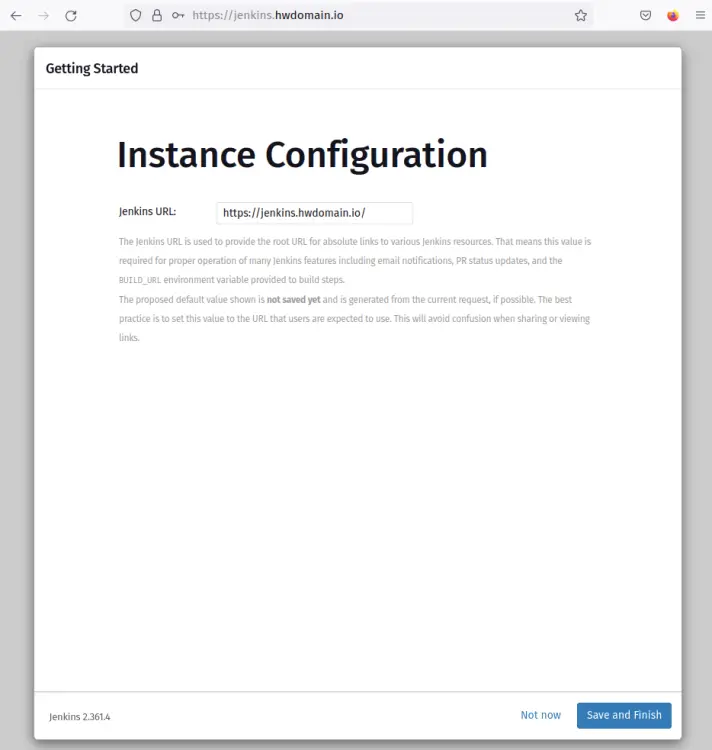
Next, input the Jenkins URL in the instance configuration. In this example, Jenkins runs with httpd reverse proxy on the domain 'https://jenkins.howtoforge.local/'.
Click 'Save and Finish' to complete Jenkins's initial configuration.
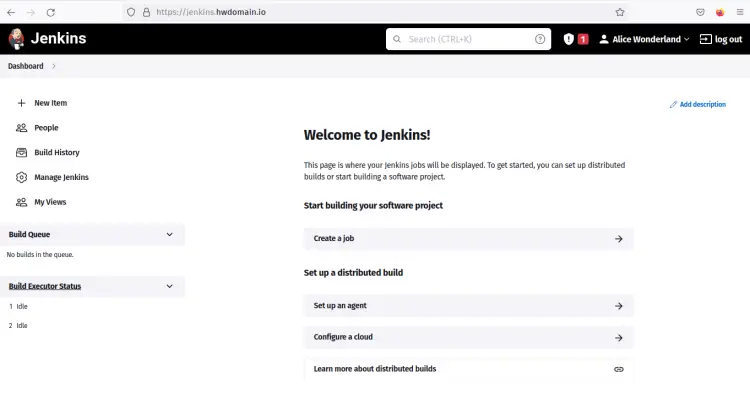
After Jenkins's initial configuration is finished, you'll then be redirected to the Jenkins dashboard.
You now have completed the Jenkins initial configurations. With this in mind, you can create and set up a new Jenkins build. Read on to learn about Jenkins Build.
Create First Jenkins Build
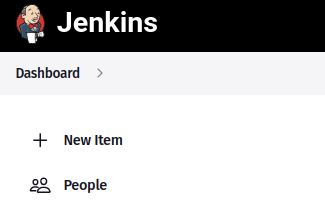
On the Jenkins dashboard, click the menu New Item to create a new Jenkins build.
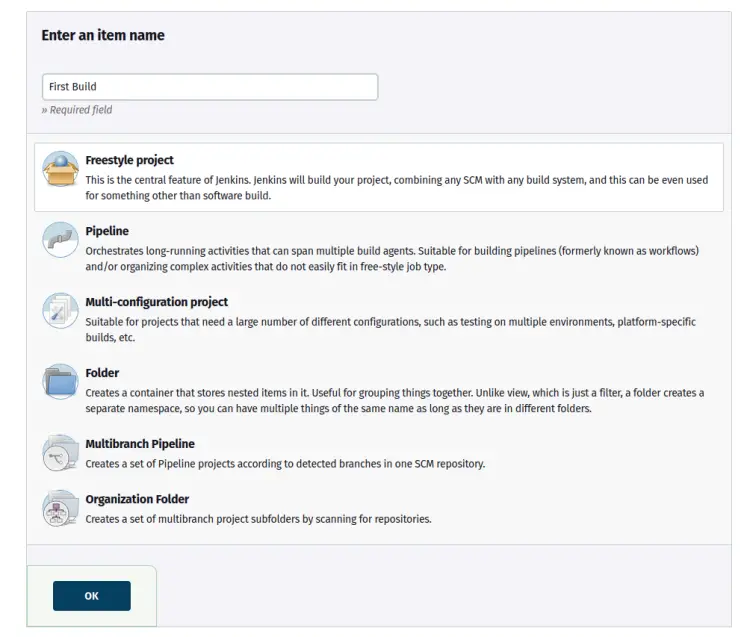
Input the project name for this new build and select the type of the project. In this example, you'll create a new Jenkins build "First Build" with the type "Freestyle project'.
Click OK to continue.
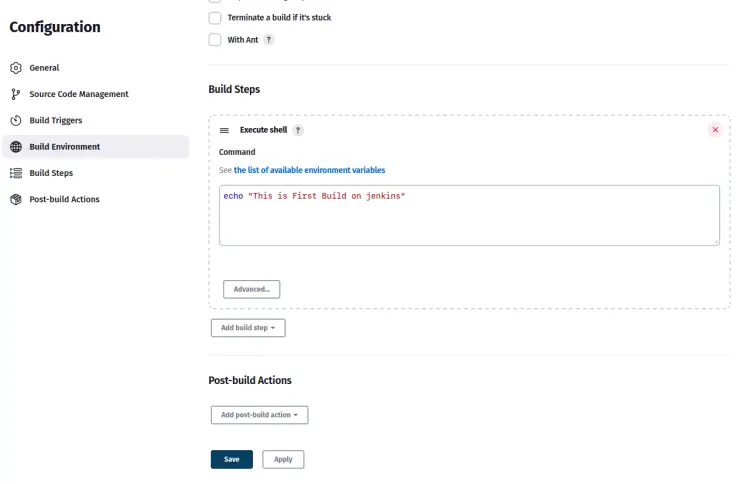
On the "General" section, input the project description. Then, move to the "Build Steps" section.
Select the build spets as "Execute shell" and input the simple bash command below.
echo "This is First build on jenkins"
Now click Save to confirm and create the Jenkins build.
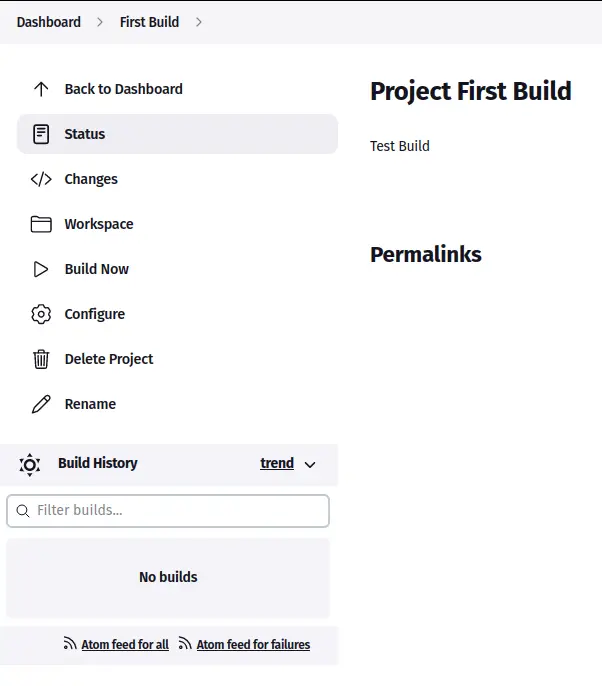
You will now be redirected to the Jenkins build page for the project "First Build".
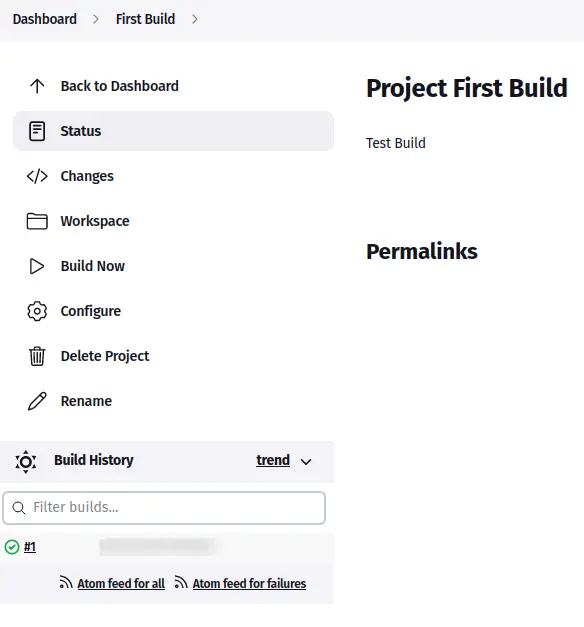
Click "Build Now" to start and run the Jenkins build. After running the project, you should see the build history under the "Build History" section.
In the following screenshot, there is only one Jenkins build history.
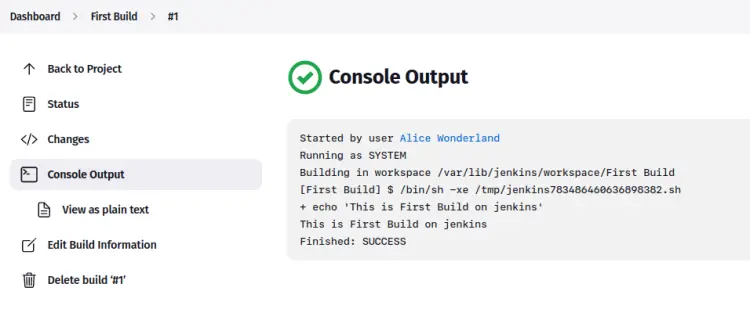
Click on build history number 1 to get more details output of the Jenkins builds. Now click "Console Output" to get detailed output generated by Jenkins build.
You now learned how to create and run Jenkins build.
Conclusion
In this article, you installed Jenkins on a Rocky Linux 9 server. You also installed and configured the Apache2/httpd web server as a reverse proxy for Jenkins and secured the Jenkins installation via SSL certificates and firewalld.
In addition to that, you also learned how the basic initial configuration for Jenkins and how to create and run Jenkins build via the Jenkins administration web interface.
Now that you've fully operational Jenkins deployment, you can add your project and set up Jenkins build for your application. Also, you can extend Jenkins functionality by adding plugins that are suitable for your environment.


