How to Install Jenkins on Rocky Linux 8
Jenkins is an open-source continuous build system. It is a server-based application written in Java, and it typically runs as a background service on Windows or Unix machines. We use Jenkins to automatically monitor the repository for changes of our source code. As soon as someone pushes his/her changes to the central source code repository, Jenkins analyzes the new source files for changes. If it finds that the source file has changed since our last compilation, then Jenkins initiates a new build on our Continuous Integration Server.
Jenkins helps us substantially with two important tasks:
- It makes sure that all of the developers are working with the latest version of the project's sources
- It alerts everybody in case something goes wrong during a build or deployment.
Jenkins supports many different Code Management (SCM) DevOps Tools like BitBucket, Git, CVS, Mercurial, Perforce, etc. By using Jenkins to poll for changes in our source code repository, we can make sure that all developers have the latest copy of the project's sources and they are working with these fresh new changes.
For example, Developer A checks out a fresh version from the project's main source control system, and once he has made some changes to a few files, he might push his local commits so that other developers can use them. Developer B might have been editing the same file at around this time, and then she too pushes her changes into the central code repo. Suddenly whenever developer A tries to check out his local copy of the project, he will be notified that there are newer changes available in the central code repository. This saves us from pulling half-baked or out-of-date changes from other developers and losing our own edits every now and then.
In this guide, we walk you through the process of installing and configuring a Jenkins server on a Rocky Linux 8 machine. This guide is also applicable for other Red Hat Linux and SUSE Linux OS.
Prerequisites
- A server with a fresh installation of Rocky Linux 8, with a minimum of 1GB of RAM. 10 GB of free space for each docker container Jenkins will create.
- A non-root user with sudo privileges.
- This guide assumes that your server can access the internet, either through a direct connection or via an upstream router/proxy.
Step 1: Updating the System
The first thing we need to do is update our system. It's important to have a clean slate by updating all of the existing packages on our machine.
sudo dnf update
or
sudo yum update
Rebooting the system is advised if you have upgraded any important system packages, such as the Kernel, in order to ensure that the changes are correctly applied.
sudo reboot now
Log back in using the same non-root user and proceed to the next step.
Step 2: Installing Java
Jenkins requires the Java Development Kit(JDK) to run, so we will need to install that. The JDK is a package in most Linux distributions that contains the Java Runtime Environment (JRE) and other tools for running/developing applications and libraries written in the Java programming language.
Both JDK 11 and JDK 8 are available in the official repo of Rocky Linux 8. You can check which JDK version is available on your system by typing the command below.
sudo dnf search java-*-openjdk
You should see an output like the one below.
Jenkins can run on both JDK 11 and JDK 8, but some old Jenkins plugins may not be compatible with JDK 11. It's recommended to use JDK 8. In this step, we install JDK 8 using the following command.
sudo dnf install java-1.8.0-openjdk -y
Once java is installed, you can verify that the software installed properly by checking its version.
java -version
You should see an output like the one below.
Step 3: Adding the Jenkins Repository
The Jenkins package isn’t included in the official repo of Rocky Linux 8. You have to add a Jenkins repository for the system to download and install the package from it. We will be using the official Jenkins repository provided by Jenkins team.
sudo dnf install wget -y
sudo wget -O /etc/yum.repos.d/jenkins.repo https://pkg.jenkins.io/redhat-stable/jenkins.repo
Now, add the GPG key for the repository using the rpm command.
sudo rpm --import https://pkg.jenkins.io/redhat-stable/jenkins.io.key
Let’s check if the repository was added successfully or not by using the following command.
sudo dnf repolist
If everything went correctly, you should see an output like the one below.
Step 4: Installing Jenkins Server
Before you can install the Jenkins server, update the repositories using the following command:
sudo dnf update -y
Now, you can install the Jenkins server by typing the following command.
sudo dnf install jenkins -y
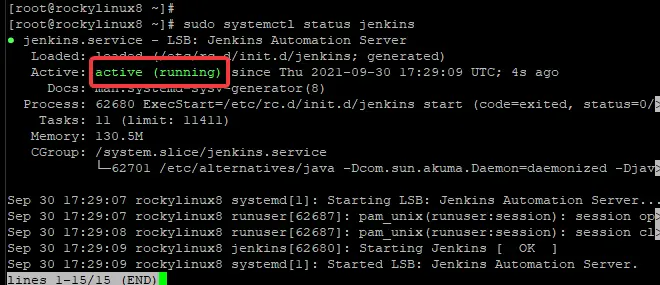
If there is no error or any specific message on the screen after you type the above command, it means Jenkins installation is successful. To check if everything is successfully installed, run the following command:
sudo systemctl status jenkins
The output of this command should be something like this.
If the jenkins service is not running, you can start it by typing the following command.
sudo systemctl start jenkins
To enable the jenkins service to start up automatically every time you reboot your system, type:
sudo systemctl enable jenkins
Step 5: Configuring the Firewall
If you install Jenkins on a server behind a firewall, you will need to open some ports both in the firewall and in the host machine so that Jenkins can be accessed.
Jenkins uses port 8080 by default for remote access, so you may want to open this port to allow an external connection.
sudo firewall-cmd --permanent --zone=public --add-port=8080/tcp
Reload your firewall to apply the changes you made.
sudo firewall-cmd --reload
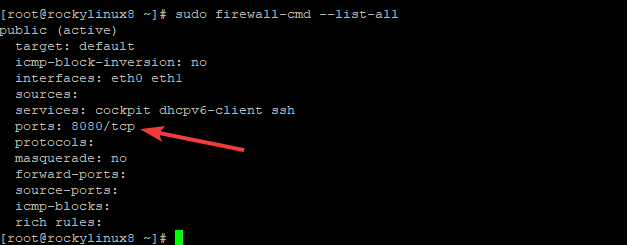
If successful, port 8080 should be open in the external zone of your firewall. You can verify by running the command below.
sudo firewall-cmd --list-all
You should get an output like this.
Step 6: Setting Up the Jenkins Server
Open up a web browser and type the server IP address with port 8080 to access Jenkins.
http://server_IP_address:8080
Where: server_IP_address is the actual IP address of your server. For example, to access the Jenkins server on 192.168.1.5, you would type http://192.168.1.5:8080.
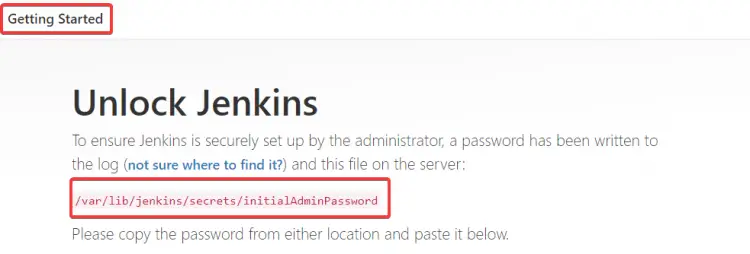
The Getting Started page for Jenkins should appear, with a tip on how to retrieve an initial admin password.
This is a temporary password that was created automatically (but not shown) by the Jenkins server during installation.
Go back to your terminal and run the following command to retrieve the password.
sudo cat /var/lib/jenkins/secrets/initialAdminPassword
This will print the admin password in your terminal.
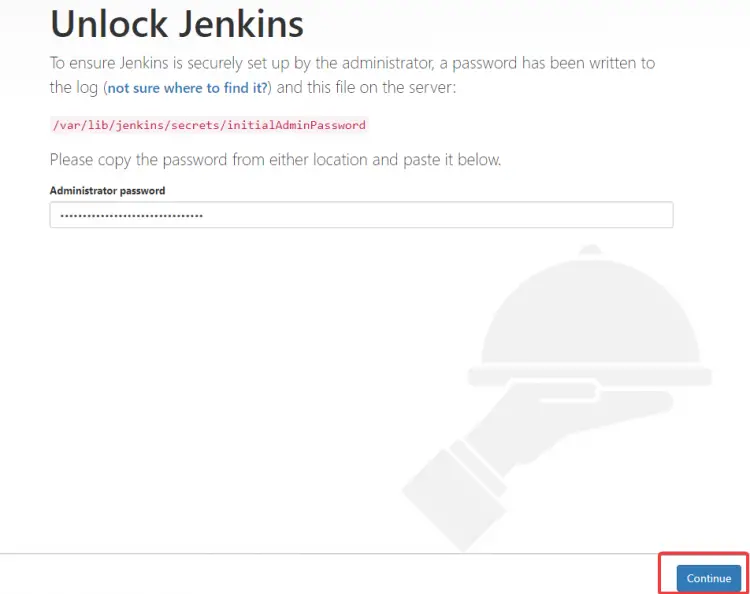
Copy and paste this password into the initial admin password field on Jenkins’s Getting Started page. Click on Continue at the bottom right.
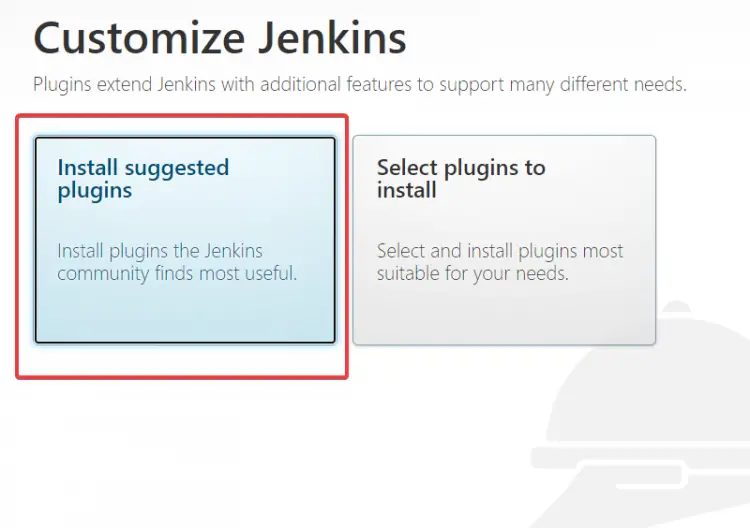
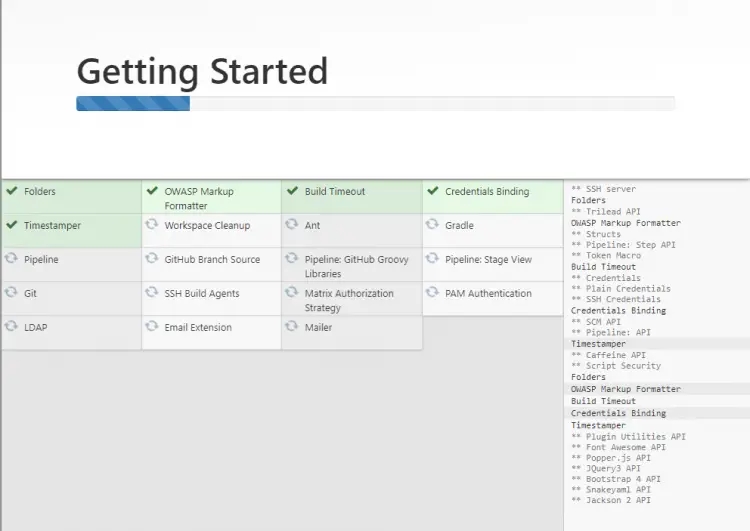
You will be taken to the plug-in page. Select the Install suggested plugins, and click on Install at the bottom of the page.
This installs a standard set of plugins that are required for Jenkins to function properly.
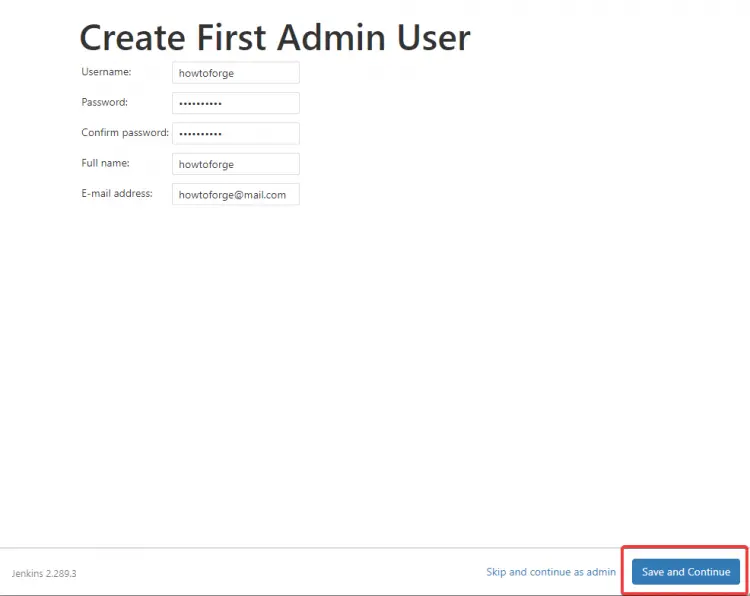
Once the installation completes, you will be taken to the Create First Admin User page. Type a username and password for the first admin user. And click on Save and continue.
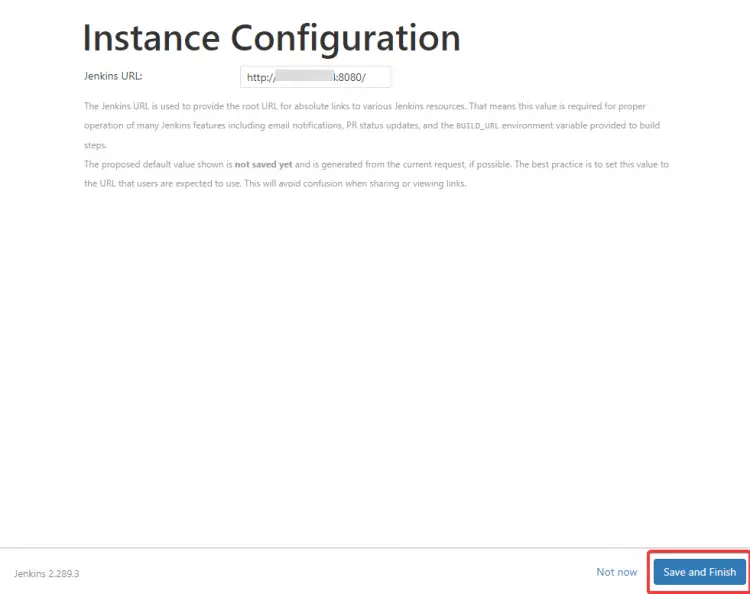
You will be given an Instance Configuration page, where you need to specify the root URL for your Jenkins server. Keep the default and click on Save and finish.
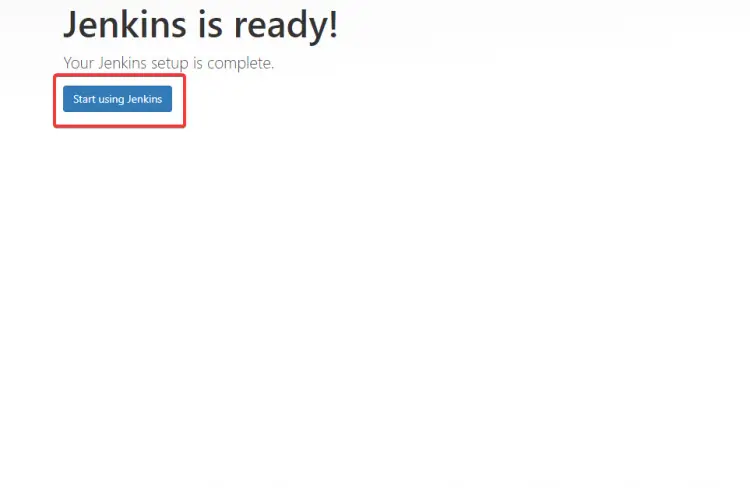
Finally, click on Start using Jenkins on the last page.
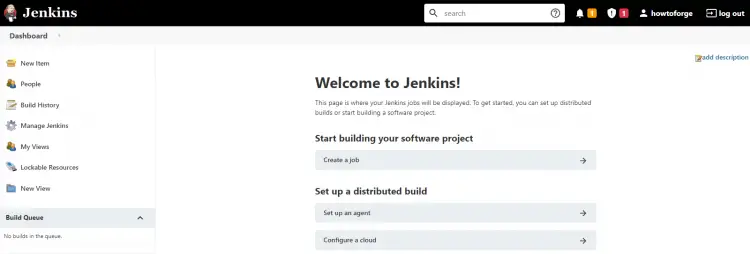
You will be taken to the Jenkins dashboard, where you will start building your first project.
The Jenkins installation and configuration are now complete.
Conclusion
In this tutorial, you learned how to install Jenkins on a Rocky Linux 8 system. You can now enjoy the benefits of continuous integration and continuous delivery in your project development process. Happy coding!
For more information about Jenkins, please see the official Jenkins documentation.
If you have any questions or suggestions, feel free to leave a comment below.


