How to Install Jellyfin Media Server on Rocky Linux 9
On this page
Jellyfin is a free and open-source media server that allows you to stream content that can be accessed from anywhere. It supports movies, TV shows, music, and Live TV/DVR. Jellyfin server can be set up on Windows, Linux, or macOS and its content accessed instantly from different devices using browsers and mobile apps using a public URL. It even makes it possible to stream these files on other PCs, TVs, or phones so long as these media devices are connected to the internet or the same network. It offers several features including, Supports DLNA, No playback limit, Fetching metadata automatically from TheTVDB, TheMovieDB, and Rotten Tomatoes, Automatic recordings, Supports hardware acceleration, and many more.
Jellyfin is a fork of the Emby Media server after Emby transitioned into a proprietary license model.
In this tutorial, you will learn how to install Jellyfin Media Server using Docker on a Rocky Linux 9 server.
Prerequisites
-
A server running Rocky Linux 9 with a minimum of 2 CPU cores and 4GB of memory. You will need to upgrade the server as per requirements.
-
A non-root user with sudo privileges.
-
A fully qualified domain name (FQDN) pointing to your server. For our purposes, we will use
jellyfin.example.comas the domain name. -
Make sure everything is updated.
$ sudo dnf update
-
Install basic utility packages. Some of them may already be installed.
$ sudo dnf install wget curl nano unzip yum-utils -y
Step 1 - Configure Firewall
The first step is to configure the firewall. Rocky Linux uses Firewalld Firewall. Check the firewall's status.
$ sudo firewall-cmd --state
running
The firewall works with different zones, and the public zone is the default one that we will use. List all the services and ports active on the firewall.
$ sudo firewall-cmd --permanent --list-services
It should show the following output.
cockpit dhcpv6-client ssh
Jellyfin needs HTTP and HTTPS ports to function. Open them.
$ sudo firewall-cmd --permanent --add-service=http
$ sudo firewall-cmd --permanent --add-service=https
Add masquerade, as the application will contact other instances.
$ sudo firewall-cmd --permanent --add-masquerade
Reload the firewall to apply the changes.
$ sudo firewall-cmd --reload
Step 2 - Install Docker and Docker Compose
Rocky Linux ships with an older version of Docker. To install the latest version, first, install the official Docker repository.
$ sudo yum-config-manager \
    --add-repo \
    https://download.docker.com/linux/centos/docker-ce.repo
Install the latest version of Docker.
$ sudo dnf install docker-ce docker-ce-cli containerd.io
You may get the following error while trying to install Docker.
ror:
 Problem: problem with installed package buildah-1:1.26.2-1.el9_0.x86_64
  - package buildah-1:1.26.2-1.el9_0.x86_64 requires runc >= 1.0.0-26, but none of the providers can be installed
  - package containerd.io-1.6.9-3.1.el9.x86_64 conflicts with runc provided by runc-4:1.1.3-2.el9_0.x86_64
  - package containerd.io-1.6.9-3.1.el9.x86_64 obsoletes runc provided by runc-4:1.1.3-2.el9_0.x86_64
  - cannot install the best candidate for the job
Use the following command if you get the error above.
$ sudo dnf install docker-ce docker-ce-cli containerd.io docker-compose-plugin --allowerasing
Enable and run the Docker daemon.
$ sudo systemctl enable docker --now
Verify that it is running.
? docker.service - Docker Application Container Engine
     Loaded: loaded (/usr/lib/systemd/system/docker.service; enabled; vendor preset: disabled)
     Active: active (running) since Sat 2022-11-12 00:19:44 UTC; 6s ago
TriggeredBy: ? docker.socket
       Docs: https://docs.docker.com
   Main PID: 99263 (dockerd)
      Tasks: 8
     Memory: 28.1M
        CPU: 210ms
     CGroup: /system.slice/docker.service
             ??99263 /usr/bin/dockerd -H fd:// --containerd=/run/containerd/containerd.sock
By default, Docker requires root privileges. If you want to avoid using sudo every time you run the docker command, add your username to the docker group.
$ sudo usermod -aG docker $(whoami)
You will need to log out of the server and back in as the same user to enable this change or use the following command.
$ su - ${USER}
Confirm that your user is added to the Docker group.
$ groups
navjot wheel docker
Step 3 - Create Docker Compose Configuration
Create the directory for Jellyfin Docker Configuration.
$ mkdir ~/jellyfin
Switch to the directory.
$ cd ~/jellyfin
Create and open the Docker compose file for editing.
$ nano docker-compose.yml
Paste the following code in it.
version: '3.8'
services:
  jellyfin:
    image: jellyfin/jellyfin
    container_name: jellyfin
    user: 1000:1000
    volumes:
      - ./config:/config
      - ./cache:/cache
      - ./media:/media
      - ./media2:/media2:ro
    restart: 'unless-stopped'
    ports:
      - 8096:8096
    # Optional - alternative address used for autodiscovery
    environment:
      - JELLYFIN_PublishedServerUrl=http://jellyfin.example.com
Save the file by pressing Ctrl + X and entering Y when prompted.
The above docker file pulls the latest version of the Jellyfin server from the Docker Hub registry. The user and group ID for the image are set to 1000. You can change it according to your system user's id for the correct permissions. We have mounted directories for the cache, configuration, and media files. The container's restart policy is set to unless-stopped which means it will keep running unless stopped manually. Jellyfin runs on port 8096 by default which is what we have exposed to the host for Nginx to use later. We have also set an environment variable specifying Jellyfin's public URL.
Create directories for the cache, and configuration directories. And then mount them as persistent volumes in the compose file. We also have mounted two media files in our file. You can file as many media directories as you want. The media2 directory is mounted as read-only.
Step 4 - Start Jellyfin
Validate the Docker compose configuration using the following command.
$ docker compose config
You will receive a similar output confirming the validity.
name: jellyfin
services:
  jellyfin:
    container_name: jellyfin
    environment:
      JELLYFIN_PublishedServerUrl: http://jellyfin.nspeaks.xyz
    image: jellyfin/jellyfin
    network_mode: host
    restart: unless-stopped
    user: 1000:1000
    volumes:
    - type: bind
      source: /home/navjot/jellyfin/config
      target: /config
      bind:
        create_host_path: true
    - type: bind
      source: /home/navjot/jellyfin/cache
      target: /cache
      bind:
        create_host_path: true
    - type: bind
      source: /home/navjot/jellyfin/media
      target: /media
      bind:
        create_host_path: true
    - type: bind
      source: /home/navjot/jellyfin/media2
      target: /media2
      read_only: true
      bind:
        create_host_path: true
Start the Jellyfin container.
$ docker compose up -d
Step 5 - Install Nginx
Rocky Linux ships with an older version of Nginx. You need to download the official Nginx repository to install the latest version.
Create and open the /etc/yum.repos.d/nginx.repo file for creating the official Nginx repository.
$ sudo nano /etc/yum.repos.d/nginx.repo
Paste the following code in it.
[nginx-stable]
name=nginx stable repo
baseurl=http://nginx.org/packages/centos/$releasever/$basearch/
gpgcheck=1
enabled=1
gpgkey=https://nginx.org/keys/nginx_signing.key
module_hotfixes=true

[nginx-mainline]
name=nginx mainline repo
baseurl=http://nginx.org/packages/mainline/centos/$releasever/$basearch/
gpgcheck=1
enabled=0
gpgkey=https://nginx.org/keys/nginx_signing.key
module_hotfixes=true
Save the file by pressing Ctrl + X and entering Y when prompted.
Install the Nginx server.
$ sudo dnf install nginx
Verify the installation.
$ nginx -v
nginx version: nginx/1.22.1
Enable and start the Nginx server.
$ sudo systemctl enable nginx --now
Check the status of the server.
$ sudo systemctl status nginx
? nginx.service - nginx - high performance web server
     Loaded: loaded (/usr/lib/systemd/system/nginx.service; enabled; vendor preset: disabled)
     Active: active (running) since Sun 2022-11-13 13:49:55 UTC; 1s ago
       Docs: http://nginx.org/en/docs/
    Process: 230797 ExecStart=/usr/sbin/nginx -c /etc/nginx/nginx.conf (code=exited, status=0/SUCCESS)
   Main PID: 230798 (nginx)
      Tasks: 3 (limit: 12355)
     Memory: 2.8M
        CPU: 13ms
     CGroup: /system.slice/nginx.service
             ??230798 "nginx: master process /usr/sbin/nginx -c /etc/nginx/nginx.conf"
             ??230799 "nginx: worker process"
             ??230800 "nginx: worker process"
Step 6 - Install SSL
Certbot tool generates SSL certificates using Let's Encrypt API. It requires the EPEL repository to work.
$ sudo dnf install epel-release
We will use Snapd to install Certbot. Install Snapd.
$ sudo dnf install snapd
Enable and Start the Snap service.
$ sudo systemctl enable snapd --now
Install the Snap core package.
$ sudo snap install core
$ sudo snap refresh core
Create necessary links for Snapd to work.
$ sudo ln -s /var/lib/snapd/snap /snap
$ echo 'export PATH=$PATH:/var/lib/snapd/snap/bin' | sudo tee -a /etc/profile.d/snapd.sh
Issue the following command to install Certbot.
$ sudo snap install --classic certbot
Enable Certbot by creating the symlink to its executable.
$ sudo ln -s /snap/bin/certbot /usr/bin/certbot
Generate the SSL certificate.
$ sudo certbot certonly --nginx --agree-tos --no-eff-email --staple-ocsp --preferred-challenges http -m [email protected] -d jellyfin.example.com
The above command will download a certificate to the /etc/letsencrypt/live/jellyfin.example.com directory on your server.
Generate a Diffie-Hellman group certificate.
$ sudo openssl dhparam -dsaparam -out /etc/ssl/certs/dhparam.pem 4096
To check whether the SSL renewal is working fine, do a dry run of the process.
$ sudo certbot renew --dry-run
If you see no errors, you are all set. Your certificate will renew automatically.
Step 7 - Config Nginx
Open the file /etc/nginx/nginx.conf for editing.
$ sudo nano /etc/nginx/nginx.conf
Add the following line before the line include /etc/nginx/conf.d/*.conf;.
server_names_hash_bucket_size 64;
Save the file by pressing Ctrl + X and entering Y when prompted.
Create and open the file /etc/nginx/conf.d/jellyfin.conf for editing.
$ sudo nano /etc/nginx/conf.d/jellyfin.conf
Paste the following code in it.
## Censor sensitive information in logs
log_format stripsecrets '$remote_addr $host - $remote_user [$time_local] '
                    '"$secretfilter" $status $body_bytes_sent '
                    '$request_length $request_time $upstream_response_time '
                    '"$http_referer" "$http_user_agent"';

map $request $secretfilter {
    ~*^(?<prefix1>.*[\?&]api_key=)([^&]*)(?<suffix1>.*)$  "${prefix1}***$suffix1";
    default                                               $request;
}

# Cache video streams
# Set in-memory cache-metadata size in keys_zone, size of video caching and how many days a cached object should persist
proxy_cache_path  /var/cache/nginx/jellyfin-videos levels=1:2 keys_zone=jellyfin-videos:100m inactive=90d max_size=35000m;
map $request_uri $h264Level { ~(h264-level=)(.+?)& $2; }
map $request_uri $h264Profile { ~(h264-profile=)(.+?)& $2; }

# Cache images
proxy_cache_path /var/cache/nginx/jellyfin levels=1:2 keys_zone=jellyfin:100m max_size=15g inactive=30d use_temp_path=off;

limit_conn_zone $binary_remote_addr zone=addr:10m;

server {
  listen 80;
  listen [::]:80;
  server_name jellyfin.example.com;
  location / { return 301 https://$host$request_uri; }
}

server {
   listen 443 ssl http2;
   listen [::]:443 ssl http2;
   server_name jellyfin.example.com;

   ## The default `client_max_body_size` is 1M, this might not be enough for some posters, etc.
   client_max_body_size 20M;

   # use a variable to store the upstream proxy
   # in this example we are using a hostname which is resolved via DNS
   # (if you aren't using DNS remove the resolver line and change the variable to point to an IP address e.g `set $jellyfin 127.0.0.1`)
   set $jellyfin jellyfin;
   resolver 127.0.0.1 valid=30;

   access_log  /var/log/nginx/jellyfin.access.log stripsecrets;
   error_log   /var/log/nginx/jellyfin.error.log;

   http2_push_preload on; # Enable HTTP/2 Server Push

   ssl_certificate /etc/letsencrypt/live/jellyfin.example.com/fullchain.pem;
   ssl_certificate_key /etc/letsencrypt/live/jellyfin.example.com/privkey.pem;
   ssl_trusted_certificate /etc/letsencrypt/live/jellyfin.example.com/chain.pem;
   ssl_session_timeout 1d;

   # Enable TLS versions (TLSv1.3 is required upcoming HTTP/3 QUIC).
   ssl_protocols TLSv1.2 TLSv1.3;

   # Enable TLSv1.3's 0-RTT. Use $ssl_early_data when reverse proxying to
   # prevent replay attacks.
   #
   # @see: https://nginx.org/en/docs/http/ngx_http_ssl_module.html#ssl_early_data
   ssl_early_data on;

   ssl_ciphers 'ECDHE-ECDSA-AES256-GCM-SHA384:ECDHE-RSA-AES256-GCM-SHA384:ECDHE-ECDSA-CHACHA20-POLY1305:ECDHE-RSA-CHACHA20-POLY1305:ECDHE-ECDSA-AES256-SHA384:ECDHE-RSA-AES256-SHA384';
   ssl_prefer_server_ciphers on;
   ssl_session_cache shared:SSL:10m;
   ssl_session_tickets off;

   keepalive_timeout    70;
   sendfile             on;
   client_max_body_size 80m;

   # OCSP Stapling ---
   # fetch OCSP records from URL in ssl_certificate and cache them
   ssl_stapling on;
   ssl_stapling_verify on;
   ssl_dhparam /etc/ssl/certs/dhparam.pem;

   # Content Security Policy
   # See: https://developer.mozilla.org/en-US/docs/Web/HTTP/CSP
   # Enforces https content and restricts JS/CSS to origin
   # External Javascript (such as cast_sender.js for Chromecast) must be whitelisted.
   # NOTE: The default CSP headers may cause issues with the webOS app
   add_header Content-Security-Policy "default-src https: data: blob: http://image.tmdb.org; style-src 'self' 'unsafe-inline'; script-src 'self' 'unsafe-inline' https://www.gstatic.com/cv/js/sender/v1/cast_sender.js https://www.gstatic.com/eureka/clank/95/cast_sender.js https://www.gstatic.com/eureka/clank/96/cast_sender.js https://www.gstatic.com/eureka/clank/97/cast_sender.js https://www.youtube.com blob:; worker-src 'self' blob:; connect-src 'self'; object-src 'none'; frame-ancestors 'self'";

   # Security / XSS Mitigation Headers
   # NOTE: X-Frame-Options may cause issues with the webOS app
   add_header X-Frame-Options "SAMEORIGIN";
   add_header X-XSS-Protection "1; mode=block";
   add_header X-Content-Type-Options "nosniff";
   add_header X-Early-Data $tls1_3_early_data;

   location = / {
       return 302 http://$host/web/;
       return 302 https://$host/web/;
   }

   location / {
       # Proxy main Jellyfin traffic
       proxy_pass http://$jellyfin:8096;
       proxy_set_header Host $host;
       proxy_set_header X-Real-IP $remote_addr;
       proxy_set_header X-Forwarded-For $proxy_add_x_forwarded_for;
       proxy_set_header X-Forwarded-Proto $scheme;
       proxy_set_header X-Forwarded-Protocol $scheme;
       proxy_set_header X-Forwarded-Host $http_host;
       proxy_buffering off;
  }

  # location block for /web - This is purely for aesthetics so /web/#!/ works instead of having to go to /web/index.html/#!/
   location = /web/ {
       # Proxy main Jellyfin traffic
       proxy_pass http://$jellyfin:8096/web/index.html;
       proxy_set_header Host $host;
       proxy_set_header X-Real-IP $remote_addr;
       proxy_set_header X-Forwarded-For $proxy_add_x_forwarded_for;
       proxy_set_header X-Forwarded-Proto $scheme;
       proxy_set_header X-Forwarded-Protocol $scheme;
       proxy_set_header X-Forwarded-Host $http_host;
   }

   location /socket {
       # Proxy Jellyfin Websockets traffic
       proxy_pass http://$jellyfin:8096;
       proxy_http_version 1.1;
       proxy_set_header Upgrade $http_upgrade;
       proxy_set_header Connection "upgrade";
       proxy_set_header Host $host;
       proxy_set_header X-Real-IP $remote_addr;
       proxy_set_header X-Forwarded-For $proxy_add_x_forwarded_for;
       proxy_set_header X-Forwarded-Proto $scheme;
       proxy_set_header X-Forwarded-Protocol $scheme;
       proxy_set_header X-Forwarded-Host $http_host;
   }

   # Cache video streams
   location ~* ^/Videos/(.*)/(?!live)
   {
       # Set size of a slice (this amount will be always requested from the backend by nginx)
       # Higher value means more latency, lower more overhead
       # This size is independent of the size clients/browsers can request
       slice 2m;

       proxy_cache jellyfin-videos;
       proxy_cache_valid 200 206 301 302 30d;
       proxy_ignore_headers Expires Cache-Control Set-Cookie X-Accel-Expires;
       proxy_cache_use_stale error timeout invalid_header updating http_500 http_502 http_503 http_504;
       proxy_connect_timeout 15s;
       proxy_http_version 1.1;
       proxy_set_header Connection "";
       # Transmit slice range to the backend
       proxy_set_header Range $slice_range;

       # This saves bandwidth between the proxy and jellyfin, as a file is only downloaded one time instead of multiple times when multiple clients want to at the same time
       # The first client will trigger the download, the other clients will have to wait until the slice is cached
       # Esp. practical during SyncPlay
       proxy_cache_lock on;
       proxy_cache_lock_age 60s;

       proxy_pass http://$jellyfin:8096;
       proxy_cache_key "jellyvideo$uri?MediaSourceId=$arg_MediaSourceId&VideoCodec=$arg_VideoCodec&AudioCodec=$arg_AudioCodec&AudioStreamIndex=$arg_AudioStreamIndex&VideoBitrate=$arg_VideoBitrate&AudioBitrate=$arg_AudioBitrate&SubtitleMethod=$arg_SubtitleMethod&TranscodingMaxAudioChannels=$arg_TranscodingMaxAudioChannels&RequireAvc=$arg_RequireAvc&SegmentContainer=$arg_SegmentContainer&MinSegments=$arg_MinSegments&BreakOnNonKeyFrames=$arg_BreakOnNonKeyFrames&h264-profile=$h264Profile&h264-level=$h264Level&slicerange=$slice_range";

       # add_header X-Cache-Status $upstream_cache_status; # This is only for debugging cache
   }

   # Cache images
   location ~ /Items/(.*)/Images {
       proxy_pass http://127.0.0.1:8096;
       proxy_set_header Host $host;
       proxy_set_header X-Real-IP $remote_addr;
       proxy_set_header X-Forwarded-For $proxy_add_x_forwarded_for;
       proxy_set_header X-Forwarded-Proto $scheme;
       proxy_set_header X-Forwarded-Protocol $scheme;
       proxy_set_header X-Forwarded-Host $http_host;

       proxy_cache jellyfin;
       proxy_cache_revalidate on;
       proxy_cache_lock on;
       # add_header X-Cache-Status $upstream_cache_status; # This is only to check if cache is working
   }

   # Downloads limit (inside server block)
   location ~ /Items/(.*)/Download$ {
       proxy_pass http://127.0.0.1:8096;
       proxy_set_header Host $host;
       proxy_set_header X-Real-IP $remote_addr;
       proxy_set_header X-Forwarded-For $proxy_add_x_forwarded_for;
       proxy_set_header X-Forwarded-Proto $scheme;
       proxy_set_header X-Forwarded-Protocol $scheme;
       proxy_set_header X-Forwarded-Host $http_host;

       limit_rate 1700k; # Speed limit (here is on kb/s)
       limit_conn addr 3; # Number of simultaneous downloads per IP
       limit_conn_status 460; # Custom error handling
       # proxy_buffering on; # Be sure buffering is on (it is by default on nginx), otherwise limits won't work
   }

}

# This block is useful for debugging TLS v1.3. Please feel free to remove this
# and use the `$ssl_early_data` variable exposed by NGINX directly should you
# wish to do so.
map $ssl_early_data $tls1_3_early_data {
  "~." $ssl_early_data;
  default "";
}
Once finished, save the file by pressing Ctrl + X and entering Y when prompted.
Verify the Nginx configuration file syntax.
$ sudo nginx -t
nginx: the configuration file /etc/nginx/nginx.conf syntax is ok
nginx: configuration file /etc/nginx/nginx.conf test is successful
Configure SELinux to allow network connections.
$ sudo setsebool -P httpd_can_network_connect 1
Restart the Nginx server.
$ sudo systemctl restart nginx
If you get the following error, then it is most probably due to SELinux Restrictions.
nginx: [emerg] open() "/var/run/nginx.pid" failed (13: Permission denied)
To fix the error, run the following commands.
$ sudo ausearch -c 'nginx' --raw | audit2allow -M my-nginx
$ sudo semodule -X 300 -i my-nginx.pp
Start the Nginx service again.
$ sudo systemctl start nginx
Step 8 - Access and Configure Jellyfin
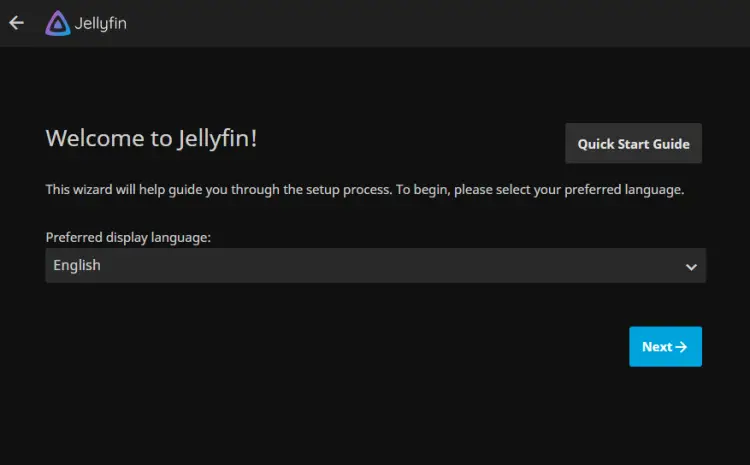
Visit the URL https://jellyfin.example.com and you will get the following screen.
Select the display language and click the Next button to proceed.
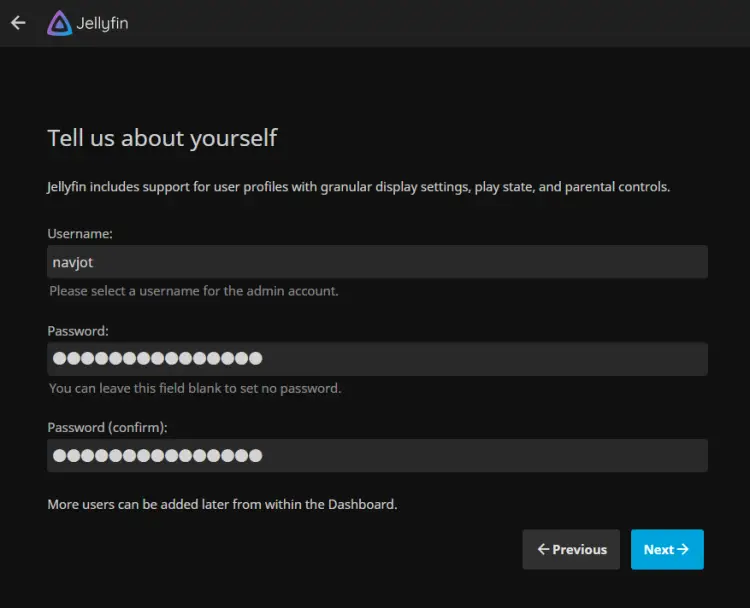
Enter your user details and click the Next button to proceed. Click the Add Media Library to add media libraries. We are adding one for movies.
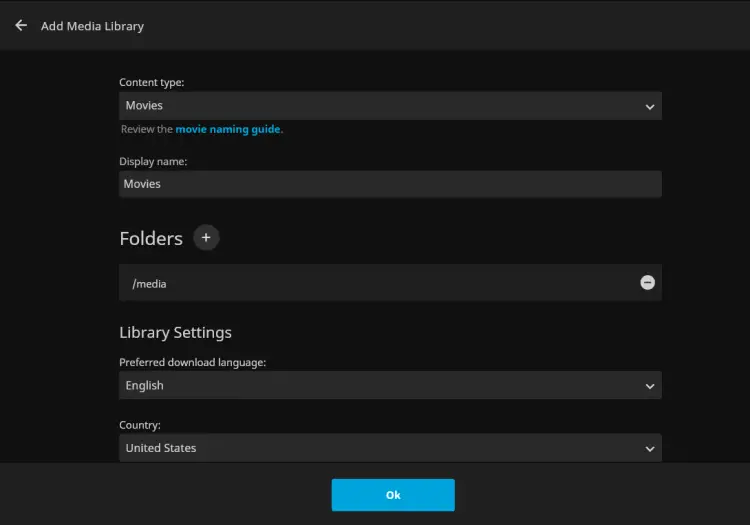
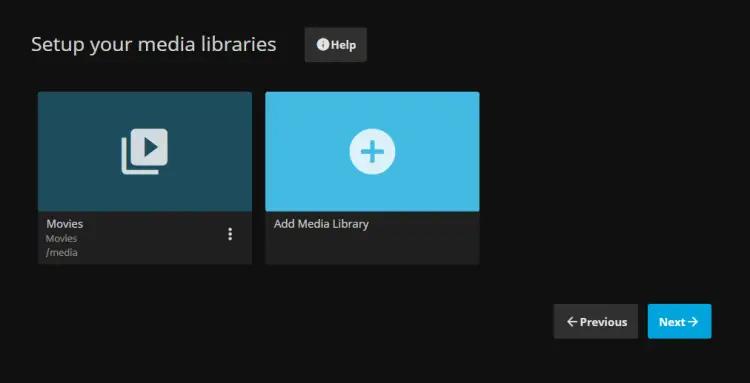
Fill in all the options and click the plus sign against the Folders option to select the folder for your library. Scroll down and fill in the required options. Click the Ok button to finish adding the library. You will be reverted to the library setup page.
Click the Next button to proceed.
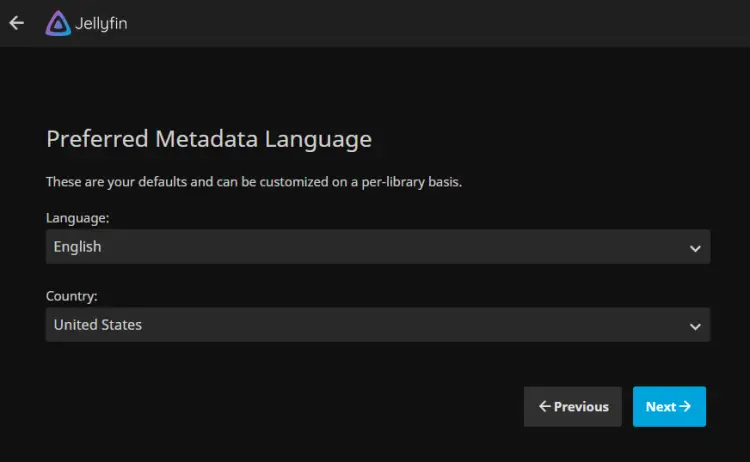
Select the language and country for your media's metadata and click the Next button to proceed.
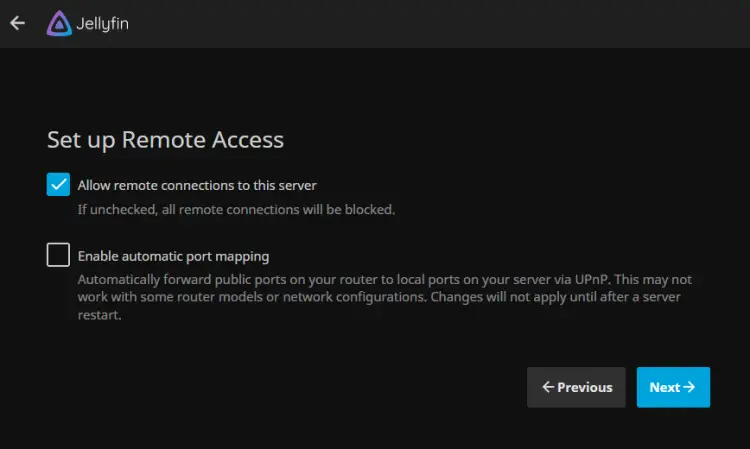
Make sure the Allow remote connections option is checked. If you want to use port mapping, enable it as well. Click the Next button when finished.
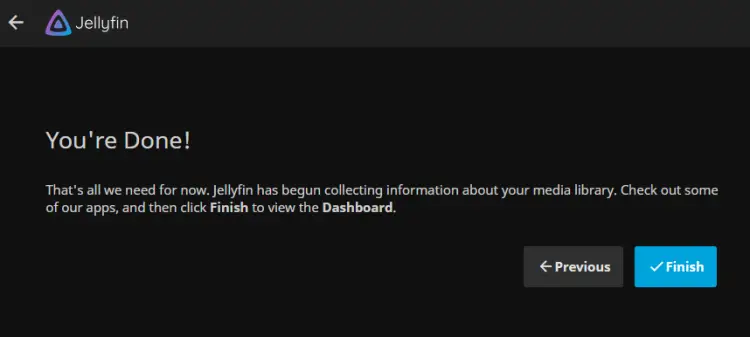
The setup is complete. Click the Finish button to proceed to the Jellyfin login page.
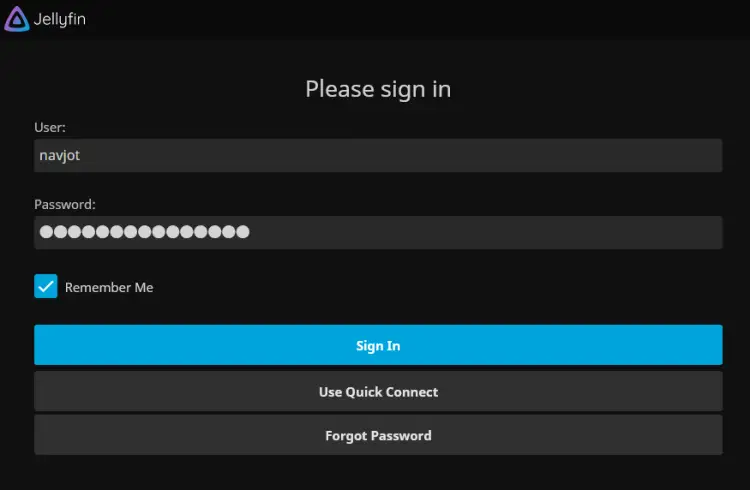
Enter your user details created earlier and click the Sign in button to proceed to the dashboard.
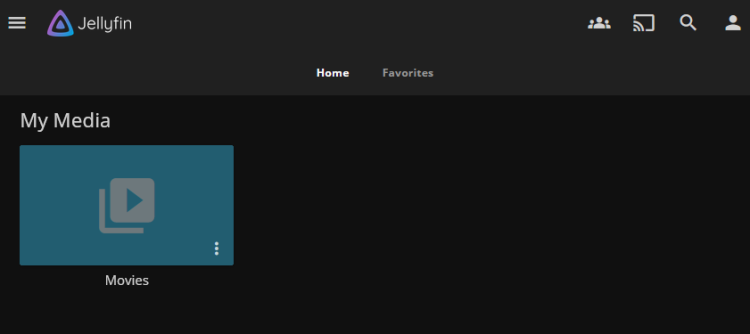
You can start using Jellyfin to play your content.
Step 9 - Upgrade Jellyfin
Upgrading Jellyfin is easy and requires a few steps. First, switch to the directory.
$ cd ~/jellyfin
Stop the Jellyfin Container.
$ docker compose down --remove-orphans
Pull the latest container image for Jellyfin.
$ docker compose pull
Make any changes in the docker-compose.yml if you want.
Start the Jellyfin container.
$ docker compose up -d
Conclusion
This concludes our tutorial on installing Jellyfin Media Server using Docker on a Rocky Linux 9 server. If you have any questions, post them in the comments below.

