How to Install Cockpit on AlmaLinux 8
Linux Cockpit is a browser-based user interface for Linux systems. Its goal is to make Linux system monitoring and administration easy and fun.
Linux Cockpit can be used as an alternative to a command-line or GUI tools like top, free, htop, lsof, iotop etc, to monitor resource usage such as CPU/Memory/Disk I/O and processes running on your system. It provides a full-fledged shell interface with tab completion on bash commands just like you have in any interactive shell session on your system.
You may have heard about Linux and its ability to be used as a server for your home or business. One way is by installing the Cockpit, which allows you to control various aspects of the system such as the graphical interface, the sound card, printers, network cards and more. This post will go over how to install Cockpit on your AlmaLinux 8 operating system so that you can experience all that it has to offer.
Prerequisites
- A server with AlmaLinux 8 installed.
- A non-root user with sudo privileges.
- A connection to the internet in order to download additional packages.
Step 1. Updating the System.
Before installing the Cockpit on your system, you must update your system to its latest version. Login to your Almalinux system via ssh and run the following command to ensure all packages are up to date.
sudo dnf update
sudo dnf install epel-release
Step 2. Installing Cockpit
The Cockpit packages are included in the default repositories so all you need to do is install it via the dnf package manager.
sudo dnf install cockpit -y
Once the installation has been completed, start and enable the Cockpit service in order to ensure that it will start up when your system starts.
sudo systemctl start cockpit.socket
sudo systemctl enable --now cockpit.socket
Verify the status of the Cockpit service to ensure that it has started successfully.
sudo systemctl status cockpit.socket
You should see an output similar to the one below.
Step 3. Configuring the Firewall
The Cockpit uses a web socket connection to communicate with the server. The Cockpit is listening on port 9090 by default. Since this is a new application, ensure that the firewall rules are set up to allow for this.
sudo firewall-cmd --permanent --zone=public --add-service=cockpit
sudo firewall-cmd --reload
Step 3. Accessing the Cockpit Web UI
The installation is now complete Your can access The Cockpit Web UI by visiting https://<IP ADDRESS>:9090/ in a web browser of your choice (Chrome or Firefox are recommended).
Where: <IP ADDRESS> is the actual IP address of your Almalinux server.
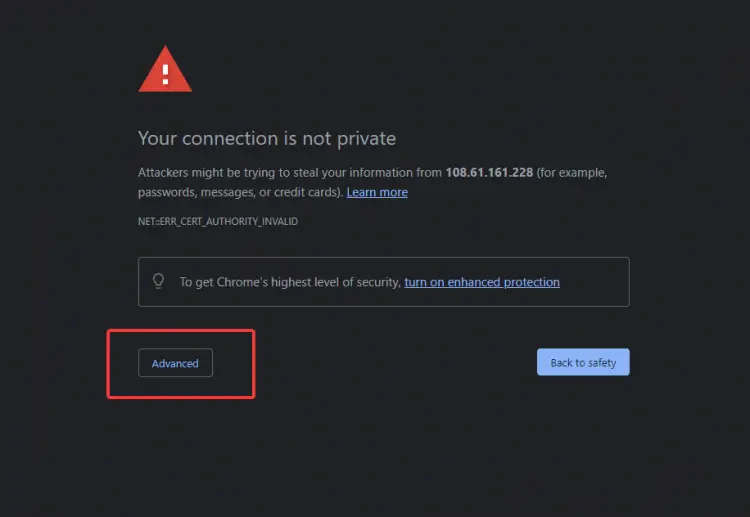
You will be greeted with a screen that says, Your connection is not private. This is perfectly normal because you have not added any SSL encryption to the connection yet. Click on "Advanced" to continue with the setup process.
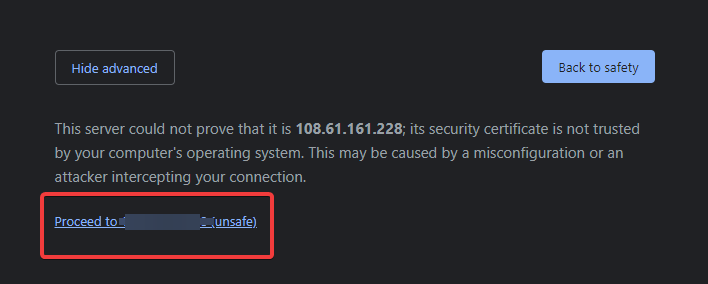
On the next screen, click on Proceed to...(unsafe) link.
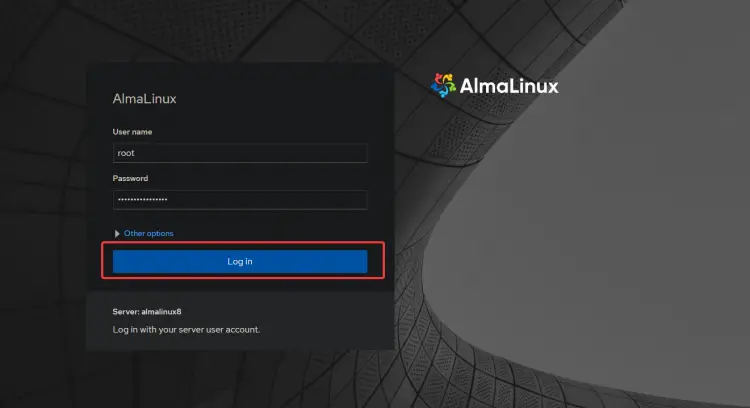
You will be taken to the login page, provide your root username and root password. Click on Log In.
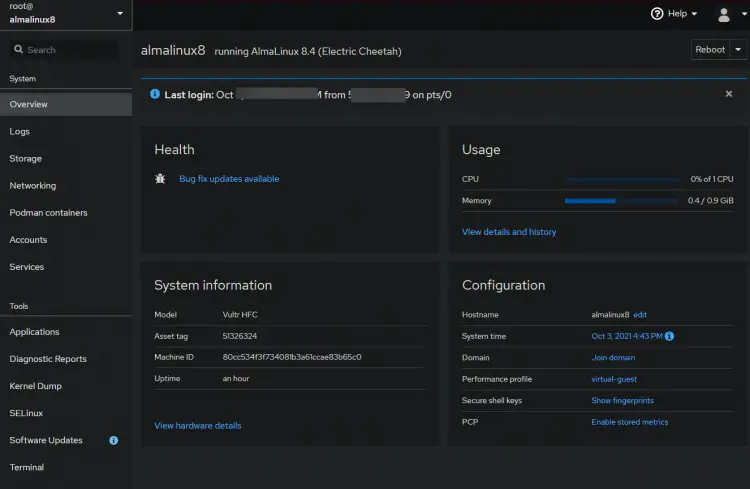
On the authorization is successful. You will be taken to the Cockpit dashboard.
From here, you can see a variety of system information such as the memory and disk usage, network connections being made by applications, total processes being run and the top processes that are currently consuming the most amount of resources.
There is a lot to configure and explore with Cockpit. Try it out by exploring your Linux servers in a whole new way.
That's it! You have successfully installed the Cockpit on your server. Have fun exploring the new interface for managing your system.
For more information on using cockpit, check out the official Cockpit documentation.
Conclusion
In this guide, you have learned how to install cockpit on your AlmaLinux 8 server and access the UI. If you have any questions, comments, or suggestions, you can drop a line below.


