How to deploy Applications on Kubernetes using Helm
This article is in continuation of my article "What is Helm and how to install it on Ubuntu 20.04 server?". If you are new to Helm, I would recommend you to first go through the article I mentioned. In this article, we will release Apache from the existing chart. We will create a sample chart and release, upgrade, rollback, delete and restore it. Let's see the commands in brief before we use them in the article later.
- helm search: Search for Helm charts
- helm repo: Perform operations like add, list, remove, update, and index on Repository
- helm delete: Delete the chart which in turn deletes all its Kubernetes objects.
- helm status: Display the status of the release.
- helm create: Create a helm chart.
- helm install: Install a chart which in turn creates its Kubernetes objects
- helm upgrade: Upgrade a release with changes we made to it.
- helm history: Get the history of the release.
- helm rollback: Revert changes to the previous version.
Before proceeding it is assumed that you are familiar with the basics of Helm. It is also assumed that you have a Kubernetes cluster and helm client already installed in it.
Pre-requisites
- Kubernetes Cluster with at least 1 worker node.
If you want to learn to create a Kubernetes Cluster, click here. This guide will help you create a Kubernetes cluster with 1 Master and 2 Nodes on AWS Ubuntu 18.04 EC2 Instances. - Helm installed on your master node(Search for my article named "What is Helm and how to install it on Ubuntu 20.04 server" to understand the basics of Helm and install it).
What will we do?
- Release a sample chart from the repo.
- Create a chart and release a sample application.
- Upgrade the release.
- Restore the release after it is deleted
Release a sample chart from the repo
First, let's check if the "helm" is available on the server or not.
helm version
As an example let's try to install an Apache chart from the hub. Execute the following command to search Apache on the hub.
helm search hub apache
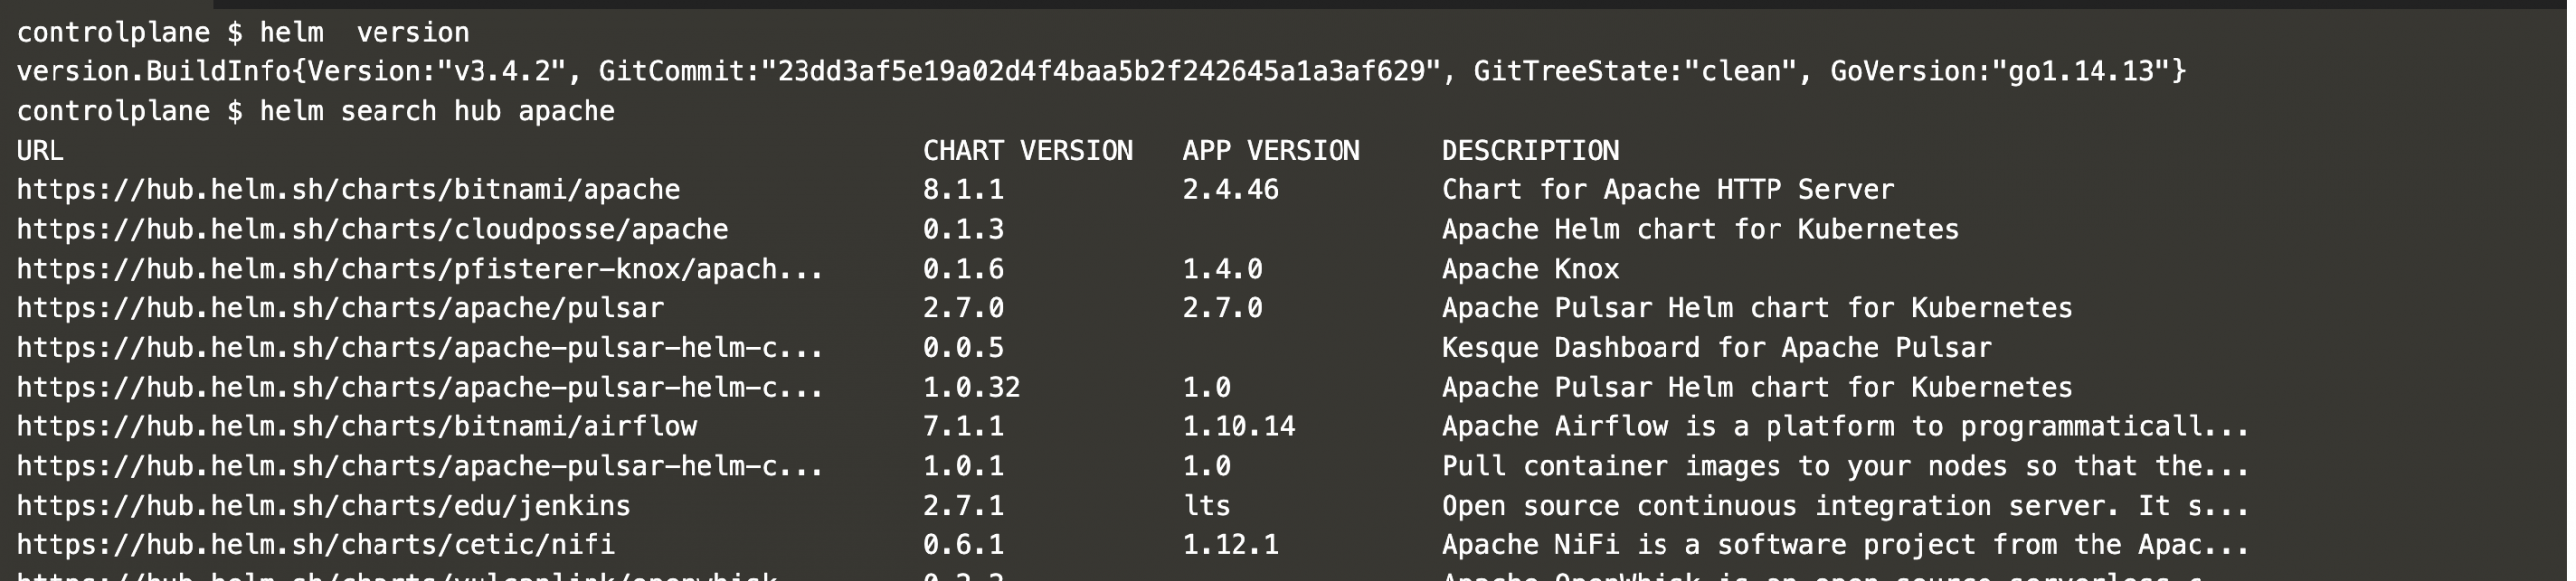
You will get a set of results, copy the URL of one of the searches for Apache. In this case, I copied the first URL.
Hit the URL in the web browser and you will see a page as follows.
On this page, you will get commands to add a repo to your local system and install the chart from it.
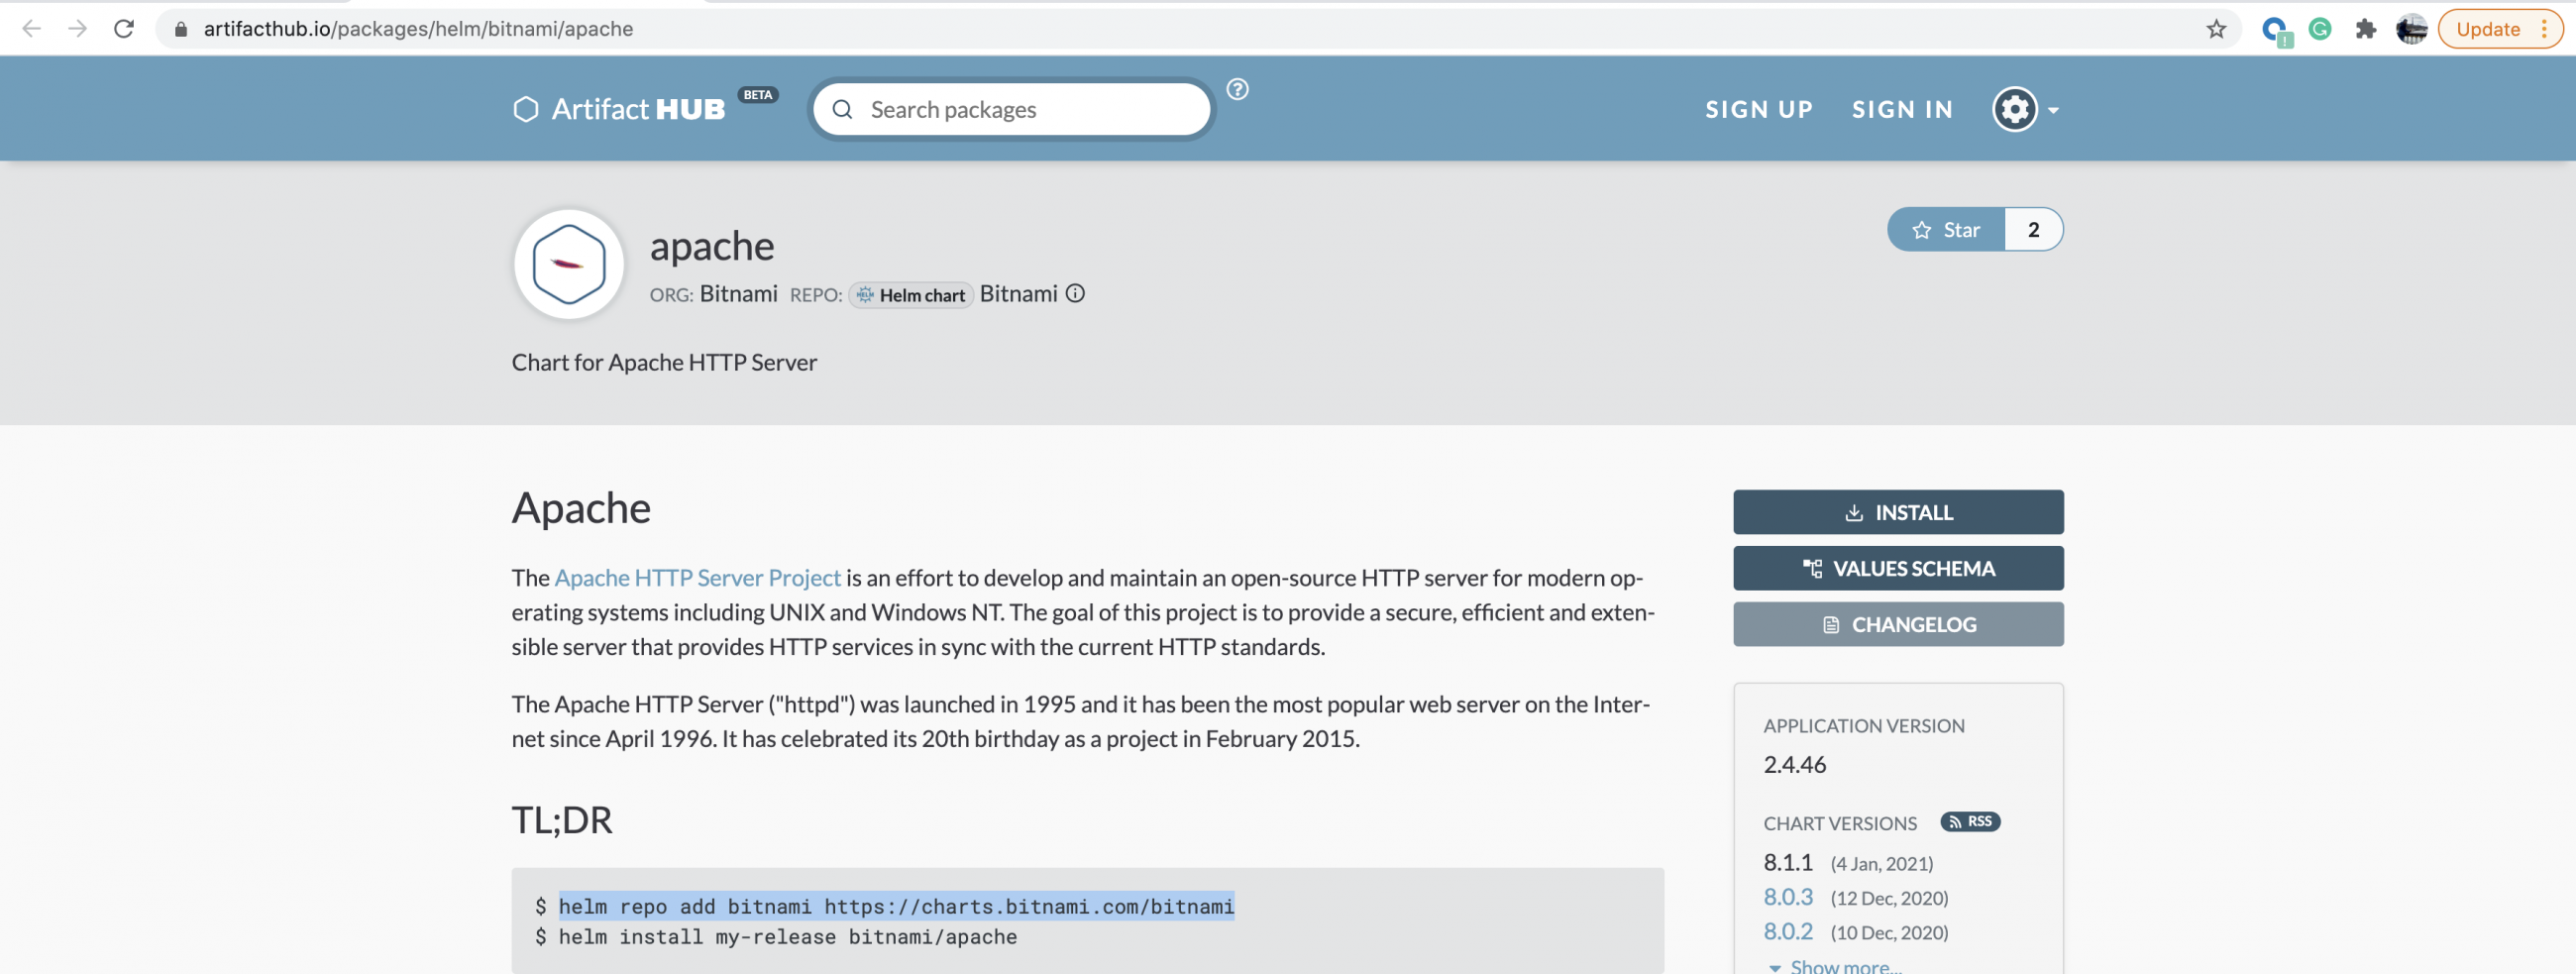
Execute the commands on your local system which will add the repository for the Apache chart.
helm repo add bitnami https://charts.bitnami.com/bitnami
helm repo list
Once you have the repository on your system you are all set to install the chart and create a release for Apache using Helm.
helm install my-release bitnami/apache
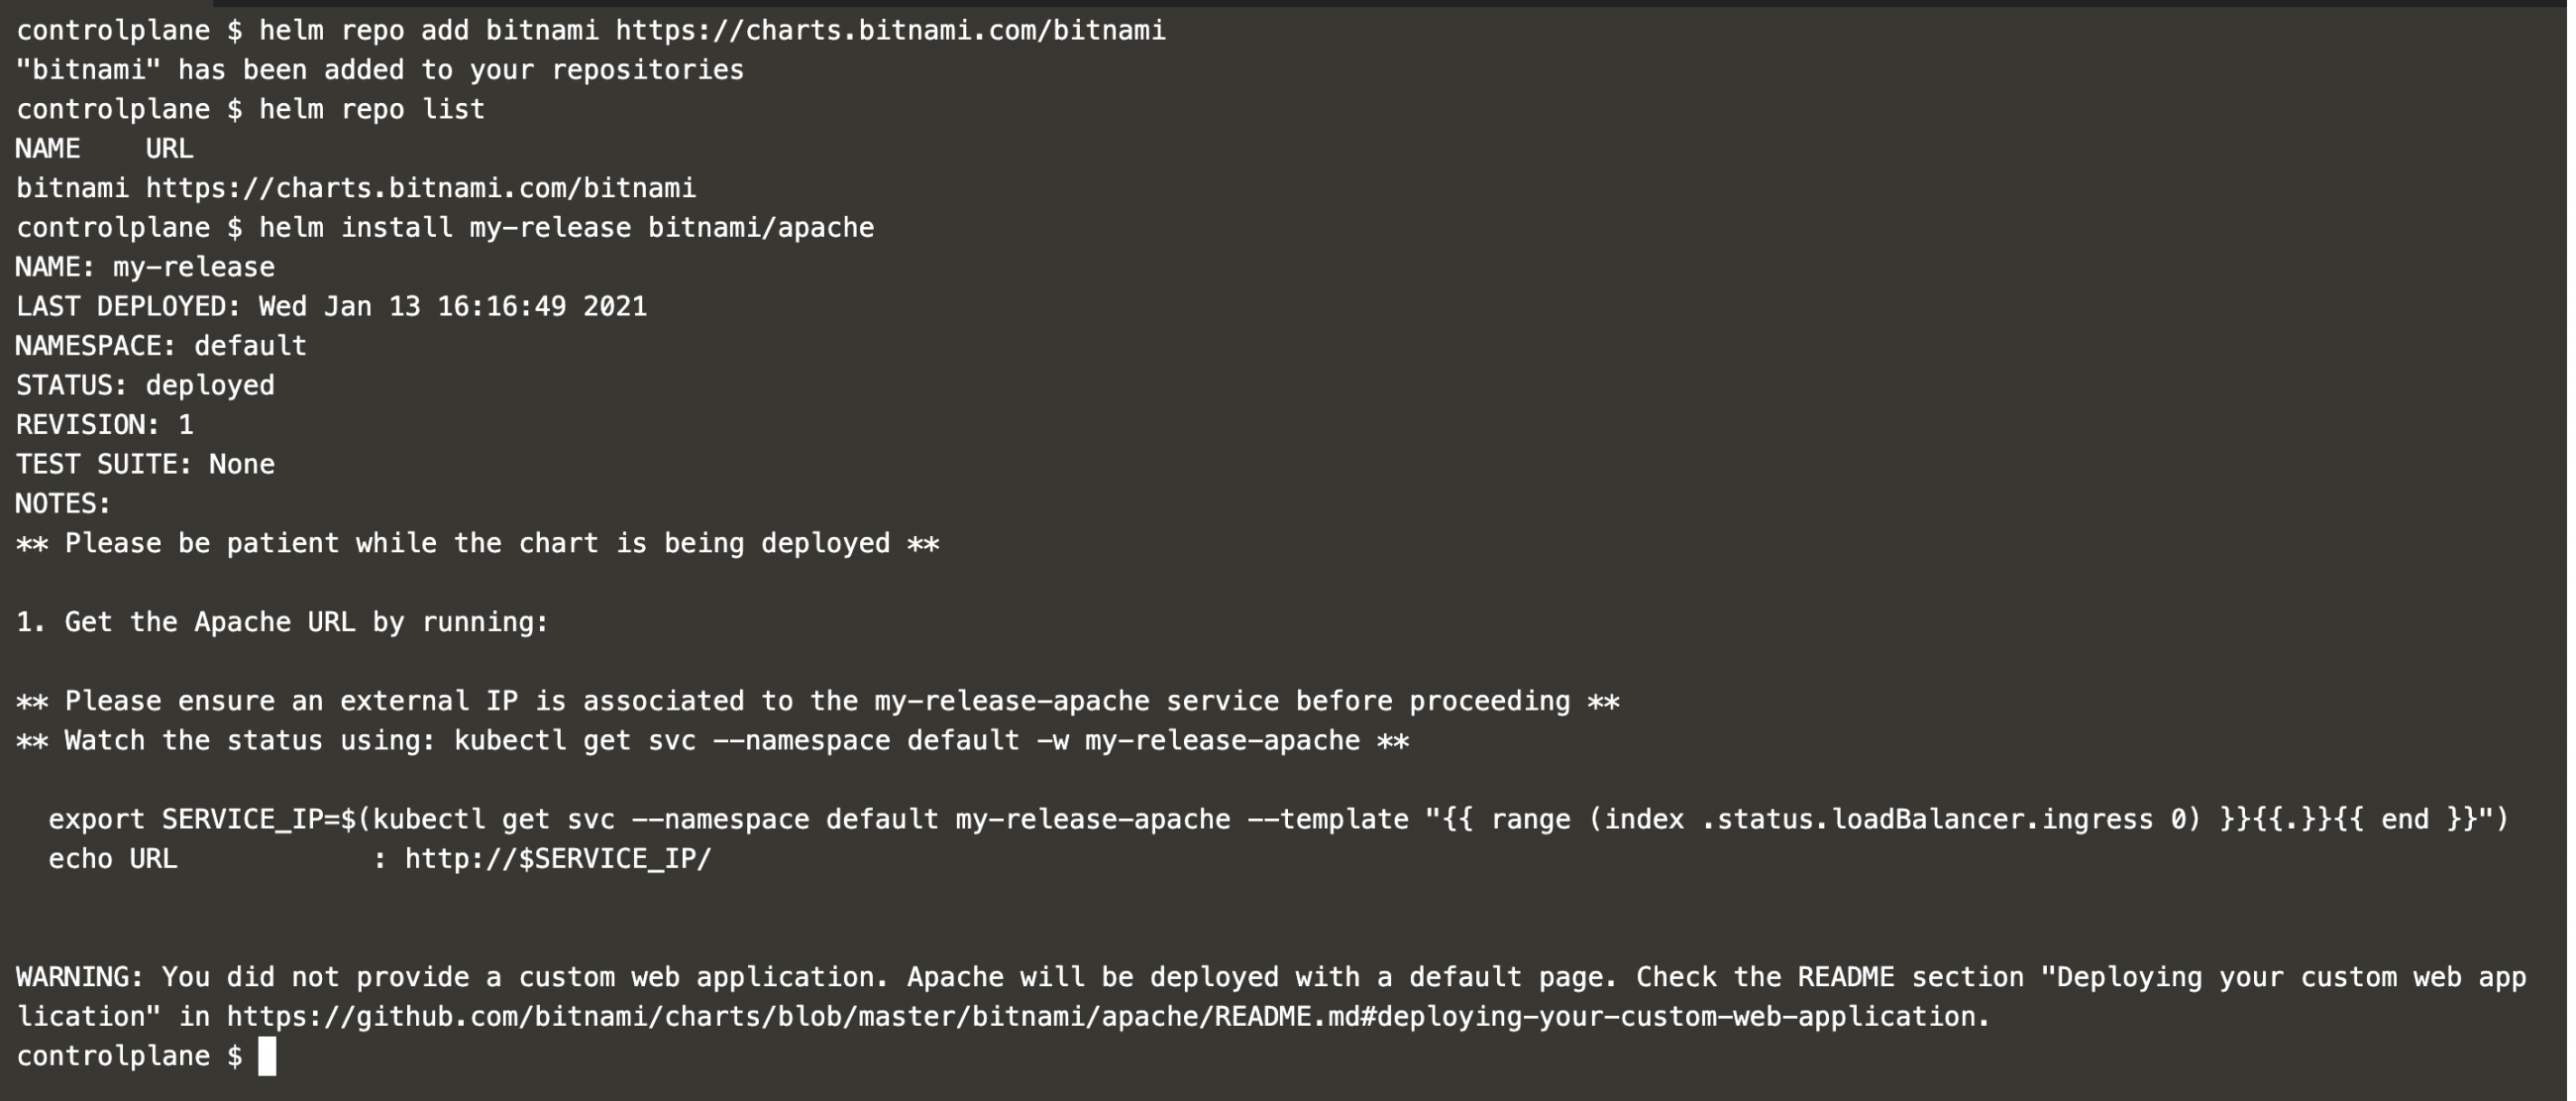
Upon successful execution of the commands, you will see the output as above.
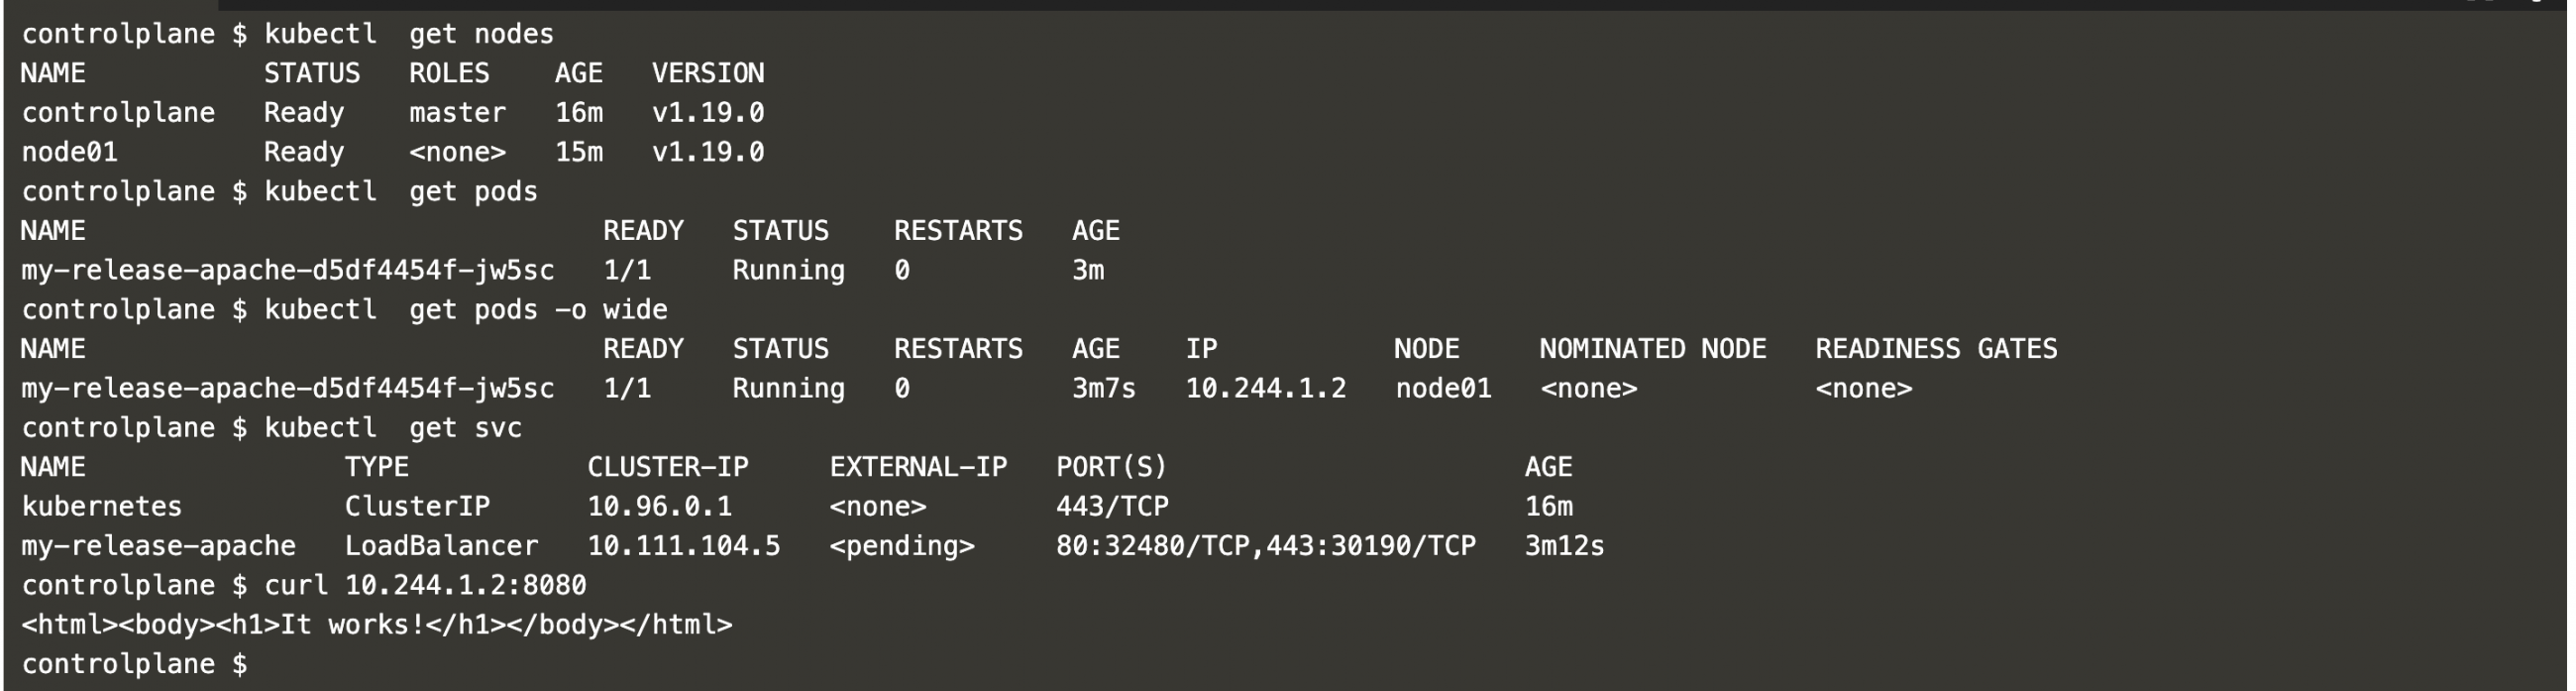
Once the chart is released you can see objects that have been created on the Kubernetes cluster.
kubectl get nodes
kubectl get pods
You can now get the IP of the pod and try to hit the Apache page using the curl command.
kubectl get pods -o wide
kubectl get svc
curl 10.244.1.2:8080
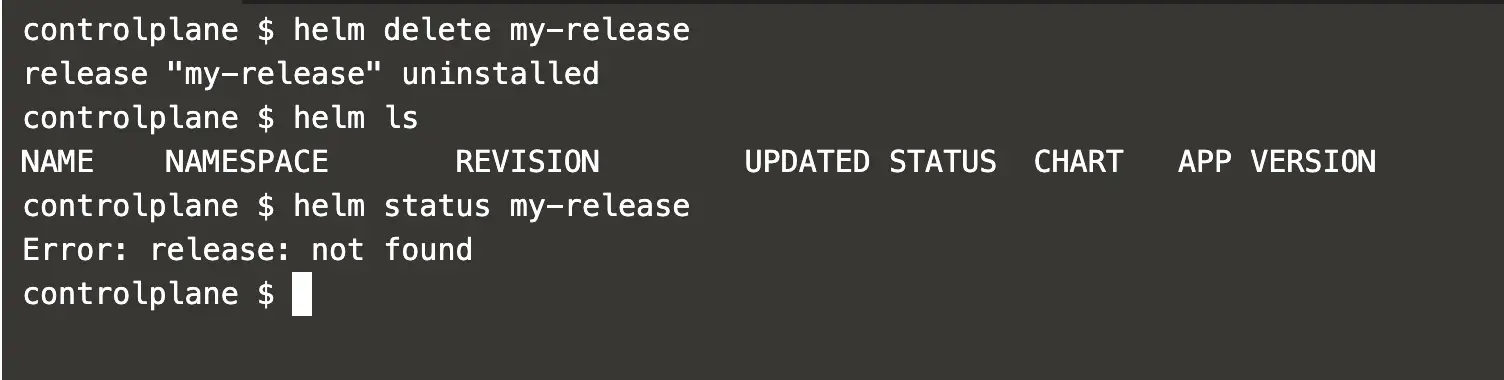
If you want to delete the release you can do it simply using the following command
helm delete my-release
You can list releases on the cluster and see if the release has successfully been deleted or not.
helm ls
helm status my-release
Create a chart and deploy a sample application
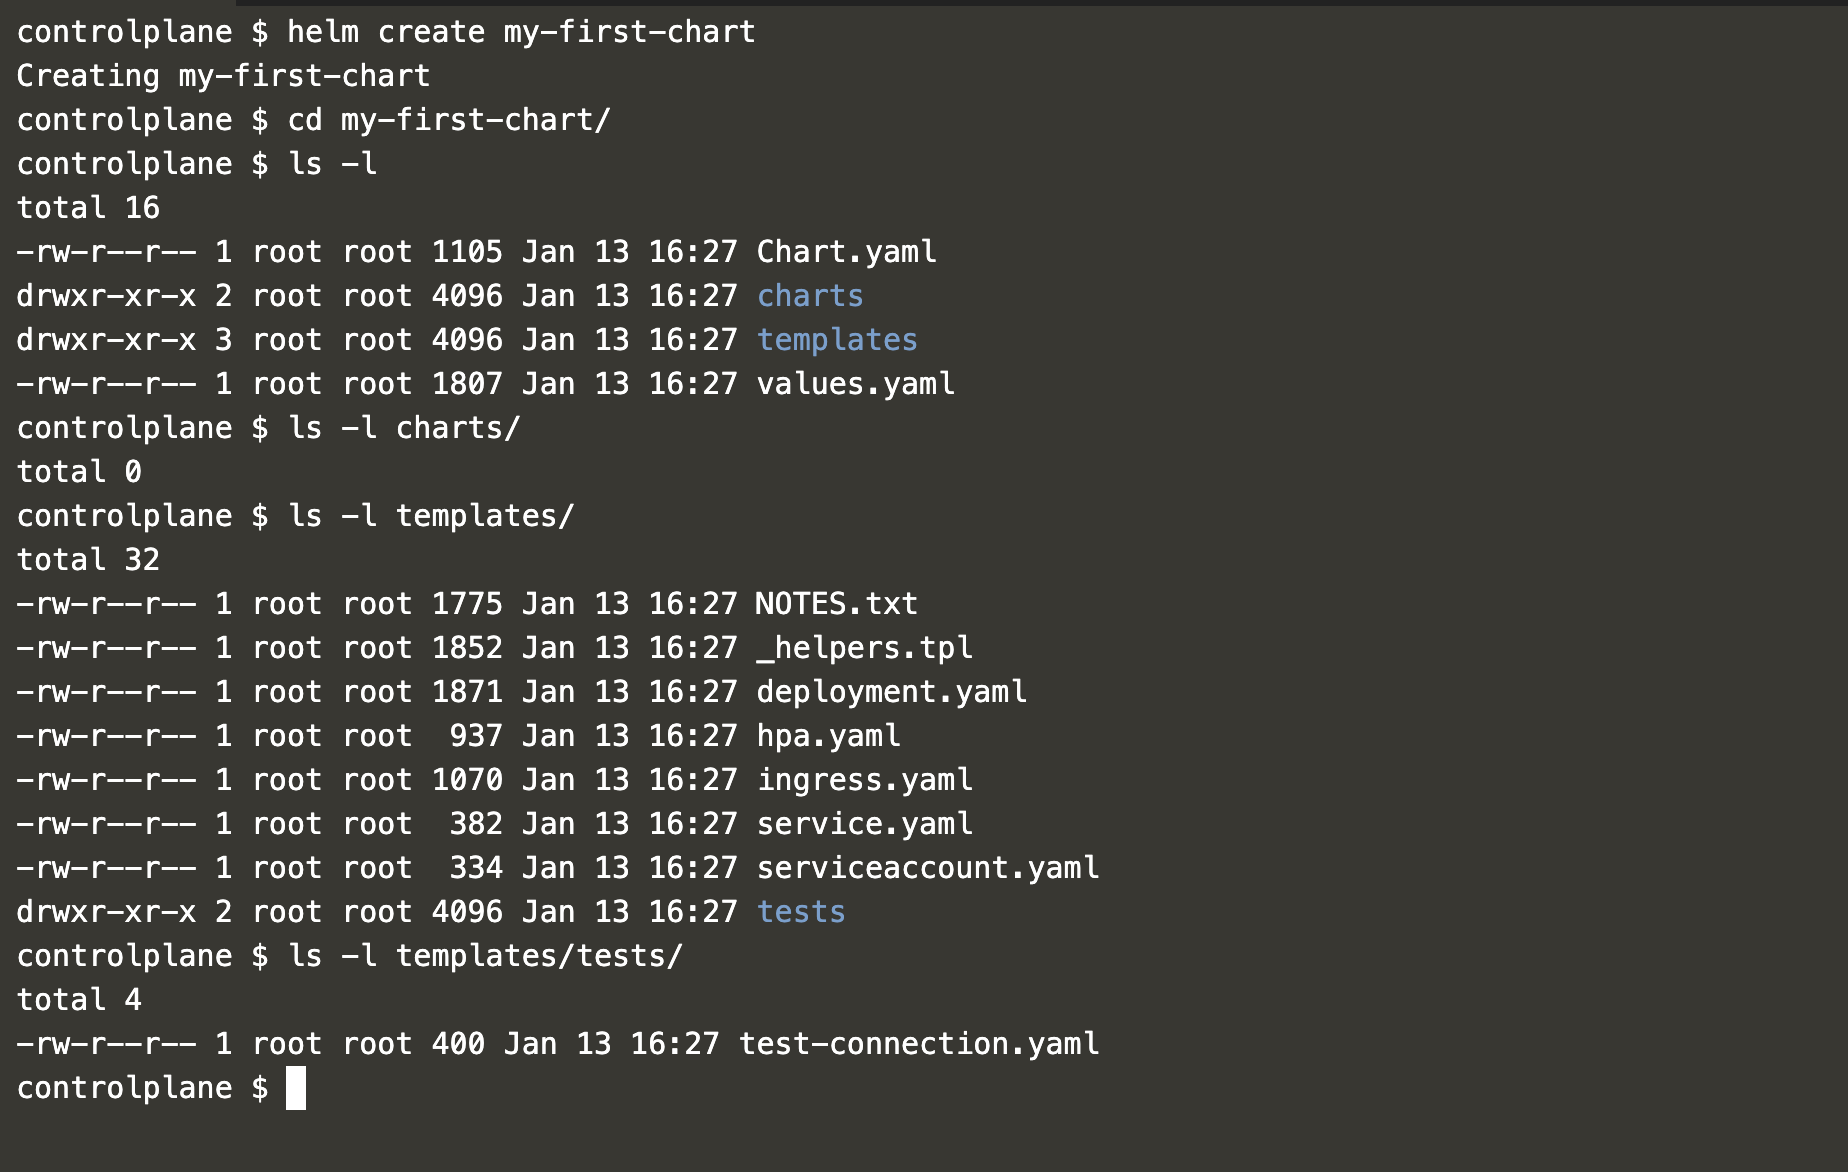
In the above scenario, we installed a chart that was readily available and configured. We can create our own chart and release our application. Creating a chart is very simple using helm. If you execute the following command you will get a chart with a sample application of Nginx in it.
helm create my-first-chart
Explore the folder structure of the chart we created using the above command.
cd my-first-chart/
ls -l
ls -l charts/
ls -l templates/
ls -l templates/tests/
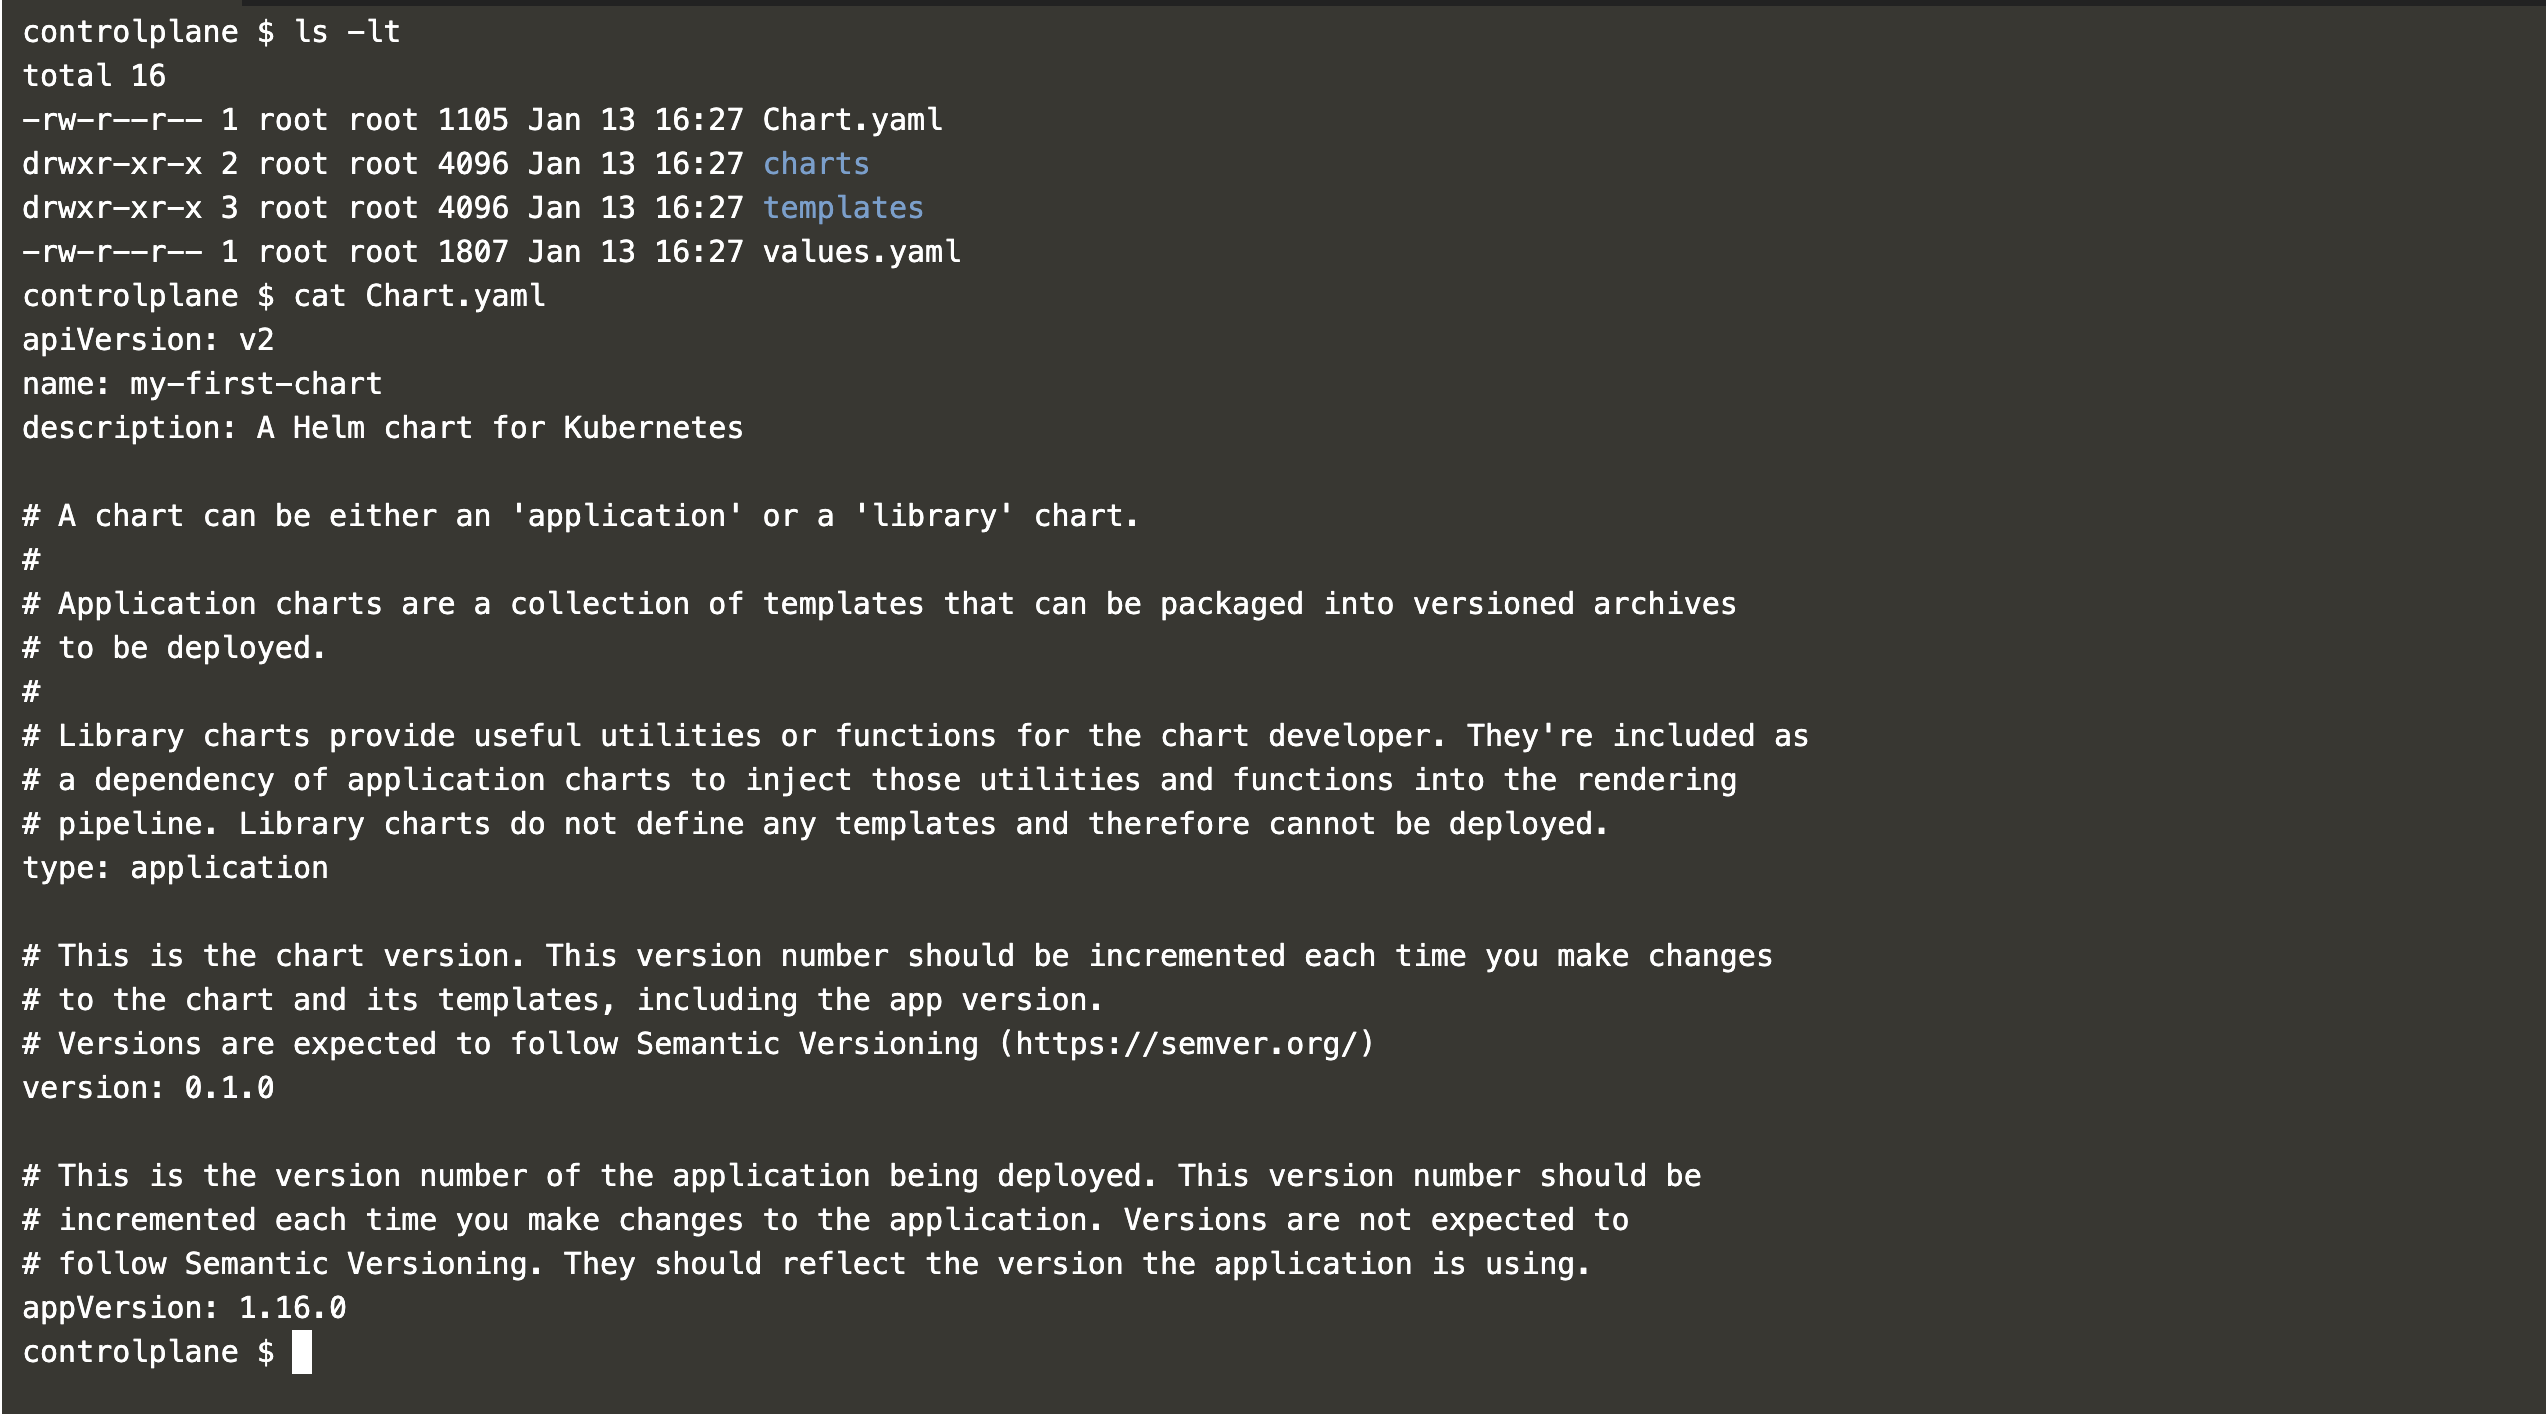
Check the content of the Chart.yaml file.
ls -lt
cat Chart.yaml
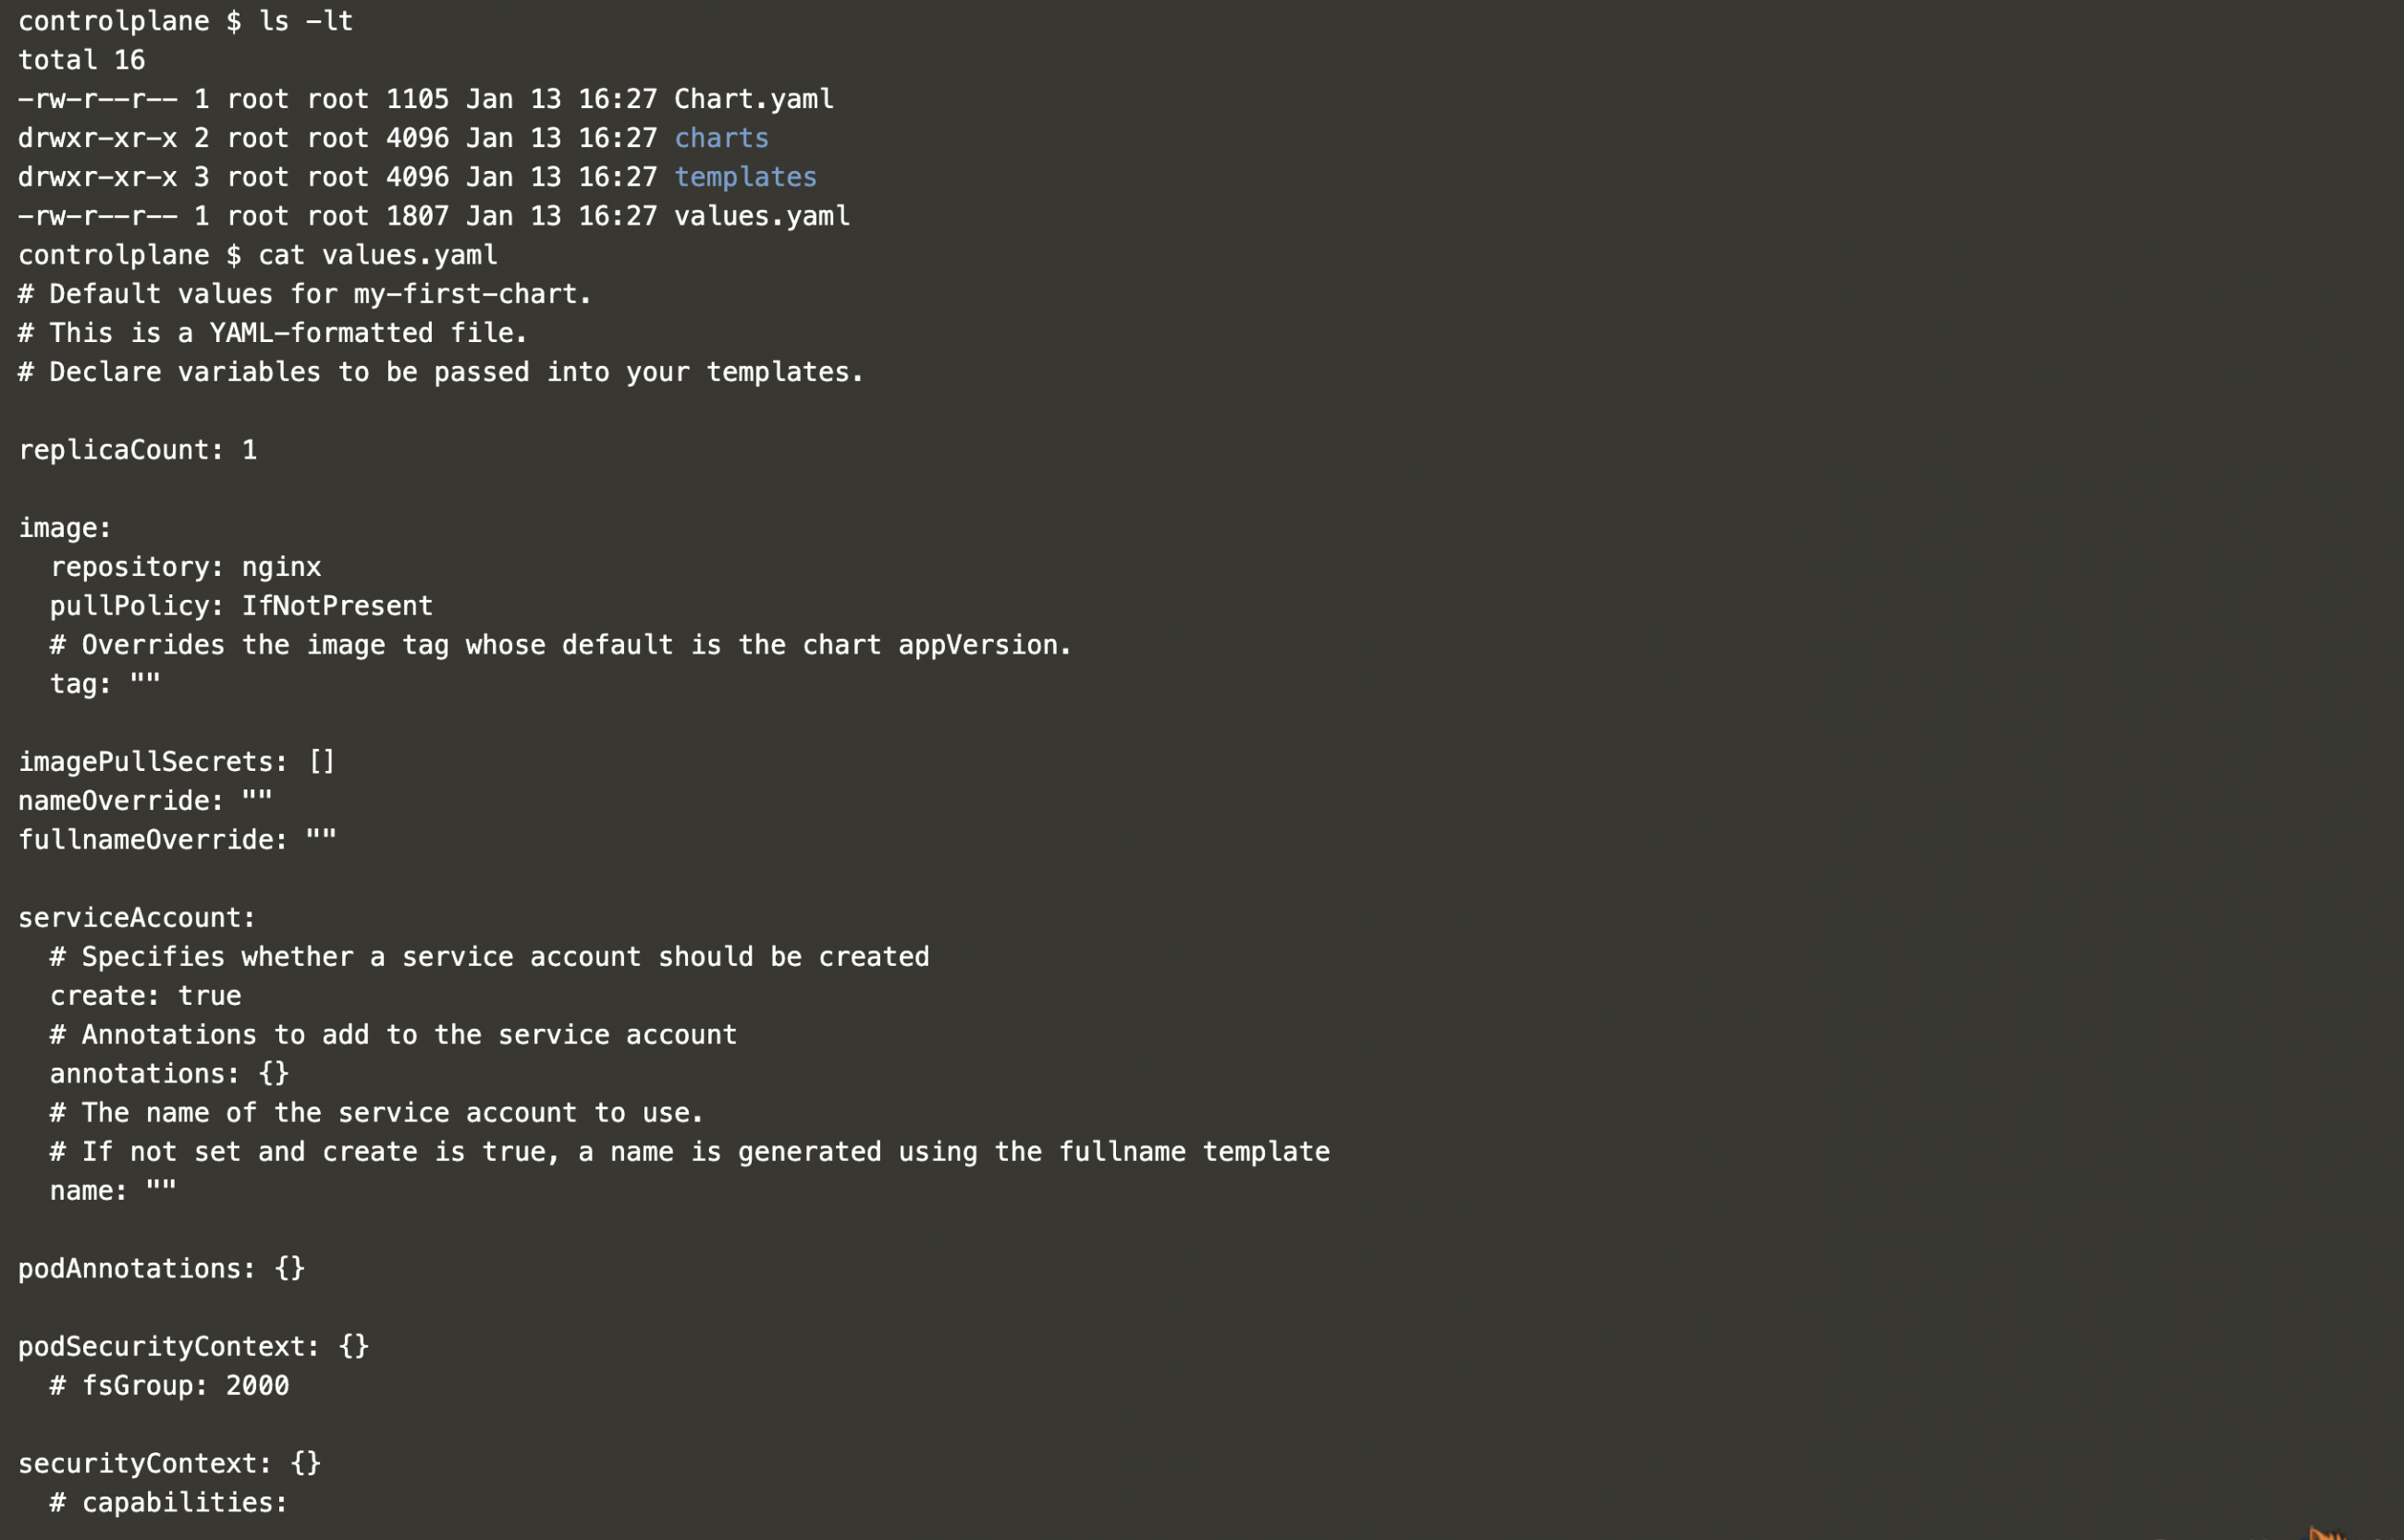
Check the content of values.yaml
ls -lt
cat values.yaml
Now let's deploy the sample application using the local chart.
pwd
cd ..
ls -l | grep my-first-chart
kubectl get pods
helm install my-first-release my-first-chart/
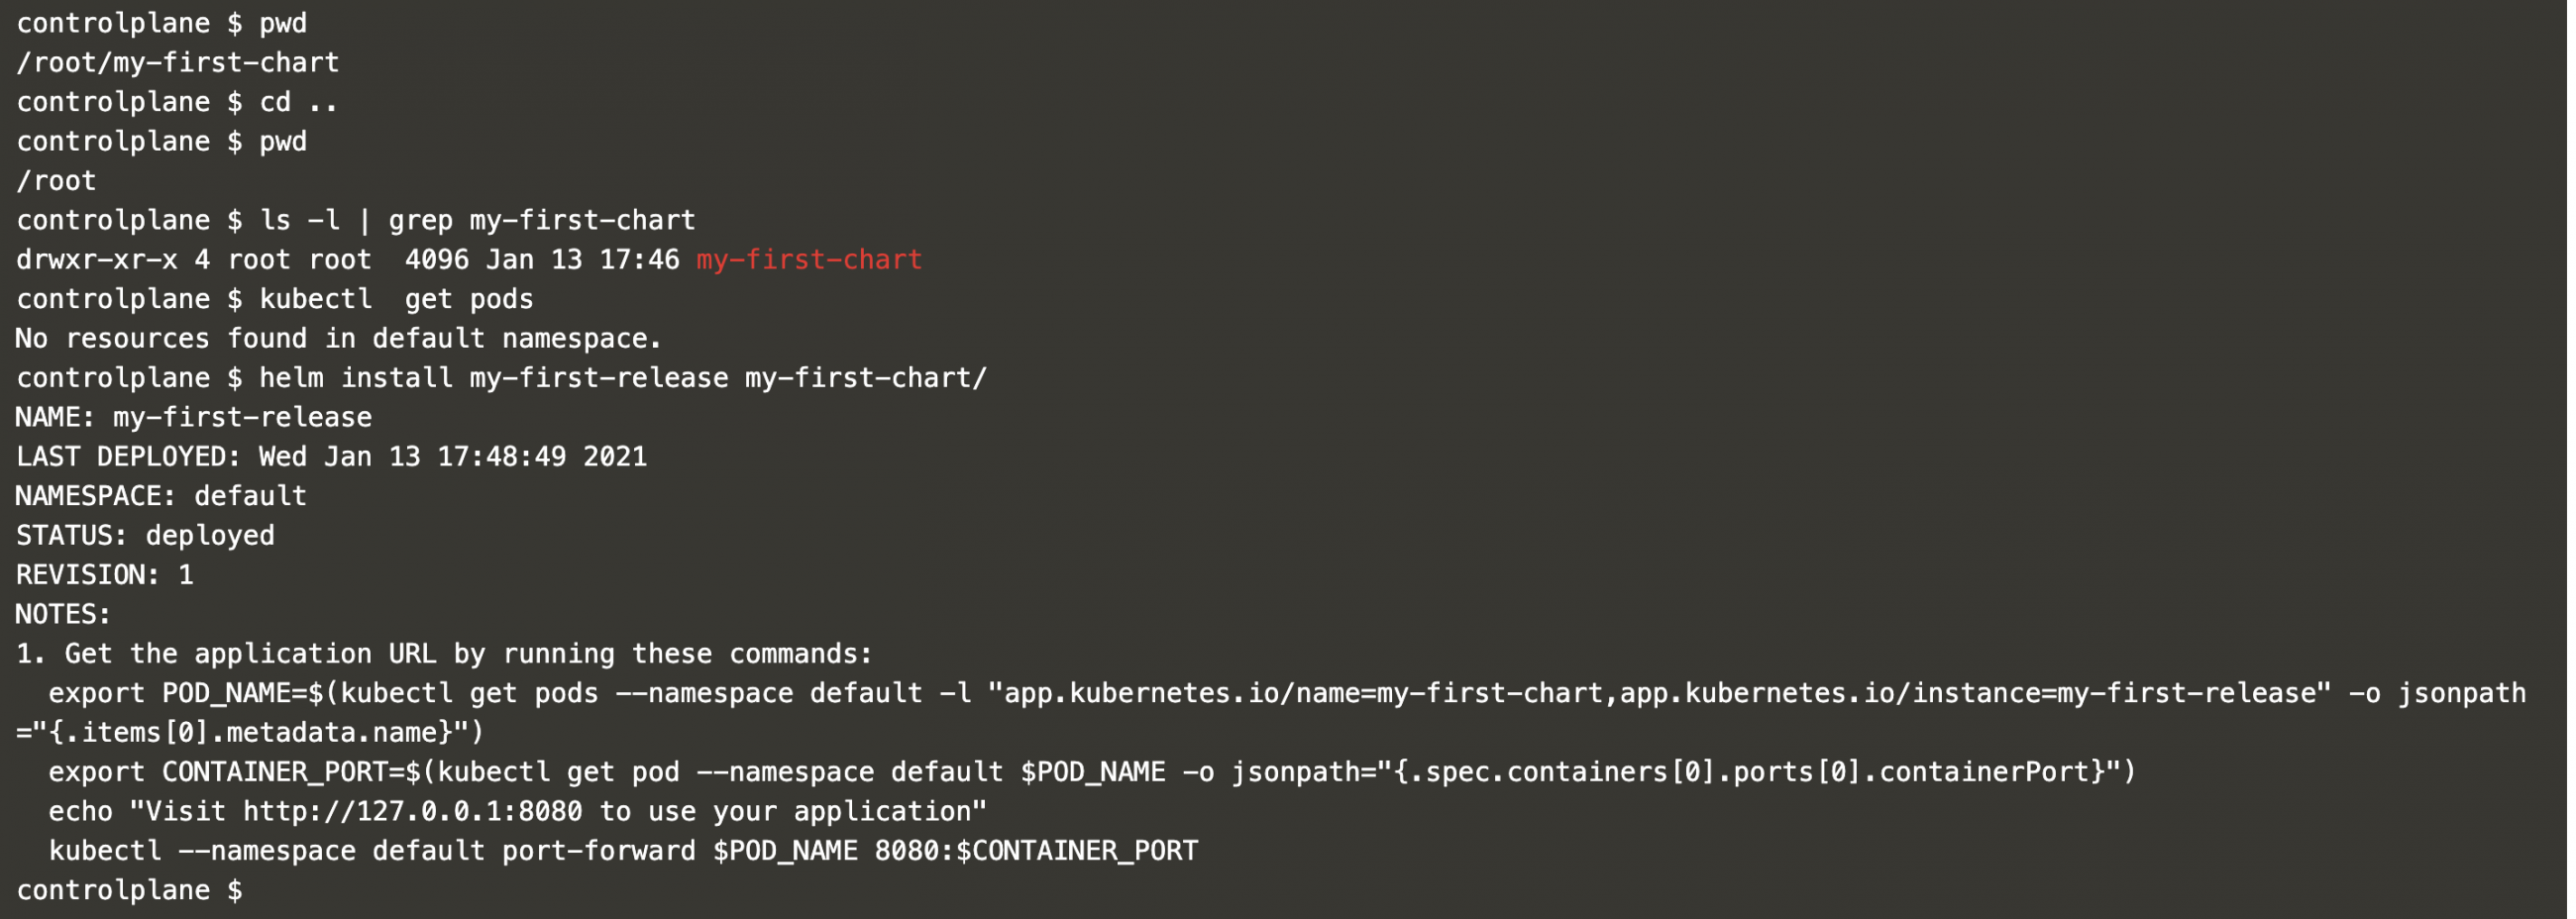
Once the chart is released successfully you can see a pod created in the cluster.
kubectl get pods
kubectl get svc
You can now access the Nginx pod through the service.
curl 10.104.229.187

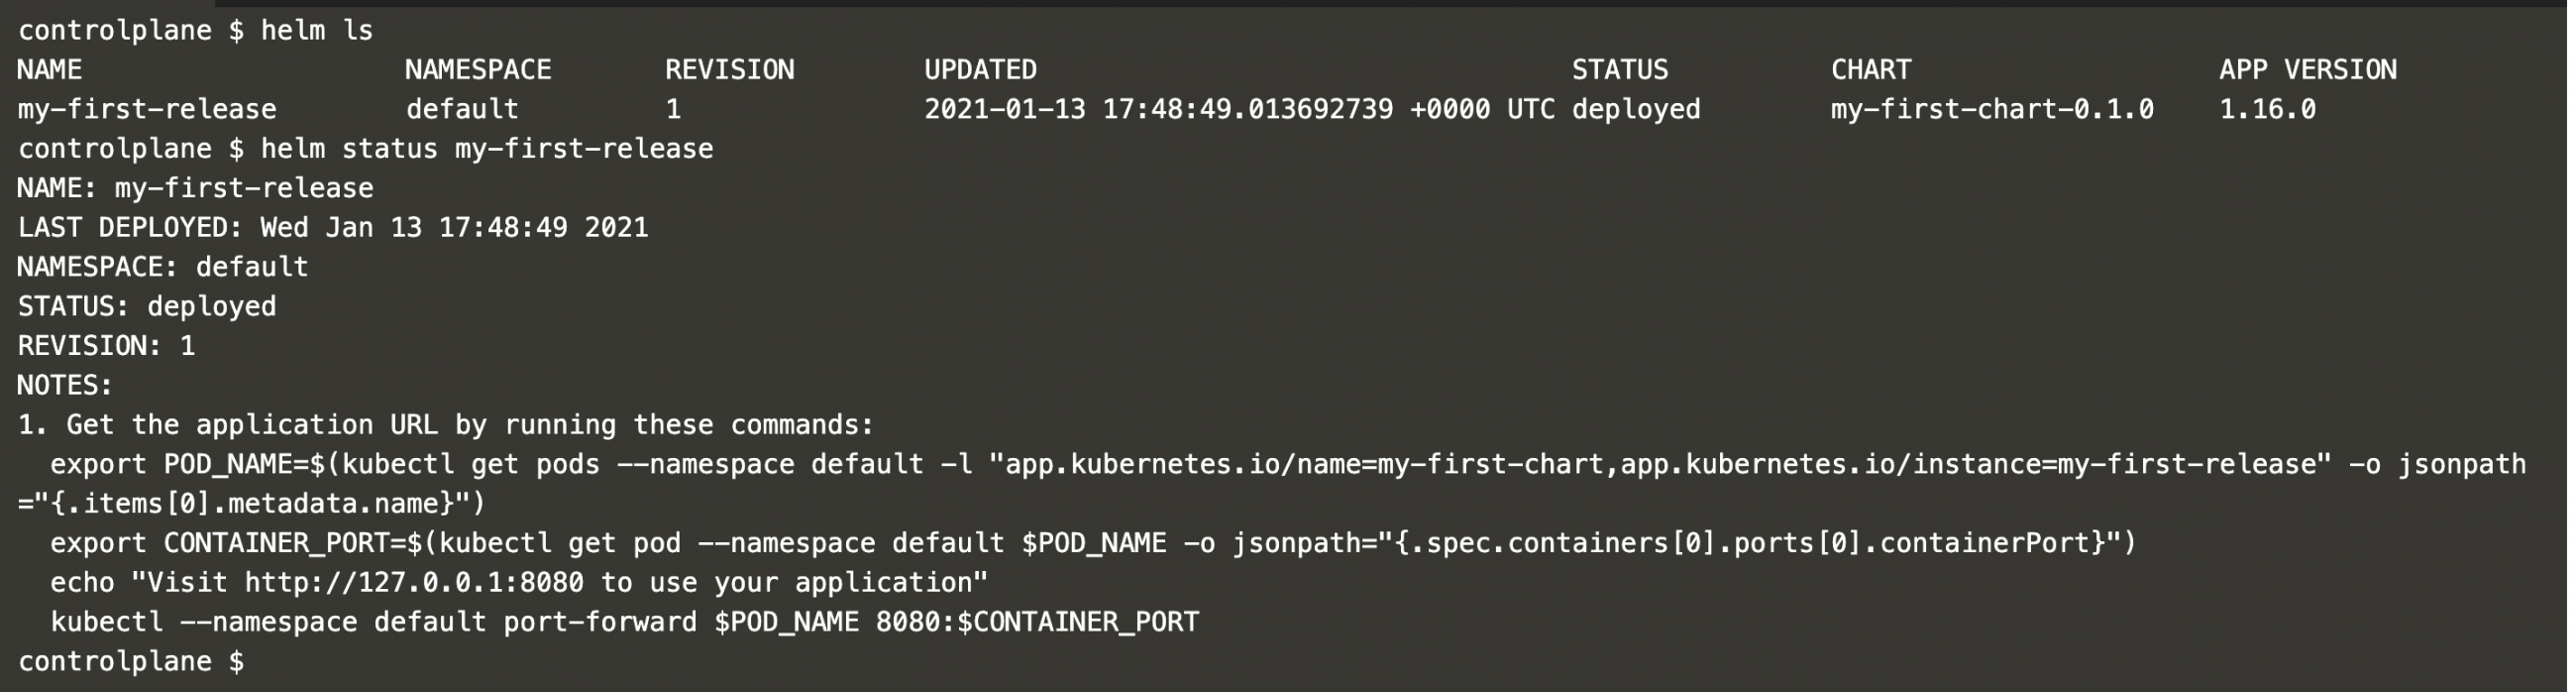
You can find information regarding the release we created using the following command.
helm ls
helm status my-first-release
Upgrade the release
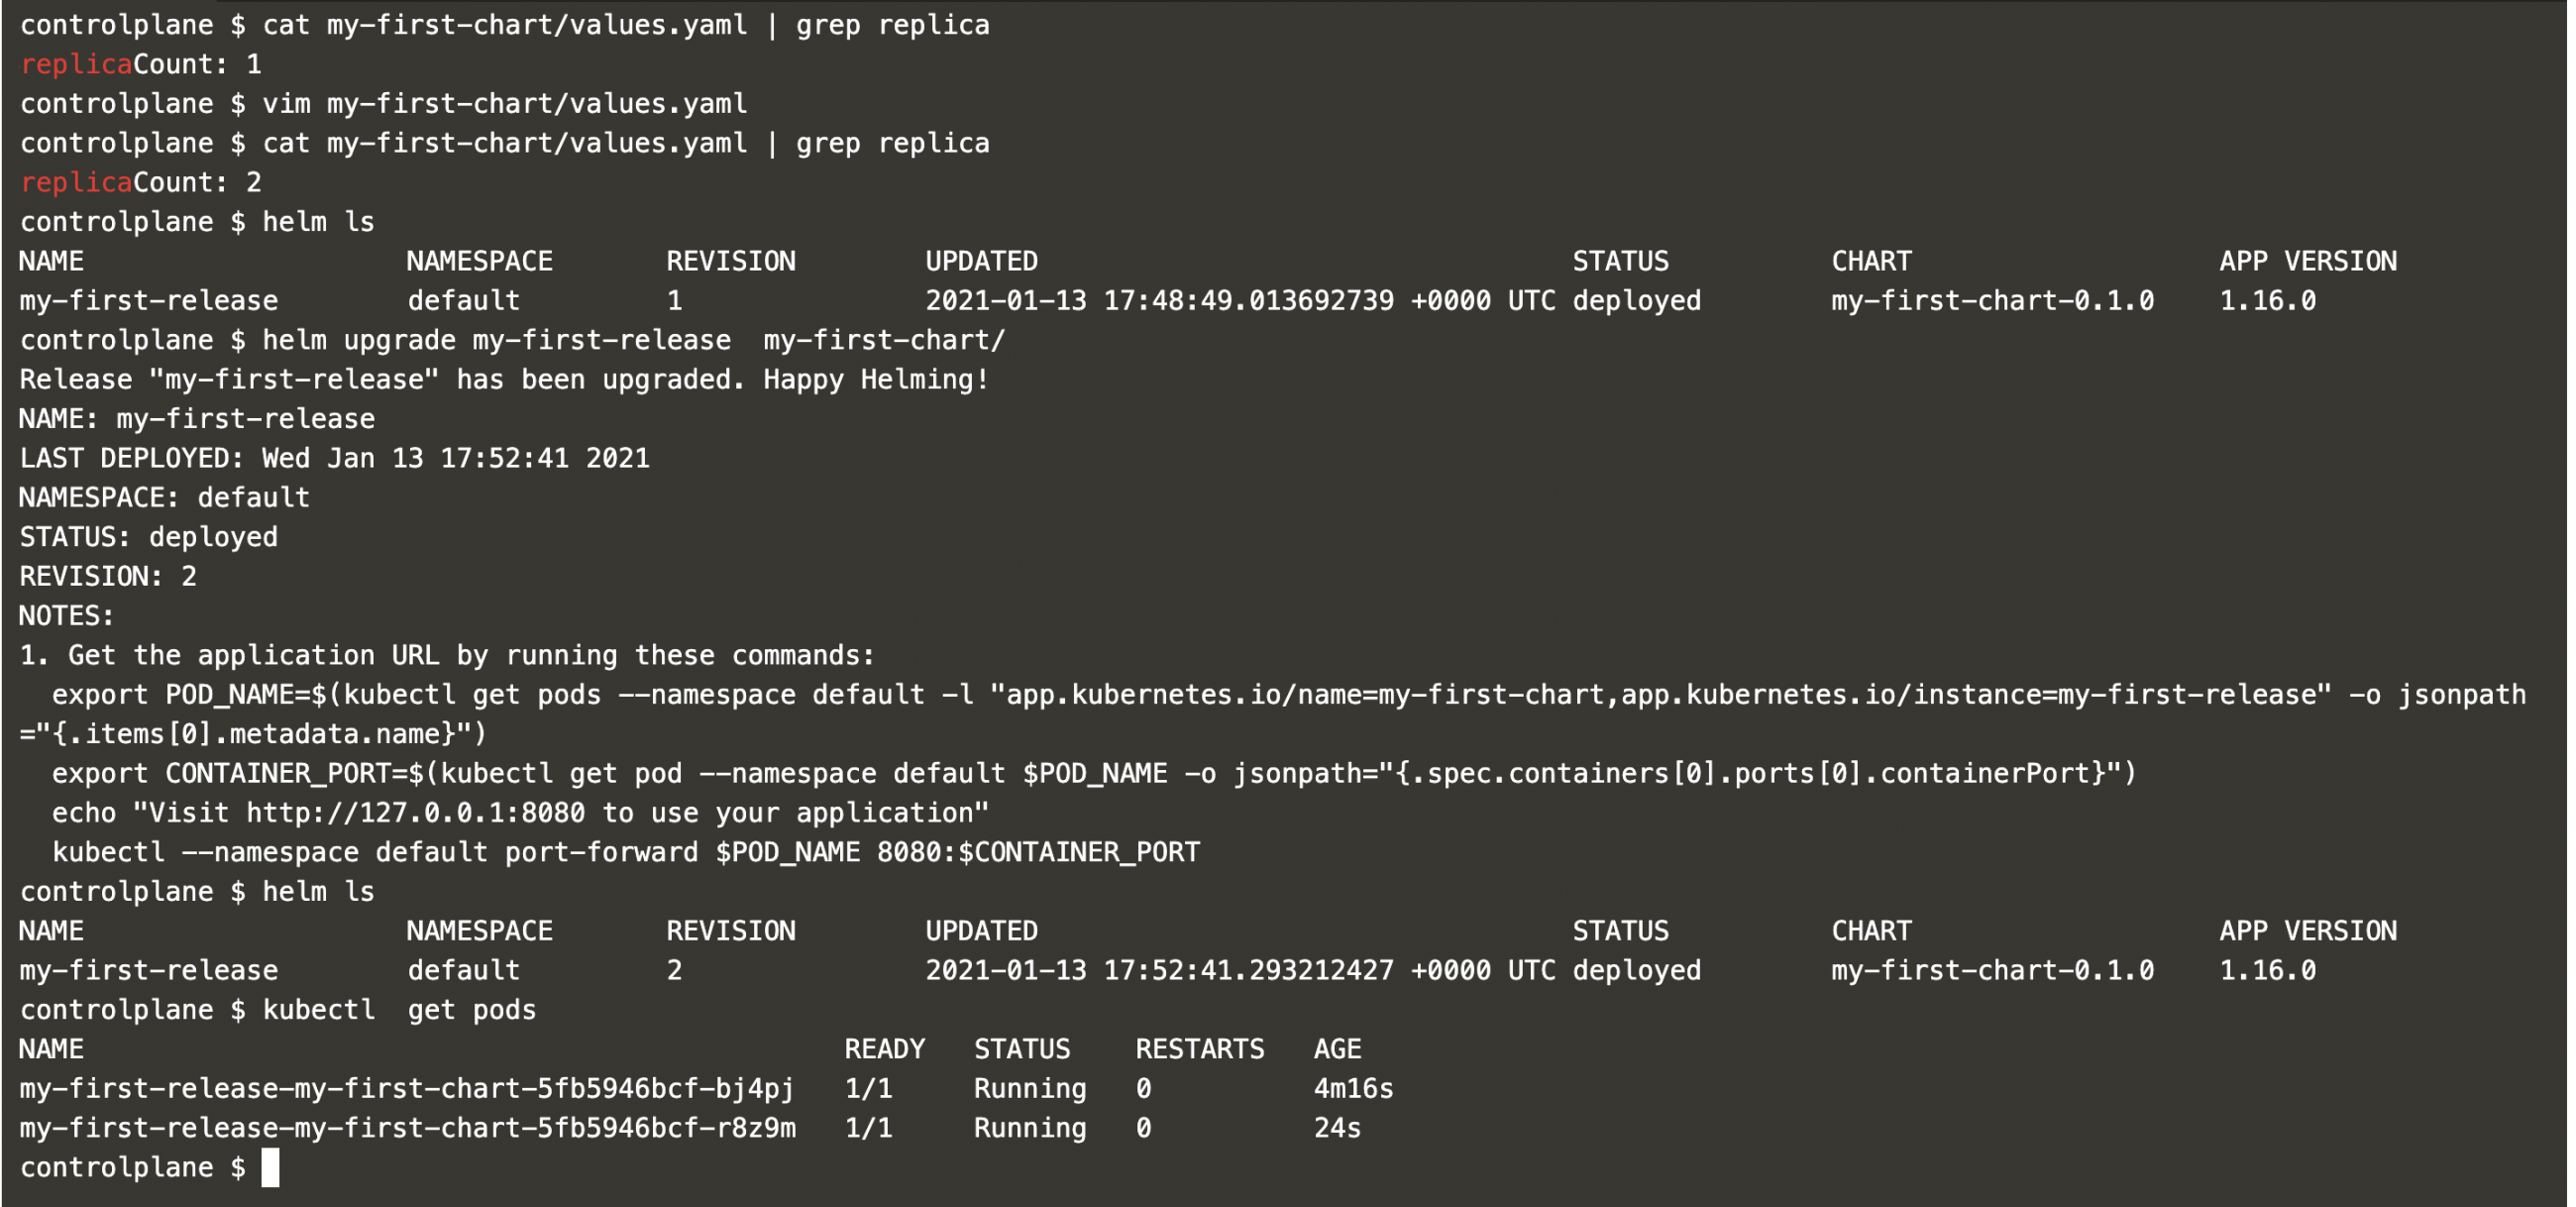
In the above scenario, we created a chart with a sample Nginx application. The replica count in the above scenario was 1. If you want to increase the replica count you can easily do it by making changes in values.yaml file.
cat my-first-chart/values.yaml | grep replica
vim my-first-chart/values.yaml
cat my-first-chart/values.yaml | grep replica
helm ls
Now you can easily roll-out your changes and upgrade your release.
helm upgrade my-first-release my-first-chart/
You can even notice the revision of the release updated to 2.
helm ls
This time you can see two pods running in the cluster as we had specified replica count to 2.
kubectl get pods
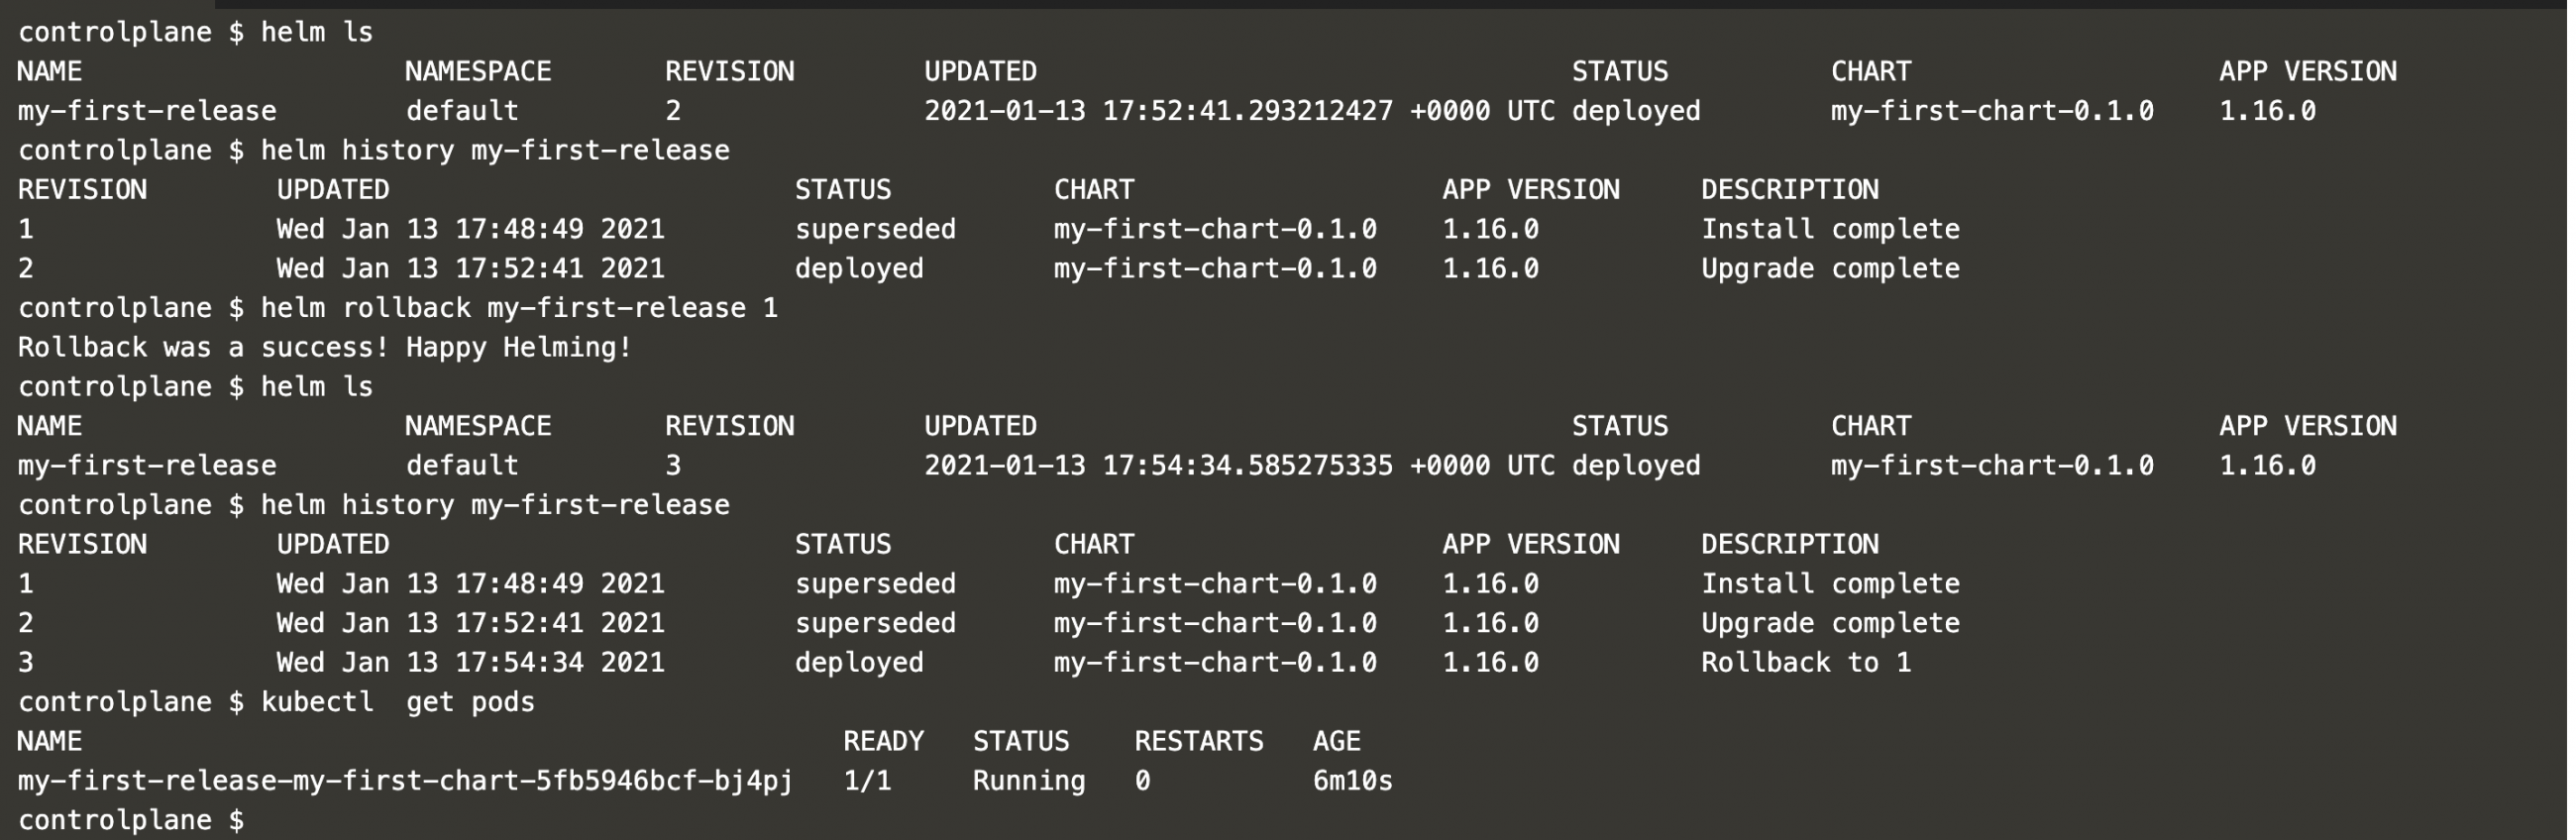
helm ls
If we check the history of the release we will notice that the release has two revisions. Revision one had 1 pod and later we updated the replica count to 2 which created revision 2 of the release.
helm history my-first-release
If we do not want the changes released in revision 2 and want to revert to revision 1, we can simply do it using the following rollback command.
helm rollback my-first-release 1
helm ls
And this will create revision 3 for the release.
helm history my-first-release
You can now see there is only one pod running in the cluster.
kubectl get pods
In case you want to delete the sample Nginx application released from the chart, you can delete it by deleting the release.
helm ls
helm delete my-first-release
helm ls

Restore the release after it is deleted
In the above scenario, we deleted the release. But by default, the release does not keep its release history when it is deleted. In case you want to revert in such a scenario you won't be able to do it unless you specify --keep-history option to the delete release command.
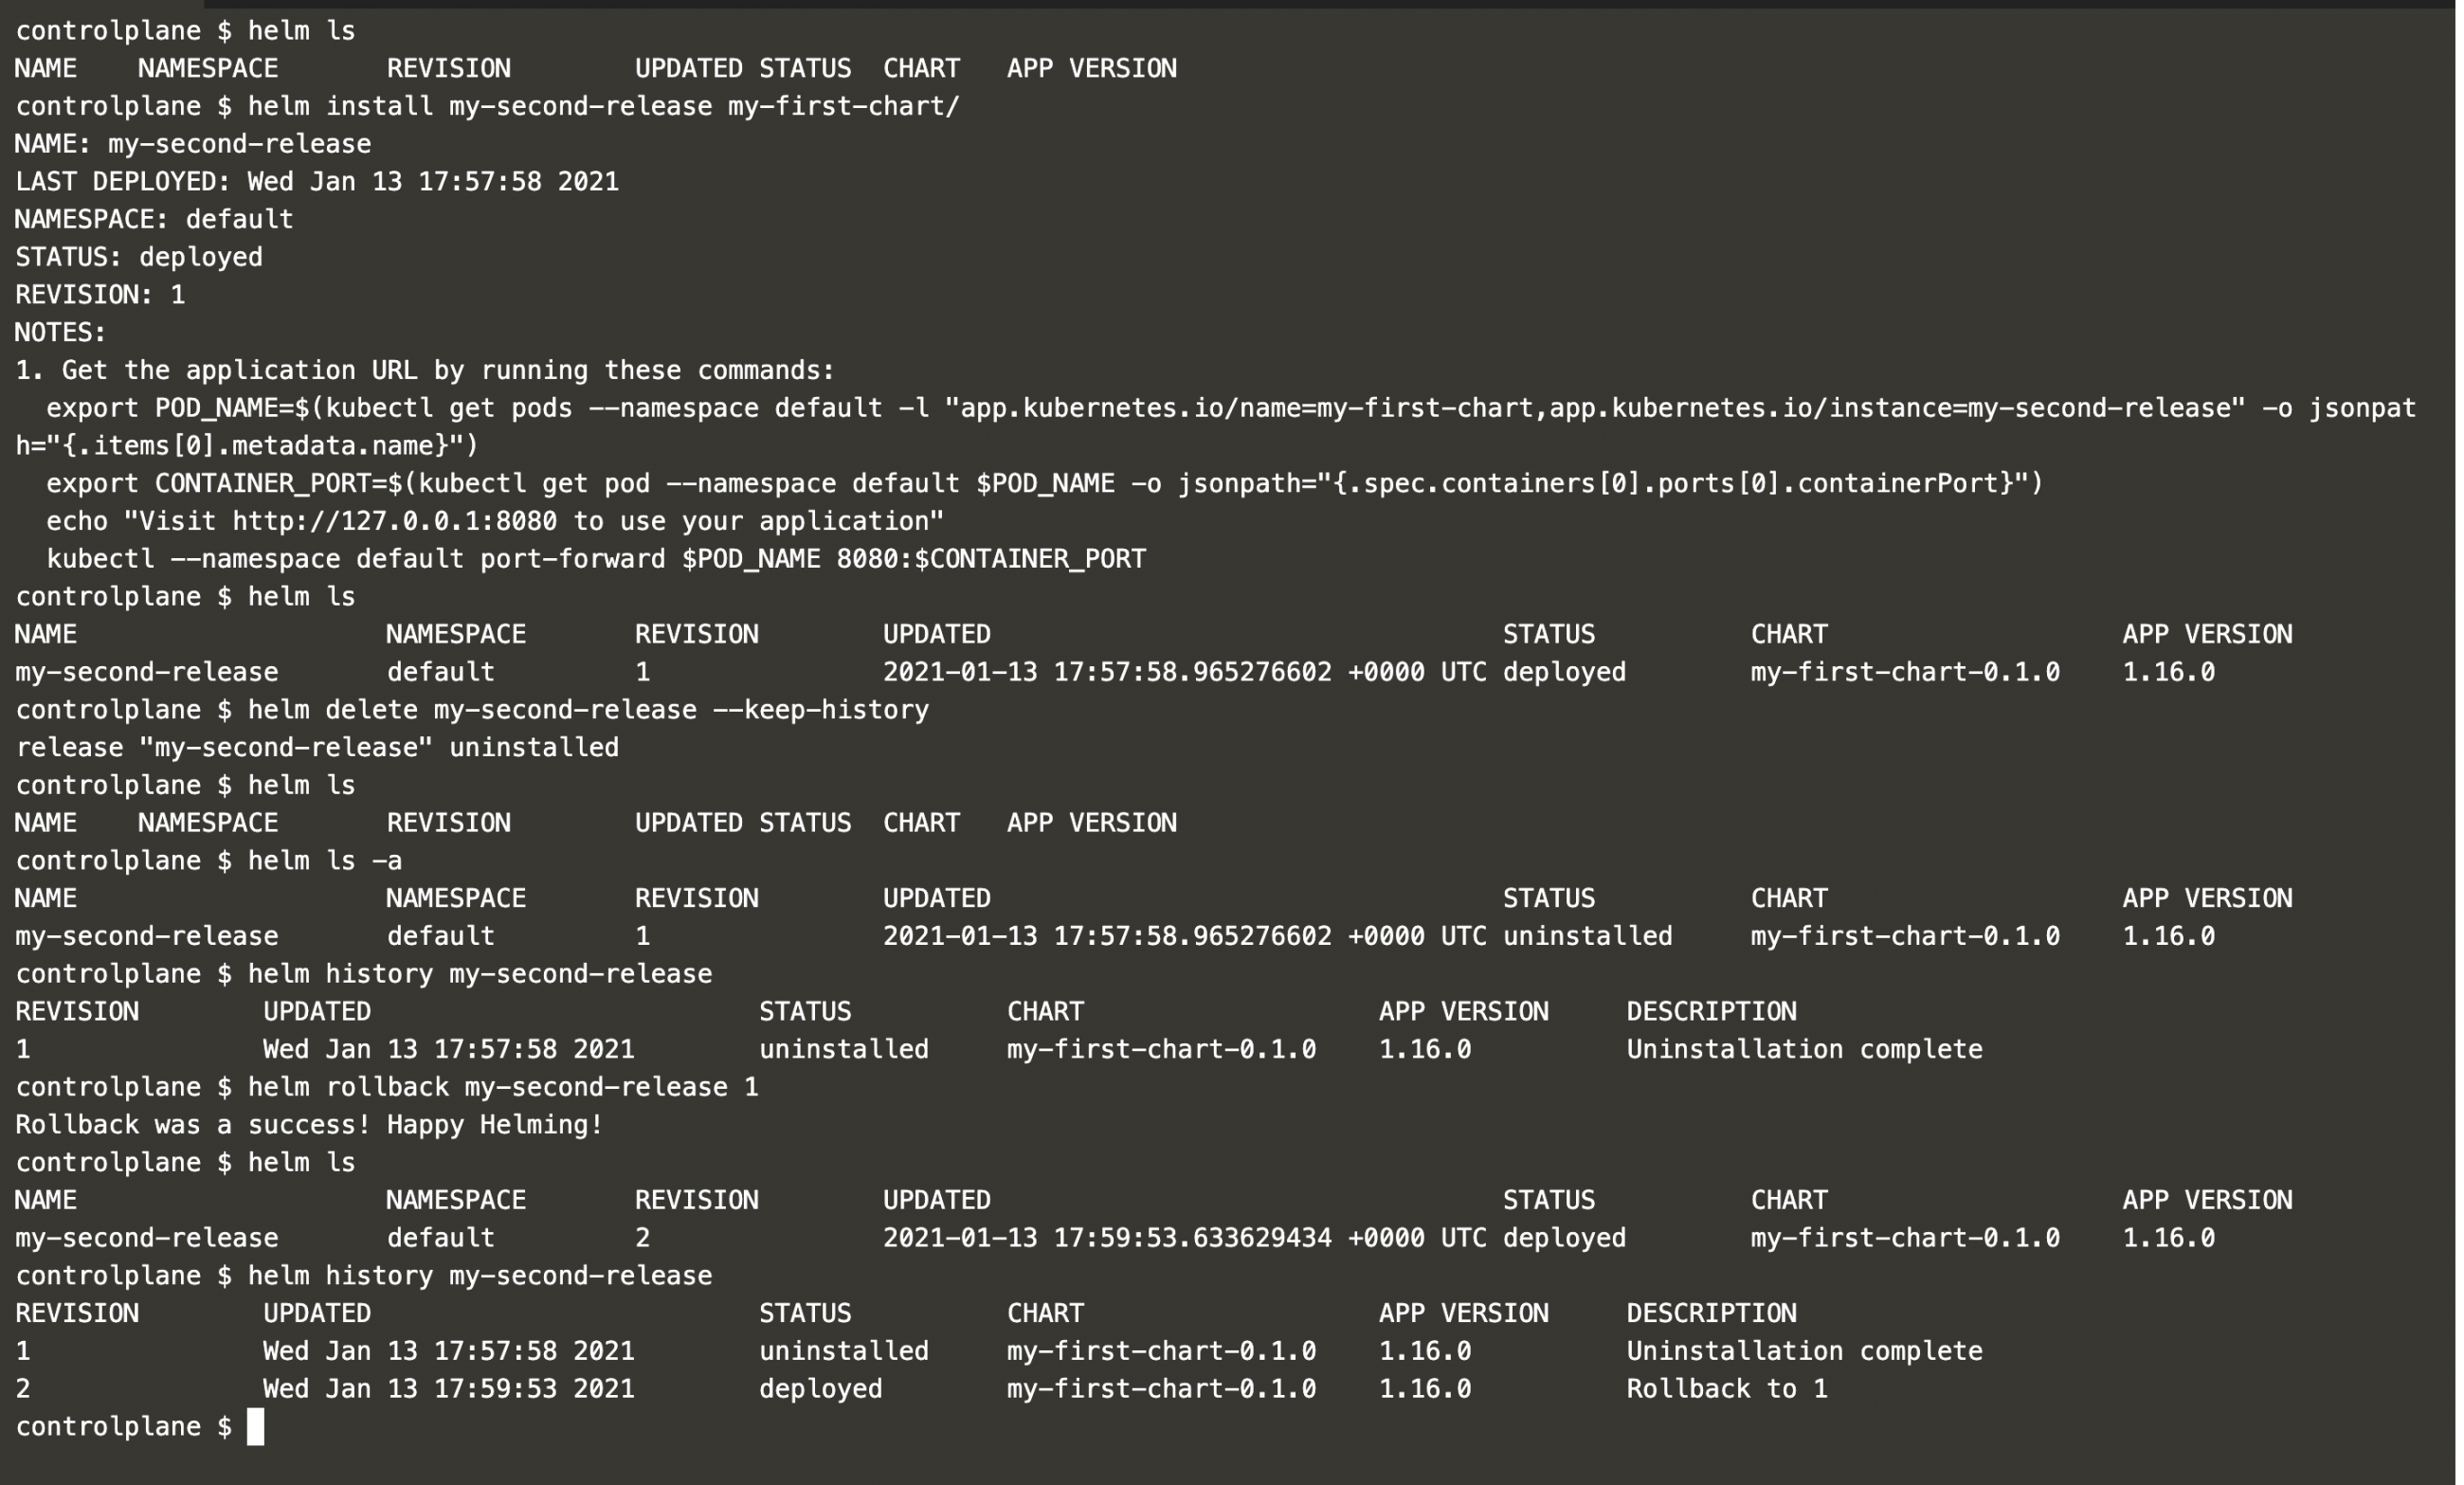
helm ls
helm install my-second-release my-first-chart/
helm ls
If you specify --keep-history option while deleting the release, the helm will create a new release version. In this way, you can revert to the previous working version even after deleting the release or application.
helm delete my-second-release --keep-history
helm ls
helm ls -a
helm history my-second-release
helm rollback my-second-release 1
helm ls
helm history my-second-release
Conclusion
In this article, we deployed a sample application from the Helm chart available on the Internet. We even saw the steps to create a Helm chart on our system and release it. Along with this, we saw how to delete Helm charts, rollback to previous versions and preserve release history even after deleting the chat.

