Creating Backups With luckyBackup On An Ubuntu 9.04 Desktop - Page 2
On this page
A Task properties window with the properties of the restore task will open if you have marked Also create a task for restore purposes. Make sure the settings are correct and click on Okay:
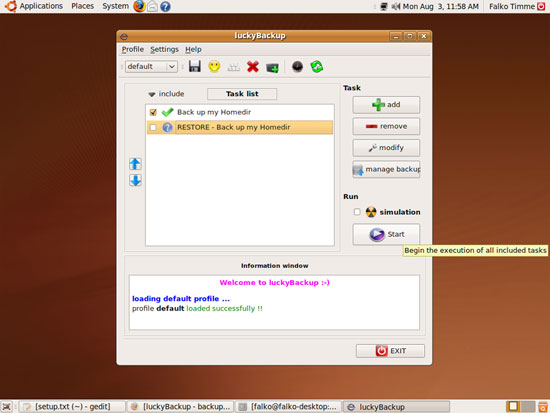
Now you will find two tasks in the main window, the backup task and the restore task. We want the backup task to be active (so that it can be run by cron, for example), while the restore task will usually be invoked manually (e.g. in case of data loss), therefore we mark the checkbox of the backup task...
... and click on the floppy disk icon to save our changes to the default profile (so that you don't lose the tasks you've just created when you close luckyBackup).
We can now invoke our first backup manually. Make sure that the backup task is checked (and the restore task is not) and click on the Start button:
A new window will pop up and show the progress of the backup. Click on Done afterwards to close it:
To restore a backup (e.g. in case of data loss), uncheck the backup task and check the restore task and click on Start:
Again, a window will pop up and show the progress of the restore process. Click on Done afterwards to close it:
Until now, we have invoked the backup manually. Of course, it would be nice if luckyBackup could create backups automatically for us a predefined times (e.g. once per day). Fortunately luckyBackup supports such scheduled tasks (i.e., cron jobs). To create such a cron job, click on the clock icon:
A new window will pop up (schedule). Click on add to create a new cron job:
You can now define when you want luckyBackup to create a backup for you. Click on okay when you're done:
The new cron job should now be listed in the schedule window. Click on cronIT !!:
That's it, luckyBackup will now create backups for you automatically.
3 Links
- luckyBackup: http://luckybackup.sourceforge.net/
- Ubuntu: http://www.ubuntu.com/


