How to create a Deployment in Kubernetes
On this page
Deployments represent a set of identical Pods. A Deployment runs multiple copies of the application. It automatically replaces any instances that fail. It helps to ensure that one or more instances of the application are always up and running. Deployments are managed by the Kubernetes Deployment controller. Deployments use a Pod template, which contains a specification for its Pods.
A Kubernetes deployment is a resource object in Kubernetes that provides declarative updates to applications.
To know more about on Deployment specifications, see the Kubernetes API documentation
In this article, we will learn to create a deployment in Kubernetes and perform operations on it.
Pre-requisites
Kubernetes Cluster with at least 1 worker node.
If you want to learn to create a Kubernetes Cluster, click here. This guide will help you create a Kubernetes cluster with 1 Master and 2 Nodes on AWS Ubuntu 18l04 EC2 Instances.
What we will do
Create a Deployment
Create a Deployment
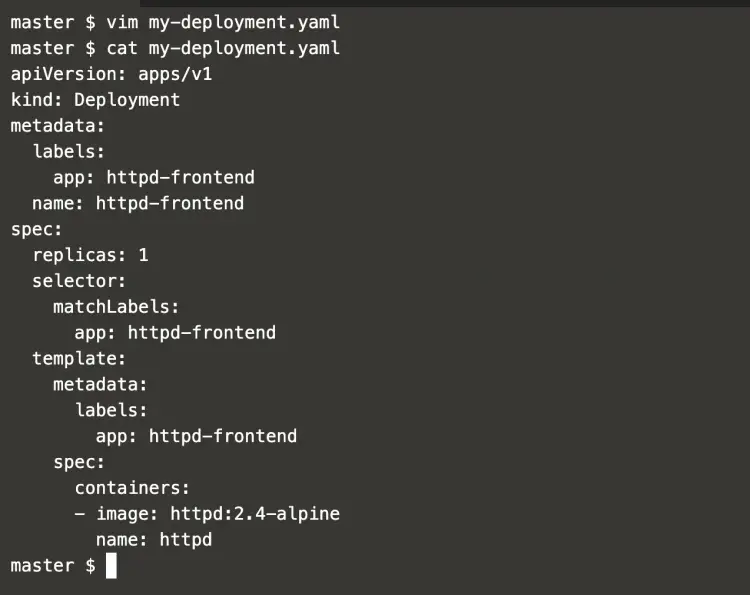
Create a file and add the following deployment definition in it.
vim my-deployment.yaml
apiVersion: apps/v1
kind: Deployment
metadata:
  labels:
    app: httpd-frontend
  name: httpd-frontend
spec:
  replicas: 1
  selector:
    matchLabels:
      app: httpd-frontend
  template:
    metadata:
      labels:
        app: httpd-frontend
    spec:
      containers:
      - image: httpd:2.4-alpine
        name: httpd
In this example:
- A Deployment named httpd-frontend will be created, indicated by the
metadata: namefield. - The Deployment will create 1 replica of the Pod, indicated by the
replicasfield. - The Pod template, or
spec: templatefield, indicates that its Pods are labeledapp: httpd-frontend - The Pod template's specification, or
template: specfield, indicates that the Pods run one container, httpd, which runs the httpd: image at version 2.4-alpine.
Use the following command to create a deployment
kubectl create -f my-deployment.yaml
Once you create a deployment, you can get its details using the following command.
kubectl get deployment | grep httpd-frontend
Deployment created a replica-set, to list it use the following command.
kubectl get replicaset | grep httpd-frontend
Pods created by the replica-set can be listed using the following command which will list the pods matching the specified name.
kubectl get pods | grep httpd-frontend
Now, you can test the auto-creation of the pod if the existing fails by deleting it.
To delete the existing pod, use the following commands.
kubectl get pods | grep httpd-frontend
kubectl delete pod httpd-frontend-74fd6fd8cd-8nj2s
kubectl get pods | grep httpd-frontend
In the above screenshot, you can see that the pod got created after deleting the existing pod.
Now, even if the replica-set is deleted, the deployment will create it.
To test this, delete the replica-set using the following command.
kubectl get replicaset | grep httpd-frontend
kubectl delete replicaset httpd-frontend-74fd6fd8cd
kubectl get replicaset | grep httpd-frontend
In the above screenshot you can see that even after deleting the replica-set, it got created.
To see a little more information of the pod, "-o wide" can be used in the command as follows.
kubectl get pods | grep httpd-frontend
kubectl get pods -o wide | grep httpd-frontend
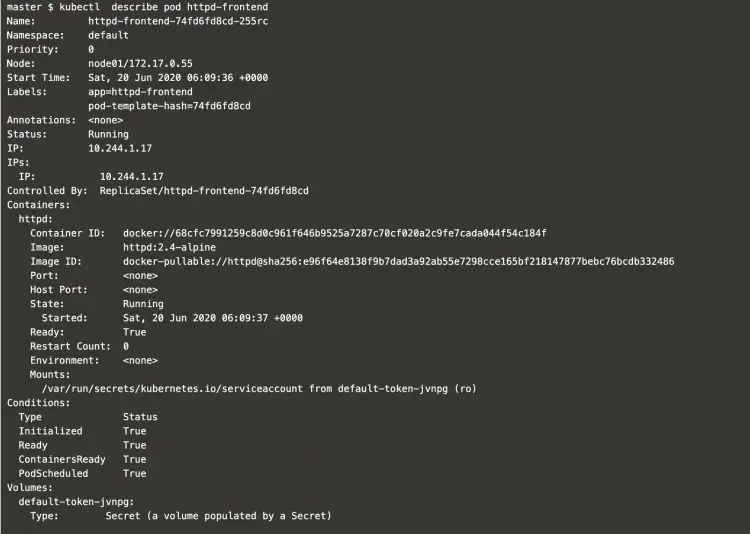
To get the complete information of the pod, it can be described using the following command.
kubectl describe pod httpd-frontend
Now, if you no longer need your application deployed using the deployment, it can be deleted by deleting the deployment.
Use the following commands to delete the deployment.
kubectl get deployment | grep httpd-frontend
kubectl delete deployment httpd-frontend
kubectl get deployment | grep httpd-frontend
In the above screenshot, you can see that after deleting the deployment it did not get created. But if you delete the pod or replicaset which were created part of deployment then they get created.
Conclusion
In this article, we learned to create a deployment and tried the delete operation on Pod, Replicaset and Deployment.


