Using Pydio In An ISPConfig 3 Multiserver Installation - Page 3
Now (re-)open the server ssh console and navigate to the webftp folder you created during pydio installation.
Edit the conf/bootstrap_repositories.php
/*
 * Copyright 2007-2013 Charles du Jeu - Abstrium SAS <team (at) pyd.io>
 * This file is part of Pydio.
 *
 * Pydio is free software: you can redistribute it and/or modify
 * it under the terms of the GNU Affero General Public License as published by
 * the Free Software Foundation, either version 3 of the License, or
 * (at your option) any later version.
 *
 * Pydio is distributed in the hope that it will be useful,
 * but WITHOUT ANY WARRANTY; without even the implied warranty of
 * MERCHANTABILITY or FITNESS FOR A PARTICULAR PURPOSE.  See the
 * GNU Affero General Public License for more details.
 *
 * You should have received a copy of the GNU Affero General Public License
 * along with Pydio.  If not, see <http://www.gnu.org/licenses/>.
 *
 * The latest code can be found at <http://pyd.io/>.
 *
 * Description : configuration file
 * BASIC REPOSITORY CONFIGURATION.
 * The standard repository will point to the data path (ajaxplorer/data by default), folder "files"
 * Use the GUI to add new repositories.
 *   + Log in as "admin" and open the "Settings" Repository
 */
defined('AJXP_EXEC') or die( 'Access not allowed');

// ADMIN REPOSITORY
$REPOSITORIES["ajxp_conf"] = array(
    "DISPLAY"           =>      "Settings",
    "DISPLAY_ID"                =>      "165",
    "DESCRIPTION_ID"    =>      "506",
    "DRIVER"            =>      "ajxp_conf",
    "DRIVER_OPTIONS"=> array()
);
Open the file plugins/auth.ftp/class.ftpAuthDriver.php and search for this (around line 110):
function setFtpDataCallback($actionName, $httpVars, $fileVars){
Add this function to the class right below the "logoutCallback" function. Replace the values with yours:
       function get_ispc_host($username) {
			// connect to ispc via remoting and read ftp user
			$server = '';
			$login = '<your remote user>';
			$pass = '<your remote user password>';


			$soap_location = 'https://pathtoispconfig:8080/remote/index.php';
			$soap_uri = 'https://pathtoispconfig:8080/remote/';

			$client = new SoapClient(null, array('location' => $soap_location,

			'uri'      => $soap_uri));
			try {
				//* Login to the remote server
				if($session_id = $client->login($login,$pass)) {

					$check = $client->sites_ftp_user_server_get($session_id, $username);
					if($check) {
						$server = isset($check['ip_address']) ? $check['ip_address'] : $check['hostname'];
					}

					if($client->logout($session_id)) {
					}
				}
			} catch (SoapFault $e) {
			}

			return ($server != '' ? $server : 'localhost');
        }
In the same file search for the function "setFTPDataCallback" that should be right below. Add the following code to the beginning of the functions so it looks like this:
    public function setFtpDataCallback($actionName, $httpVars, $fileVars)
    {
               if(isset($httpVars['userid'])) {
                       // get host from ispconfig
                       $httpVars['FTP_HOST'] = $this->get_ispc_host($httpVars['userid']);
               }
        $options = array("CHARSET", "FTP_DIRECT", "FTP_HOST", "FTP_PORT", "FTP_SECURE", "PATH");
        $ftpOptions = array();
      [...]
    }
Open the file plugins/access.ftp/class.ftpAccessDriver.php and add "return true;" to the beginning of the function "isWriteable":
        public function isWriteable($path, $type="dir"){
               return true;

               $parts = parse_url($path);
               [...]
        }
Open data/plugins/boot.conf/bootstrap.json and make it look like
{
  "core.conf":{
    "USER_CREATE_REPOSITORY":false,
    "SAVE_GUEST_PREFERENCES":false,
    "SKIP_USER_HISTORY":false,
    "USERS_LIST_COMPLETE_LIMIT":"20",
    "USERS_LIST_COMPLETE_MIN_CHARS":"3",
    "USERS_LIST_HIDE_LOGIN":false,
    "ALLOW_CROSSUSERS_SHARING":false,
    "UNIQUE_INSTANCE_CONFIG":{
      "instance_name":"conf.serial",
      "group_switch_value":"conf.serial"
    }
  },
  "core.auth":{
    "ENABLE_USERS":true,
    "CASE_SENSITIVE":true,
    "ALLOW_GUEST_BROWSING":false,
    "PASSWORD_MINLENGTH":"6",
    "SESSION_SET_CREDENTIALS":true,
    "SECURE_LOGIN_FORM":false,
    "MASTER_INSTANCE_CONFIG":{
      "instance_name":"auth.ftp",
      "TRANSMIT_CLEAR_PASS":true,
      "REPOSITORY_ID":"<YOUR_VALUE>",
      "LOGIN_REDIRECT":"",
      "FTP_LOGIN_SCREEN":true,
      "AUTOCREATE_AJXPUSER":false,
      "AJXP_ADMIN_LOGIN":"",
      "group_switch_value":"auth.ftp"
    },
    "MULTI_MODE":{
      "instance_name":"MASTER_SLAVE",
      "group_switch_value":"MASTER_SLAVE"
    },
    "MULTI_USER_BASE_DRIVER":"",
    "SLAVE_INSTANCE_CONFIG":[

    ],
    "SLAVE_INSTANCE_CONFIG_group_switch":""
  }
}
Replace <YOUR_VALUE> by the md5 hash that you find in the file data/plugins/conf.serial/aliases.ser.
Open file plugins/auth.ftp/manifest.xml. You have to change some lines in there.
Around line 53:
if(el.name != "userid" && el.name!="password" && el.name != "get_action" && el.name!="login_seed"){
remove the el.name != "userid" && part so it looks like this:
if(el.name!="password" && el.name != "get_action" && el.name!="login_seed"){
Around line 79:
<div class="dialogLegend" ajxp_message_id="ftp_auth.1">AJXP_MESSAGE[ftp_auth.1]</div>
add this directly behind:
<input type="hidden" name="FTP_HOST" value=""><input type="hidden" name="FTP_SECURE" value="FALSE"><input type="hidden" name="FTP_DIRECT" value="FALSE"><input type="hidden" name="FTP_PORT" value="21"><input type="hidden" name="CHARSET" value=""><input type="hidden" name="PATH" value="/web">
so it looks like this:
<div class="dialogLegend" ajxp_message_id="ftp_auth.1">AJXP_MESSAGE[ftp_auth.1]</div><input type="hidden" name="FTP_HOST" value=""><input type="hidden" name="FTP_SECURE" value="FALSE"><input type="hidden" name="FTP_DIRECT" value="FALSE"><input type="hidden" name="FTP_PORT" value="21"><input type="hidden" name="CHARSET" value=""><input type="hidden" name="PATH" value="/web">
(If you want to grant access to the base dir instead of the web dir, e. g. if you want to access the "private" folder, too, just change the "/web" to "/" in the last hidden input field.)
Around line 82:
Remove these three lines from the file:
<tr>
<td align="right"><ajxp:message ajxp_message_id="ftp_auth.2">AJXP_MESSAGE[ftp_auth.2]</ajxp:message> </td><td colspan="3"><input type="text" name="FTP_HOST" style="width: 190px; padding:0px; margin-right: 10px;" class="dialogFocus"><ajxp:message ajxp_message_id="ftp_auth.8">AJXP_MESSAGE[ftp_auth.8]</ajxp:message> <input type="text" name="FTP_PORT" style="width: 25px; padding:0px;" value="21"></td>
</tr>
Around line 86 (after deleting the previous lines):
Remove all 13 lines from the file. This section starts with:
<tr>
<td colspan="4">
<div class="dialogLegend" style="margin-top: 12px;" ajxp_message_id="ftp_auth.3">AJXP_MESSAGE[ftp_auth.3]</div>
and ends with
<td align="right"><ajxp:message ajxp_message_id="ftp_auth.7">AJXP_MESSAGE[ftp_auth.7]</ajxp:message> </td><td><input type="radio" name="FTP_DIRECT" style="width: 12px; padding:0px;" value="TRUE"><label style="display:inline-block;width:27px;">AJXP_MESSAGE[440]</label><input type="radio" name="FTP_DIRECT" style="width: 12px; padding:0px;" value="FALSE" checked><label style="display:inline-block;width:27px;">AJXP_MESSAGE[441]</label></td>
</tr>
Save your changes.
IMPORTANT! Now you have to clear the data cache:
rm data/cache/*.ser
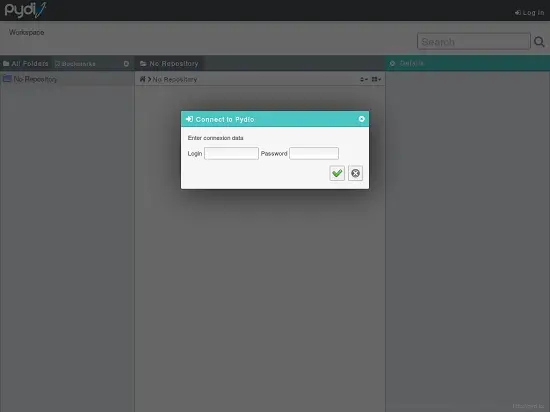
Now you are finished. Once you reload your pydio login screen in the browser you will be prompted with a slightly different one than before:

You can now login with every ftp user you create inside ISPConfig, no matter on what server of your multi-server-setup it resides. Have fun.

