The Perfect Desktop - Ubuntu 13.10 (Saucy Salamander)
This tutorial exists for these OS versions
- Ubuntu 14.10 (Utopic Unicorn)
- Ubuntu 13.10 (Saucy Salamander)
- Ubuntu 14.04 LTS (Trusty Tahr)
- Ubuntu 13.04 (Raring Ringtail)
- Ubuntu 12.10 (Quantal Quetzal)
- Ubuntu 12.04 LTS (Precise Pangolin)
On this page
- 1 Preliminary Note
- 2 Installing The Base System
- 3 Update The System
- 4 Flash Player And Java
- 5 Inventory Of What We Have So Far
- 6 Install Synaptic and Configure Additional Repositories
- 7 Install Additional Software
- 8 TrueType Fonts
- 9 Google Earth
- 10 Inventory (II)
- 11 Opera
- 12 MiroPlayer
- 13 Skype for 32 & 64 bit Systems
- 14 Cheese(The webcam)
- 15 Inventory (III)
- 15 Links
This tutorial shows how you can set up an Ubuntu 13.10 (Saucy Salamander) desktop that is a full-fledged replacement for a Windows desktop, i.e. that has all the software that people need to do thethings they do on their Windows desktops. The advantages are clear: you get a secure system without DRM restrictions that works even on oldhardware, and the best thing is: all software comes free of charge.
Ubuntu 13.10 will by default start the new Unity ver 7.1 desktop which requires that your hardware supports 3D acceleration,however you can also switch to Ubuntu 2D mode in the log on screen. If your hardware does not support 3D acceleration or you don't like Unity,you can still switch back to 2D version or download one of the countless alternatives.
I want to say first that this is not the only way of setting up sucha system. There are many ways of achieving this goal but this is the way I take.
1 Preliminary Note
To fully replace a Windows desktop, I want the Ubuntu desktop to have the following software installed:
Graphics:
- The GIMP - free software replacement for Adobe Photoshop
- Shotwell Photo Manager - full-featured personal photo management application for the GNOME desktop
Internet:
- Firefox
- Opera
- Chromium - Google's open-source browser
- Flash Player 11
- FileZilla - multithreaded FTP client
- Thunderbird - email and news client
- Evolution - combines e-mail, calendar, address book, and task list management functions
- aMule - P2P file sharing application
- Transmission BitTorrent Client - Bittorrent client
- Vuze - Java Bittorrent client
- Empathy IM Client - multi-platform instant messaging client
- Skype
- Google Earth
- Xchat IRC - IRC client
- Gwibber Social Client - open-source micro-blogging client (Twitter, Facebook, etc.)
- Pidgin IM Client - Multi-platform instant messaging client
- LibreOffice Writer - replacement for Microsoft Word
- LibreOffice Calc - replacement for Microsoft Excel
- Adobe Reader
- GnuCash - double-entry book-keeping personal finance system, similar to Quicken
- Scribus - open source desktop publishing (DTP) application
Sound & Video:
- Amarok - audio player
- Audacity - free, open source, cross platform digital audio editor
- Banshee - audio player, can encode/decode various formats and synchronize music with Apple iPods
- MPlayer - media player (video/audio), supports WMA
- Rhythmbox Music Player - audio player, similar to Apple's iTunes, with support for iPods
- gtkPod - software similar to Apple's iTunes, supports iPod, iPod nano, iPod shuffle, iPod photo, and iPod mini
- XMMS - audio player similar to Winamp
- dvd::rip - full featured DVD copy program
- Kino - free digital video editor
- Sound Juicer CD Extractor - CD ripping tool, supports various audio codecs
- VLC Media Player - media player (video/audio)
- RealPlayer - media player (available for i386 systems only)
- Totem - media player (video/audio)
- Xine - media player, supports various formats; can play DVDs
- Brasero - CD/DVD burning program
- K3B - CD/DVD burning program
- Multimedia Codecs
Programming:
- KompoZer - WYSIWYG HTML editor, similar to Macromedia Dreamweaver, but not as feature-rich (yet)
- Bluefish - text editor, suitable for many programming and markup languages
- Eclipse - Extensible Tool Platform and Java IDE
Other:
- VirtualBox OSE - lets you run your old Windows desktop as a virtual machine under your Linux desktop, so you don't have to entirelyabandon Windows
- TrueType fonts
- Java
- Read-/Write support for NTFS partitions
- Synaptic Package Manager
- gdebi Package Installer
Lots of our desired applications are available in the Ubunturepositories, and some of these applications have been contributed by the Ubuntu community.
As you might have noticed, a few applications are redundant, forexample there are two CD/DVD burning applications in my list (Brasero, K3B). If you know which one you like best, you obviously don't need toinstall the other applications, however if you like choice, then of course you can install both. The same goes for music players likeAmarok, Banshee, Rhythmbox, XMMS or browsers (Firefox, Opera, Chromium).
I will use the username howtoforge in this tutorial. Please replace it with your own username.
2 Installing The Base System
The installation of the base system is easy as 1-2-3 because theUbuntu installer doesn't offer a lot of options to choose from, so you cannot go wrong.
Download the Ubuntu 13.10 desktop edition iso image from http://www.ubuntu.com/download/ubuntu/download, burn it onto a CD, and boot your computer from it:
Select your language and click on the Install Ubuntu button to start the installation:
On the next screen you see a few requirements for the Ubuntu 13.10 installation (the system should have at least 5.9 GB available drive space and should be connected to the Internet). Please check the Download updates while installing and Install this third-party software (this will install the software necessary to process Flash, MP3, and other mediafiles) checkboxes and click on Continue:
Now we come to the partitioning of our hard disk. Usually Erase disk and install Ubuntu is a good choice, unless you need custom partitions and know what you're doing. Erase disk and install Ubuntu will create one big / partition for us:
Select the hard drive that you want to use for the Ubuntu installation. Then choose your time zone:

Change the keyboard layout, if necessary:
Type in your real name, your desired username along with a password,and click on Continue:

Further if you have preconfigured your UbuntuOne account then you can login with your credentials:
Afterwards, Ubuntu is being installed. This can take a few minutes,so be patient:
After the installation, you will be asked to reboot the system.Click on Restart Now:
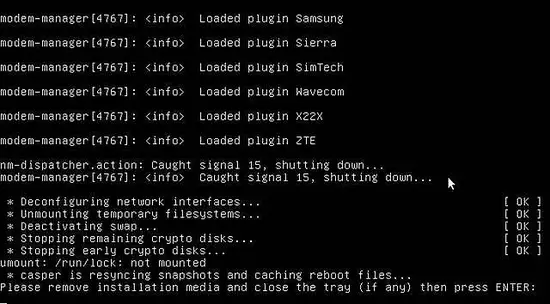
At the end of the shutdown process, you are asked to remove the Ubuntu installation CD from the CD drive. Please do this now and press ENTER.
Your new Ubuntu system starts. Log into the desktop with the username and password you provided during the installation:
This is how your new Ubuntu Unity desktop looks:
Now the base system is ready to be used.
3 Update The System
Now it's time to check for updates and install them. You can start the Update Manager by opening the Dash, typing in Update Manager into the search bar and clicking on the icon:
The Update Manager tells you which updates are available (you can click on the Check button to refresh the list). Click on Install Updates to install them:
If there are any updates available you can install them by clicking on Install Updates and entering your password confirm administrative rights. When the update is complete,click on Close (if a new kernel was amongst the updates, a system restart is required to make the changeseffective. If this is necessary, you will see a Restart Now button. Click on that button to restart the system.). The system is now up-to-date.
4 Flash Player And Java
If you have checked the Install this third-party software check-box during installation Flash Player should already be installed on the system but Java has to be installed manually.
To check this, open Firefox and type about:plugins in the address bar. Firefox will then list all installed plugins, and it should list the Flash Player (version 11.2 r202) plugins among them.
We will install Java a few steps below.
5 Inventory Of What We Have So Far
Now let's browse all menus to see which of our needed applications are already installed (open Dash and click on the second icon at its bottom - The label Installed displays all application already on your system):
You should find the following situation ([x] marks an application that is already installed, whereas [ ] is an application that is missing):
Graphics:
[ ] The GIMP
[x] Shotwell Photo Manager
Internet:
[x] Firefox
[ ] Opera
[ ] Chromium
[x] Flash Player
[ ] FileZilla
[x] Thunderbird
[ ] Evolution
[ ] aMule
[x] Transmission BitTorrent Client
[ ] Vuze
[x] Empathy IM Client
[x] Pidgin IM client
[ ] Skype
[ ] Google Earth
[ ] Xchat IRC
[ ] Gwibber Social Client
Office:
[x] LibreOffice Writer
[x] LibreOffice Calc
[ ] Adobe Reader
[ ] GnuCash
[ ] Scribus
Sound & Video:
[ ] Amarok
[ ] Audacity
[ ] Banshee
[ ] MPlayer
[x] Rhythmbox Music Player
[ ] gtkPod
[ ] XMMS
[ ] dvd::rip
[x] Kino
[ ] Sound Juicer CD Extractor
[ ] VLC Media Player
[ ] RealPlayer
[x] Totem
[ ] Xine
[x] Brasero
[ ] K3B
[ ] Multimedia-Codecs
Programming:
[ ] KompoZer
[ ] Bluefish
[ ] Eclipse
Other:
[ ] VirtualBox
[ ] TrueType fonts
[ ] Java
[x] Read/Write support for NTFS partitions
[ ] gdebi
[ ] Synaptic Package Manager
So some applications are already on the system. NTFS read-/write support is enabled by default on Ubuntu 13.10.
6 Install Synaptic and Configure Additional Repositories
Before you install any additional packages it's best to first install the Synaptic Package Manager since it easily lets you download multiple packages at a time. Open a terminal (Dash > Terminal) and enter
sudo apt-get update
sudo apt-get -f install
sudo apt-get install synaptic
To install Adobe-reader open the link in browser & download the latest binary package for the Adobe.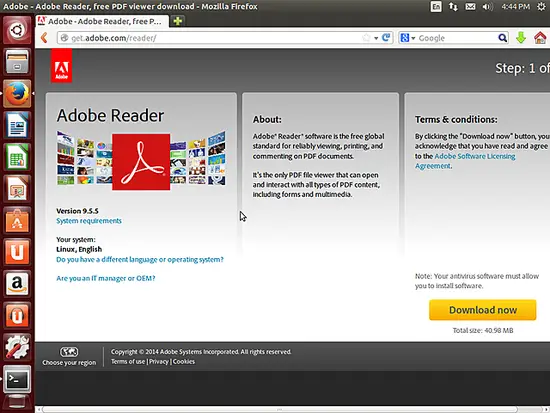
Goto your Download directory & give execute permissions to the binary file & run the installer.
chmod +x AdbeRdr*
sudo ./AdbeRdr*
So your Adobe reader is installed.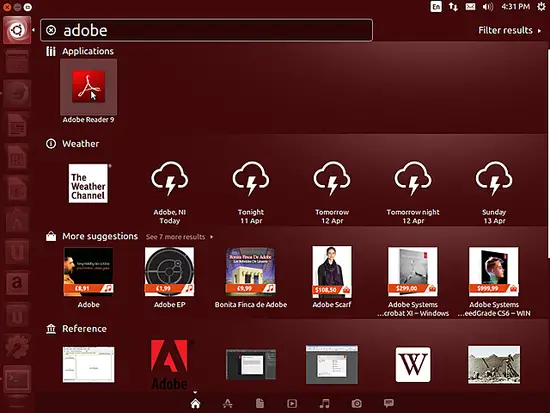
7 Install Additional Software
To install additional applications, open the Synaptic Package Manager (Dash > Synaptic Package Manager):
Type in your password:
In the Synaptic Package Manager, we can install additional software. You can use the Quick filter field to find packages. To select a package for installation, click on the check-box in front of it and select Mark for Installation from the menu that comes up:
If a package has a dependency that needs to be satisfied, a window will pop up. Accept the dependencies by clicking on Mark:
Select the following packages for installation (* is a wildcard; e.g. gstreamer* means all packages that start with gstreamer):
- amarok
- gimp
- flashplugin-installer (necessary only if you didn't check the Install this third-party software checkboxduring installation)
- amule
- audacity
- vuze
- bluefish
- dvdrip
- filezilla
- ttf-mscorefonts-installer
- gnucash
- gstreamer* (necessary only if you didn't check the Install this third-party software checkbox duringinstallation)
- gtkpod
- k3b
- kino
- mplayer
- smplayer
- eclipse
- kompozer
- scribus
- vlc*
- mozilla-plugin-vlc
- xchat-gnome
- xmms2*
- sound-juicer
- acroread
- non-free-codecs
- ubuntu-restricted-extras
- libdvdcss2
- xine-ui
- xine-plugin
- evolution
- virtualbox-ose
- chromium-browser
- googleearth-package
- skype (32 bit version only, leave it out for 64 bit)
- banshee
- transmission
- icedtea-plugin
- gdebi
After you've selected the desired packages, click on the Apply button. Confirm your selection by again clicking on Apply:
The packages are now being downloaded from the repositories and installed. This can take a few minutes, so please be patient:
You might have to answer a few questions. Accept the licenses and proceed:
After all packages have been installed, click on Close:
8 TrueType Fonts
To check if the TrueType fonts have been installed correctly, open a word processor like LibreOffice. You should now find your new Windows fonts there:
9 Google Earth
To install the Google Earth please got to the link
Select your architecture & let the file to get downloaded with gdebi-gtk which will take care of all the dependencies.

Install the package
Put your login password to get it authenticated.

It will install the Google earth in your ubuntu desktop.


10 Inventory (II)
Now let's check again what we have so far. Our inventory should nowlook like this:
Graphics:
[x] The GIMP
[x] Shotwell Photo Manager
Internet:
[x] Firefox
[ ] Opera
[x] Chromium
[x] Flash Player
[x] FileZilla
[x] Thunderbird
[x] Evolution
[x] aMule
[x] Transmission BitTorrent Client
[x] Vuze
[x] Empathy IM Client
[ ] Skype
[x] Google Earth
[x] Xchat IRC
[x] Gwibber Social Client
Office:
[x] LibreOffice Writer
[x] LibreOffice Calc
[x] Adobe Reader
[x] GnuCash
[x] Scribus
Sound & Video:
[x] Amarok
[x] Audacity
[x] Banshee
[x] MPlayer
[x] Rhythmbox Music Player
[x] gtkPod
[x] XMMS
[x] dvd::rip
[x] Kino
[x] Sound Juicer CD Extractor
[x] VLC Media Player
[ ] RealPlayer
[x] Totem
[x] Xine
[x] Brasero
[x] K3B
[x] Multimedia-Codecs
Programming:
[x] KompoZer
[x] Bluefish
[x] Eclipse
Other:
[x] VirtualBox
[x] TrueType fonts
[x] Java
[x] Read/Write support for NTFS partitions
[x] gdebi
[x] Synaptic Package Manager
11 Opera
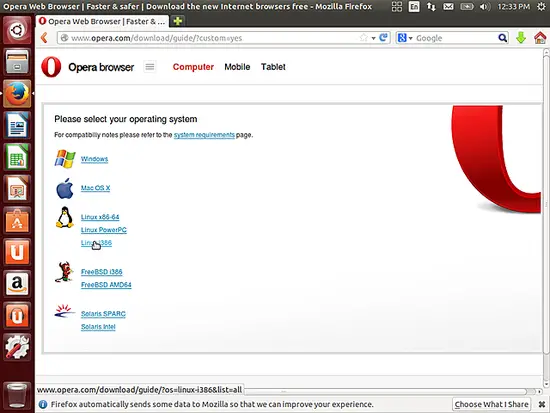
Open a browser and go to link; select Linux with your distro architecture:
Select the version of the Opera which you want to install, in fact every one will be using the updated one.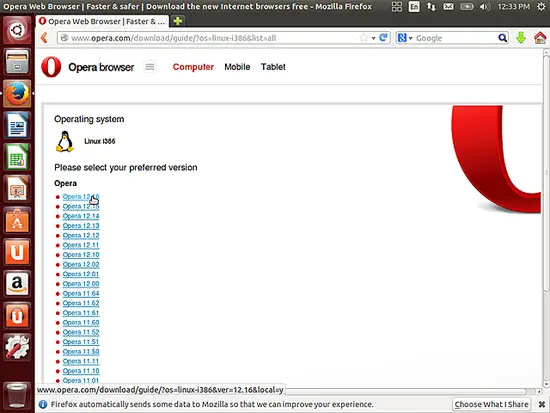
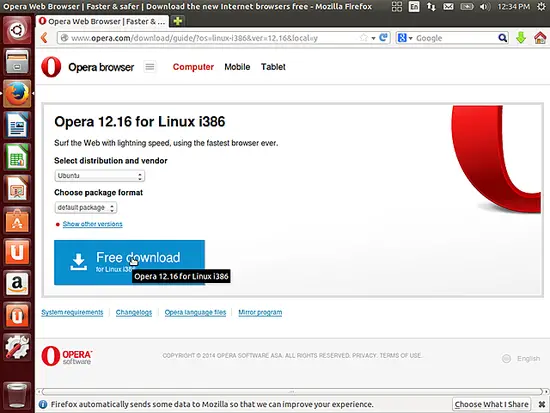
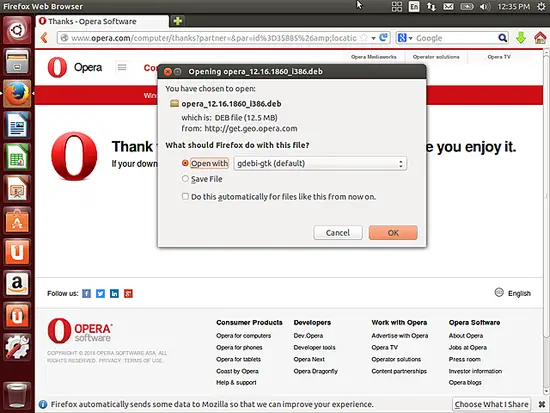
A download dialogue should come up. If it offers the option Open with Ubuntu Software Center (default), choose that one and follow the installation wizard. If you just see Open with and a Browse... button, select that option and click on the Browse... button. Select gdebi-gtk (/usr/bin/gdebi-gtk):
On the apperearing window, select Install Package: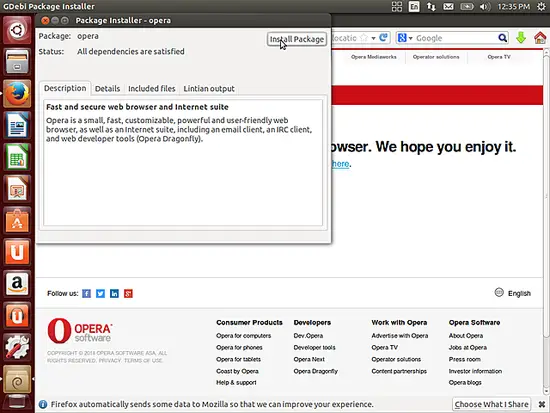
Put the system login password & continue.
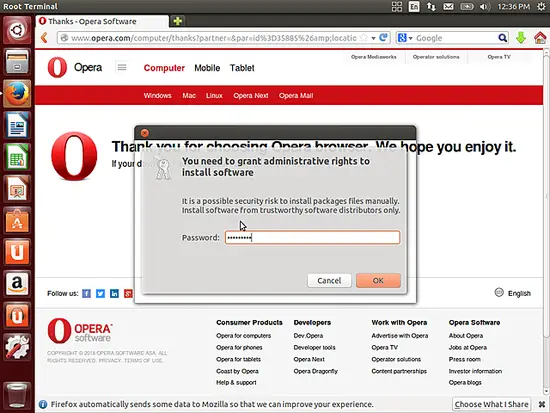
After complete installation it will ask you to agree the license agreement.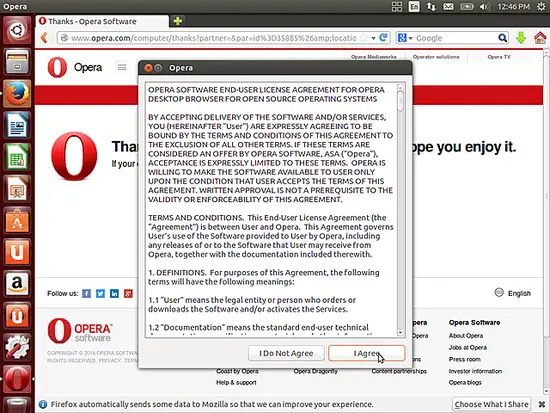
Just make I Agree & enjoy Opera.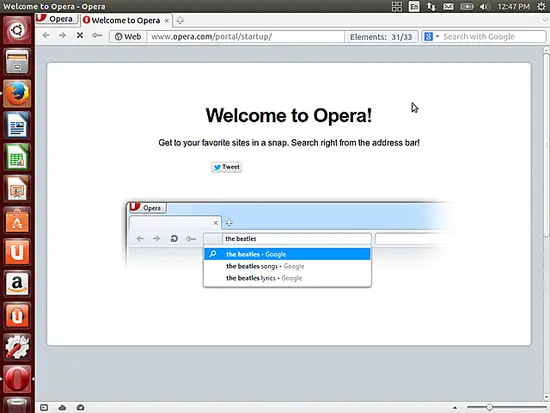
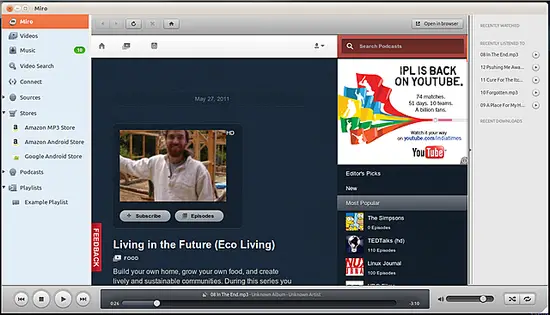
12 MiroPlayer
To install Miro check the file /etc/apt/sources.list
sudo vi /etc/apt/sources.list
Make sure that there are Universe is included.
Then update the system
sudo apt-get update
& finally install Miro by using
sudo apt-get install miro
It will install the miro for ubuntu.
13 Skype for 32 & 64 bit Systems
While Skype is only available for 32 bit systems in the Ubuntu repository, you can download it for 64 bitsystems on their homepage. Therefore go on link and select the right version to download:
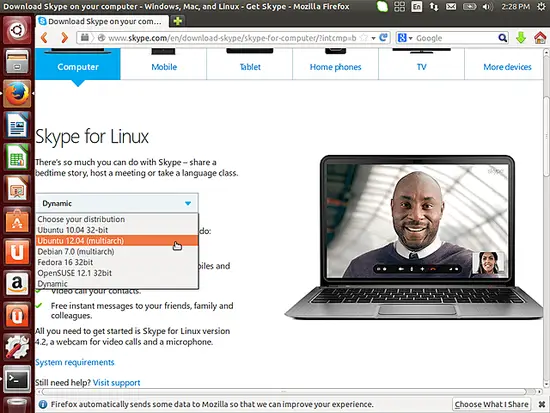
Further let the file get downloaded & install the file with command
sudo dpkg -i skype*.deb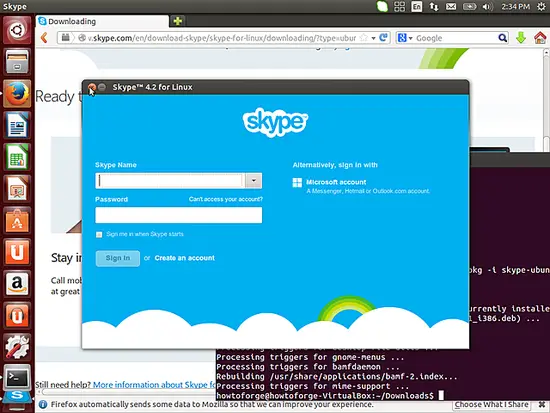
14 Cheese(The webcam)
For using the webcam you can use cheese. Simply install it by command
sudo apt-get install cheese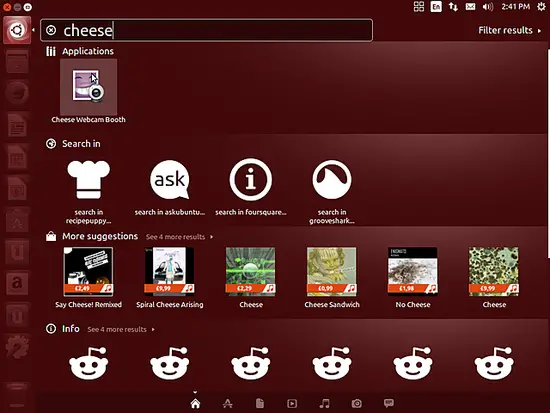
15 Inventory (III)
We have now all wanted applications installed:
Graphics:
[x] The GIMP
[x] Shotwell Photo Manager
Internet:
[x] Firefox
[x] Opera
[x] Chromium
[x] Flash Player
[x] FileZilla
[x] Thunderbird
[x] Evolution
[x] aMule
[x] Transmission BitTorrent Client
[x] Vuze
[x] Empathy IM Client
[x] Skype
[x] Google Earth
[x] Xchat IRC
[x] Gwibber Social Client
Office:
[x] LibreOffice Writer
[x] LibreOffice Calc
[x] Adobe Reader
[x] GnuCash
[x] Scribus
Sound & Video:
[x] Amarok
[x] Audacity
[x] Banshee
[x] MPlayer
[x] Rhythmbox Music Player
[x] gtkPod
[x] XMMS
[x] dvd::rip
[x] Kino
[x] Sound Juicer CD Extractor
[x] VLC Media Player
[x] RealPlayer
[x] Totem
[x] Xine
[x] Brasero
[x] Cheese
[x] Multimedia-Codecs
Programming:
[x] KompoZer
[x] Bluefish
[x] Eclipse
Other:
[x] VirtualBox
[x] TrueType fonts
[x] Java
[x] Read/Write support for NTFS partitions
[x] Synaptic Package Manager
[x] gdebi Package Installer
15 Links
- Ubuntu: http://www.ubuntu.com/


