SSH Key Management with privacyIDEA
In this tutorial I will show, how you can manage your SSH keys for all your servers and different user accounts. This is important, if you have more than one SSH key and it is even more important, if you a responsible for many different users with different SSH keys. Do you still know, whos keys are located on which servers? What will you do, if you have to revoke the user's keys?
We will use privacyIDEA as the system to manage the SSH keys. Originally privacyIDEA is a system to manage One Time Password tokens. But a while ago it was enhanced with a new concept so that it can be used to manage many different kind of authentication items - in this case SSH keys. (I gave a german talk about this on the german conference OpenRheinRuhr).
Prerequisites
I assume that you have installed a privacyIDEA system and connected your user database. You can do this easily by following this tutorial which will give you an appliance like system based on Ubuntu LTS.
What we will do now, is
- upload SSH Keys for the users,
- configure, which SSH Key can be used on which SSH server
- and finally adapt the SSH configuration on the SSH servers, so that the SSH Keys managed by privacyIDEA are used to authenticate on the SSH server.
Upload SSH Keys
First we need to upload the SSH keys of the users.
Please Note: We only need to upload the SSH public key. Never upload a private key!
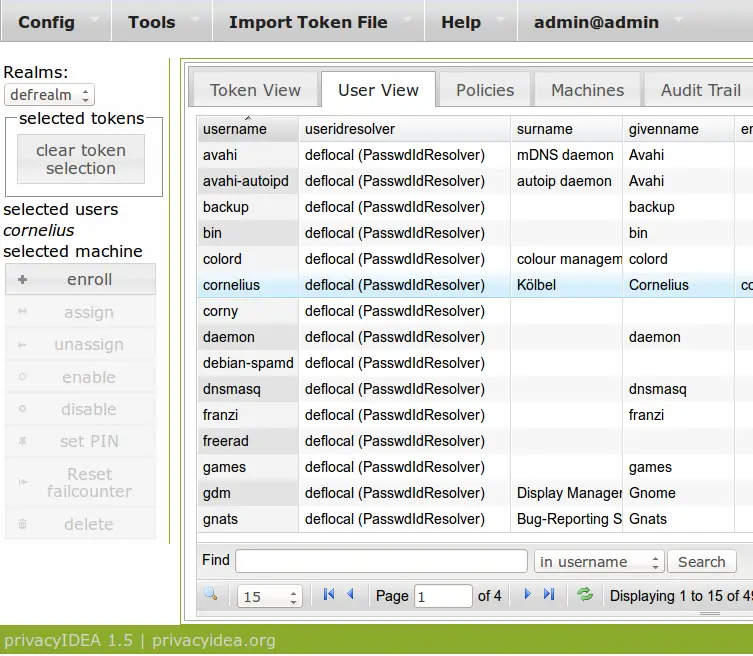
When uploading a SSH key a new token object of type SSH key is created. At the moment only the administrator can upload the SSH key of a user. The Administrator has to login and select the corresponding user.
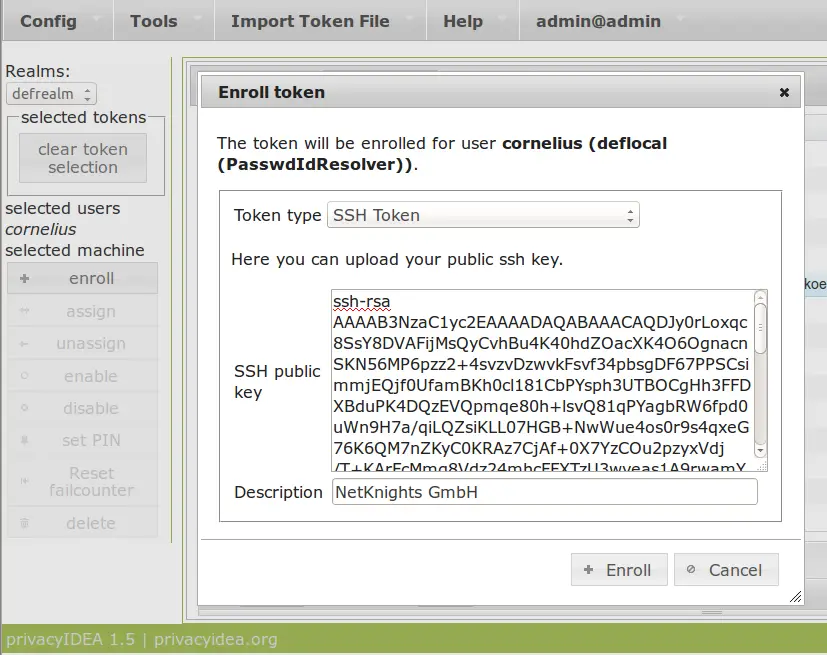
Then click the button Enroll and select the type SSH Token and copy-and-paste the SSH public key.
The description of the token will be filled in automatcally with the comment of the SSH key.
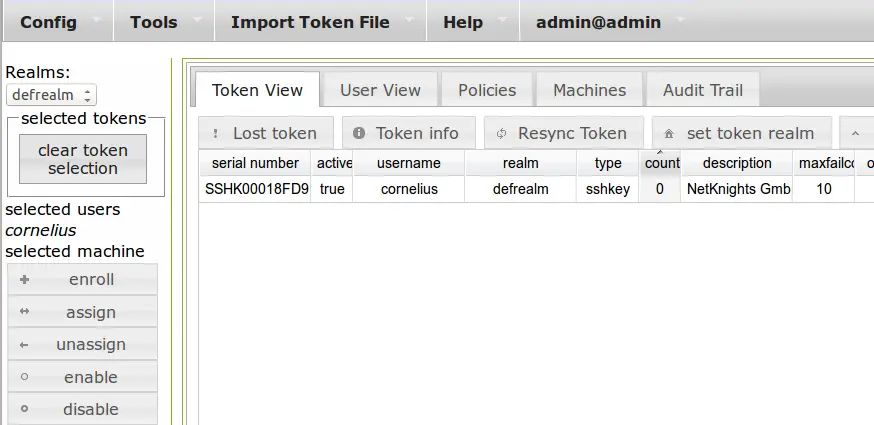
Now you can change to the Token view and you can see the new created token of type sshkey
Assign SSH Key to SSH Server
The Idea of using Tokens for certain machines is originally described at github and also in the online documentation.
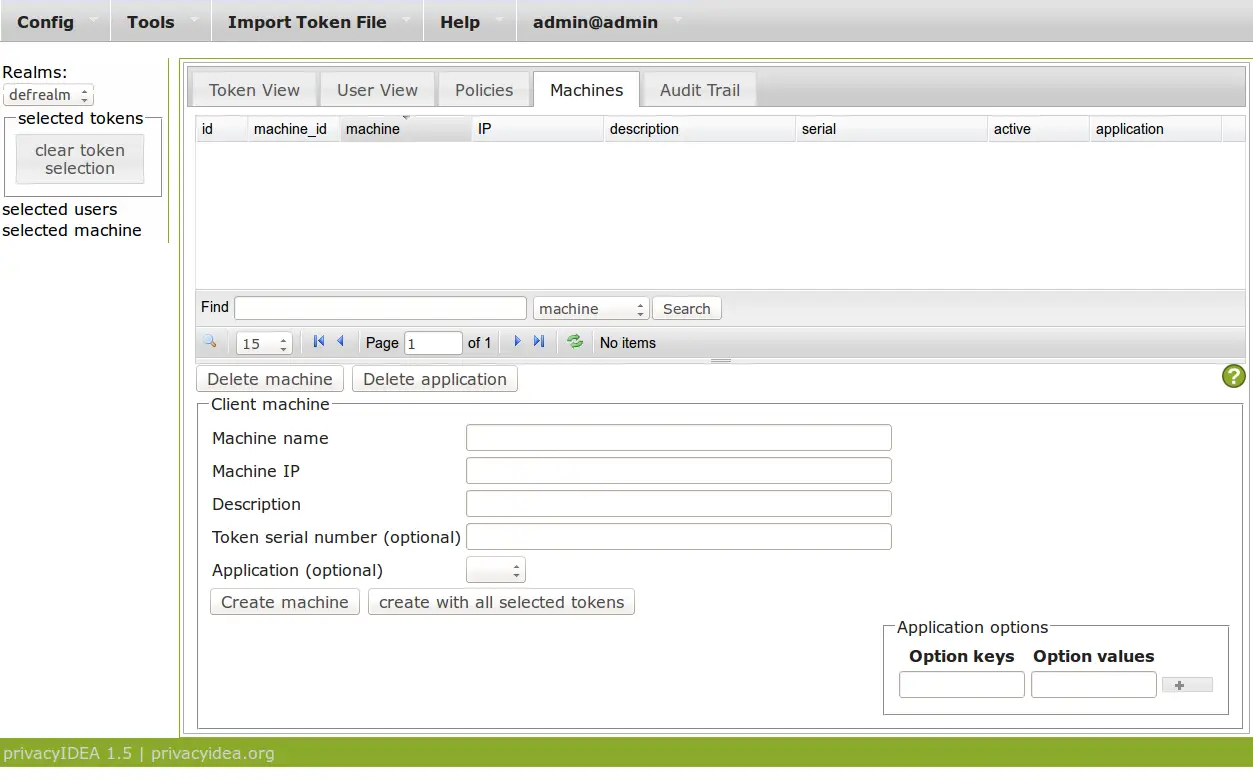
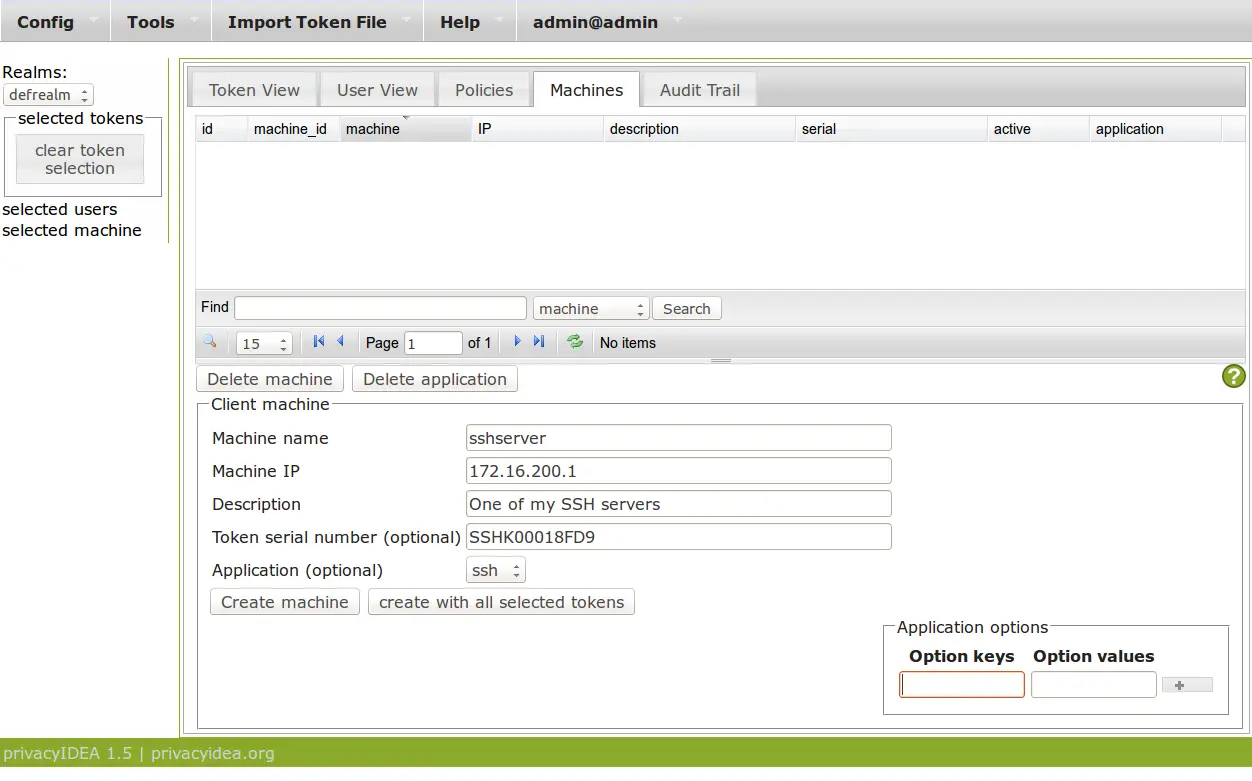
You need to define, which token is allowed to authenticate at which application on which machine. (This way also offline authentication with LUKS is possible) This can be done in the Machines view.
In privacyIDEA 1.5 you also need to define the machine (the SSH server) with the IP address. This will change in privacyIDEA 2.x.
This way we create a machine definition that says, that the ssh token SSHK00018FD9 may be used to login via SSH on the server 172.16.200.1. If the option key is left blank, this SSH token can be used to login as user root. You could as well enter an option "user" with the username as the value to be able to login as another user.
Setup SSH server
Now the SSH server needs to know about the fact, that the key, which was defined centrally in privacyIDEA, may be used to login via SSH. There are two alternative ways to achieve this.
We can use saltstack to distribute the SSH keys to all the SSH servers. For this we need to setup and run saltstack, which gives us a bit of an overhead. This is why we choose the second alternative in this tutorial.
The second alternative uses the SSH configuration key AuthorizedKeysCommand. This can be used in /etc/ssh/sshd_config to define a command, that is run each time someone tries to login via SSH. Such a command needs to take the username as parameter and needs to return a list of allowed SSH keys.
To achieve this, we use the command privacyidea-authorizedkeys which comes with the privacyidea admin client. So you need to install the privacyidea admin client on the each of your SSH servers. You can do this using the ready made ubuntu package from launchpad or python package from the Python Package index.
To install privacyidea admin client into your main system you run:
pip install privacyideaadm
privacyidea-authorizedkeys is not allowed to take any additional paramters except the username. This is why you need to create a configuration file /etc/privacyidea/authorizedkeyscommand which looks like this:
[Default]
url = https://your.privacyidea.server
admin = low_rights_admin
adminrealm = admin_realm
password = secret
Please be sure to restrict the access rights of this file. In a productive environment you should also ensure, that the token administrator mentioned in this config file is not allowed to perform any additional task like deleteing or creating tokens.
If everything is setup correctly you should be able to run
privacyidea-authorizedkeys root
...and you should see the ssh public key you uploaded to privacyIDEA.
Finally you need to reconfigure the SSH daemin and restart it. Your /etc/ssh/sshd_config should have a section that looks like this:
AuthorizedKeysCommand /usr/bin/privacyidea-authorizedkeys
# You also should run the command with lower privileges.
# The low_priv_user needs to have read access to /etc/privacyidea/authorizedkeyscommand.
# AuthorizedKeysCommandUser low_priv_user
Authenticate!
After restarting the SSH daemon you should be able to login via SSH with the uploaded SSH key. As soon as you either delete the SSH token or even disable the SSH token in privacyIDEA, the user can not login with this SSH key anymore.
This way you have full control over all keys of all your users. You can disable one SSH key at one central point and a user will not be able to login to any SSH server anymore.


