How to do image steganography on Linux
On this page
Steganography is the ancient art of the information concealment. People have found numerous methods to achieve this such as “invisible” inks, messages hidden in objects, and the famous “null cipher”. The word “steganography” comes from the Greek words “steganos” and “graphy” which means “impenetrable writing”. The years have passed and steganography has evolved into a sophisticated part of cryptography. Using the same basic principles that people utilized in their cryptographic efforts during the past, we can now perform similar feats on our Linux operating systems.
Choice of Tools
In this tutorial, I will use the OpenStego tool to perform the steganography. Thankfully, there are quite a lot of options that Linux users can choose from in this particular field with some of them being the command line Steghide and OutGuess, or the GUI Steganography Studio and Steg.
Data Hiding
First you need to download the latest version of the program from Git. As I use Ubuntu, I downloaded the .deb file. If you're using Ubuntu as well, you can install the package by opening a terminal in the /Downloads folder and giving the following command: “sudo dpkg -i openstego_0.6.1-1_amd64.deb”
The way OpenStego achieves the hiding of the data is by embedding them inside a carrier file which can be an image file. Lets suppose that I have a document that I want to pass to another person without anyone else even noticing that it is there. The original document doesn't need to be encrypted as it will be hidden inside an image file. OpenStego names those as “Message File” and “Cover File”.
The image file can be a .bmp, .gif, .jpeg, or .png. Select the two files by pressing the “file navigation” buttons on the right of each entry box and then set the name and location of an output file. Finally, setting a password is important as this is the only information that you need to share with the recipient who also has to use OpenStego to extract the hidden data. Finally, press the “Hide Data” on the lower right and you're done.
The two pictures look identical, but the second one contains a hidden document in it. The only thing that could blow this cover is the fact that people believe that there is always a hidden message in Led Zeppelin material.
Watermarking
The second thing that you can do with OpenStego is to watermark the file with a unique signature so that the recipient ensures that the file is coming from a trusted source. To do this, press the “Digital Watermarking” option on the left and then choose the “Generate Signature”. Then you can add a passphrase and set the name and location of the signature file that will be created upon the pressing of the “Generate Signature” button on the right.
The next step is to embed the watermark into the files. Select the signature file, the files to be watermarked, and finally set the name and location of the output files.
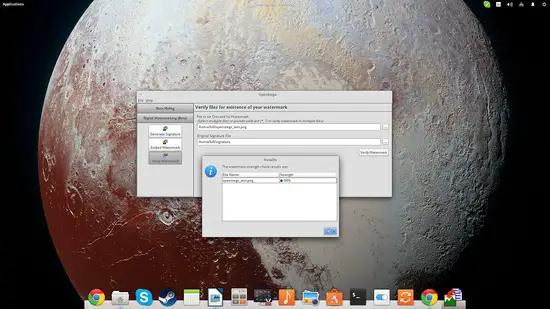
The recipient then may verify the watermark by selecting the original signature file and the file to be checked. If the score is higher than 70%, then it's a good enough match.


