How To Migrate ISPConfig 2, ISPConfig 3.x, Confixx, CPanel or Plesk to ISPConfig 3.2 (single server)

In this howto, we'll show how to use the ISPConfig Migration Tool 2.0 to migrate a single server to a new ISPConfig 3.2 server. The Migration Tool is part of the ISPConfig Migration toolkit which is available here.

The ISPConfig Migration Tool can be used to migrate these Hosting Control Panels to an ISPConfig 3.2 server:

  • ISPConfig 2
  • ISPConfig 3 and 3,1
  • Plesk 10 - 12.5
  • Plesk Onyx
  • Confixx
  • Cpanel

In this tutorial, we'll migrate an ISPConfig 3.0 server to a new system running ISPConfig 3.2. The Migration from other supported hosting control panels is done similarly. The Migration Tool will guide you step by step through the migration process.

Prerequisites

  • ISPConfig 3.x on the source server.
  • ISPConfig 3.1.7 or higher on the target server.
  • PHP 5.3+ with JSON, mcrypt, OpenSSL and mbstring support on the source.
  • Old and new server must not be connected to the same master server. If they are connected to the same master, use ISPCopy instead (which is part of the Migration Toolkit as well).
  • Migration Toolkit License.
  • The old and new server must use the same Let's Encrypt client. If your old server uses certbot, then ensure that the new system is using certbot too and not acme.sh.

Create a remote user in ISPConfig

You need a remote user on the target ISPConfig server.

Go to System -> Remote User

Add remote User in ISPConfig.

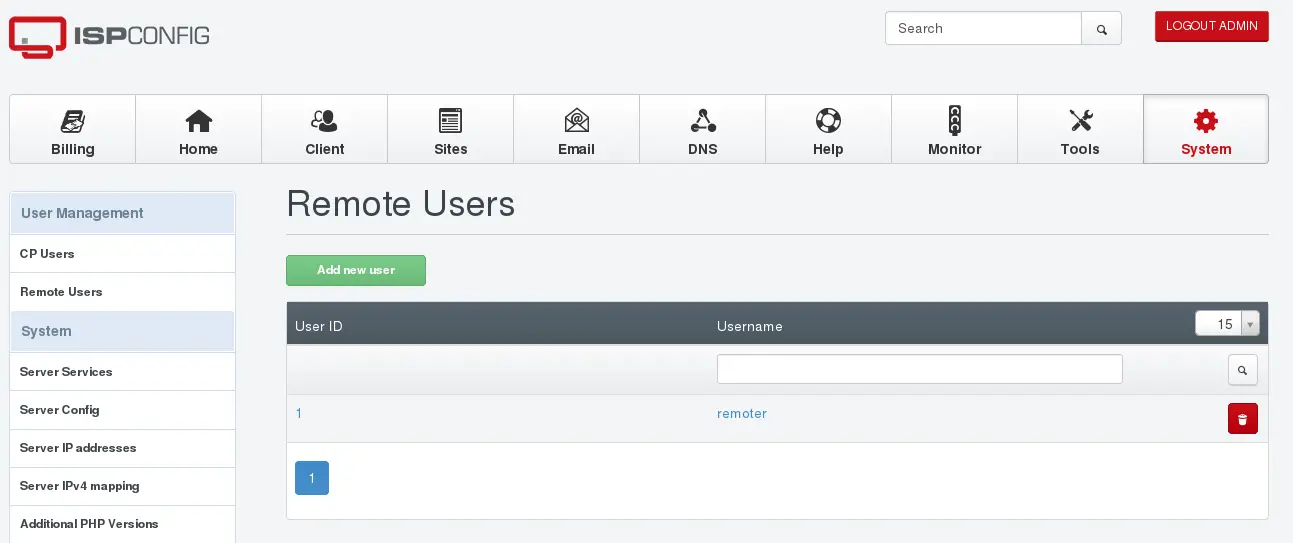
Click on the Add new user button.

Enter a username and password for the remote user, e. g. "remoter" and make sure you checked all checkboxes. Then click "save".

Remote user permissions

If you are using an ISPConfig version 3.1.11 on the target server, then edit the file /usr/local/ispconfig/security/security_settings.ini as root user:

nano /usr/local/ispconfig/security/security_settings.ini

and change the values of ids_anon_enabled and ids_user_enabled from 'yes' to 'no'.

....
[ids]
ids_anon_enabled=no
ids_anon_log_level=1
ids_anon_warn_level=5
ids_anon_block_level=20
ids_user_enabled=no
ids_user_log_level=1
ids_user_warn_level=10
ids_user_block_level=25
ids_admin_enabled=no
ids_admin_log_level=1
ids_admin_warn_level=5
ids_admin_block_level=100
sql_scan_enabled=yes
sql_scan_action=warn
apache_directives_scan_enabled=yes
nginx_directives_scan_enabled=yes
....

The IDS can be enabled again when the migration is finished. If you use ISPConfig 3.1.12 or newer, then this change is not required. 

Next, please check if the php-soap module is installed on the target server. If it is not installed, then install it now. On Debian and Ubuntu, you can install the PHP Soap module with apt:

apt-get install php-soap

Another prerequisite is that target and source server must have rsync installed. Please check with e.g.:

rsync --version

on both nodes that rsync is installed. If it is not installed, then install the rsync package of the operating system. E.g. with:

apt-get install rsync

on Debian and Ubuntu or with:

yum install rsync

on CentOS.

On the target server, there might be a file /etc/ssh/sshd_config.d/custom.conf created by the ISPConfig auto-installer which prevents the Migration tool from working. This file must be deleted if it exists. Run this command on the target server as root user to delete the file:

rm /etc/ssh/sshd_config.d/custom.conf

All following steps are done on the source server unless told otherwise.

Download and extract the Migration Tool

cd /root
mkdir migration
cd migration
wget https://www.ispconfig.org/downloads/ispconfig_migration_toolkit-latest.zip
unzip ispconfig_migration_toolkit-latest.zip
mv ispconfig_migration_toolkit/ispc3-migration-tool-*.tar.gz /root/migration/migtool.tar.gz
tar xzf migtool.tar.gz
rm -f migtool.tar.gz

Prepare passwordless login (optional)

During migration, there will be an SSH connection for transferring settings and data from the source to the target server(s). For this, the source server has to be able to connect to the target(s) without password.

You can either:

  • Set up passwordless login by yourself (add the public key of the source to the target root's authorized_keys file).
  • Or allow root access via ssh to the target by password (temporarily). The Migration Tool will then call ssh-keygen and ssh-copy-id for you. These are direct system calls, so if you are prompted for the target's ssh root password during this step, the input is NOT read by the Migration Tool, it is a direct prompt by the ssh-copy-id system command.

Run the migration (dry-run)

./migrate

If you want to run the tool on a specific PHP version (E.g. PHP 7.4 on Ubuntu 22.04), then use this command instead:

PHP=/usr/bin/php7.4 ./migrate

The result of any of the above commands will be like this:

Welcome to the ISPConfig3 Migration Tool V2 Version 2.0.0

Although this tool does not alter anything on the source server, you should
ALWAYS make a BACKUP of all your data before migrating to a new server!

You need to have some prerequisites set up to use this tool:
 * create an remote user (system -> remote users) in your TARGET ISPConfig3 system and grant ALL rights to it
 * make sure this (the SOURCE system) can reach the remoting api of the TARGET system

*** Disclaimer of Warranties ***
ISPConfig disclaims to the fullest extent authorized by law any and all other warranties, whether express or implied,
including, without limitation, any implied warranties of title, non-infringement, integration, merchantability or
fitness for a particular purpose.
By continuing to use this software, you agree to this.

First of all the most important question:
Do you want to make a real migration or a dry run? (dry, migrate): dry

We want to run in dry-run mode first, so we enter dry here.

The following modules are available:
        1. Confixx to ISPConfig 3 migrator (confixx)
        2. Plesk (10.5 - 17.5) to ISPConfig 3 migrator (plesk)
        3. ISPConfig 2 to 3 migrator (ispconfig2)
        4. ISPConfig 3 to ISPConfig 3 migrator (ispconfig3)

Which one is the one matching your SOURCE system? (confixx, plesk, ispconfig2, ispconfig3): ispconfig3

The Migration Tool needs to know which control panel you are using on your source server. It tries to recognize the required module on the source server, so you can normally simply press ENTER.

Enter this (SOURCE) server's ip that is used for outgoing connections [192.168.10.10]: 123.123.123.123

The Migration Tool needs to know what IP address on the source server is used for outgoing connections, i. e. which ip address other servers will see when the source is connecting to them. The tool tries to guess the ip address but you might need to change the value if you are using a private network for example.

Name of the remote user of TARGET ISPConfig3 system []: remoter
Password for this remote user []: yourremotepassword
URL to the remote system (e. g. https://yourdomain.com:8080/remote/) []: https://www.example.com:8080/remote/
You gave me remote user 'remoter' with password 'yourremotepassword'
And I shall connect to 'https://www.example.com:8080/remote/'
Is this correct? (y, n): y

Provide the Migration Tool with the data of the remote user that you created on the target and confirm your input with "y". The Migration Tool then will try to connect to the remote API of your target system.

I will now have to make some changes in your ISPConfig3 TARGET system config.
        1.) Enable domain module if needed
        2.) Remove client prefixes (will be undone automatically at the end)
        3.) Enable login for mail accounts if needed

Testing MySQL connection ... OK

What is the main public(!) ip of the target server www.example.com? [123.123.123.123]: [ENTER]

The Migration Tool will change some ISPConfig settings on the target (these changes will not be done, when runnin in dry-run mode) and test the connection to the MySQL server. It tries to guess the MySQL credentials by looking at some system files but eventually, you will be prompted for the MySQL root password.

Next, you need to give the public IP of the target server. It will be pre-fetched from DNS, but you might need to adjust it, especially if you use the same hostname on the source and target.

Do you want me to overwrite/update existing entries with the same name? (y, n): y
You can now set entry names, that shall NOT be overwritten.
You should use this if you plan to import several server's data to a multi-server installation.
If this tool finds a name that is already present, it UPDATES the data with the SOURCE data!
If this tool finds a name that you marked as not to overwrite, it either
         - appends a _2, _3 etc. to this name and creates a new entry, or
         - prepends a server prefix if specified by --server-prefix argument

The Migration Tool allows merging multiple servers into one target. When doing this, it might be that there are conflicting usernames on the source servers, e. g. if you have two databases with the name "testdatabase". If you answer "y" to this question, then the second database will replace the first one. If you answer "n" then it will change the name of the second database to "testdatabase_2".

Be sure to answer "y" when doing a single server migration because otherwise, you will create duplicates if you run the migration tool multiple times on the same source.

You currently have 0 FTP username name(s) marked:

You can now add further names to this list. Just enter them one by one or provide a comma-separated list.
To delete one or more names from the list, prepend a /DELETE to your input.
To clear all names from the list, type /CLEAR.
A blank input proceeds to the next step.
Your choice : [ENTER]

The Migration Tool offers you to mark some usernames for FTP, databases, clients etc. as "reserved". This means they will not be overwritten as mentioned in the section above. Normally you will leave this blank, but in some cases you might prevent usernames like "admin" or "administrator" from being imported. So you can enter them here which will result in a renaming of the imported names to "admin_2" etc.

The question is repeated for the different service types (FTP, database, clients, mail users).

What is the database name of your SOURCE ISPConfig 3 installation? [dbispconfig]: [ENTER]

The tool now asks for the database name on the source server that holds the control panel's data. Please check if the recognized database is correct and change it if needed.

Do you want to migrate only some services or everything?                                                                 
Valid services are: client, web, mail, ftp, database, cronjob, dns, billing                                              
Please enter one or more services (comma-separated) or leave blank for all: [ENTER]

The new Migration Tool is able to only migrate a subset of services, e. g. only migrate mail accounts and skip webs etc.

We want to migrate all services so we just leave the input blank and press ENTER.

To copy over web data, I need SSH access to the target webserver.
Please make sure that root login via SSH is allowed. On the target open /etc/ssh/sshd_config
and set PermitRootLogin to yes or without-password.
You can revert this once the migration is complete.

What is the ip for the target web server to connect via SSH? [123.123.123.123]: [ENTER]
What is the SSH port? [22]: [ENTER]

For copying over web, mail and db data, the Migration Tool requires passwordless SSH access to the target server. You need to provide the ip and port that the source should connect to. If you haven't already set up passwordless access you will be prompted for the root SSH password of the target server.

Testing MySQL connection ... OK

Starting API calls.

[50/74] <Domain> processing mydomain.com

The tool will now start to create/update all the entries on the target ISPConfig. On dry run it won't change or copy anything of course. Wait for the API calls to finish.

Processing of entries done.                                                                                              
=============
Migration tool run completed.

Once the migration tool finished the dry run without errors, we can continue with the real migration.

Run the migration

./migrate

If you want to run the tool on a specific PHP version (E.g. PHP 7.4 on Ubuntu 22.04), then use this command instead:

PHP=/usr/bin/php7.4 ./migrate

The result of any of the above commands will be like this:

	Welcome to the ISPConfig3 Migration Tool V2 Version 2.0.0rc2

Although this tool does not alter anything on the source server, you should
ALWAYS make a BACKUP of all your data before migrating to a new server!

You need to have some prerequisites set up to use this tool:
 * create an remote user (system -> remote users) in your TARGET ISPConfig3 system and grant ALL rights to it
 * make sure this (the SOURCE system) can reach the remoting api of the TARGET system

*** Disclaimer of Warranties ***
ISPConfig disclaims to the fullest extent authorized by law any and all other warranties, whether express or implied,
including, without limitation, any implied warranties of title, non-infringement, integration, merchantability or
fitness for a particular purpose.
By continuing to use this software, you agree to this.

First of all the most important question:
Do you want to make a real migration or a dry run? (dry, migrate): migrate

This time we answer the prompt with "migrate" and answer the questions just as we did during the dry run. The tool will have your inputs from the dry run pre-filled, so you will mostly be able to press ENTER.

Testing MySQL connection ... OK
Copying Let'sEncrypt files to target ... OK

Starting API calls.
[9/11]  processing [email protected] (web213p41)

This time the process will take a bit longer as there are real API calls being done. Wait for the process to finish.

Processing of entries done.                                                                                              
Target ISPConfig job queue has 35 entries left. Waiting .. 

To make sure all paths are created on the target the Migration Tool waits for ISPConfig to process all requests before it continues.

[INFO] Target ISPConfig job queue has completed. Continuing.

[19/935] Syncing /var/www/clients/client26/web21/web to /var/www/clients/client1424/web21/

Now the tool syncs all paths (web, mail) and copies over the database contents to the target server. This process can take a while depending on the amount of data you have.

If you want to do the actual data syncing in a separate step you can skip it by running ./migrate --no-syncjobs instead of just ./migrate

Final steps

The Migration Tool will reset the values it changed at the beginning (e. g. client prefixes).

Depending on your source control panel the Migration Tool activated the domain module on your target ISPConfig. This means that domains can only be used for websites, email domains etc. if they have been assigned by an administrator first (using Client -> Domains). If you do not want to use the domain module, you can disable it under System -> Interface settings -> Tab "Domains".

Finally, check the migrate.log that was created for entries that have [ERROR] or [WARNING] markers. These indicate problems during the migration process.

Re-Sync your target

Re-Sync accounts and settings

If things changed on the source control panel after you did the migration, you can just re-run it. The Migration Tool will update all entries with the new settings from your source server. And add new entries that were created in the meantime. Deleted entries on the source will not be deleted on the target!.

Re-Sync data

If you only want to re-sync the data for web, mail, and databases you can run ./migrate --syncjobs. This will skip all migration steps and only run the synchronization of websites, databases, and emails.

You can also ony re-sync one of the services, e. g. ./migrate --syncjobs --only=database. This will skip re-syncing website data and emails.

Advanced options

To get a list of advanced options which allows it to migrate e.g. single websites, mail domains or clients, use the --help option.

./migrate --help

The current options are:

Usage:  migrate <options>
        List of options:
        --help
                        Show this screen
        --server-prefix=<prefix>
                Use given prefix for conflicting usernames, if further
conflicts occur,
                add _2 _3 _4 ... to username
        --source-temp-dir=<parth>
                Set a different temp directory for actions on the source
server than /tmp
        --target-temp-dir=<parth>
                Set a different temp directory for actions on the target
server than /tmp
        --syncjobs
                Don't run the migration process, just re-sync all data
(web files, database contents)
        --no-syncjobs
                Only do the migration, don't copy any data files or
database contents to target
        --ignore-sync-errors
                Don't abort syncjobs processing if an error occurs. This
can be helpful for example
                if a command like chattr does not work correctly on the
target server.
        --confixx-no-domain
                On a confixx migration (source server) do not create a
dummy website that contains
                all other domains of that client as alias domains.
                Confixx uses a different approach for storing and
managing domains, so there is no
                "main" domain, but a hosting instead, that has all
domains assigned.
                On confixx servers where clients only have a single
domain it can be better to not
                create a dummy website with a single alias, but use the
domain as website instead.
        --only=client|web|mail|ftp|database|cronjob|dns|billing
                Only migrate the given service(s) and skip the others.
Can be provided multiple times.
        --exclude=client|web|mail|ftp|database|cronjob|dns|billing
                Migrate all services but the given one(s). Can be
provided multiple times.
        --only=/--exclude= on --syncjobs run
                When limiting the resync to single services, only web,
mail, database, system are valid.
        --only-client=<username>
                Only migrate a single client and it's data (web, mail
etc.). This can be used together
                with --only= / --exclude= to limit the migrated data
even further.
        --only-web=<domain.com>
                Only migrate the given domain and it's assigned
databases, ftp accounts etc.
                This can be used together with the other
--only-x/--exclude-x and --only=/--exclude= options
                to specify the data to be migrated.
        --only-mail=<domain.com>
                Only migrate the given mail domain and it's assigned
mail accounts, spam filter etc.
                This can be used together with the other
--only-x/--exclude-x and --only=/--exclude= options
                to specify the data to be migrated.
        --only-database=<databasename>
                Only migrate the given database and it's parent website.
                This can be used together with the other
--only-x/--exclude-x and --only=/--exclude= options
                to specify the data to be migrated.
        --only-dns=<domain.com>
                Only migrate the given DNS zone and it's assigned DNS
records.

                The above options can also be used in the opposite way,
using --exclude-client, --exclude-web,
                --exclude-mail, --exclude-database, --exclude-dns
                WARNING! Clients ALWAYS have to be migrated otherwise
you will have all migrated data assigned
                to the admin user instead of the client!

Share this page:

Suggested articles

70 Comment(s)

Add comment

Comments

By: lnxgs at: 2018-01-18 19:04:55

Does the script also copy the email boxes (messages)?

Thanks

By: till at: 2018-01-19 08:33:18

Yes. The script copies the configuration for Websites, Databases, Email and DNS and the Website, Database and Email data.

By: Juho at: 2018-01-28 13:53:56

If the source server has Courier and the destination server Dovecot, does the script handle the migration of email?

By: till at: 2018-01-28 14:35:01

Yes, the migration tool is able to convert mailboxes from courier to dovecot.

By: Lars at: 2018-01-22 05:27:24

Will the login credentials remain the same when migrating from Confixx ?

For example, for email Confixx 3.x uses the format "web1p1" as username while a standard ISPConfig setup uses the email address "[email protected]".If not possible by default, is there a way to tweak ISPConfig to use both the old Confixx and the new ISPConfig format (so users do not have to change their email settings after migrating) ?Thanks, Lars

By: till at: 2018-01-22 09:45:07

The login credentials remain the same. ISPConfig support login names instead of email addresses as well.

By: Nathan at: 2018-02-08 11:39:51

Access denied for user 'root'@'localhost' (using password: YES) in /root/migration/v56/migrate.php on line 485

When i write password: Testing MySQL connection ... OK

And couple next steps: [ERROR] Could not find database dbispconfig

but db exist. Any help? 


By: till at: 2018-02-08 15:20:11

Are you able to connect to mysql with this command?

mysql -u root -h localhost -p'yourpasword' dbispconfig


replace the word yourpassword with the actual password. The Migration Tool support can be reached here, if you need further help: https://www.ispconfig.org/get-support/?type=migration

By: Nathan at: 2018-02-08 16:11:18

mysql -u root -h localhost -p'yourpasword' dbispconfig is working 

I will send question to support. Thank You.

By: Stefan Warnat at: 2018-02-13 23:06:12

WOW. What a great tool. Thanks!

One addition for this tutorial.

The php-soap PHP Extension is required on target system to sucessfully finish the migration and the error will only be shown in apache error log. (An admin should check this on errors, but I know some admins, which don't know the error_log :) )

I installed the server be the auto install script from this forum, which don't install the extension, because it isn't a default one. I will also add comment on the installer topic.

By: webscom at: 2018-03-13 16:16:32

Hello,

I have a problem during migration execution stops with this error: (migrate.log)2018-03-13 15:43:29 - [INFO] Job queue has 69 entries left. Waiting ...2018-03-13 15:44:08 - [INFO] Target ISPConfig job queue has completed. Continuing.2018-03-13 15:44:08 - [INFO] Skipping system server as we have no job entries for this target.2018-03-13 15:44:08 - [INFO] Successfully executed command replace -? 2>/dev/null2018-03-13 15:44:08 - [INFO] Command chattr -i '/var/www/clients/client1/web1' failed.2018-03-13 15:44:08 - [ERROR] Execution of job failed: array (  'type' => 'chattr',  'path' => '/var/www/clients/client1/web1',  'enable' => false,  'stop_on_error' => true,)would you have an idea of the worries?I notice that in my directories some rights on the directories are root and not client1, could that come from this?

https://www.noelshack.com/2018-11-2-1520957690-2018-03-13-17-12-13-webscom-i5-kimsufi.pngthank you in advance for your help

By: Tom Albers at: 2018-03-14 14:58:03

 This looks awesome. I now have a master-slave setup. But the master also does mail and I want to split that to a new slave. How would that work? Do I first setup a new slave, add it to the cluster and then run the migrate script for mail only? Or do I start with a standalone server, migrate and then somehow add it to the cluster?

By: jhonatan at: 2018-04-09 17:35:39

 i have this problem, to execute the command ./migrate

with the PHP 5.3 ionCube Encoder and requires PHP 5.3 to be installed. in Unknown on line 0

By: Oliver at: 2018-06-07 19:21:49

How can i move a Server from an old ispconfig multiserver setup to another ispconfig multiserver setup?

I had an old server setup with multiple virtual servers in a multiserver setup mixed with some standalone servers. Now i do a migration to new server in a multi-server setup. My virtual Servers are migrated but how can i migrate the standalone servers without a new machine?

By: till at: 2018-06-08 05:59:43

You can move standalone servers with the tool and also nodes of a multiserver from one multiserver setup to another one and you can also import standalone servers into a multiserver system or join several nodes of a multiserver system or standalone servers into a single server.

By: Ruslan at: 2018-07-19 07:33:20

Hello!

Is it possible to disable cronjob migration?

If I select only database service or only web service for migration than cronjob is migrating as well.

By: Carlos at: 2018-07-26 23:17:16

Hello till, this tool work, if i wanna change to a new server with nginx and the old server have apache??

Ty.

By: Johan Seutens at: 2018-08-23 22:03:03

I would like to migrate to a ubuntu 18.04LTS with php7.2 but thats still unsupported any news on getting that fixed ?

By: till at: 2018-08-24 07:02:06

You can do that right away with the current version of the Migration Tool as the PHP version on the target system does not matter. Using PHP 7.2 on the target is absolutely fine as the Migration Tool is run on the source server only.

Besides that, the latest versions of the tool support PHP 7.2 on the source server too. You can download the latest version through the download link that you received by email after the purchase.

By: Zsolt at: 2018-09-21 11:13:50

Wow!I have a multiserver installation (panel, db, ns1, ns2, mail1, mail2, mail3, mail4, mail5, web1, web2, web3, web4, web5, web6), but my panel server is a very old centos, but that server is the panel server. I have a new ubuntu installation and i want to that server will be the new panel server. Is it possible ? So i want to migrate with this tool only the panel server.

By: till at: 2018-09-21 14:40:36

The combination of migrating the panel server only while keeping the slaves attached plus changing to a different Linux distribution at the same time is not possible with the Migration Tool nor with ISPCopy (the second tool in the Migration Toolkit). Let me explain why it's not possible. The Migration Tool is able to migrate single servers or nodes of a multiserver setup to a new single- or multiserver setup, it does this by importing the configuration and data into the new ISPConfig installation. This will not work in your case as you don't have a new Multiserver Setup as target (the slaves don't get migrated in your case). To overcome this limitation, we developed the second tool of the Migration Toolkit, ISPCopy. The difference compared to the Migration Tool is that ISPCopy copies over an ISPConfig installation 'as it is' to the new server, so this would work for moving your master server to a new hardware. But as ISPConfig copies the installation incl. it's config files, it is not possible to switch to a different Linux Distribution with ISPCopy. So the issues why it's not possible is your desired combination of moving the master only in combination with the change to a different Linux distribution.


If your master server just runs the control panel, then it basically has no config, it's just the ISPConfig UI and the ISPConfig database plus some MySQL users. So the easiest way would be to install a new ISPConfig single server system in expert mode so you just install the ISPConfig GUI like you did on the current server, then dump the dbispconfig database on the old system and import it into the new server. Finally, export the ispcsrv* mysql users on the old system and add them to the new one. If you like to outsource this, ask Florian from ISPConfig business support for a quote to move the master, you can reach him here: https://www.ispconfig.org/get-support/?type=ispconfig

By: thctlo at: 2018-09-25 07:45:08

No directadmin  :-(  

Any chance this script wil support DA also? 

By: till at: 2018-09-25 07:59:25

We plan to add more widely used panels like Directadmin and Cpanel. But I can't give you an estimate yet when they will be available as an import option.

By: Chris L at: 2018-10-25 14:39:55

Few issues:

When syncing  what appears to be mail contents I get nothing but ERRORs: job failed.ar/vmail/somedomain.com/username/Maildir to /var/vmail...

This is going to an Amazon Debian EC2.  Dry run worked fine

By: till at: 2018-10-25 14:46:30

Hello Chris, it might be that your EC2 instance firewall blocks the rsync transfer. Please contact the Migration Tool support here to get help: https://www.ispconfig.org/get-support/?type=migration

By: Chris L at: 2018-10-25 15:25:01

I didn't have rsync installed on source and target machines - duh!

By: till at: 2018-10-25 15:44:16

I've added a note in the tutorial to check if rsync is installed on both nodes.

By: Levien at: 2018-11-19 16:15:14

getting 2 errors:

first one:

WARNING! client templates can not be imported!All imported clients will have their correct limits but no template assigned!Further things that will NOT be imported:         - getmail accounts         - APS information about installed APS packagesand second: Testing MySQL connection ... OKTesting target server's MySQL setting ...Warning Warning Your max_allowed_packet setting is < 128M (16M). DB import might fail.- changing the value doen;t do the trick so what now?

By: till at: 2018-11-19 16:32:54

These are messages to inform you what can be imported and what not, so they do not indicate an error or failure of the import. The second info suggests that you should try to raise the max_allowed_packet  size on the new system to avoid potential problems with large database imports: https://stackoverflow.com/questions/8062496/how-to-change-max-allowed-packet-size

By: Patrick at: 2018-11-20 15:15:27

Hi, i run into a problem at the START of the migration, i have three servers that will become one, but somehow on all of them the remote logins FAIL

It keeps saying that the credentials are incorrect but i am 100% sure they are correct.

By: till at: 2018-11-20 15:21:32

When the tool says that the login fails, then the login is not possible. This can be caused by wrong user credentials or by blocking the connection with a firewall or by connecting to a wrong server or using a wrong remote url. The Migration tool needs to be run on the old serrver and the remote api connection is made to the new server and the remote URL must have the form https://www.example.com:8080/remote/ which means the URL end alsways with /remote/

If you need support for the Migration tool, then contact the Migration tolol support here: https://www.ispconfig.org/get-support/?type=migration

By: Petr Vlcek at: 2019-02-12 10:18:32

Hi, We are trying to migrate ISPCOnfig to a new HW and tried both ISP_Copy and Migration tool. Source is Debian7, apache 2.2.22, php 5.5 and SQL 5.5.60,  ISP config  We went throught all possible scenarios. For the scenario "Copy tool" we installed target exactly same SW but no go... In both cases Apache on the target servers fails to run after the migration or copy script.


The "isp_copy " runs fully through, but at the end the apache fails to run. The same happens with ".migration" script, where we installed latest debian 9+php5+php7+latest mysql+ISPConfig 3.1.13. It says:

-- Unit apache2.service has begun starting up.

Feb 11 21:50:17 web apachectl[24989]: AH00548: NameVirtualHost has no effect and will be removed in the next release /etc/apache2/sites-enabled/000-ispconfig.conf:73

Feb 11 21:50:17 web apachectl[24989]: Action 'start' failed.

Feb 11 21:50:17 web apachectl[24989]: The Apache error log may have more information.

Feb 11 21:50:17 web systemd[1]: apache2.service: Control process exited, code=exited status=1

Feb 11 21:50:17 web systemd[1]: Failed to start The Apache HTTP Server.

-- Subject: Unit apache2.service has failed

-- Defined-By: systemd

-- Support: https://www.debian.org/support

-- Unit apache2.service has failed.

-- The result is failed.

Feb 11 21:50:17 web systemd[1]: apache2.service: Unit entered failed state.

Feb 11 21:50:17 web systemd[1]: apache2.service: Failed with result 'exit-code'.


Any help will be highy appretiated.


By: till at: 2019-02-12 11:24:12

Restart apache and then check the apache error.log file for errors, most likely your old apache 2.2 website config contains settings that cause apache 2.4 on Debian 9 to fail or you use Apache modules on the old server that are not installed on the new one. And better use the migration tool and not isp_copy in your case as your new server has an apache version with a different syntax (apache 2.2 vs. 2.4) and the migration tool creates new vhost file with 2.4 syntax while isp_copy copies over the 2.2 files. If you need further help, please contact the migration support here: https://www.ispconfig.org/get-support/?type=migration

By: Petr Vlcek at: 2019-02-12 16:01:56

Well, that is what I already tried, after non-succesful ISP_copy to identical platform (from LXC to VM), I abandoned ISPCOPYscript and focused only on the migration script that always finished ok, but after that apache just will not start.

By: till at: 2019-02-12 17:10:14

ISPCopy would have worked if the platform would have been identical, but Debian 7 and 9 are not identical platforms as apache syntax is different, so copying an Apache 2.2 config file to an Apache 2.4 server may break the installation, which can be avoided by using the migration tool instead. As mentioned above, please contact the support (as you did in the meantime) when you have a problem with the tool, the comment section here is not a suitable place to post logs with internals of your server.

By: schnbeck at: 2019-03-13 21:48:28

I had the problem that starting with the mail forwards the transfer failed. Reason was an apache restart with the new but not functional configurations. I got the transfer running with a loop deleting /etc/apache2/sites-enabled/100* and could then work on the problems of the website configurations.

By: sweetromain at: 2019-04-16 07:18:55

The migration will remove source data on complete transfert to target ? Or just do a copy/paste to the target ?

By: till at: 2019-04-16 07:33:39

The Migration tool does not alter the source server in any way, so don't worry, no data gets deleted. And the Migration Tool does not just copy files, it imports the configuration into ISPConfig on the target, recreates the sites, mail accounts, DNS zones etc. changes Ip addresses in the config and paths where needed and then moves the data to the new server.

By: Fernando at: 2019-05-05 18:39:38

2 Questions:

1. Can I migrate from a server that has Apache installed to a new one that has Nginx? I have all features installed (except XMPP) but I am only using for e-mail and DNS servers.

2. Is there any issue in using the migration tool when the "old" server has MariaDB self hosted and the "new" one uses an external MariaDB server?

Thanks!

By: till at: 2019-05-06 09:37:14

1) Yes, that's possible.

2) ISPConfig always uses a local MySQL server, unless the new system is a multiserver system. You might have been able to manually tweak ISPConfig to use an external MySQL system on a single server, but that's not officially supported and we have not tested such scenarios with the migration tool. It might work though. External database nodes in multiserver systems are fully supported in the migration tool.

By: Fernando at: 2019-05-08 02:24:33

Thansk Till!

I actually made a mistake in my previous e-mail and the database is local to the server.

I made a dry-run to test (I have not yet bough the license) and it worries me the following lines in the log file:

2019-05-08 02:01:33 - [INFO] Found 0 DNS Zone entries.

2019-05-08 02:01:33 - [INFO] Found 0 DNS Record entries.

This worries me because I am using ISPConfig as a slave server to multiple zones but reading the log it looks like it founds no DNS zones. Can you confirm that that slave/secondary DNS-Zones are migrated as well?

By: Croydon at: 2019-05-08 06:16:45

Are you running the tool on the source server that has the DNS zones? The tool needs to be run on each server that shall be migrated. 

By: Fernando at: 2019-05-08 11:19:16

I am running the tool on the server that is to be migrated. This is a secondary DNS server that has the zones configured as such via the ISPConfig interface.

By: till at: 2019-05-08 15:04:17

I guess you are mixing things up here. slave zones are not DNS zones, so if you have slave zones only, then the tool will show 2019-05-08 02:01:33 - [INFO] Found 0 DNS Zone entries. as slaves records are in a different table and not DNS zones.

Please contact Migration Tool support so we can help you directly: https://www.ispconfig.org/get-support/?type=migration

By: Fernando at: 2019-05-08 02:27:25

An additional question on top of the previous one:

The log shows the target server is multi-server? It is a single server.

2019-05-08 02:01:18 - [INFO] Target is multiserver? yes

Also, is there any issue to migrate php7.2 servers?

By: Croydon at: 2019-05-08 06:17:48

Please look into the /usr/local/ispconfig/server/lib/config.inc.php of the target and check if the server_id is > 1 there. In addition check the "server" database table on the target ISPConfig database if it contains more than 1 entry.

By: Fernando at: 2019-05-08 11:29:18

server_id is '1' and there is only one entry in the database, as per the output below. Can you advise?

[email protected]:~$ 

[email protected]:~$ sudo cat /usr/local/ispconfig/server/lib/config.inc.php | grep server_id

[sudo] password for fazevedo: 

$conf['server_id'] = '1';

[email protected]:~$ 

[email protected]:~$ 

[email protected]:~$ mysql -u ispconfig -p

Enter password: 

Welcome to the MariaDB monitor.  Commands end with ; or \g.

Your MariaDB connection id is 11941

Server version: 10.1.38-MariaDB-0ubuntu0.18.04.1 Ubuntu 18.04


Copyright (c) 2000, 2018, Oracle, MariaDB Corporation Ab and others.


Type 'help;' or '\h' for help. Type '\c' to clear the current input statement.


MariaDB [(none)]> use dbispconfig;

Reading table information for completion of table and column names

You can turn off this feature to get a quicker startup with -A


Database changed

MariaDB [dbispconfig]> 

MariaDB [dbispconfig]> 

MariaDB [dbispconfig]> 

MariaDB [dbispconfig]> select * from server;

[RESULT OMMITED]

1 row in set (0.00 sec)


MariaDB [dbispconfig]> MariaDB [dbispconfig]> quit;

Bye

[email protected]:~$ 

[email protected]:~$ 

By: till at: 2019-05-08 15:01:28

You started the Migration Tool on the old server as shown in the guide, and not on the new one? Please contact Migration Tool support so we can help you directly: https://www.ispconfig.org/get-support/?type=migration

By: FredZ at: 2019-05-07 07:00:41

A really stupid thing has me stuck. I can't get past the ssh key pair setup. On Debian root doesn't exist, but the key pairs seem to insist on using root to copy the key pairs from the source to the new server. Wanting to get this all sorted before I purchase the tool.

By: till at: 2019-05-07 15:34:06

A root user exists on Debian and the connection must be made by the root user as the user which copies the data must be able to set the ownership of all files for all users correctly.

By: Gaby at: 2019-09-10 16:36:39

In the link above (https://www.ispconfig.org/add-ons/ispconfig-migration-tool/) it is mentioned, that the OS has to be same. So does the migration tool work from Ubuntu 14.04 (ISPconfig 3.0.5) to Ubuntu 16.04 (ISPconfig 3.1.15)? Or are these two Versions of Ubuntu considered als different OS?

By: till at: 2019-09-10 17:04:08

You mix up ISPCopy with the Migration Tool here. The link you posted explains that it has to be the same OS when you use ISPCopy only. For the Migration Tool, which is used in this tutorial, the OS does not matter. So you can use the Migration Tool to migrate the ISPConfig installation from Ubuntu 14.04 to 16.04, but using migrating to Debian or CentOS would work as well.

By: Jan at: 2019-09-16 20:55:30

We have ISPConfig running on ancient Ubuntu 14.04.6 system. We'd like to transfer ISPConfig to the new server, with Ubuntu 18.04 LTS. Will the ISPConfig Migration toolkit handle properly differences between applications for both of this OS-es? For example: will it automagically tune existing Apache2 config on Ubuntu 14.04 to the version available in Ubuntu 18.04? What about changes in MySQL database between this two OS-es?

By: Joan at: 2020-01-20 22:19:51

Select policy number (1, 2, 3, 4, 5, 6, 7):These spamfilter policies are available. Please select the one, that should be applied to all other mail accounts.[ 1] Non-paying[ 2] Uncensored[ 3] Wants all spam[ 4] Wants viruses[*5] Normal[ 6] Trigger happy[ 7] PermissiveSelect policy number (1, 2, 3, 4, 5, 6, 7):Reading Reseller entries ...Fatal error: Call to a member function get() on a non-object in /root/migration/v54/includes/modules/ispconfig2.inc.php on line 616

By: till at: 2020-01-21 08:29:05

Hi Joan, please contact the Migration Tool Support here: https://www.ispconfig.org/get-support/?type=migration

By: Istvan at: 2020-04-19 16:20:46

Hi All,

After the migration, on the target, every site has "*" not ipv4 address.

Do I have to change manually or is there any solution for this ?


thank in advance for ideas :)

By: Kiron at: 2020-05-22 12:28:34

Is there any way to change the default TTL on the destination server after migration? Each new migrated record has a TTL of 86400.

By: Rostislav Stemon at: 2020-05-26 07:46:27

DNS migration of SRV records did not work.

2020-05-26 06:52:13 - [ERROR] API call to dns_srv_add failed.2020-05-26 06:52:13 - [ERROR] JSON API REPLY ERROR: srv_error_regex<br />

By: till at: 2020-05-26 08:15:22

The posted error message is from ISPConfig and not the Migration Tool, the Tool just logged it for you. If you have issues with your migration, please contact the migration tool support: https://www.ispconfig.org/get-support/?type=migration

By: basilmmathew17 at: 2022-03-17 13:24:09

please give me the fix of srv_error_regex 

By: Giovanni Dedè at: 2020-07-06 15:00:01

Hi, I have a question.

Does the migration tool move /etc/dovecot directory?in that directory I have many custom preferences of the mail server.

Thanks,

Giovanni

By: till at: 2020-07-06 15:07:41

No, the tool does an import of websites, mail accounts, DNS records etc. from one control panel to another, it does not copy complete config file directories as they are as this would impose issues when the operating system versions or control panels or operating systems, in general, are not identical between source and target. So if you are using a custom server config, then you must reconfigure the new server in the same way to keep it. Or use ISPCopy, which is part of the Migration Toolkit as well. ISPCopy copies an ISPConfig installation from one server to another as it is, but in that case, OS, OS version, and ISPConfig version should be the same between source and target.

By: Lester at: 2021-05-15 08:10:52

After initial migration and DNS is being propagated how do you ensure the mail delivered to the old mail server can be moved to the new one, BUT also not overwrite mailbox so that new mail delivered to the new mail server already remains.

Currently it looks like resync sets the target data to match source exactly losing any mail delivered to new mail server?

By: spazio at: 2022-01-23 14:04:22

I didn't see any way to re-sync just one website files/database/ftp-user etc.

I get an error saying that --sync-jobs cannot be use with --only-web

./migrate --syncjobs --only-web=domain.com

I'm migrating a server that have more than 500 GIB of web files plus the database. Naturally it takes more than 10 hours just for the process to complete. Before transféring each website traffic from the old server to the new. I want to re-cync JUST one website at a time! ( Just not to comletely go crazzzy!)

Is there a way to JUST re-sync only one domain website?

Is there a way to JUST re-sync only one domain email?

Thanks

By: till at: 2022-01-23 14:21:19

Resync will sync the same items that you migrated, you can't apply a different selection to the resync process. Example: if you migrated just a single client or single website in the last migration tool run, then re-sync will sync just this single client or website. if you migrated a whole server at once, then re-sync will resync all clients and websites.

The resync will be quite fast and will not kate as long as the original sync as it will only migrate changes in files and databases again and not the whole data. Just run it to see how long it takes so you know which timespan to expect for a final second run.

By: Stephane at: 2022-06-06 06:23:50

Hi,

It's a nice tool and it's working fine, I just have one problem, I can't understand how to define the PHP version used.

On the Old one, I've setup PHP7.3 on the new it's PHP7.0.


An idea on how to manage this ?

Thanks

By: till at: 2022-06-06 07:06:38

Enter the new version that shall be used when the tool asks for it. take care to use the exact same naming that the tool shows for the available PHP versions.

By: agarcia71 at: 2022-06-06 17:24:36

PLEASE HELP!, after doing migration, the new server is not resolving any domain.

I did a migration from 3.1 to 3.2.8p1., Ubuntu 20.04, without any error. The option I selected was ISPConfig3. If I turn off the old server, they stop resolving the domains hosted there.


By: till at: 2022-06-06 18:35:35

Did you change the DNS server of all domains to the new one at your domain registrar? If you need further help, please post in the ISPConfig support forum here at howtoforge.

By: BMS at: 2022-12-08 14:46:34

Why are the dnssec records being generated on the target server? This way all the keys need to be renewed @ the registrar.

can this be disabled?