How to Install Plex Media Server on CentOS 7
Plex is a client-server media software suite. It has two main components, plex media server, and plex player.
Plex media server is an application that allows you to organize your media files like video, audio, photo, and other media from online sources, then stream them over the local network or over the internet. It can be installed on Windows, MacOS, Linux, and even FreeBSD system.
Plex Player is the front-end that allows you to play your media files over the local or remote computer that running the Plex media server.
In this tutorial, we will show you step-by-step how to install and configure Plex media server on your CentOS 7 server. We will install Plex Media Server from its own repository, then configure the Firewalld rules for the media server access, and finally, configure the Plex player using the Plex web app.
Prerequisites
- CentOS 7 system
- Root privileges
What we will do
- Add Plex Repository to the CentOS 7 System
- Install Plex Media Server on CentOS 7
- Configure Firewalld Rules for Plex Media Server
- Testing
Step 1 - Add Plex Repository
The first step we need to do for this guide is to add the Plex repository to our CentOS 7 system.
Go to the 'yum.repos.d' directory and create new repo file 'plex.repo' using the vim editor.
cd /etc/yum.repos.d/
vim plex.repo
Paste the following Plex repository configuration there.
# Plex.repo file will allow dynamic install/update of plexmediaserver.
[PlexRepo]
name=PlexRepo
baseurl=https://downloads.plex.tv/repo/rpm/$basearch/
enabled=1
gpgkey=https://downloads.plex.tv/plex-keys/PlexSign.key
gpgcheck=1
Save and exit.
Plex repository has been added to the CentOS 7 system.
Step 2 - Install Plex Media Server on CentOS 7
Now we will install Plex media server on our CentOS server.
Run the yum command below.
sudo yum -y install plexmediaserver
After the installation is complete, start the plex service and enable it to launch everytime at system boot using the systemctl commands below.
systemctl start plexmediaserver
systemctl enable plexmediaserver
Plex media server has been installed - check it using the following command.
systemctl status plexmediaserver
And you will get the result as shown below.
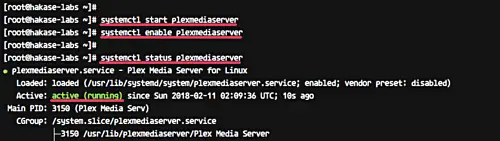
The Plex Media Server is now running on the CentOS 7 server.
Step 3 - Configure Firewalld Rules for Plex Media Server
In this tutorial, we will enable Firewalld services. Make sure firewalld packages are installed on the system.
Or you can install them using the yum command below.
sudo yum -y install firewalld
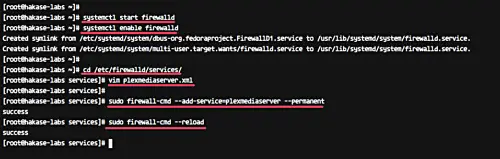
Now start the firewalld service and enable it to launch every time at system boot.
systemctl start firewalld
systemctl enable firewalld
Next, we need to add new firewalld configuration for our plex installation. Plex media server needs some port in the 'LISTEN' state, so we will create new firewalld XML configuration.
Go to the '/etc/firewalld/service' directory and create a new service firewalld configuration 'plex.xml' using vim.
cd /etc/firewalld/services/
vim plexmediaserver.xml
There, paste the following configuration.
<?xml version="1.0" encoding="utf-8"?>
<service>
  <short>plexmediaserver</short>
  <description>Ports required by plexmediaserver.</description>
  <port protocol="tcp" port="32400"></port>
  <port protocol="udp" port="1900"></port>
  <port protocol="tcp" port="3005"></port>
  <port protocol="udp" port="5353"></port>
  <port protocol="tcp" port="8324"></port>
  <port protocol="udp" port="32410"></port>
  <port protocol="udp" port="32412"></port>
  <port protocol="udp" port="32413"></port>
  <port protocol="udp" port="32414"></port>
  <port protocol="tcp" port="32469"></port>
</service>
Save and exit.
Now add the 'plexmediaserver' service to the firewalld services list, then reload the configuration.
sudo firewall-cmd --add-service=plexmediaserver --permanent
sudo firewall-cmd --reload
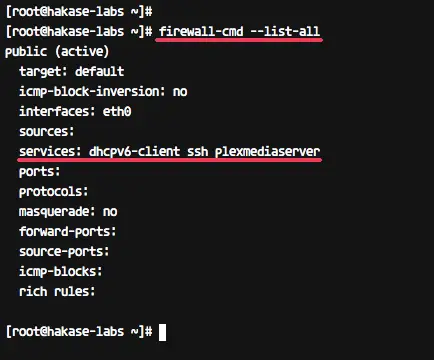
And you will get the result as below.
The plexmediaserver service has been added to firewalld - check it using the firewalld command below.
firewall-cmd --list-all
And you should get 'plexmediaserver' on service list.
Step 4 - Configure Plex Media Server
Before configuring the Plex media server, make sure you have an account for Plex. If not, you can register using the URL below.
And then login to your account.
If you're a registered user and logged in with your browser, you can open your Plex media server installation url in the following way.
http://192.168.33.10:32400/web/
And you will be redirected to the plex login as below.
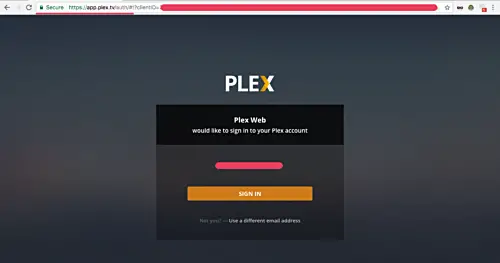
Click the 'SIGN IN' button.
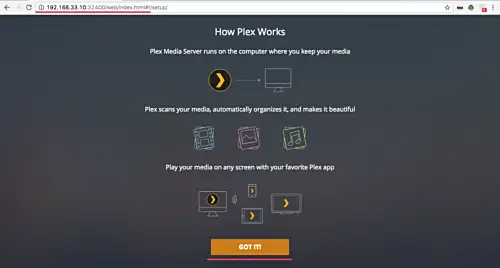
And you will get the page about how plex works - just click the GOT IT button.
Now the server setup page.
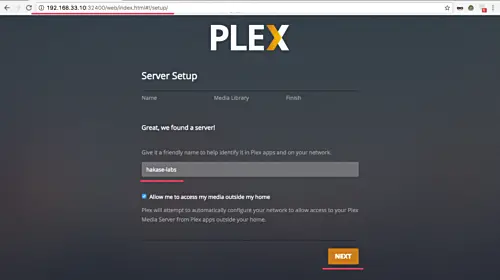
Type your server name and click the 'NEXT' button.
Now you will see the page for plex library configuration.
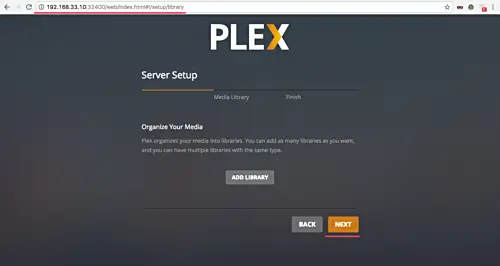
Click the 'NEXT' button again.
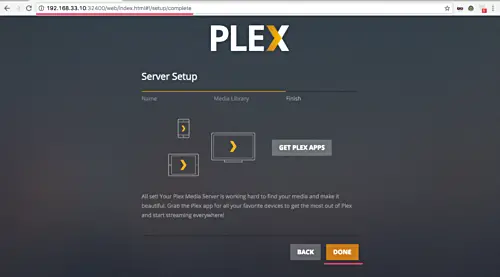
And the plexmediaserver configuration has been completed - click the 'DONE' button.
And you will get the plex Dashboard.
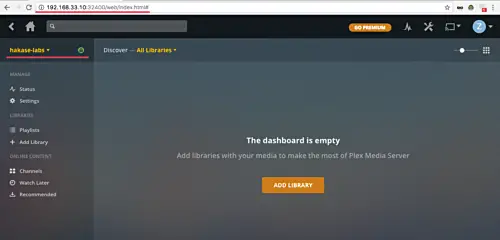
Now you can add media files to your plex media server.
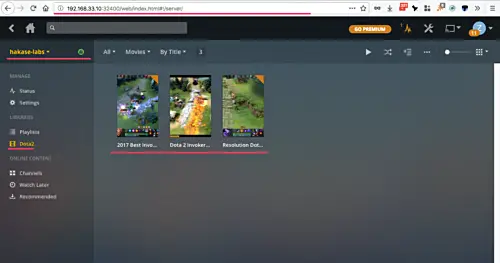
Below is an example library from our Plex installation.
Plex Media Server installation and configuration on CentOS 7 server has been completed successfully.

