How to access your Ubuntu 14.04 Desktop securely over the network with FreeNX
FreeNX offers a way to securely access your desktop remotely over a local network or the Internet. FreeNX is the OpenSource implementation of the NX protocol, originally developed by NoMachine. The NX protocol is very efficient and allows X-Desktop-Connections over slow network uplinks. The connection is secured with SSL / TLS. In this tutorial we are going to check how to install and configure FreeNX on Ubunru 14.04 (Trusty Tahr).
Installation
Installing FreeNX Server.
The FreeNX packages is not availabble in the official ubuntu repositories, you will have to add FreeNX PPA:
sudo apt-add-repository ppa:freenx-team/trusty
For the older versions:
sudo apt-add-repository ppa:freenx-team
All it takes is a confirmation to add it, hit Enter and you are done. 
After being done with it you can proceed with the installation:
sudo apt-get upgrade
This will update your repositoties.
sudo apt-get install freenx-server
With the above commands you should be able to install FreeNX on your system.
Installing the NX Client
The actual client is not available on the repositories. You will need to install the client from the NoMachine's website. Download and install the client and you will be done. You will be able to go through the setup , and you will be done.
Configuring FreeNX
Configuring SSH
The default port used by FreeNX is port 22 for SSH. There are chances that your port 22 might be blocked by your ISP due to security reasons, so basically we will have to change the default port for SSH connections.
sudo nano /etc/ssh/sshd_config
Find Port 22 and replace with Port 8888
After doing the above all you need to do is restart your SSHD:
sudo /etc/init.d/ssh restart
Generally FreeNX detect's SSHD port, but if it doesn't you may try this:
sudo nan /etc/nxserver/node.conf
Find #SSHD_PORT=22 and replace with SSHD_PORT=8888
Make sure you uncommment the port number. This is how you can change the port number for FreeNX.
Starting/Stoping FreeNX
FreeNX is not a service so you will have to run it manualy:
sudo /etc/init.d/freenx-server stop/start
Creating Custom SSH Keys
Using the default ssh keys for authentication will be pure stupidity. So, lets start with creating your own To crete your own custom keys use:
sudo dpkg-reconfigure freenx-server

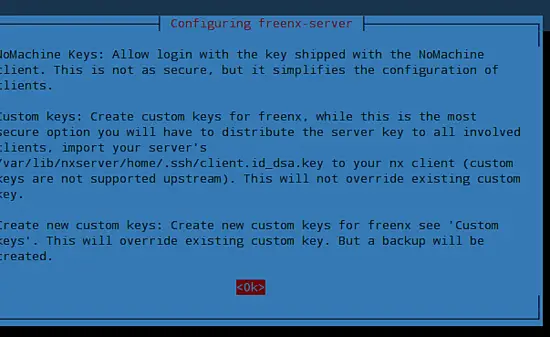
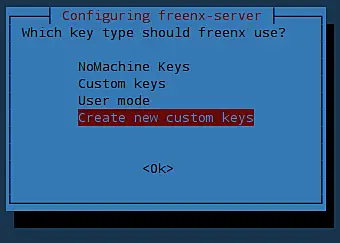
Hit Enter and the next you will se is a option for using the key type for FreeNX: 
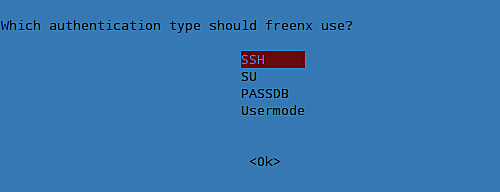
Select the option "Create new custom keys" then you will be prompted for the type of authentication, mke sure you use SSH. 
Now we need to copy the key to the $HOME folder:
sudo cp /var/lib/nxserver/home/.ssh/client.id_dsa.key ~/

Now you can copy your client.id_dsa.key to your relevant USB drive or any place you want to keep it, make sure it is safe and is only accessible by you. The file will be used by your client machine to connect with your server system. After creating your file you should be able to use it next time with your nx client.

