RESTORE-DC User Manual
How To Use This Manual
This manual is part reference and part tutorial, meaning that you can look to it for everything from the simple questions of , “What does this icon do?” to the more involved questions, like “How do I schedule e-mail notifications?” Your experience with Restore will depend on your privileges on the Restore system. The administrator for the system will have a few extra capabilities that a standard user will not.
The first three chapters are arranged in order of the administrative hierarchy. Chapter 1 details the responsibilities of the Data Center (DC) Administrator. The DC Administrator has the ability to manage all levels of RESTORE DC. Although, the primary responsibility as described in Chapter 1 is to create and modify Resellers and to allocate storage quota for each Reseller. Chapter 2 details the Reseller's responsibilities, and Chapter 3 goes into detail describing the functions of the Client Administrator.
We have tried to accommodate all levels of users in this manual, providing information pertinent to both administrators and users (novice computer users and advanced users). Each chapter contains a brief overview and a list of the chapter sections. Each chapter section will contain a summary that will tell you why you would need to know this information or what you would gain from the instructions in that section. In each chapter section there are steps that walk you through the process accompanied by examples or screen shots to help you visualize the process of using Restore. Some complex concepts will occupy several sections, using the first section to explain basic functions and other sections to explain concept applications. These chapters will note that users who feel comfortable with the basic functions can skip ahead. For specific issues consult the table of contents, glossary, and index.
1 The Data Center Administrator
Overview
This chapter is intended only for people who will be acting as an Administrator of the RESTORE system. As the DC Administrator, you begin as the only user on the RESTORE system, and it is up to you to handle the creation of any system resellers and possibly clients and users. Also, as the RESTORE DC Administrator you have the ability to act as and become any user in the system. This chapter will take you through the creation and management of resellers, clients, users and groups as well as how to control and manage your RESTORE system.
1.1 DC Administrative Privileges
As the DC Administrator, you have a few special abilities that RESTORE Resellers and Clients will not have. Once you login you will see the Administration Dashboard. The administrator is the only user with access to the “Resellers” section of RESTORE. Here the administrator creates and modifies Resellers, Users and Groups, giving them the ability to manage their own backups while keeping everyone's data safe.
You will see the main RESTORE Dashboard in Figure 1.1. Along the top-right of the window, you will find the RESTORE toolbar, very similar to the one your Users will see except with one key difference: the “Add Reseller” button. As the Administrator, you have absolute power over all Filestores on your system, able to start, stop, edit, or even remove them without permission from the owner of the Filestore. We will discuss the concepts of permissions and ownership later in this manual.
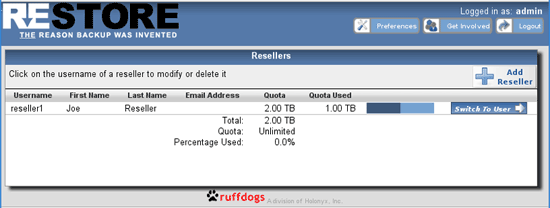
Figure 1.1 - The Administrative Dashboard
1.2 Creating Resellers
Upon installation, the “admin” account is the only user in the system. Click the “Add Reseller” button to begin adding Resellers. The Create Reseller window (Figure 1.2) opens and here you will enter the information needed to create a new reseller account. To create a new Reseller, you will need to assign the User a User Name and Password. User Name may include letters, numbers, underscores, and dashes. Passwords may contain letters, numbers, and punctuation.
NOTE: both User Name and Password are case-sensitive, “john” and “John” would be considered two different users.
Along with entering the new Reseller's account information this is where you enter the alloted storage “Quota” for the Reseller. The Quota number you enter will be the amount of server storage space assigned to this Reseller. Storage Quota's are divided into MB, GB and TB.
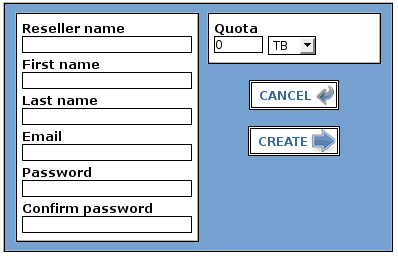
Figure 1.2 - Create Reseller window
After you have filled out the form completely, including the Quota, click the “Create” 'button. The Reseller account will be created, and you will receive a confirmation message in the top-center of the screen. You will also now see the Reseller list you created.
Modifying Resellers
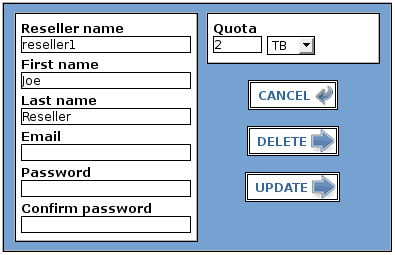
Once a Reseller has been added to RESTORE updating the Resellers information is easy. To update a Reseller click on the Resellers name and the Update Reseller window opens (Figure 1.3). After making changes click the “Update” button.
1.3 Information Your Users will Need
As the administrator, it is your responsibility to supply your resellers with the information they need to access the RESTORE system. They will need the location of the machine (either a host name or IP address) as well as their User Name and Password.
1.4 Where to Find the RESTORE Server
Your users will need either the IP address of your RESTORE server or a name by which to access it. Setting up domain name resolution for your RESTORE system is beyond the scope of this document, but to find the IP address of your system, you can open a command line on the RESTORE server as root and issue the command, ''ifconfig''. This will display various information about your server's network connection including its IP address.
Open a Web browser on your computer. Into the location bar, type the address of your RESTORE server as provided by your administrator. The Restore browser URL is http://ip_of_server/restore (e.g., http://192.168.10.10/restore)
2 The Reseller Administrator
Overview
The main objectives of the Reseller is to create and modify each clients administrator along with allocated storage quota. The Reseller may also need to control many aspects of their client's assigned storage Quota.
2.1 The Reseller's Administration Privileges
As the Reseller of a Filestore setting up Clients is next. A Client/User needs to have the ability to back up, restore and configure data, but what if you have multiple users you would like to be able to use one or more Filestores? This is why RESTORE uses Groups to manage permissions. By granting a Group ownership of a Filestore, you can allow all the users in that group the ability to manage its contents.
After logging in as a Reseller you will see the Client Dashboard (see Figure 2.1). You are now logged in as "reseller1" and the "Add Client" button is where you create new Client Administrators who will create Users and Groups to manage their filestores. To the left of the button are instructions on how to modify or delete a client.
Note: All clients, users and groups listed on the images are for demonstration purposes only.
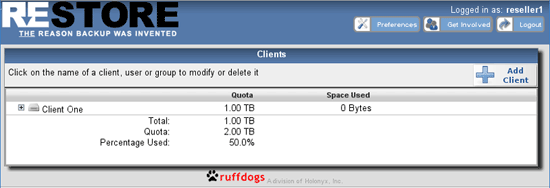
Figure 2.1 - The Reller1 Dashboard
2.2 Creating Clients
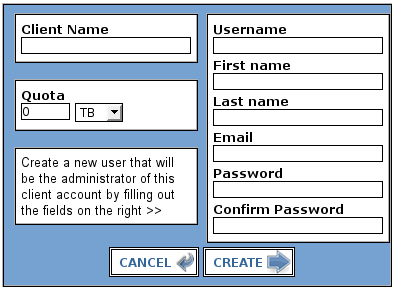
To create a new Client from this Dashboard (Figure 2.1), click the " ![]() Add Client” button and the “Create Client” window will pop up (Figure 2.2). To create a Client, you will need to assign the User a “User Name” and “Password”. The “User Name” may include letters, numbers, underscores, and dashes. Passwords may contain letters, numbers, and punctuation.
Add Client” button and the “Create Client” window will pop up (Figure 2.2). To create a Client, you will need to assign the User a “User Name” and “Password”. The “User Name” may include letters, numbers, underscores, and dashes. Passwords may contain letters, numbers, and punctuation.
NOTE: both User Name and Password are case-sensitive, “john” and “John” would be considered two different users.
Along with entering the new Client's account information this is where you enter the alloted storage “Quota” for this Client. The Quota number you enter will be the amount of server storage space assigned. Storage Quota's are divided into MB, GB and TB.
Modify Clients
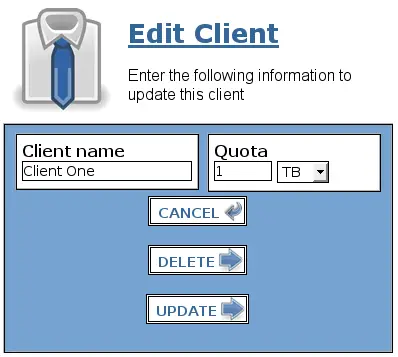
Below you will see the Resellers Dashboard (Figure 2.3) with Users and Groups added under the 'Client One' directory. This is the screen where users are added and modified.
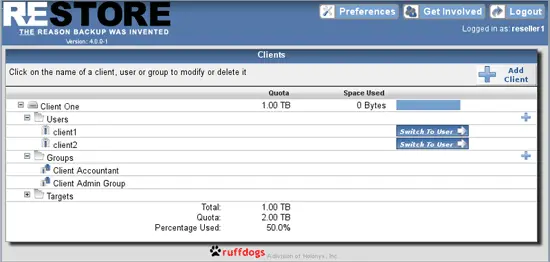
Figure 2.3 - Reseller's Dashboard
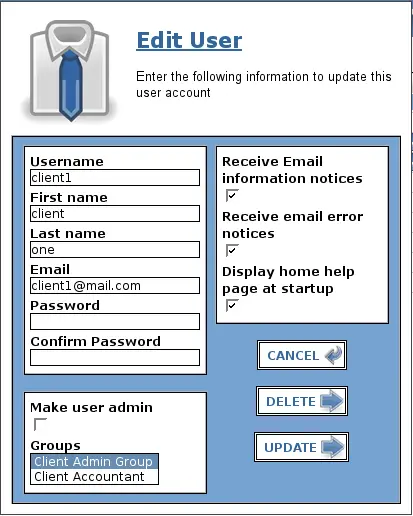
To modify or remove a user name (such as "client1") or a group (such as 'Client Accountant') from within a directory or from the RESTORE system entirely, click on the user's name under the "Users" or "Groups" list. From the screen that appears (Figure 2.4), you may delete the user, change the user's name, password, e-mail and other preferences that we will discuss in Chapter 5.
2.3 Creating Users
Next is creating “Users”. The Resellers Dashboard (see Figure 2.1) is where new Users are created. Click on the ![]() link to open the Client directory you created. To add Client click the
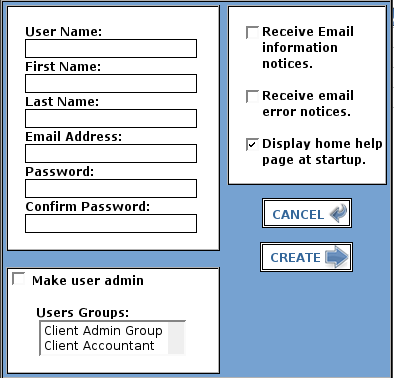
link to open the Client directory you created. To add Client click the ![]() button in the Users row and the 'Create User'' window will pop up (Figure 2.5. To create a User you will need to assign the User a User Name and Password. User Name may include letters, numbers, underscores, and dashes. Passwords may contain letters, numbers, and punctuation.
button in the Users row and the 'Create User'' window will pop up (Figure 2.5. To create a User you will need to assign the User a User Name and Password. User Name may include letters, numbers, underscores, and dashes. Passwords may contain letters, numbers, and punctuation.
NOTE: both User Name and Password are case-sensitive, “john” and “John” would be considered two different users.
Notice the “Make user admin” option box. Once “Users Groups" are made a “user admin” can be selected here. If “Users Groups” have not been made yet the Client can modify this option at a later time. Within this window the User can be allocated email notices and assiagned the “help page at startup" option.
Creating Groups
Next is creating users within “Groups”. The Resellers Dashboard (Figure 2.1) is where new Groups are created. Click the ![]() next to the client directory you previously created.
next to the client directory you previously created.
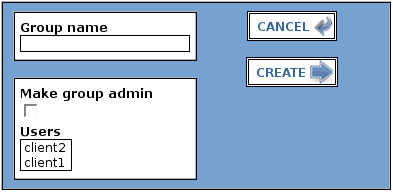
Click the ![]() button to the right of the Groups row and the “Create Groups” window will pop up (Figure 2.6). To create a User you will need to assign a “Group Name” and next “Select Users” you wish to put in the group. You can 'select multiple users' by holding down the “Ctrl” key on your keyboard while clicking them. When finished adding Users click on the "Create” button. You can also add previously created “Users” to existing “Groups” as needed by clicking on an existing Group and then follow the 'select multiple users' instructions above .
button to the right of the Groups row and the “Create Groups” window will pop up (Figure 2.6). To create a User you will need to assign a “Group Name” and next “Select Users” you wish to put in the group. You can 'select multiple users' by holding down the “Ctrl” key on your keyboard while clicking them. When finished adding Users click on the "Create” button. You can also add previously created “Users” to existing “Groups” as needed by clicking on an existing Group and then follow the 'select multiple users' instructions above .
Now that you have created your Groups, when you are ready you can to administer permissions on Filestores. We'll discuss the permissions later in Chapter 6.
Modify Users in the Clients and Groups Directories
Below you will see the Resellers Dashboard (Figure 2.7) with Users and Groups added under the 'Client One' directory. This is where you modify or delete a user.

Figure 2.7 - Reseller's Dashboard
To modify or remove a user name (such as "client1") or a group (such as 'Client Accountant') from within a directory or from the RESTORE system entirely, click on the user's name under the "Users" or "Groups" list. From the screen that appears (Figure 2.8), you may delete the user, change the user's name, password, e-mail and other preferences that we will discuss in Chapter 7.
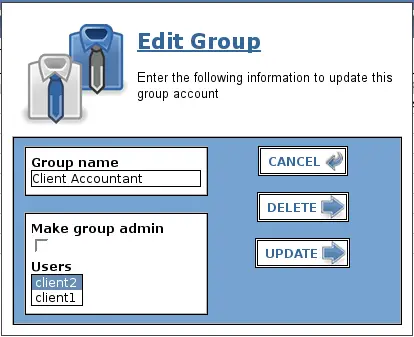
To edit or delete a Group click on the group name. The example below uses the 'Client Accountant'. After clicking on the group name the window shown in Figure 2.9 opens for editing.
NOTE: When removing a user, any Filestores the user owns will not be removed. Ownership of those Filestores will be transferred to the admin account.

