The Perfect Server - OEL 5.4 [ISPConfig 3] - Page 4
On this page
5 Install Webserver and Ftpserver
On computer http.netbck.com we will install:
Apache
Pure-Ftpd
Mysql
vloger
Webalizer
Jailkit
fail2ban
rkhunter
ISPConfig
and, after the email installation, squirrelmail (and the optional EGroupware package).
We install MySQL because it is needed by ISPConfig.
The rest of the packages are needed packages for a Webserver: Apache itself, Pure-Ftpd to allow upload of Web pages and packages to control login and report usages and logs.
Install Apache with suPHP, Mysql and Mcrypt
Download basic packages and start httpd and mysql.
yum install httpd php php-mysql php-mbstring rpm-build gcc openssl-devel cyrus-sasl-devel pkgconfig zlib-devel pcre-devel openldap-devel expect libtool-ltdl-devel libtool gdbm-devel gamin-devel mysql-server mod_suphp
If you want that web disk space are created on another disk or partition, now you can mount it at /var/www.
If you want that user disk space are created on another disk or partition, now you can mount it at /home.
chkconfig --level 235 httpd on
chkconfig --level 235 mysqld on
/etc/init.d/mysqld start
/etc/init.d/httpd start
Set the root password for mysql:
mysqladmin -u root password xxxx
Install Mcrypt:
yum install mhash gcc libmcrypt
cd /tmp
wget ftp://ftp.pbone.net/mirror/download.fedora.redhat.com/pub/fedora/epel/5/i386/php-mcrypt-5.1.6-5.el5.i386.rpm
rpm -ivh php-mcrypt-5.1.6-5.el5.i386.rpm
Install and start Pure-Ftpd
yum install pure-ftpd
chkconfig --levels 235 pure-ftpd on
/etc/init.d/pure-ftpd start
Install Vlogger And Webalizer
yum install webalizer perl-DateTime-Format-HTTP perl-DateTime-Format-Builder
cd /tmp
wget http://n0rp.chemlab.org/vlogger/vlogger-1.3.tar.gz
tar xvfz vlogger-1.3.tar.gz
mv vlogger-1.3/vlogger /usr/sbin/
rm -rf vlogger*
Install Jailkit
Jailkit is needed only if you want to chroot SSH users.
cd /tmp
wget http://olivier.sessink.nl/jailkit/jailkit-2.11.tar.gz
tar xvfz jailkit-2.11.tar.gz
cd jailkit-2.11
./configure
make
make install
cd ..
rm -rf jailkit-2.11*
Install fail2ban and rkhunter
yum install fail2ban rkhunter
chkconfig --levels 235 fail2ban on
/etc/init.d/fail2ban start
Grant Mysql Privileges on mysql.netbck.com conmputer
All those actions must be done on mysql.netbck.com computer.
Before we install ISPConfig, we need to allow logins to the ispconfig database on mysql.netbck.com from http.netbck.com computer.
We must execute the following SQL sentences:
mysql -u root -p
GRANT ALL PRIVILEGES ON *.* TO root@'192.168.1.212' IDENTIFIED BY 'xxxx' WITH GRANT OPTION;
GRANT ALL PRIVILEGES ON *.* TO root@'http.netbck.com' IDENTIFIED BY 'xxxx' WITH GRANT OPTION;
flush privileges;
The whole session must look like:
mysql -u root -p
Enter password:
Welcome to the MySQL monitor. Commands end with ; or \g.
Your MySQL connection id is 8274
Server version: 5.0.77 Source distribution

Type 'help;' or '\h' for help. Type '\c' to clear the buffer.

mysql> GRANT ALL PRIVILEGES ON *.* TO root@'192.168.1.212' IDENTIFIED BY 'xxxx' WITH GRANT OPTION;
Query OK, 0 rows affected (0.00 sec)

mysql> GRANT ALL PRIVILEGES ON *.* TO root@'http.netbck.com' IDENTIFIED BY 'xxxx' WITH GRANT OPTION;
Query OK, 0 rows affected (0.00 sec)

mysql> flush privileges;
Query OK, 0 rows affected (0.01 sec)

mysql> Bye
End of actions to be done on mysql.netbck.com computer.
From now, all actions must be done on http.netbck.com computer.
Install ISPConfig
On a distributed configuration, it is needed to install and configure ISPConfig on all computers. The configuration of ISPConfig on this computer must join the ISPConfig on computer mysql.netbck.com.
Also, every computer must have its MySQL database. So, when configuring ISPConfig, first we must answer about the local MySQL database, then say that we want to join an existing ISPConfig configuration and answer about the remote MySQL database.
Synchonization between databases is done automaticaly by the system.
To install and configure ISPConfig, we must do the following:
cd /tmp
wget http://downloads.sourceforge.net/ispconfig/ISPConfig-3.0.2.1.tar.gz?use_mirror=
tar xvfz ISPConfig-3.0.2.1.tar.gz
cd ispconfig3_install/install/
php -q install.php
--------------------------------------------------------------------------------
_____ ___________ _____ __ _
|_ _/ ___| ___ \ / __ \ / _(_)
| | \ `--.| |_/ / | / \/ ___ _ __ | |_ _ __ _
| | `--. \ __/ | | / _ \| '_ \| _| |/ _` |
_| |_/\__/ / | | \__/\ (_) | | | | | | | (_| |
\___/\____/\_| \____/\___/|_| |_|_| |_|\__, |
__/ |
|___/
--------------------------------------------------------------------------------
>> Initial configuration
Operating System: Redhat or compatible, unknown version.
Following will be a few questions for primary configuration so be careful.
Default values are in [brackets] and can be accepted with <ENTER>.
Tap in "quit" (without the quotes) to stop the installer.
Select language (en,de) [en]: <---- ENTER
Installation mode (standard,expert) [standard]: expert <---- expert
Full qualified hostname (FQDN) of the server, eg server1.domain.tld [http.netbck.com]: <---- ENTER
MySQL server hostname [localhost]: <---- ENTER
MySQL root username [root]: <---- ENTER
MySQL root password []: xxxx <---- root's password
MySQL database to create [dbispconfig]: <---- ENTER
MySQL charset [utf8]: <---- ENTER
Shall this server join an existing ISPConfig multiserver setup (y,n) [n]: y <---- y (join an existing ISPConfig multiserver)
MySQL master server hostname []: mysql.netbck.com <---- mysql.netbck.com
MySQL master server root username [root]: <---- ENTER
MySQL master server root password []: xxxx <---- root's password at mysql.netbck.com
MySQL master server database name [dbispconfig]: <---- ENTER
Adding ISPConfig server record to database.
Configure Mail (y,n) [y]: n <---- n
Configure Jailkit (y,n) [y]: <---- ENTER
Configuring Jailkit
Configure FTP Server (y,n) [y]: <---- ENTER
Configuring Pureftpd
Stopping pure-ftpd: [ OK ]
Starting pure-ftpd: [ OK ]
Configure DNS Server (y,n) [y]: n <---- n
Hint: If this server shall run the ispconfig interface, select 'y' in the 'Configure Apache Server' option.
Configure Apache Server (y,n) [y]: <---- ENTER
Configuring Apache
Configuring vlogger
Configuring Apps vhost
Configure Firewall Server (y,n) [y]: n <---- n
Configuring Firewall
Install ISPConfig Web-Interface (y,n) [y]: n <---- n (only configured at mysql.netbck.com)
Installing ISPConfig
ISPConfig Port [8080]: <---- ENTER
chown: `getmail': invalid user
Configuring DBServer
Installing Crontab
no crontab for root
Stopping httpd: [ OK ]
[Thu Apr 01 16:17:00 2010] [warn] NameVirtualHost *:443 has no VirtualHosts
[Thu Apr 01 16:17:00 2010] [warn] NameVirtualHost *:80 has no VirtualHosts
Starting httpd: [ OK ]
Installation completed.
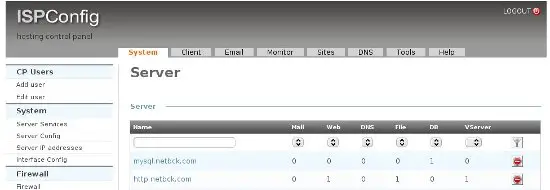
Log into ISPConfig at http://mail.netbck.com and allow to http.netbck.com server only the installed options: Web, File and Vserver.
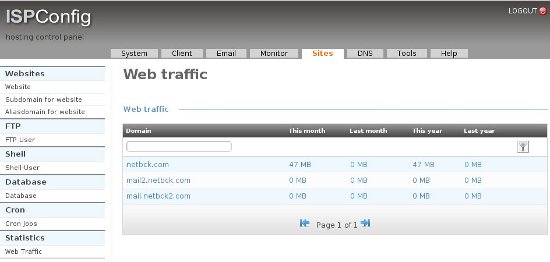
Configuration needed for Web Traffic accounting
If you want to have statistics about Web Traffic, you need to configure Apache Log Format and install Zimbra.
You must to configure Apache Log Format to add the Virtual Host on the logfile. Without this information, vlogger is unable to know the Virtual Host.
vi /etc/httpd/conf/http.conf
Change the line:
LogFormat "%h %l %u %t \"%r\" %>s %b \"%{Referer}i\" \"%{User-Agent}i\"" combined
And add an uppercase %V at the beginning. The line must be replaced by:
LogFormat "%V %h %l %u %t \"%r\" %>s %b \"%{Referer}i\" \"%{User-Agent}i\"" combined
service httpd restart
Installing and configuring Zimbra is a bit more complex. Execute:
yum install sudo libidn gmp compat-libstdc nptl sysstat
cd /tmp
wget http://files2.zimbra.com/downloads/6.0.5_GA/zcs-6.0.5_GA_2213.RHEL5.20100202220948.tgz
tar xvfz zcs-6.0.5_GA_2213.RHEL5.20100202220948.tgz
cd zcs-6.0.5_GA_2213.RHEL5.20100202220948
./install.sh
Operations logged to /tmp/install.log.31859
Checking for existing installation...
    zimbra-ldap...NOT FOUND
    zimbra-logger...NOT FOUND
    zimbra-mta...NOT FOUND
    zimbra-snmp...NOT FOUND
    zimbra-store...NOT FOUND
    zimbra-apache...NOT FOUND
    zimbra-spell...NOT FOUND
    zimbra-convertd...NOT FOUND
    zimbra-memcached...NOT FOUND
    zimbra-proxy...NOT FOUND
    zimbra-archiving...NOT FOUND
    zimbra-cluster...NOT FOUND
    zimbra-core...NOT FOUND


PLEASE READ THIS AGREEMENT CAREFULLY BEFORE USING THE SOFTWARE.
ZIMBRA, INC. ("ZIMBRA") WILL ONLY LICENSE THIS SOFTWARE TO YOU IF YOU
FIRST ACCEPT THE TERMS OF THIS AGREEMENT. BY DOWNLOADING OR INSTALLING
THE SOFTWARE, OR USING THE PRODUCT, YOU ARE CONSENTING TO BE BOUND BY
THIS AGREEMENT. IF YOU DO NOT AGREE TO ALL OF THE TERMS OF THIS
AGREEMENT, THEN DO NOT DOWNLOAD, INSTALL OR USE THE PRODUCT.

License Terms for the Zimbra Collaboration Suite:
  http://www.zimbra.com/license/zimbra_public_eula_2.1.html


Press Return to continue <---- ENTER
Checking for prerequisites...
     FOUND: NPTL
     FOUND: sudo-1.6.9p17-5
     FOUND: libidn-0.6.5-1.1
     FOUND: gmp-4.1.4-10
     FOUND: compat-libstdc++-33-3.2.3-61
     FOUND: /usr/lib/libstdc++.so.5
    FOUND: /usr/lib/libstdc++.so.6
Checking for suggested prerequisites...
    FOUND: perl-5.8.8
    FOUND: sysstat
Prerequisite check complete.

Checking for installable packages

Found zimbra-core
Found zimbra-ldap
Found zimbra-logger
Found zimbra-mta
Found zimbra-snmp
Found zimbra-store
Found zimbra-apache
Found zimbra-spell
Found zimbra-memcached
Found zimbra-proxy


Select the packages to install

Install zimbra-ldap [Y] n <---- n

Install zimbra-logger [Y] <---- ENTER

Install zimbra-mta [Y] n <---- n

Install zimbra-snmp [Y] n <---- n

Install zimbra-store [Y] n <---- n

Install zimbra-apache [Y] n <---- n

Install zimbra-spell [Y] <---- ENTER

Install zimbra-memcached [N] <---- ENTER

Install zimbra-proxy [N] <---- ENTER
Checking required space for zimbra-core

Installing:
   zimbra-core
    zimbra-logger
    zimbra-apache
    zimbra-spell

The system will be modified. Continue? [N] Y <---- Y

Removing /opt/zimbra
Removing zimbra crontab entry...done.
done.
Cleaning up zimbra init scripts...done.
Cleaning up /etc/ld.so.conf...done.
Cleaning up /etc/prelink.conf...done.
Cleaning up /etc/security/limits.conf...done.

Finished removing Zimbra Collaboration Suite.

Installing packages

    zimbra-core......zimbra-core-6.0.5_GA_2213.RHEL5-20100202220948.i386.rpm...
And now, you must edit the file /usr/local/ispconfig/server/scripts/vlogger:
vi /usr/local/ispconfig/server/scripts/vlogger
Near the line 150, there is a line that says: use Date::Format;.
Before this line, you must add the line: use lib '/opt/zimbra/zimbramon/lib/';
That is: this portion of the file must look as:
use lib '/opt/zimbra/zimbramon/lib/';
use Date::Format;
That's all, folks!!!. The system is ready to account Web traffic.


