The Perfect Server - OEL 5.4 [ISPConfig 3] - Page 3
3.2 Common configuration
On all computers, we must to do some additional configuration.
Edit /etc/hosts
Edit the /etc/hosts file to include all the computers names/IPs:
vi /etc/hosts
The file must have:
# Do not remove the following line, or various programs
# that require network functionality will fail.
127.0.0.1       localhost.netbck.com localhost

192.168.1.211	mysql.netbck.com mysql
192.168.1.212	http.netbck.com http
192.168.1.213	email.netbck.com email
Check internet access
Simply, ping any Internet address.
ping -c 5 www.google.com
You must receive an answer like:
PING www.l.google.com (209.85.229.99) 56(84) bytes of data.
64 bytes from ww-in-f99.1e100.net (209.85.229.99): icmp_seq=1 ttl=49 time=39.7 ms
64 bytes from ww-in-f99.1e100.net (209.85.229.99): icmp_seq=2 ttl=49 time=39.9 ms
64 bytes from ww-in-f99.1e100.net (209.85.229.99): icmp_seq=3 ttl=49 time=39.6 ms
64 bytes from ww-in-f99.1e100.net (209.85.229.99): icmp_seq=4 ttl=49 time=39.8 ms
64 bytes from ww-in-f99.1e100.net (209.85.229.99): icmp_seq=5 ttl=49 time=39.8 ms
--- www.l.google.com ping statistics ---
5 packets transmitted, 5 received, 0% packet loss, time 4020ms
rtt min/avg/max/mdev = 39.689/39.834/39.921/0.085 ms
If you have problems accessing the Internet try adding the default Gateway Device:
vi /etc/sysconfig/network
The file will look like (substitute eth0 with the device you use to access the Internet):
NETWORKING=yes
NETWORKING_IPV6=no
HOSTNAME=mysql.netbck.com
GATEWAY=192.168.1.1
GATEWAYDEV=eth0
And then execute:
service network restart
Prepare the system to download online software
We will download software online. Now, we add the needed repositories.
Execute:
cd /etc/yum.repos.d
wget http://public-yum.oracle.com/public-yum-el5.repo
vi public-yum-el5.repo
Change all occurrences of enable=0 with enable=1.
The file must contain:
name=Enterprise Linux $releasever GA - $basearch - base
baseurl=http://public-yum.oracle.com/repo/EnterpriseLinux/EL5/0/base/$basearch/
gpgkey=http://public-yum.oracle.com/RPM-GPG-KEY-oracle-el5
gpgcheck=1
enabled=1

[el5_u1_base]
name=Enterprise Linux $releasever U1 - $basearch - base
baseurl=http://public-yum.oracle.com/repo/EnterpriseLinux/EL5/1/base/$basearch/
gpgkey=http://public-yum.oracle.com/RPM-GPG-KEY-oracle-el5
gpgcheck=1
enabled=1

[el5_u2_base]
name=Enterprise Linux $releasever U2 - $basearch - base
baseurl=http://public-yum.oracle.com/repo/EnterpriseLinux/EL5/2/base/$basearch/
gpgkey=http://public-yum.oracle.com/RPM-GPG-KEY-oracle-el5
gpgcheck=1
enabled=1

[el5_u3_base]
name=Enterprise Linux $releasever U3 - $basearch - base
baseurl=http://public-yum.oracle.com/repo/EnterpriseLinux/EL5/3/base/$basearch/
gpgkey=http://public-yum.oracle.com/RPM-GPG-KEY-oracle-el5
gpgcheck=1
enabled=1

[el5_u4_base]
name=Enterprise Linux $releasever U4 - $basearch - base
baseurl=http://public-yum.oracle.com/repo/EnterpriseLinux/EL5/4/base/$basearch/
gpgkey=http://public-yum.oracle.com/RPM-GPG-KEY-oracle-el5
gpgcheck=1
enabled=1

[el5_addons]
name=Enterprise Linux $releasever - $basearch - addons
baseurl=http://public-yum.oracle.com/repo/EnterpriseLinux/EL5/addons/$basearch/
gpgkey=http://public-yum.oracle.com/RPM-GPG-KEY-oracle-el5
gpgcheck=1
enabled=1

[el5_oracle_addons]
name=Enterprise Linux $releasever - $basearch - oracle_addons
baseurl=http://public-yum.oracle.com/repo/EnterpriseLinux/EL5/oracle_addons/$basearch/
gpgkey=http://public-yum.oracle.com/RPM-GPG-KEY-oracle-el5
gpgcheck=1
enabled=1
Add more repositories and upgrade the installed packages:
rpm -Uhv http://apt.sw.be/redhat/el5/en/i386/rpmforge/RPMS/rpmforge-release-0.3.6-1.el5.rf.i386.rpm
yum install apt ghostscript-fonts
apt-get update
apt-get upgrade
Synchronize the server clock
To maintain all systems synchronized, simply execute:
chkconfig --levels 235 ntpd on
/etc/init.d/ntpd start
4 Install MySQL
Now, we are ready to install MySQL, Phpmyadmin and ISPConfig on computer mysql.
Install MySQL itself
The installation of MySQL is very simple. Execute:
yum install mysql-server mysql
This simple command installs MySQL and its dependencies.
If you want that MySQL databases are created on another disk or partition, now you can mount it at /var/lib/mysql and give permission to mysql:mysql
Start the mysql engine and set the password for the main user root. Execute:
chkconfig --level 235 mysqld on
service mysqld start
mysqladmin -u root password xxxx
Now, we can login into mysql:
mysql -u root -p
Enter password:
Welcome to the MySQL monitor. Commands end with ; or \g.
Your MySQL connection id is 8520
Server version: 5.0.77 Source distribution
Type 'help;' or '\h' for help. Type '\c' to clear the buffer.
mysql>
We can connect to mysql from localhost. In order to allow the conexion from mysql.netbck.com, we need to execute (connected to mysql):
mysql> SET PASSWORD FOR 'root'@'mysql.netbck.com' = PASSWORD('xxxx');
Install phpMyAdmin (optional)
phpMyAdmin is a free software tool written in PHP intended to handle the administration of MySQL over the World Wide Web.
First, install Apache and PHP and allow Autostart of Apache by executing:
yum install httpd php php-mysql php-mbstring mysql-devel mhash gcc libmcrypt
chkconfig --level 235 httpd on
service httpd restart
Install php_mcrypt. Execute:
cd /tmp
wget ftp://ftp.pbone.net/mirror/download.fedora.redhat.com/pub/fedora/epel/5/i386/php-mcrypt-5.1.6-5.el5.i386.rpm
rpm -ivh php-mcrypt-5.1.6-5.el5.i386.rpm
And install phpMyAdmin:
yum install phpmyadmin
By default, phpMyAdmin is only accessible from localhost. You can allow the access from other computers by editing the /etc/httpd/conf.d/phpmyadmin.conf file.
vi /etc/httpd/conf.d/phpmyadmin.conf
Add lines of type Allow. Example of a complete file:
# # Web application to manage MySQL #Order Deny,Allow Deny from all Allow from 127.0.0.1 Allow from 192.168 Alias /phpmyadmin /usr/share/phpmyadmin Alias /phpMyAdmin /usr/share/phpmyadmin Alias /mysqladmin /usr/share/phpmyadmin
You must fill the phpMyAdmin blowfish_secret with some sentence.
vi /usr/share/phpmyadmin/config.inc.php
Put some string in the line $cfg['blowfish_secret'] = ''; /* YOU MUST FILL IN THIS FOR COOKIE AUTH! */
Example: $cfg['blowfish_secret'] = 'something'; /* YOU MUST FILL IN THIS FOR COOKIE AUTH! */
Restart Apache...
service httpd restart
... and, now, phpMyAdmin is accessible at http://mysql.netbck.com/phpmyadmin.
Install and configure ISPConfig
On a distributed configuration, it is needed to install and configure ISPConfig on every computer. All ISPConfig needs is a local MySQL database and all ISPConfigs, except the first to install, must join the existing environment.
On the other hand, we must define the computers that can be ISPConfig webservers.
For this installation, the first computer to install ISPConfig and the unique ISPConfig WebServer is mysql.netbck.com.
To install and configure ISPConfig, we must execute:
cd /tmp
wget http://downloads.sourceforge.net/ispconfig/ISPConfig-3.0.2.1.tar.gz?use_mirror=
tar xvfz ISPConfig-3.0.2.1.tar.gz
cd ispconfig3_install/install/
php -q install.php
--------------------------------------------------------------------------------
_____ ___________ _____ __ _
|_ _/ ___| ___ \ / __ \ / _(_)
| | \ `--.| |_/ / | / \/ ___ _ __ | |_ _ __ _
| | `--. \ __/ | | / _ \| '_ \| _| |/ _` |
_| |_/\__/ / | | \__/\ (_) | | | | | | | (_| |
\___/\____/\_| \____/\___/|_| |_|_| |_|\__, |
__/ |
|___/
--------------------------------------------------------------------------------
Operating System: Redhat or compatible, unknown version.
Following will be a few questions for primary configuration so be careful.
Default values are in [brackets] and can be accepted with <ENTER>.
Tap in "quit" (without the quotes) to stop the installer.
Select language (en,de) [en]: <---- ENTER
Installation mode (standard,expert) [standard]: expert <---- expert
Full qualified hostname (FQDN) of the server, eg server1.domain.tld [mysql.netbck.com]: <---- ENTER
MySQL server hostname [localhost]: mysql.netbck.com <---- mysql.netbck.com (the full name of mysql server)
MySQL root username [root]: <---- ENTER
MySQL root password []: xxxxxx <---- mysql password of root user
MySQL database to create [dbispconfig]: <---- ENTER
MySQL charset [utf8]: <---- ENTER
Shall this server join an existing ISPConfig multiserver setup (y,n) [n]: <---- ENTER (n) because it is the first ISPConfig installation
Adding ISPConfig server record to database.
Configure Mail (y,n) [y]: n <---- n
Configure Jailkit (y,n) [y]: n <---- n
Configure FTP Server (y,n) [y]: n <---- n
Configure DNS Server (y,n) [y]: n <---- n
Hint: If this server shall run the ispconfig interface, select 'y' in the 'Configure Apache Server' option.
Configure Apache Server (y,n) [y]: <---- ENTER (y) because this computer will be the ISPConfig Webserver
Configuring Apache
Configuring vlogger
Configuring Apps vhost
Configure Firewall Server (y,n) [y]: <---- ENTER
Configuring Firewall
Install ISPConfig Web-Interface (y,n) [y]: <---- ENTER (y) because this computer will be the ISPConfig Webserver
Installing ISPConfig
ISPConfig Port [8080]: 80 <---- try the port you want
chown: `getmail': invalid user
Configuring DBServer
Installing Crontab
no crontab for root
Stopping httpd: [ OK ]
[Sun Mar 28 00:28:42 2010] [warn] NameVirtualHost *:443 has no VirtualHosts
[Sun Mar 28 00:28:42 2010] [warn] NameVirtualHost *:80 has no VirtualHosts
Starting httpd: [ OK ]
Installation completed.
ISPConfig is accessible at http://mail.netbck.com.
We need to configure the services that computer mail.netbck.com accepts (only mysql).
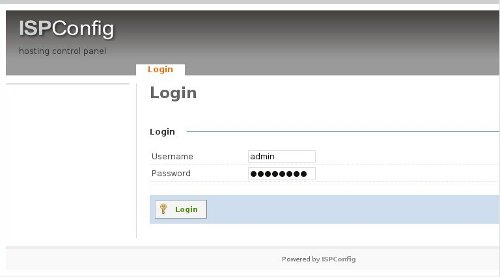
So, access ISPConfig 3 under http://mail.netbck.com. Log in with the username admin and the password admin (you should change the default password after your first login):
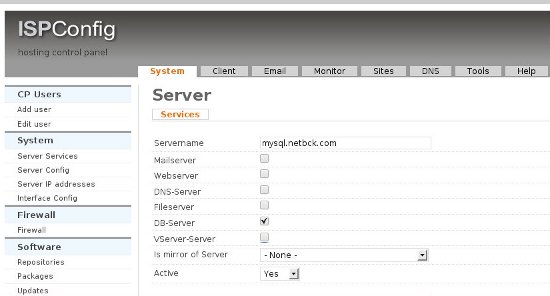
By default, all options are enabled.
We must entry in mysql.netbck.com option and uncheck all options but DB-Server:


