Install OpenWRT, Chillispot, FreeRadius Based Managed Hotspot(s) Including PayPal Payment Gateway - Page 2
5 Create/Configure Your PayPal Account
While strictly speaking this step is optional, Chillifire will charge you a fee if you use their PayPal account rather than your own. This can be easily avoided by adding your own PayPal account to the Chillifire account profile.
However, this requires that the account is a "Premier Account" to accept credit card payments as opposed to only PayPal account transfers. It also must be configured in a certain way. I assume for the purpose of this exercise that you either have a PayPal Premer Account or create one for this tutorial.
Once the account is created, it needs to be set up to work with Chillifire:
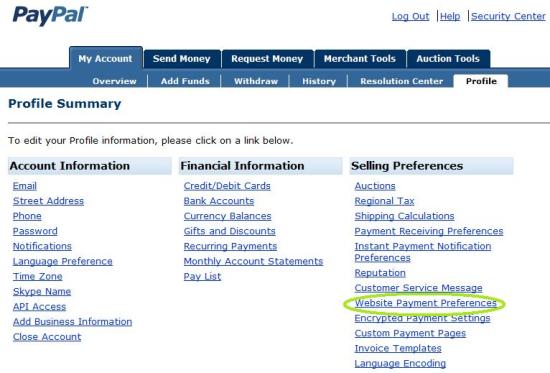
Click 'Profile', and then 'Website Payment Preferences'.

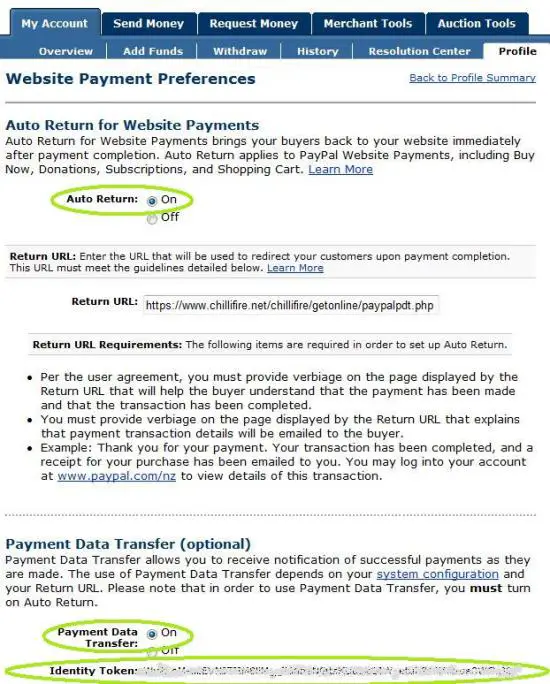
a) On the next screen you need to set Auto Return = "On". The Return URL does not matter as it is set programmatically.
b) Payment Data Transfer (PDT) must be set to "On". The system will genrate and Identity Token, which you will need to configure your Chillifire account. I suggest you copy and paste it to a file for later use.
c) To accept Credit Card Payments - not just PayPal account Payments - you need to set PayPal Account Optional to "On".
Leave all other options on the screen "Off" or "No" and press "Save".

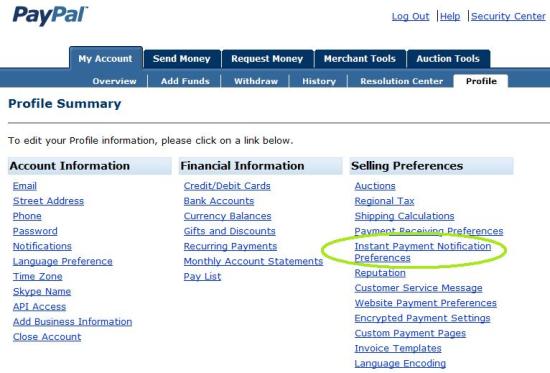
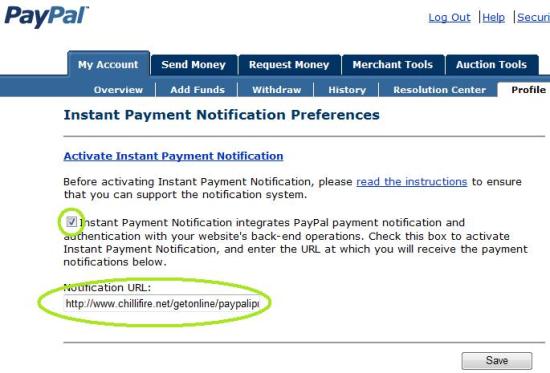
Now click on 'Instant Payment Notification (IPN)'. On the next screen check the checkbox to activate IPN.
Enter the address https://www.chillifire.net/getonline/paypalipn.php in the address field and press the "Save" button.
6 Activating Your Chillifire Account
The router will work just fine now for punters, but you have not identified yourself to Chillifire, nor have you told Chillifire how you want to receive your share of the revenue. So you don't want to miss the next steps.
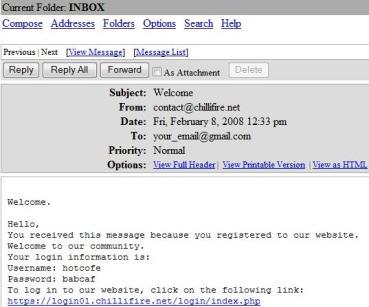
Once you have registered an account the system will send two emails to the email address you specified in the contact details. The first will give you the account name and password (the password can be changed later in the Chillifire Hotspot Management System),
and the second will give you a link to activate the account.
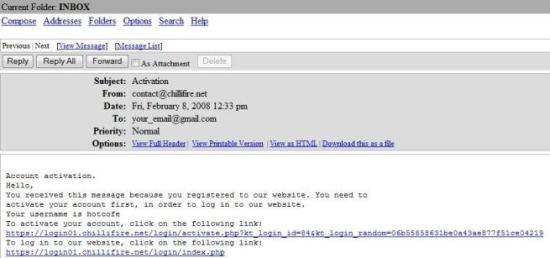
When you press the activation link, the system will activate the account and show you a success message. The system will forward you automatically to the login screen of the Chillifire management console.
Note: You can access this hotspot management console at any time on login01.chillifire.net/login

On the login screen enter your name and password and press
the ‘Login’ button. For security reasons, the system will confirm
the time of your last logon. .
The first time you logon the system will acknowledge you as a new account.

You can press the tabs ‘Routers’ and then ‘Router Assignment’ and you will see the router(s) assigned to your account. If your account has affiliate (= Chillifire Business Solution) or partner (= Chillifire Corporate Solution) status, you will see also all the routers of your affiliates and all of the accounts managed by you.
 .
.
Return to the ‘Start Menu’ and press the ‘Accounts’ tab. You will see your own account. If your account has affiliate or partner status, you will see also all the accounts and affiliates managed by you.

Press edit on the ‘Accounts’ overview screen and you will get to the accounts detailed screen. Here you can add your own branding slogan and your own logo so the screen the hotspot user sees is cobranded. You can also maintain your own terms and conditions that are presented to the end-user, if you wish.
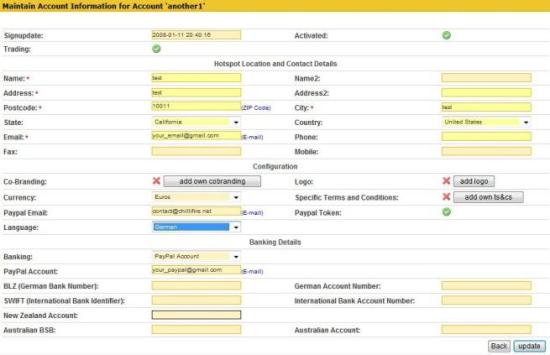
It is also here where you need to enter your own PayPal account ID (email address).
The most important entry on this screen, however, are your own bank account settings. We need your account details, so we can transfer your share of the funds to you. There are specific fields for Australia, New Zealand, Germany, EU banking and a PayPal account. You can determine your preferred method of receiving funds here.
Press ‘Update’ to save your entries.
YOU ARE DONE!
7 Used OpenSource Software
Openwrt
Freeradius
MySQL
PHP
Apache
OpenVPN
ISPConfig
BIND
Postfix
Munin
Monit
Snort
OSSEC
Prelude/Prewikka
DenyHosts

