Installing MySQL And phpMyAdmin On FreeNAS
This howto was written when I needed to run some php based web applications and the only system around was FreeNAS. Although many people are using php and MySQL on a FreeNAS box successfully I couldn't find any simple tutorial for the purpose, so I wrote one in case anyone needs it.
For this howto the following software and configurations were used:
- FreeNAS version 0.7RC1
- Installed with option "install 'full' OS on HDD + data + swap partition" or "install 'full' OS on HDD + data partition"
- Installaed with enough space on OS partition to install additional packages
- Working Internet connection
For the installation of FreeNAS there is a good tutorial available on HowtoForge, click this link.
Install MySQL
After a successfull installation and configuration of FreeNAS we will install MySQL on the box using the following steps.
Create the group and user 'mysql' using the FreeNAS WebGUI, it is important because FreeNAS will forget about the users created on command line after reboot.
ssh in to the FreeNAS box:
# ssh 192.168.1.250
[email protected]'s password:
Copyright (c) 1980, 1983, 1986, 1988, 1990, 1991, 1993, 1994
The Regents of the University of California. All rights reserved.
Welcome to FreeNAS!
freenas:~#
Create a directory to store MySQL data files, in my case I create a sub-directory in /mnt/dynamic/db to store database files, the reason to create this folder is to utilize the space on the data partition, as the data files grow it is a good place to store your growing database files.
# mkdir /mnt/dynamic/db/mysql
By default the MySQL server on FreeNAS stores database files in /var/db/mysql which does not exist at this point, so let's make a symbolic link in that directory:
# ln -s /mnt/dynamic/db/mysql /var/db/mysql
Give all permissions to the user and group mysql for /mnt/dynamic/db/mysql:
# chown -R mysql:mysql /mnt/dynamic/db/mysql
Allow anyone to create temporary files in the following direcories, MySQL needs to create temporary files there:
# chmod 777 /tmp
# chmod 777 /var/tmp
Type the following command to install MySQL server:
# pkg_add -r mysql50-server
Execute the following command to create default databases and tables:
# mysql_install_db
Installing MySQL system tables...
090819 11:18:58 [Warning] option 'max_join_size': unsigned value 18446744073709551615 adjusted to 4294967295
090819 11:18:58 [Warning] option 'max_join_size': unsigned value 18446744073709551615 adjusted to 4294967295
OK
Filling help tables...
090819 11:18:58 [Warning] option 'max_join_size': unsigned value 18446744073709551615 adjusted to 4294967295
090819 11:18:58 [Warning] option 'max_join_size': unsigned value 18446744073709551615 adjusted to 4294967295
OK
To start mysqld at boot time you have to copy
support-files/mysql.server to the right place for your system
PLEASE REMEMBER TO SET A PASSWORD FOR THE MySQL root USER !
To do so, start the server, then issue the following commands:
/usr/local/bin/mysqladmin -u root password 'new-password'
/usr/local/bin/mysqladmin -u root -h freenas.local password 'new-password'
Alternatively you can run:
/usr/local/bin/mysql_secure_installation
which will also give you the option of removing the test
databases and anonymous user created by default. This is
strongly recommended for production servers.
See the manual for more instructions.
You can start the MySQL daemon with:
cd /usr/local ; /usr/local/bin/mysqld_safe &
You can test the MySQL daemon with mysql-test-run.pl
cd mysql-test ; perl mysql-test-run.pl
Please report any problems with the /usr/local/bin/mysqlbug script!
The latest information about MySQL is available on the web at
http://www.mysql.com
Support MySQL by buying support/licenses at http://shop.mysql.com
Now to automatically start mysql after a reboot, add mysql_enable="YES" to rc.conf, GUI is prefereable to make this change, select System -> Advance -> rc.conf:
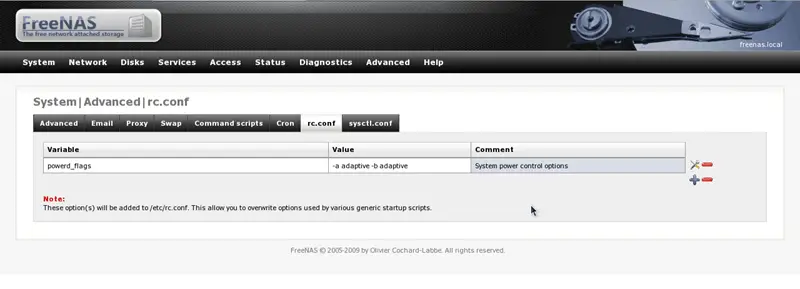
Click on the red plus sign to create a new entry:
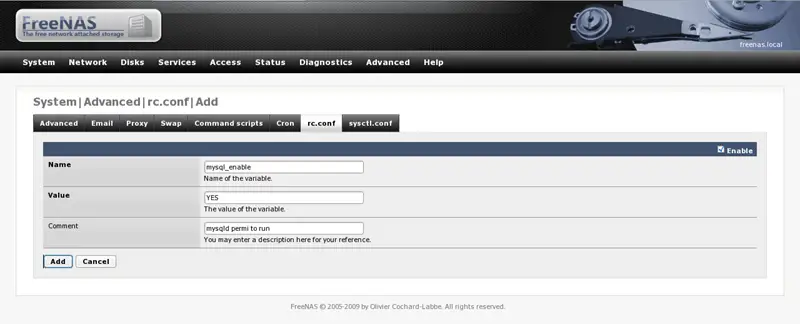
After filling the fields as shown in the image click the add button:
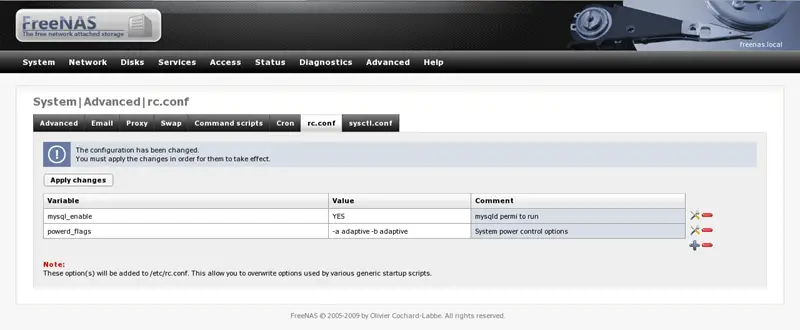
Click the button "Apply changes" to apply and save the changes permanently:
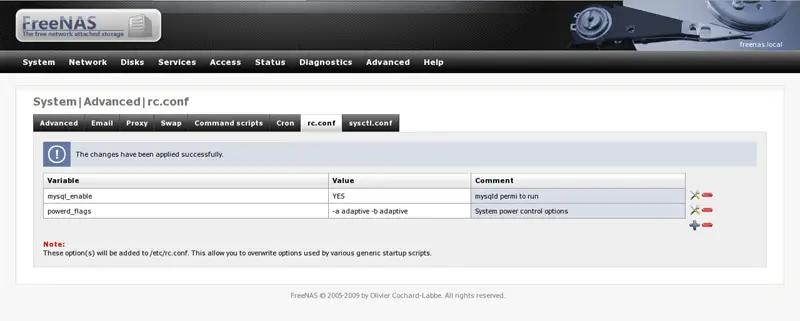
The installation of the MySQL server has successfully been completed. At this point you may reboot FreeNAS and check the proper startup of the MySQL server after reboot.
Installation of PHP
Although FreeNAS includes php for its own web interface working upon it, it's good to install extra supporting packages to run php-based applications. Let's start the process with the following commands:
# pkg_add -r php5
# pkg_add -r php5-extensions
# pkg_add -r php5-xmlrpc
# pkg_add -r php5-gettext
# pkg_add -r php5-mcrypt
# pkg_add -r php5-mysql
# pkg_add -r php5-mbstring
These commands install php5 and some basic packages needed to run phpMyAdmin, after the installation you will not be able to access FreeNAS webGUI interface because of a problem, don't panic let's correct it by issuing the following commands:
# mv /usr/local/bin/php /usr/local/bin/php-cli
# cp /usr/local/bin/php-cgi /usr/local/bin/php
Back in business! At this point our installation of the MySQL server and PHP has successfully been completed.
Installation of phpMyAdmin
Let's create a proper directory to hold applications, you are welcome to use you own scheme:
# mkdir /mnt/dynamic/apps
# cd /mnt/dynamic/app
Donwload phpMyAdmin from http://sourceforge.net/projects/phpmyadmin/files/phpMyAdmin/; in my case I've donloaded the phpMyAdmin-3.2.1-english.tar.gz file. You can use the following command on the FreeNAS box or copy via scp.
fetch http://sourceforge.net/projects/phpmyadmin/files/phpMyAdmin/3.2.1/phpMyAdmin-3.2.1-english.tar.gz
Untar the archeive and create the necessary symbolic links:
# tar -zxvf phpMyAdmin-3.2.1-english.tar.gz
# ln -s /mnt/dynamic/apps/phpMyAdmin-3.2.1-english/ /mnt/dynamic/apps/phpMyAdmin
Now create a link to run phpMyAdmin from the default location:
# ln -s /mnt/dynamic/apps/phpMyAdmin/ /usr/local/www/phpMyAdmin
You can access phpMyAdmin from http://< FreeNAS IP >/phpMyAdmin/.
Enjoy!

