How to Use Rsnapshot for Backup and Restore on Linux Servers
rsnapshot is a backup utility for Linux-based machines. It is available on most Linux distributions, you can easily install it through the package manager. rsnapshot is written in Perl with no dependencies, it also supports local and remote backup.
With rsnapshot, you can back up your local directory. As for remote backup, rsnapshot utilizes 'ssh' and 'rsync'.
In this tutorial, you'll learn how to backup and restore using Rsnapshot on a Linux server. You'll be setting up rsnapshot for local backup and remote backup. You'll also learn how to set up an automatic backup with rsnapshot and cron.
Prerequisites
To complete this guide, make sure you have the following:
- A Linux server such as Debian, Ubuntu, CentOS, or any distribution
- A non-root user with administrator privileges
- Optional, additional server to test remote backup
Installing rsnapshot
rsnapshot is a backup utility that is available on most Linux distributions. You can install it through the respective package manager. In this section, you'll be installing rsnapshot on the Debian server. So if you're using a different distribution, install it with your current package manager.
First, update your package index with the following command. In this example, we'll be using Debian, you can use Debian-based distributions such as Ubuntu, Linux Mint, etc.
sudo apt update
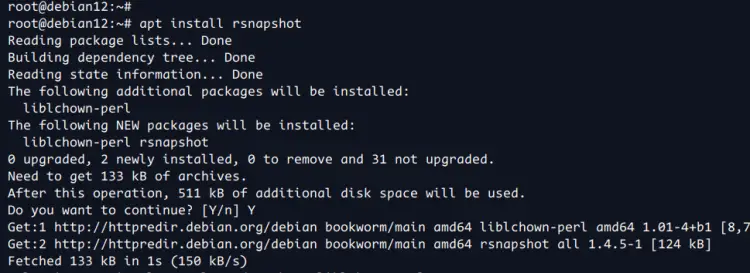
Once updated, run the command below to install the 'rsnapshot' package. Enter 'Y' to confirm your installation.
sudo apt install rsnapshot
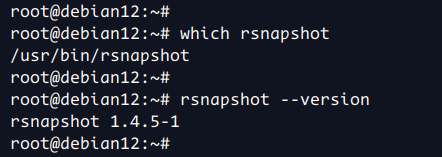
After the installation is complete, check the 'rsnapshot' binary location and its version.
which rsnapshot
rsnapshot --version
You can see below, the Rsnapshot 1.4 is installed in the '/usr/bin/rsnapshot'.
Configuring SSH key authentication
When doing remote backup, you must ensure your rsnapshot server can log in to the target server using SSH key authentication. So for remote backup, you must have the following:
- A user that will be used to log in to the target server
- SSH key-based authentication is enabled
In this section, you'll generate an SSH key on the rsnapshot server. And then copy the SSH public key to the target server on '192.168.10.41' using user 'alice'.
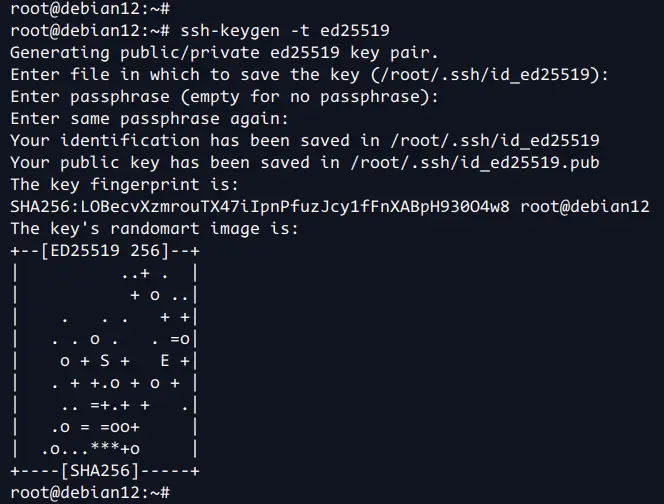
On the 'rsnapshot' server, generate the SSH public and private keys using the 'ssh-keygen' command below. Press 'ENTER' when asked for the location key and password.
ssh-keygen -t ed25519
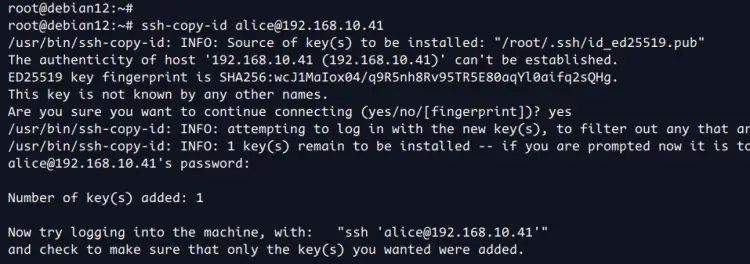
Now run the 'ssh-copy-id' command below to upload the SSH public key to your target server. In this example, you'll do remote backup from the server '192.168.10.41' with the key-based SSH authentication and using the user 'alice'.
ssh-copy-id [email protected]
Enter your password when prompted.
Once the SSH public key is uploaded, you're ready to set up Rsnapshot.
Configuring rsnapshot
In this section, you'll configure rsnapshot for both local and remote backup. You'll modify the default configuration '/etc/rsnapshot.conf', set up the default backup directory, enable integration with SSH and Rsync, set up interval backup, and then configure local and remote backup.
Copy the rsnapshot default configuration '/etc/rsnapshot.conf' and modify the file with the 'nano' or 'vim' editor.
sudo cp /etc/rsnapshot.conf /etc/rsnapshot.conf.orig
sudo nano /etc/rsnapshot.conf
Change the default 'snapshot_root' with a new directory. This directory will be used to store your backup data.
snapshot_root /data/backup/
Uncomment the 'cmd_rsync' and 'cmd_ssh' options to enable remote backup with rsync via SSH.
cmd_rsync /usr/bin/rsync
cmd_ssh /usr/bin/ssh
Change the default backup levels or intervals like the following. The naming is optional, you can change it as needed. So for this example, the 'daily 6' will create backup directories named 'daily.0' to 'daily.5'.
NOTE: Use TAB instead of space, because that will throw an error.
retain daily 6
retain weekly 7
retain monthly 4
Uncomment the 'logfile' option to enable a rsnapshot log to the file.
logfile /var/log/rsnapshot.log
If you're running a remote server with a custom SSH port, uncomment the 'ssh_args' option and change the port.
ssh_args -p 22
Now for local backup, use the configuration like this. In this example, we'll back up the local directory '/home/arvdl' to the 'local'. The destination path should be a relative path, this is equal to '/srv/backup/name-interval/local'.
backup /home/arvdl/ local
For the remote backup via SSH and rsync, use the configuration like this. In this example, we'll backup directories '/etc' and '/var/www' from the remote server '192.168.10.41' with the SSH user 'alice' to the 'server1' relative path directory.
backup [email protected]:/etc/ server1
backup [email protected]:/var/www server1
Save and exit the file when done.
After you've configured rsnapshot, check and test the rsnapshot configuration with the following. If you've proper config, you'll see an output 'Syntax OK'.
rsnapshot configtest
Testing rsnapshot backup manually
Now that you've configured rsnapshot, let's verify and test your backup with rsnapshot by doing the backup manually, checking the backup directory and rsnapshot log file.
To test your backup manually, run the 'rsnapshot' command below. Make sure to change 'daily' with your backup name.
rsnapshot daily
If the process is complete, check the backup directory '/srv/backup' with the following command. You'll see a new backup directory 'daily.0' that contains your backup files from local and remote servers.
ls /srv/backup/
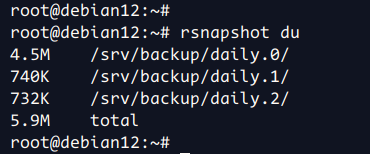
Now run the command below to check disk usage by rsnapshot.
rsnapshot du
In the output below, you can see total disk usage for rsnapshot backup is 5MB.
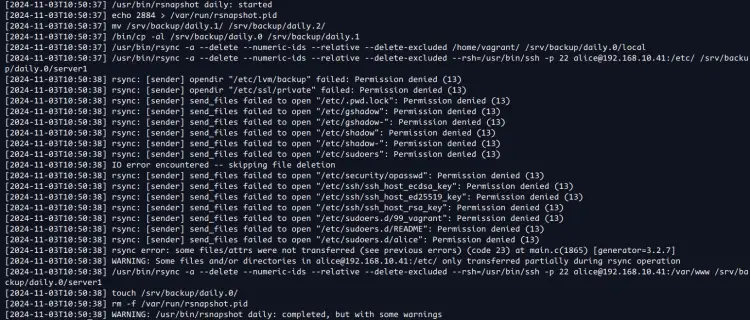
Lastly, check the backup log file '/var/log/rsnapshot.log' to check your backup process.
cat /var/log/rsnapshot.log
The following shows that the backup was successful, but with some warnings, such as permission denied when backing up the '/etc/shadow' file.
Automatic backup with Cron
For the automatic backup, you can integrate rsnapshot with cron. For example, you'll set up cron for automatic backup as 'daily', 'weekly', and 'monthly'.
Open the file '/etc/cron.d/rsnapshot' with the 'nano' editor. This file is an example generated by rsnapshot.
sudo nano /etc/cron.d/rsnapshot
Input the following configuration to automatic backup via rsnapshot. In this example, the 'daily' backup will be running daily, as well as 'weekly' and 'monthly' within their respective time.
0 0 * * * root rsnapshot daily
0 0 * * 0 root rsnapshot weekly
0 0 1 * * root rsnapshot monthly
Save the file and exit the editor.
With this, your automatic backup will be run via cron.
Restoring rsnapshot backup
To restore the rsnapshot backup, you just need to copy your data from the backup directory to your destination. For this example, you can copy your data from the backup directory '/srv/backup'.
Conclusion
Congratulations! You've completed the tutorial for installing rsnapshot and setting up rsnapshot for local and remote backup, and you've learned some basic 'rsnapshot' commands. Lastly, you've also learned how to set up an automatic backup with rsnapshot and cron.


