How to Install Sensu Monitoring Solution on Ubuntu 22.04
This tutorial exists for these OS versions
- Ubuntu 22.04 (Jammy Jellyfish)
- Ubuntu 20.04 (Focal Fossa)
- Ubuntu 16.04 (Xenial Xerus)
On this page
Sensu is an open-source infrastructure and application monitoring system designed for both container and non-container monitoring and multi-cloud infrastructure.
Sensu is a scalable, secure, and integrated monitoring solution for your technology and server infrastructure. It can be used to monitor servers, application health, and services, and send alerts notification to multiple targets with third-party integration.
In this guide, you will set up the Sensu Monitoring Solution on an Ubuntu 22.04 server. You'll also install and configure the Sensu-go-client that will be used for managing Sensu. And lastly, you will install Sensu Agent on the target host to monitor and set up Sensu checks for basic system monitoring.
Prerequistes
To complete this guide, you will need the following requirements:
- Two Ubuntu 22.04 servers - The first server will be used to install Sensu Monitoring Solution, and the second server is the target server to monitor.
- A non-root user with sudo/root administrator privileges.
Below is the details server that will be used for this guide:
Hostname        IP Address      Used as
--------------------------------------------------
sensugo-server  192.168.5.100   Sensu Server
machine1        192.168.5.120   Target Monitoring
Now let's jump to the installation.
Adding Sensu Repository
Sensu is a secure and scalable monitoring solution that can be installed on multiple operating systems such as Linux, macOS, Windows, and FreeBSD. Sensu provides its own repository, especially for RHEL-based and Debian-based distribution. sensu packages are delivered via the packagecloud.io repository.
For this first step, you'll set up the Sensu repository on both the Sensu server and the target Monitoring system.
To start, run the below apt command to update the package index and install some basic packages to your system.
sudo apt update
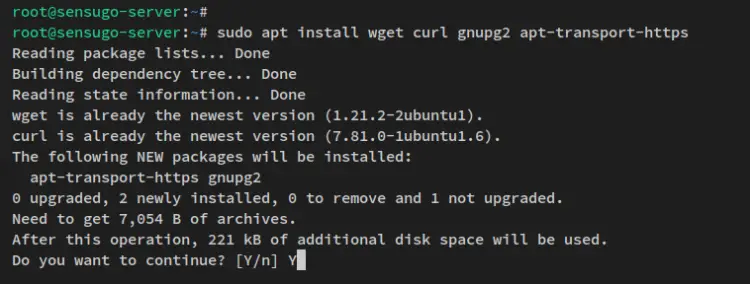
sudo apt install wget curl gnupg2 apt-transport-https
When prompted, input y to confirm and press ENTER.
Next, run the below command to add the Sensu stable repository to your systems. This will download the bash script that will automatically set up and configure the Sensu repository for your Ubuntu systems.
curl -s https://packagecloud.io/install/repositories/sensu/stable/script.deb.sh | sudo bash
You'll receive an output similar to this.
After the sensu repository is added, you'll now be ready to start the Sensu Go installation on the Sensu Server and the Sensu Agent on the Target Monitoring.
Installing and Configuring Sensu Go Backend
Sensu Go Backend is the main component of the Sensu Monitoring Platform. It provides a web administration dashboard, and HTTP API that allows you to manage Sensu via the command-line, and also provides the WebSockets that will be used for target machines/agents to connect.
Before you you get started, ensure that you run all of the following commands on the Sensu Server. In this example is the server hostname 'sensugo-server'.
To start, run the below apt command to install the Sensu Go backend.
sudo apt install sensu-go-backend
Now the installation should begin.
After Sensu Go Backend is installed, download the sample configuration via the wget command below to the '/etc/sensu/backend.yml'. Then open the file using the nano editor command.
sudo curl -L https://docs.sensu.io/sensu-go/latest/files/backend.yml -o /etc/sensu/backend.yml
sudo nano /etc/sensu/backend.yml
Uncomment the following lines in the file.
cache-dir: "/var/cache/sensu/sensu-backend"
config-file: "/etc/sensu/backend.yml"

log-level: "debug"
state-dir: "/var/lib/sensu/sensu-backend"
Save the file and exit the editor when you're done.
Next, run the below systemctl command utility to start and enable the Sensu Go Backend service 'sensu-backend'.
sudo systemctl start sensu-backend
sudo systemctl enable sensu-backend
The 'sensu-backend' should now be running and enabled. Also, the service will automatically run upon the bootup.
Verify the 'sensu-backend' service status via the following systemctl command.
sudo systemctl is-enabled sensu-backend
sudo systemctl status sensu-backend
You will receive the output similar to this - The 'sensu-backend' service is enabled and it's now running.
With the Sensu Go Backend is running, you'll next initialize the Sensu Go Backend by setting up the admin password and generating some configurations.
To initialize the Sensu Go Backend installation, run the below command to create new environment variables that will be used to set up the Sensu admin user and password.
This example will be using the 'sensuadmin' as the user and the 'sensupassword' as the password. So, be sure to change the admin user and password.
export SENSU_BACKEND_CLUSTER_ADMIN_USERNAME=sensuadmin
export SENSU_BACKEND_CLUSTER_ADMIN_PASSWORD=sensupassword
Now run the following 'sensu-backend' command to initialize the Sensu Go Backend installation.
sensu-backend init
You'll receive the output similar to this - The Sensu Go Backend is now initialized and it's running on the default port '3000'.
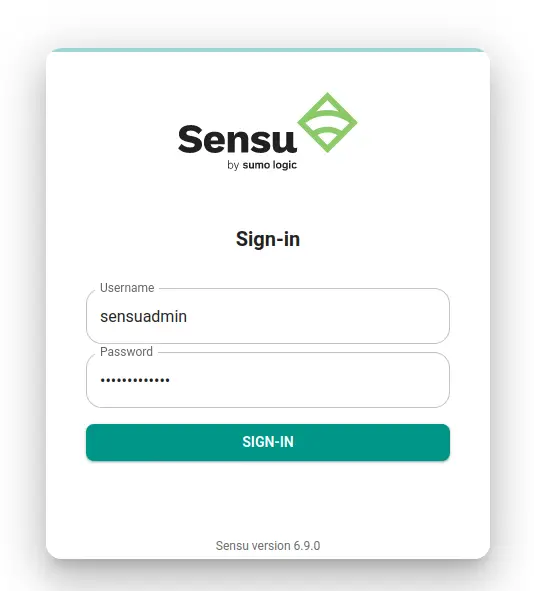
Now open the web browser and visit the server IP address followed by the TCP port 3000 (i.e: http://192.168.5.100:3000). And you should get the Sensu login page.
Log in with the username and password during the initialization process and click 'SIGN-IN'.
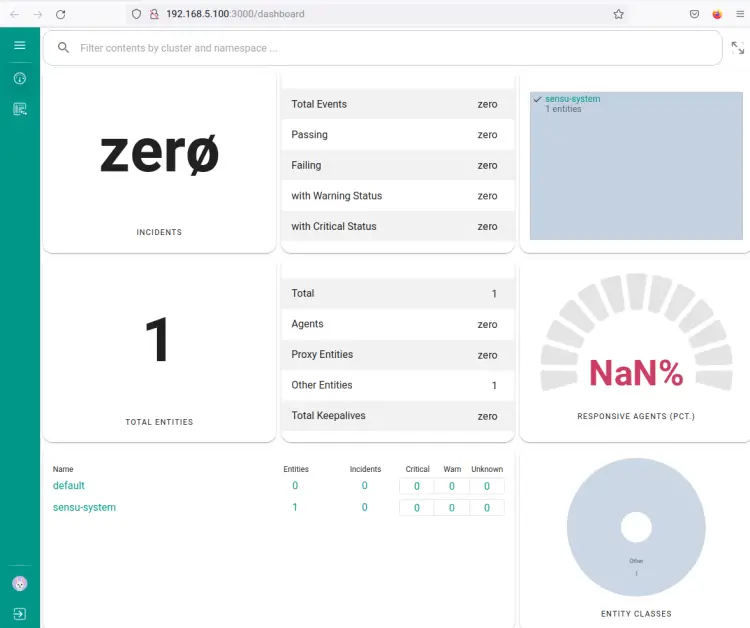
After logging in, you should see the Sensu administration dashboard. You've now finished the Sensu Go Backend installation.
Additionally, you can also verify the health status of your Sensu Go Backend server via the Sensu API.
Install the 'jq' package utility to your system via the apt command below.
sudo apt install jq -y
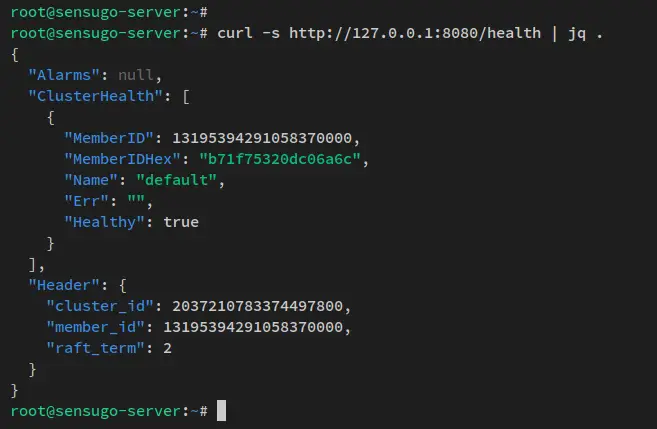
Now run the below curl command to access the Sensu Server API that runs on the default port '8080'. This command will check the health status of your Sensu server, then the output will be formatted as json, which makes the output readable.
curl -s http://127.0.0.1:8080/health | jq .
Output - In the following output the 'Healthy: true' and no error.
Installing and Configuring sensuctl
With the Sensu Go Backend installed and configured, you'll then install the Sensu Go Client on the Sensu Server. The Sensu Go Client provides a command-line utility 'sensuctl' that allows you to manage Sensu via the terminal server.
The way 'sensuctl' works is by communicating with the Sensu Server via API to create, read, update, and delete resources, events, and entities on the Sensu Server.
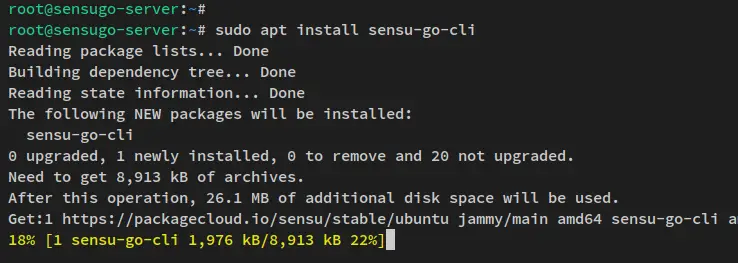
Run the below apt command to install the Sensu Go Client. The installation should now begin.
sudo apt install sensu-go-cli
After 'sensu-go-cli' is installed, open the '~/.bashrc' file using the below nano editor command.
nano ~/.bashrc
Add the following lines to the bottom of the line. This configuration will enable the auto-complete for the 'sensuctl' command.
if [ -f /usr/share/bash-completion/bash_completion ]; then
. /usr/share/bash-completion/bash_completion
elif [ -f /etc/bash_completion ]; then
. /etc/bash_completion
fi

source <(sensuctl completion bash)
Save the file and exit when you are finished.
Next, reload your current session by reloading the '~/.bashrc' file. Then verify using the 'sensuctl' command.
source ~/.bashrc
sensuctl TAB
If you press the TAB button after the 'sensuctl' command, you should get the list of options for that command.
With the Sensu Go Client installed, you'll now start configuring the connection to the Sensu Server.
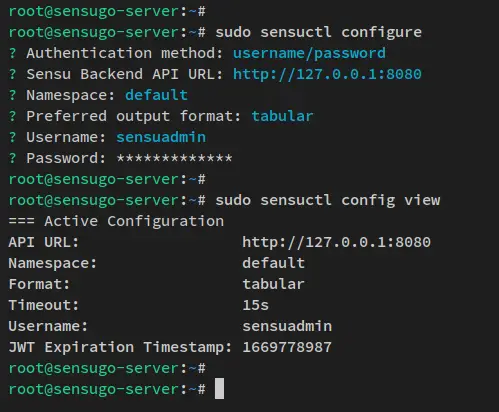
Run the below 'sensuctl configure' command to add the Sensu Server.
sudo sensuctl configure
You'll now be asked about some configurations:
- Authentication method? username/password
- Sensu Backend API URL? Sensu API is running by default on http://127.0.0.1:8080
- Namespace? default
- Preferred output format? Select the output format that you want - this example is tabular.
- Username? admin user for sensu
- Password? password for the sensu admin user
After the 'sensuctl' configuration is finished, run the below command to verify the details current configuration.
sudo sensuctl config view
You'll receive the output similar to this - The Sensu Go Client is now connected to the Sensu Server via HTTP API that runs by default on localhost:8080.
At this point, you've finished the basic configuration of the Sensu Go Backend and the Sensu Go Client. In the next step, you'll monitor the target machine via the Sensu Agent.
Installing Sensu Agent on Target Machine
Sensu Agent is a lightweight client that runs on target machines that you want to monitor. It works by communicating via WebSockets to the Sensu Server with features such as self-register, sending keepalive messages, and executing monitoring checks.
Before you start, ensure that the Sensu repository is added. Also, ensure that you run the below commands on the target machine, this example uses the server with hostname 'machine1'.
Run the below apt command to install the Sensu Agent to your system. The installation should automatically proceed.
sudo apt install sensu-go-agent
After Sensu Agent is installed, download the configuration file of Sensu Agent to '/etc/sensu/agent.yml' via the curl command. Then open the file '/etc/sensu/agent.yml' using the nano editor command.
sudo curl -L https://docs.sensu.io/sensu-go/latest/files/agent.yml -o /etc/sensu/agent.yml
sudo nano /etc/sensu/agent.yml
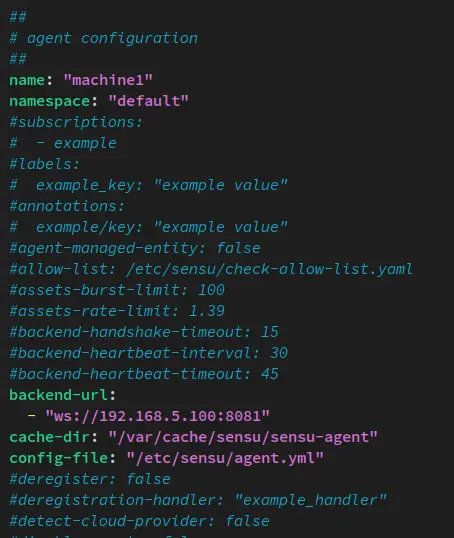
Change the default configuration with the following lines. Ensure to change the 'name' with the hostname of the target machine, and the backend URL is the WebSocket address for the Sensu Server that runs on the default port '8081'.
In this example, the target machine hostname is 'machine1' and the IP address of the Sensu Server is '192.168.5.100'.
name: "machine1"
namespace: "default"
...
backend-url:
  - "ws://192.168.5.100:8081"
cache-dir: "/var/cache/sensu/sensu-agent"
config-file: "/etc/sensu/agent.yml"
Save the file and exit the editor when you're finished.
Next, run the below systemctl command utility to start and enable the 'sensu-agent' service. The service should now be running and enabled, which means the service will automatically start upon the bootup.
sudo systemctl start sensu-agent
sudo systemctl enable sensu-agent
Now verify the 'sensu-agent' service via the below command to ensure that the service is running.
sudo systemctl is-enabled sensu-agent
sudo systemctl status sensu-agent
You'll receive the output like the following - The 'sensu-agent' service is enabled and the current status is running.
Lastly, go back to the Sensu Server terminal and run the below 'sensuctl' command to verify that the target machine 'machine1' is available on the Sensu Server.
sensuctl entity list --format tabular
You'll receive the output similar to this - The target machine 'machine1' is added to the Sensu Server via the Sensu Agent.
Now that the target machine 'machine1' is added to the Sensu Server, you'll next set up checks for basic system monitoring.
Setting up Checks for Monitoring System
On Sensu, checks is where you define what thing you want to monitor. Examples of checks is monitoring for CPU usage, memory usage, disk usage, and many more. Checks is part of the Assets, which is dynamic runtimes that are shareable and reusable.
In this step, you'll create new checks for monitoring CPU usage, memory usage, and disk usage. These checks will be used to monitor the target machine 'machine1'.
To start, run the below sensuctl command to update the entity or target machine 'machine1'.
sensuctl entity update machine1
The class should be 'agent' and the Subscription should be 'System'.
Now run the below sensuctl command utility to add assets to your Sensu Server. You can get another asset of Sensu from the Sensu asset hub https://bonsai.sensu.io.
sensuctl asset add sensu/check-cpu-usage
sensuctl asset add sensu/check-memory-usage
sensuctl asset add sensu/check-disk-usage
You will receive an output similar to this.
Adding runtime asset 'sensu/check-cpu-usage'
Adding runtime asset 'sensu/check-memory-usage'.
Adding runtime asset 'sensu/check-disk-usage'.
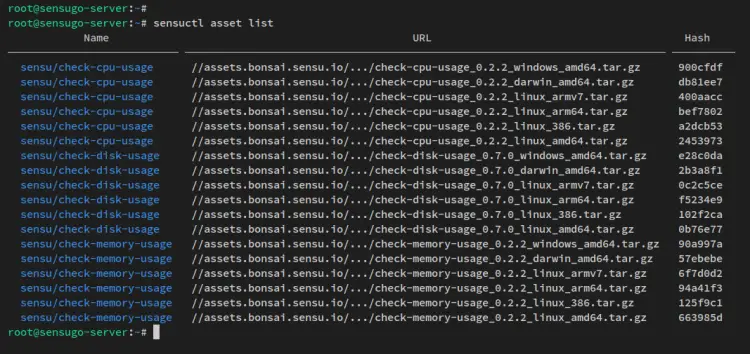
Next, verify the list of assents on the Sensu Server via the sensuctl command below. You should see these runtime assets is added to the Sensu Server.
sensuctl asset list
With Sensu assets is added, you'll then create checks based on the asset that you've added.
Run the below command to create a check 'check_cpu' with the subscription as 'system' and use the runtime assent 'sensu/check-cpu-usage'. You can adjust the settings on the 'command' option.
sensuctl check create check_cpu \
--command 'check-cpu-usage -w 75 -c 90' \
--interval 60 \
--subscriptions system \
--runtime-assets sensu/check-cpu-usage
Run the below command to create a check 'check_mem' with the subscription as 'system' and use the runtime assent 'sensu/check-memory-usage'. You can adjust the settings on the 'command' option.
sensuctl check create check_mem \
--command 'check-memory-usage -w 80 -c 90' \
--interval 60 \
--subscriptions system \
--runtime-assets sensu/check-memory-usage
Run the below command to create a check 'check_disk' with the subscription as 'system' and use the runtime assent 'sensu/check-disk-usage'. You can adjust the settings on the 'command' option.
sensuctl check create check_disk \
--command 'check-disk-usage --include-fs-type "xfs,ext4" --exclude-fs-path "/boot" --warning 90 --critical 95' \
--interval 60 \
--subscriptions system \
--runtime-assets sensu/check-disk-usage
Now verify the list of checks on the Sensu Server via the 'sensuctl' command utility below. You'll then see three checks that you've created, the check_cpu, check_mem, and check_disk.
sensuctl check list
Now back to the web browser and visit the Sensu administration dashboard. Ensure that you're in the 'default' namespace, then click 'Entities'.
You should see that the target machine 'machine1' is added with the status OK.
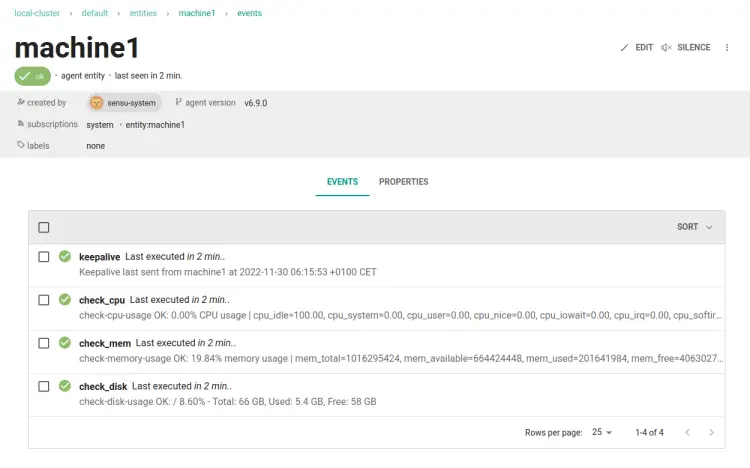
Click on 'machine1' to get details monitoring. And you should get the page like the following - all checks that you've created is executed and running.
You've now created and configured assets and checks for system monitoring on the Sensu Server.
Conclusion
You have now installed the Sensu Monitoring Solution on the Ubuntu 22.04 Server. You have also learned the basic usage of the Sensuctl command for managing the Sensu backend. Additionally, you have successfully monitored the Linux host machine via the Sensu Agent and set up "assets" and "checks" for monitoring target servers.

