How to Install Sensu Monitoring Solution on Rocky Linux 9
On this page
Sensu is an open-source infrastructure and application monitoring system designed for container and non-container monitoring and multi-cloud infrastructure.
Sensu is a scalable, secure, integrated monitoring solution for your technology and server infrastructure. It can be used to monitor servers, application health, and services, and send alerts notification to multiple targets with third-party integration.
In this tutorial, you will install Sensu Monitoring Solution on a Rocky Linux 9 server. In addition to that, you will also install and set up Sensuctl which allows you to manage Sensu via the command line terminal.
Through the end of this tutorial, you will also install Sensu Agent on RHEL-based distributions and Debian-based distributions. Then, you will set up checks for monitoring servers via Sensu Agent.
Prerequistes
To follow this tutorial, you will need the following requirements:
- A Linux server with Rocky Linux 9.
- A non-root user with sudo/root administrator privileges.
- An SELinux is running on permissive mode.
As for the target monitoring server, this example uses Rocky Linux and Debian servers. Below are the details servers that will be used for the demonstration:
Host          IP Address        Used as
-----------------------------------------------
sensu-rock    192.168.5.45    Sensu Go Backend
RPM-OS        192.168.5.80    Sensu Go Agent
DEB-OS        192.168.5.85    Sensu Go Agent
That's it. You're good to go to start the Sensu installation.
Setting up Repository
The first thing you will do is enable CRB (Code Ready Builder) repository, add the EPEL (Extra Package for Enterprise Linux) repository, then you will add the Sensu repository via packagecloud.io.
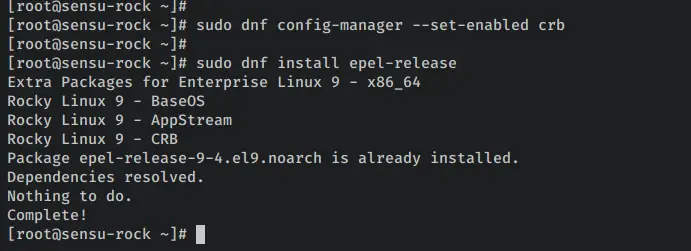
On Rocky Linux 9, the crb repository is equivalent to PowerTools which is available on CentOS. Run the following dnf command to enable the crb repository and install the EPEL repository.
sudo dnf config-manager --set-enabled crb
sudo dnf install epel-release
Once crb is enabled and the EPEL repository installed, run the following command to add the Sensu repository to your Rocky Linux server. This will set up the Sensu repository on your system automatically, and you'll be using the Sensu repository from the stable branch.
curl -s https://packagecloud.io/install/repositories/sensu/stable/script.rpm.sh | sudo bash
Verify the list of enabled repositories on your system by entering the dnf command below. You should receive an out that the crb, epel, and sensu_stable repositories are added to your Rocky Linux system.
sudo dnf repolist
Now that you've added the necessary repositories, you're ready to start Sensu installation.
Installing Sensu Go Backend
Sensu is a complete solution for monitoring at scale that can be used to monitor traditional servers, containers, applications, and/or cloud applications. Before installing Sensu, you must know that there are three components on Sensu, below is the list:
- Sensu Backend - the main component of Sensu that is powered by an embedded transport and etcd datastore. Sensu Backend exposed the WebSocket that will be used to communicate with Sensu Agent, the HTTP API that will be used to communicate with sensuctl. Also, it provides a web UI dashboard that you can access via browser.
- Sensu Agent - this is a lightweight client that will be installed and running on target servers. AN agent will generate status and metrics on the target server and send the results to the Sensu Backend via WebSocket.
- Sensu Workstation - this is the local computer on that you can install Sensuctl, or you can access Sensu Dashboard from your browser.
In this section, you will install and configure Sensu Backend on the Rocky Linux server.
Enter the following dnf command to install the 'sensu-go-backend' package to your system. When prompted, input y to confirm and press ENTER to proceed.
sudo dnf install sensu-go-backend
Once Sensu Backend is installed, download the sample configuration of Sensu Backend to '/etc/sensu/backend.yml' via curl. Then, open the downloaded file using the following nano editor command.
sudo curl -L https://docs.sensu.io/sensu-go/latest/files/backend.yml -o /etc/sensu/backend.yml
sudo nano /etc/sensu/backend.yml
Uncomment the following lines.
cache-dir: "/var/cache/sensu/sensu-backend"
config-file: "/etc/sensu/backend.yml"

log-level: "debug"
state-dir: "/var/lib/sensu/sensu-backend"
Save and close the file '/etc/sensu/backend.yml' when finished.
Next, run the following systemctl command utility to start and enable the 'sensu-backend' service. With this, the Sensu Backend should be running and will start automatically at system startup.
sudo systemctl start sensu-backend
sudo systemctl enable sensu-backend
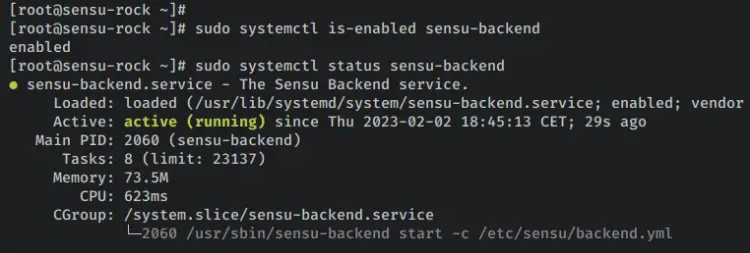
Run the following systemctl command to verify the 'sensu-backend' service and ensure that the service is running and enabled.
sudo systemctl is-enabled sensu-backend
sudo systemctl status sensu-backend
The output 'enabled' confirms that the Sensu Backend will start automatically at system startup. And the output 'active (running)' confirms that the Sensu Backend is currently running.
Now that you've installed the Sensu backend and it's running and enabled. Next, you will initialize the Sensu admin user and verify the installation.
Configuring Sensu Go Backend
In this section, you will initialize the administrator username and password for Sensu Backend, verify the installation via curl and web browser, and open some ports via firewalld.
Run the following command to set up environment variables 'SENSU_BACKEND_CLUSTER_ADMIN_USERNAME' and 'SENSU_BACKEND_CLUSTER_ADMIN_PASSWORD'. Be sure to change the value with your username and password.
export SENSU_BACKEND_CLUSTER_ADMIN_USERNAME=adminsensu
export SENSU_BACKEND_CLUSTER_ADMIN_PASSWORD=SensuRocks
Now run the following 'sensu-backend init' command to initialize your Sensu installation. With this, your Sensu backend admin user is created.
sensu-backend init
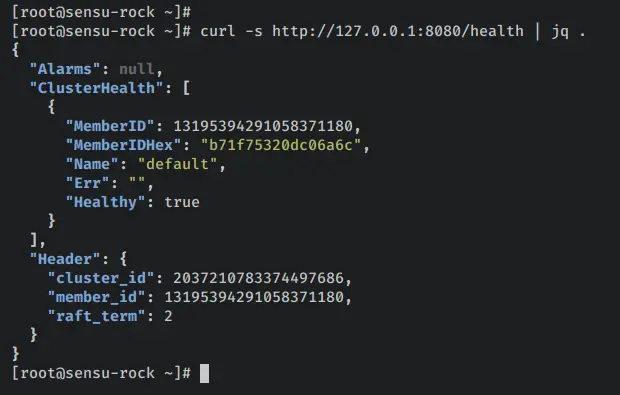
Next, run the following command to install the 'jq' package for parsing output to json. Then, run the curl command to verify the Sensu Backend status. The HTTP API of the Sensu backend is running on the default port 8080.
sudo dnf install jq
curl -s http://127.0.0.1:8080/health | jq .
The output 'Healthy: true' confirms that the Sensu Backend is running without an error.
Before accessing the Sensu dashboard, you must open ports on firewalld.
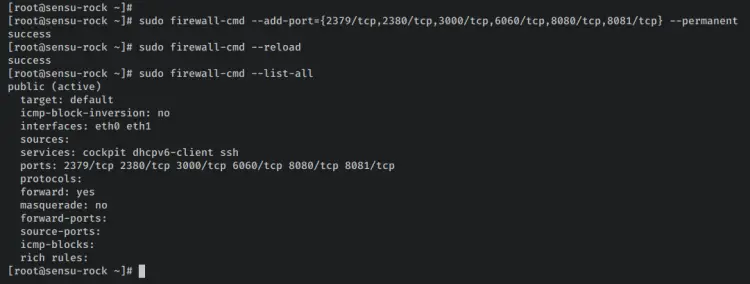
Enter the following firewall-cmd command top some ports for Sensu Backend. Then, reload the firewalld to apply the changes.
sudo firewall-cmd --add-port={2379/tcp,2380/tcp,3000/tcp,6060/tcp,8080/tcp,8081/tcp} --permanent
sudo firewall-cmd --reload
Verify the list of open ports on firewalld via the following command.
sudo firewall-cmd --list-all
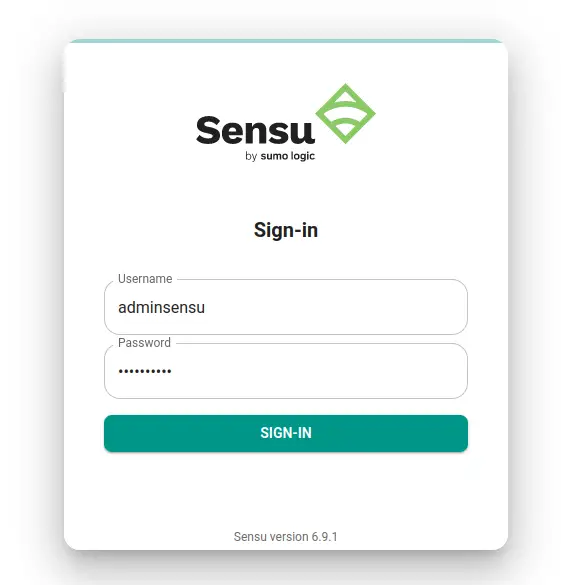
Now open your web browser and visit the server IP address followed by port 3000 (i.e: http://192.168.5.45:3000/). You should get the login page of the Sensu backend.
Log in with your username and password, then click 'SIGN-IN'.
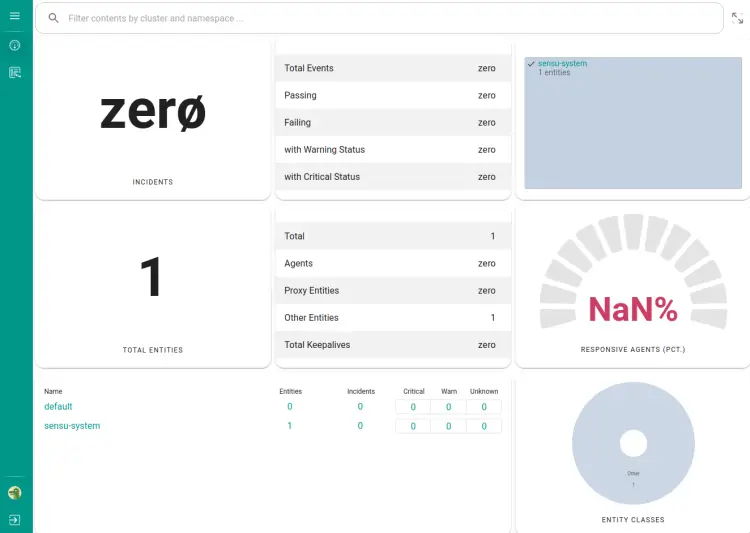
When successful, you should get the Sensu administration dashboard.
With this, you have now installed Sensu Backend, configured the admin user and password, and also successfully logged in to the Sensu dashboard from the browser. In the next step, you will install the Sensuctl, then connect to the Sensu Backend via Sensuctl.
Installing Sensuctl Command Line
Run the following dnf command to install the Sensuctl command. When prompted, input y to confirm and press ENTER to proceed.
sudo dnf install sensu-go-cli
Once Sensuctl is installed, run the following command to verify the binary path and version of Sensuctl.
which sensuctl
sensuctl --version
The binary path of Sensuctl is available at the '/bin/sensuctl', and the installed version is v6.9.1.
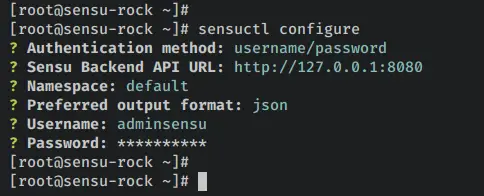
Next, run the following 'sensuctl' command to configure the connection to your Sensu Backend server.
sensuctl configure
You'll now be asked about some configurations:
- Authentication method? username/password
- Sensu Backend API URL? Sensu API is running by default on http://127.0.0.1:8080
- Namespace? default
- Preferred output format? Select the output format that you want - this example is json.
- Username? admin user for sensu
- Password? password for the sensu admin user
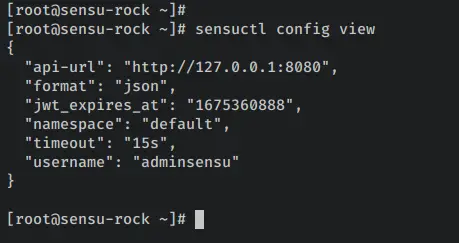
When finished, run the below command to verify the details connection.
sensuctl config view
You'll receive the output similar to this - The Sensuctl is connected to the Sensu Backend via HTTP API that runs by default on 'http://127.0.0.1:8080'.
After configuring Sensuctl, you will now enable the auto-completion for the Sensuctl command line.
Run the following dnf command to install the 'bash-completion' package.
sudo dnf install bash-completion -y
When 'bash-completion' is installed, open the '~/.bashrc' file using the following nano editor command.
sudo nano ~/.bashrc
Add the following lines to the file. This will enable the 'bash-completion' for the root user.
if [ -f /usr/share/bash-completion/bash_completion ]; then
. /usr/share/bash-completion/bash_completion
elif [ -f /etc/bash_completion ]; then
. /etc/bash_completion
fi

source <(sensuctl completion bash)
Save and exit the file when finished.
Next, run the following command to reload the '~/.bashrc' file on your current session.
source ~/.bashrc
Verify the auto-completion by entering the 'sensuctl' command and pressing TAB.
sensuctl TAB
When successful, you should get the list of options that are available on the 'sensuctl' command.
With this, you have now installed Sensuctl, connected to the Sensu Backend server via Sensuctl, and also configured its auto-complete. Next, you will set up Sensu Agent on Rocky Linux and Debian servers.
Installing Sensu Agent
In this section, you will install and set up Sensu Agent on two different nodes. You will install Sensu Agent on RHEL-based distributions and Debian-based distributions. Then, set up the Sensu Agent to connect to the Sensu Backend server that you've installed via WebSocket.
Now, let's start.
Sensu Agent on RHEL-Based Distributions
This example uses a Rocky Linux 9 machine, which is based on RHEL or CentOS 9. To install Sensu Agent, you must add the Sensu repository and open some ports on firewalld.
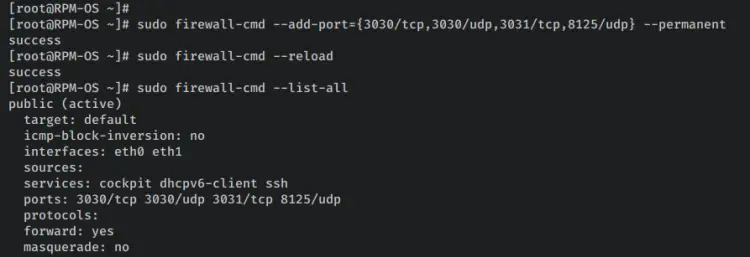
Run the following firewall-cmd command to open some ports. Then, reload the firewalld to apply the changes.
sudo firewall-cmd --add-port={3030/tcp,3030/udp,3031/tcp,8125/udp} --permanent
sudo firewall-cmd --reload
Verify the list of enabled ports on firewalld via the command below.
sudo firewall-cmd --list-all
You should receive an output like this:
Next, enter the following dnf command to enable the crb repository and install the EPEL repository.
sudo dnf config-manager --set-enabled crb
sudo dnf install epel-release
Now add the Sensu repository by entering the below command. This will download and run the bash installer script that will automate the repository configuration.
curl -s https://packagecloud.io/install/repositories/sensu/stable/script.rpm.sh | sudo bash
Output:
Once the Sensu repository is added, run the following dnf command to install the 'sens-go-agent' package to your system. When prompted, input y to confirm and press ENTER to proceed.
sudo dnf install sensu-go-agent
Output:
Next, run the following command to download the Sensu Agent config file to '/etc/sensu/agent.yml'. Then, open the config file '/etc/sensu/agent.yml' using the nano editor command below.
sudo curl -L https://docs.sensu.io/sensu-go/latest/files/agent.yml -o /etc/sensu/agent.yml
sudo nano /etc/sensu/agent.yml
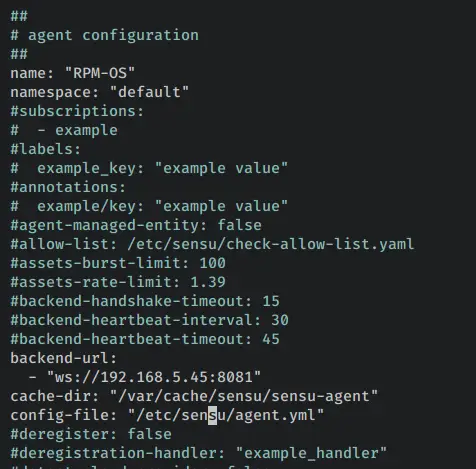
Uncomment the following lines and be sure to change the default 'name' with the system hostname and the 'backend-url' with the WebSockt IP address of the Sensu Backend server.
In this example, the system hostname is 'RPM-OS' and the Sensu Backend server IP address is '192.168.5.45'.
name: "RPM-OS"
namespace: "default"
...
backend-url:
  - "ws://192.168.5.45:8081"
cache-dir: "/var/cache/sensu/sensu-agent"
config-file: "/etc/sensu/agent.yml"
Save the file '/etc/sensu/agent.yml' and exit the editor when finished.
Now run the following systemctl command to start and enable the 'sensu-agent' service.
sudo systemctl start sensu-agent
sudo systemctl enable sensu-agent
An output 'Create symlink ... => ...' confirms that the Sensu Agent is enabled.
Next, verify the 'sensu-agent' service via the following systemctl command to ensure that the service is running and enabled.
sudo systemctl is-enabled sensu-agent
sudo systemctl status sensu-agent
An output 'enabled' confirms that the Sensu Agent is enabled and will start automatically upon system startup. And the status of Sensu Agent is 'active (running)'.
With Sensu Agent running on the 'RPM-OS' machine, the agent will be connected to Sensu Backend via WebSocket on port 8081.
Sensu Agent on Debian-Based Distributions
Now you will install Sensu Agent the Debian-based distribution, set up the UFW firewall, then configure the Sensu Agent to connect to the Sensu Backend server.
First, you must open some ports on your system. On Debian-based distribution, you can use ufw to set up the firewall.
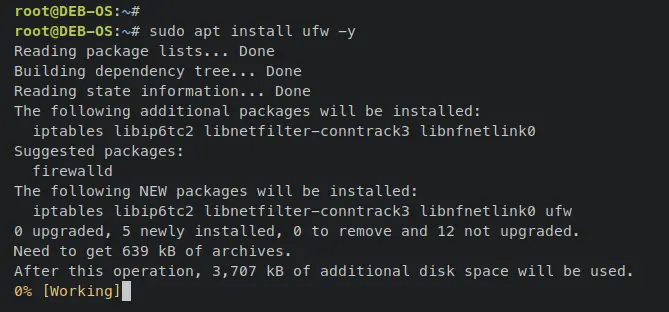
Run the following apt command to install the ufw firewall.
sudo apt install ufw -y
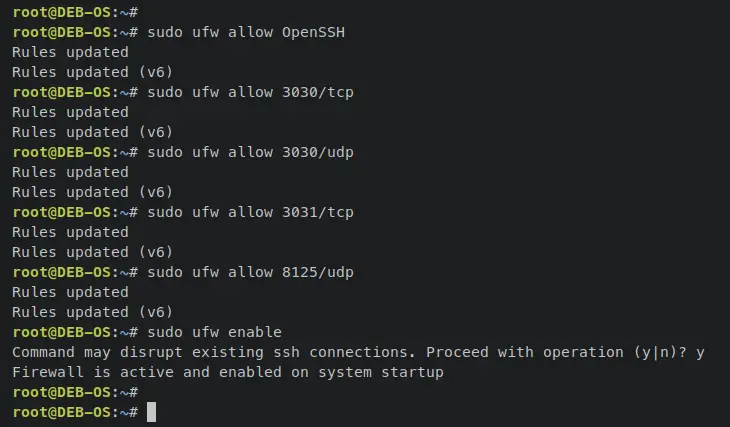
Once installed, run the following ufw command to add the OpenSSH service and some ports that will be used by Sensu Agent.
sudo ufw allow OpenSSH
sudo ufw allow 3030/tcp
sudo ufw allow 3030/udp
sudo ufw allow 3031/tcp
sudo ufw allow 8125/udp
The output 'Rules updated' confirms that the new rule added to the firewall.
Next, run the following command to start and enabled the ufw firewall. When prompted, input y to confirm and press ENTER to proceed.
sudo ufw enable
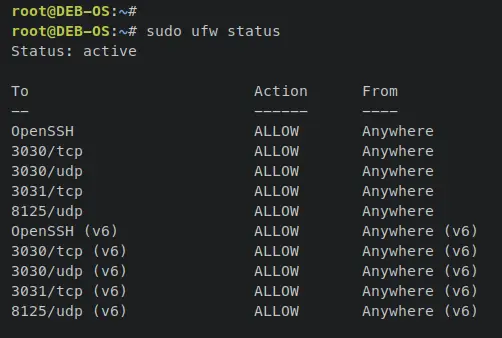
Verify the list of enabled ports and applications on ufw by entering the following command.
sudo ufw status
You should receive an output like this:
Now you're ready to install the Sensu Agent package.
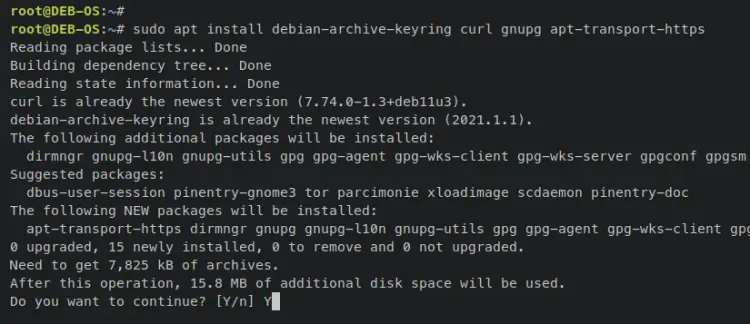
Run the following apt command to install basic dependencies on your system. Input y to confirm and press ENTER to proceed to the installation.
sudo apt install debian-archive-keyring curl gnupg apt-transport-https
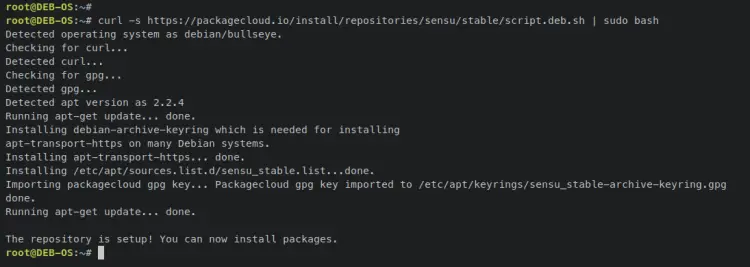
Next, add the Sensu repository for Debian-based distribution by entering the following command. This will download and run the bash installer script that will automate the repository configuration.
curl -s https://packagecloud.io/install/repositories/sensu/stable/script.deb.sh | sudo bash
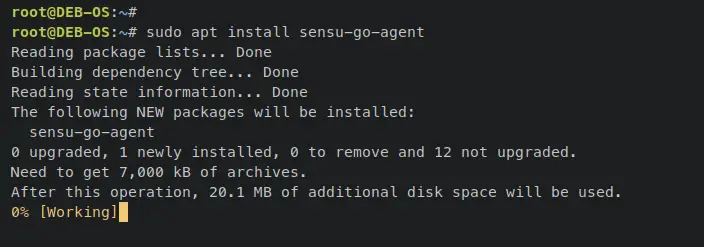
Once the repository is added, install 'sensu-go-agent' via the 'apt install' command below. When prompted, input y and press ENTER.
sudo apt install sensu-go-agent
Next, run the following command to download the Sensu Agent config file to '/etc/sensu/agent.yml'. Then, open the config file '/etc/sensu/agent.yml' using the nano editor command below.
sudo curl -L https://docs.sensu.io/sensu-go/latest/files/agent.yml -o /etc/sensu/agent.yml
sudo nano /etc/sensu/agent.yml
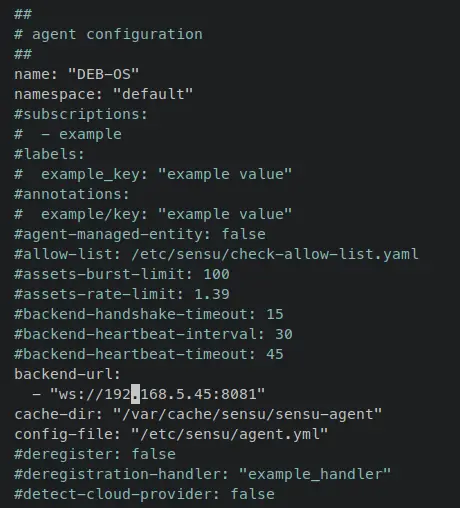
Uncomment the following lines and be sure to change the default 'name' with the system hostname and the 'backend-url' with the WebSockt IP address of the Sensu Backend server.
In this example, the system hostname is 'DEB-OS' and the Sensu Backend server IP address is '192.168.5.45'.
name: "DEB-OS"
namespace: "default"
...
backend-url:
  - "ws://192.168.5.45:8081"
cache-dir: "/var/cache/sensu/sensu-agent"
config-file: "/etc/sensu/agent.yml"
Save the file '/etc/sensu/agent.yml' and exit the editor when finished.
Now run the following systemctl command to start and enable the 'sensu-agent' service.
sudo systemctl start sensu-agent
sudo systemctl enable sensu-agent
An output 'Create symlink ... => ...' confirms that the Sensu Agent is enabled.
Next, verify the 'sensu-agent' service via the following systemctl command to ensure that the service is running and enabled.
sudo systemctl is-enabled sensu-agent
sudo systemctl status sensu-agent
An output 'enabled' confirms that the Sensu Agent is enabled and will start automatically upon system startup. And the status of Sensu Agent is 'active (running)'.
With Sensu Agent running on the 'DEB-OS' machine, the agent will be connected to Sensu Backend via WebSocket on port 8081.
Verifying Agent via Sensu Go Backend and Sensuctl
At this point, you have added two servers 'RPM-OS" and 'DEB-OS' to the Sensu Monitoring solutions via the Sensu Agent. In this section, you will verify both servers from the Sensu backend dashboard and via the Sensuctl command from the terminal.
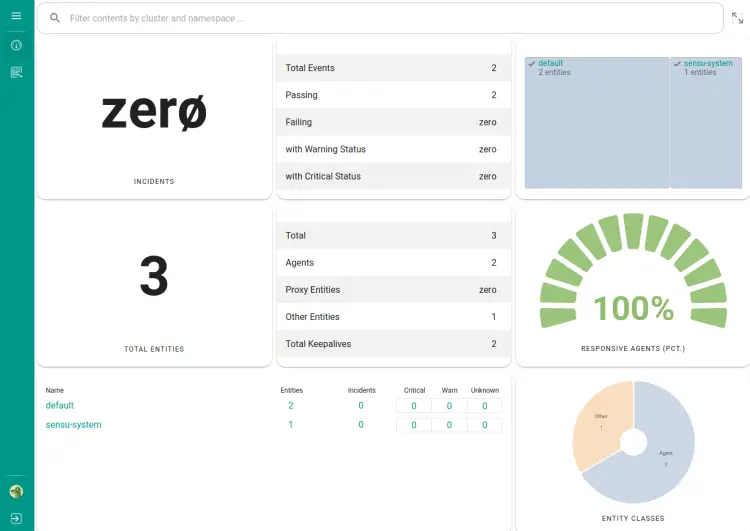
Back to the Sensu dashboard and you should see three entities available on Sensu.
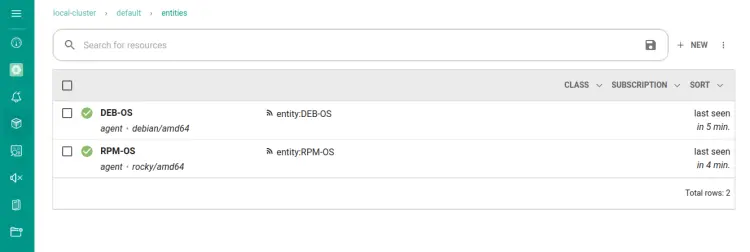
Click on the 'default' namespace and you should see the 'RPM-OS' and 'DEB-OS' added to Sensu.
Next, back to the Sensu Backend terminal server and run the following sensuctl command to verify the list of entities that are available on Sensu.
sensuctl entity list --format tabular
You should receive two entities 'RPM-OS' and 'DEB-OS' added and available on Sensu.
Creating Checks for System Monitoring
On Sensu, checks is where you define what thing you want to monitor. Examples of checks is monitoring for CPU usage, memory usage, disk usage, and many more. Checks is part of the Assets, which is dynamic runtimes that are shareable and reusable.
In this section, you'll create new checks for monitoring CPU usage, memory usage, and disk usage. These checks will be used to monitor the 'RPM-OS' and 'DEB-OS' servers.
The process to create a check on Sensu is by adding Sensu assets, then defining checks that depend on your need. And all these processes can be done via the Sensuctl command.
Run the following command to add an asset for checking CPU usage.
sensuctl asset add sensu/check-cpu-usage
Now run the below command to create a check 'check_cpu' with the subscription as 'system' and use the runtime assent 'sensu/check-cpu-usage'. You can adjust the settings on the 'command' option.
sensuctl check create check_cpu \
--command 'check-cpu-usage -w 75 -c 90' \
--interval 60 \
--subscriptions system \
--runtime-assets sensu/check-cpu-usage
Next, add a new asset for checking memory usage using the following command.
sensuctl asset add sensu/check-memory-usage
Run the below command to create a check 'check_mem' with the subscription as 'system' and use the runtime assent 'sensu/check-memory-usage'. You can adjust the settings on the 'command' option.
sensuctl check create check_mem \
--command 'check-memory-usage -w 80 -c 90' \
--interval 60 \
--subscriptions system \
--runtime-assets sensu/check-memory-usage
Run the following command to add the new asset for checking disk usage.
sensuctl asset add sensu/check-disk-usage
Then, create a new check for checking disk usage using the below command. This will create a check 'check_disk' with the subscription as 'system' and use the runtime assent 'sensu/check-disk-usage'. You can adjust the settings on the 'command' option.
sensuctl check create check_disk \
--command 'check-disk-usage --include-fs-type "xfs,ext4" --exclude-fs-path "/boot" --warning 90 --critical 95' \
--interval 60 \
--subscriptions system \
--runtime-assets sensu/check-disk-usage
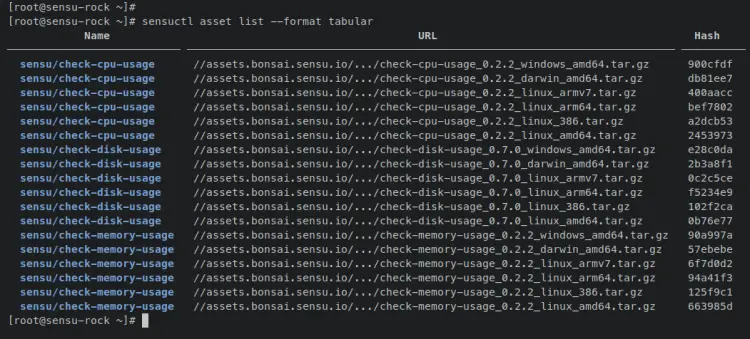
Lastly, run the following command to verify the list of assets available on your Sensu Backend. You should see multiple assets that can be used to create checks for multiple system architectures.
sensuctl asset list --format tabular
Now verify the list of checks that you have created by entering the following command. You should see three checks 'check_cpu', 'check_mem', and 'check_disk'.
sensuctl check list --format tabular
Apply System Checks to Monitor Agents/Hosts
Now that you've added checks on Sensu, you will next apply checks to the entity/host 'RPM-OS' and 'DEB-OS' by modifying each entity and changing its subscriptions.
All of your checks 'check_cpu', 'check_mem', and 'check_disk' are configured to the 'system' subscription.
First, check the list of entities via the sensuctl command below. You should see the 'RPM-OS' and 'DEB-OS' servers on the list.
sensuctl entity list --format tabular
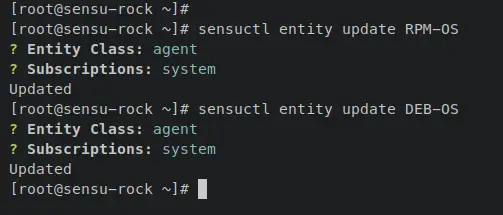
Next, run the following command to modify the 'RPM-OS' and 'DEB-OS' entities. The entity class should be 'agent', then add the subscription 'system'. An output 'Updated' confirms that the entity is changed.
sensuctl entity update RPM-OS
sensuctl entity update DEB-OS
Output:
Now back to the Sensu Dashboard, then select the 'default' namespace. Click on the Entities menu and you should see the 'system' subscription added to both DEB-OS and RPM-OS.
Click on the 'DEB-OS' to get details monitoring. And you should see all checks on the 'system' subscription are applied.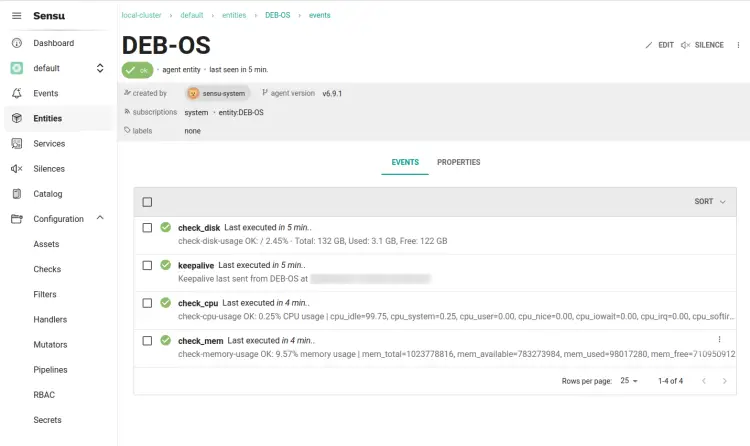
Click on the 'RPM-OS' to get detailed monitoring. And you should see all checks on the 'system' subscription are applied.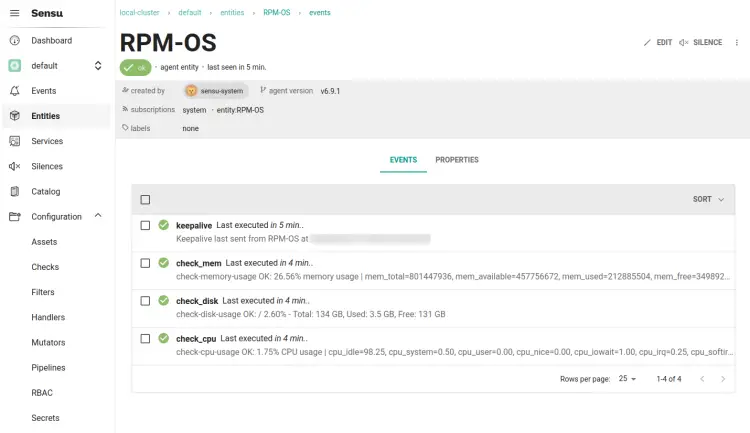
With this, you've now applied checks to both servers RPM-OS and DEB-OS.
Conclusion
In this tutorial, you've installed Sensu monitoring Solution on a Rocky Linux 9 server. You've installed and initialized the Sensu Backend administrator user, and also have installed and configured the Sensuctl command line for managing the Sensu backend.
In addition to that, you have also added two hosts (Rocky Linux and Debian Server) to Sensu via the Sensu Agent. Also, you have added assets for the monitoring system, created Sensu checks, and also applied checks to the target host monitoring.
With this in mind, you can now add new more hosts via Sensu Agent. Also, you can define and create new checks, add new Sensu assets, then apply checks to your hosts and applications. You can now learn more about Sensi from Sensu's official documentation.

