How to Install OpenLDAP Server on AlmaLinux 9
OpenLDAP is a software implementation of the Lightweight Directory Access Protocol (LDAP). OpenLDAP is free and open-source software with its BSD-style license called OpenLDAP Public License. Its command-line drive LDAP software is available on most Linux distributions such as CentOS, Ubuntu, Debian, SUSE, and many more.
OpenLDAP is a complete software suite for LDAP servers, which includes SLAPD (standalone LDAP daemon), SLURPD (standalone LDAP update replication daemon), and some utilities and tools for managing LDAP servers. OpenLDAP is a highly customizable LDAP server and supports all major computing platforms.
In this tutorial, we'll show you how to install OpenLDAP Server on an AlmaLinux 9, so you can get started with ease.
Prerequistes
To finish this tutorial, ensure you have the following:
- An AlmaLinux 9 machine - This demo uses a server with hostname ldap and the IP address 192.168.10.50.
- A non-root user with administrator privileges.
Setting Up FQDN
Before installing the OpenLDAP server, you must ensure that the fqdn is configured and pointed to the proper IP address. Complete the following steps to set up fqdn on your AlmaLinux machine.
Run the following command to set up the fqdn of your AlmaLinux machine. In this case, the server will have fqdn ldap.hwdomain.local.
sudo hostnamectl set-hostname ldap.hwdomain.local
Now open the /etc/hosts file using the following nano editor command.
sudo nano /etc/hosts
Insert the following configuration and be sure to change the IP address, fqdn, and hostname.
192.168.10.50 ldap.hwdomain.local ldap
Save the file and exit the editor when finished.
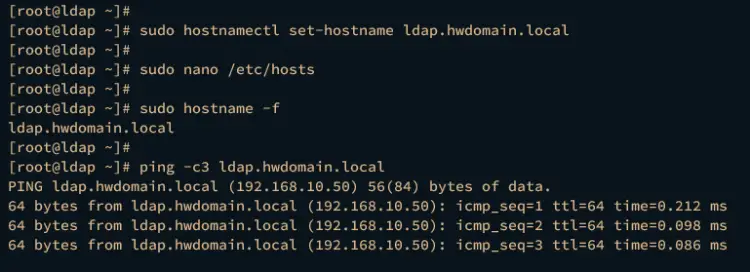
Lastly, run the following command to verify the fqdn of your system and ensure that it's pointed to the proper local IP address.
sudo hostname -f
ping -c3 ldap.hwdomain.local
In this case, the fqdn ldap.hwdomain.local is pointed to the IP address 192.168.10.50.
Installing OpenLDAP Server
The OpenLDAP server package is available on the EPEL repository. So, before installing the OpenLDAP server, you must install the EPEL repository on your AlmaLinux server.
The following section will show you how to add the EPEL repository, install the OpenLDAP server, and manage the OpenLDAP service.
First, add the EPEL repository to your AlmaLinux server via the dnf command below.
sudo dnf install epel-release -y
After that, run the dnf command below to install the OpenLDAP server and client packages.
sudo dnf install openldap-servers openldap-clients
When prompted, input y to confirm and press ENTER.
Also, when asked to add the GPG key of the EPEL repository, input y again and press ENTER.
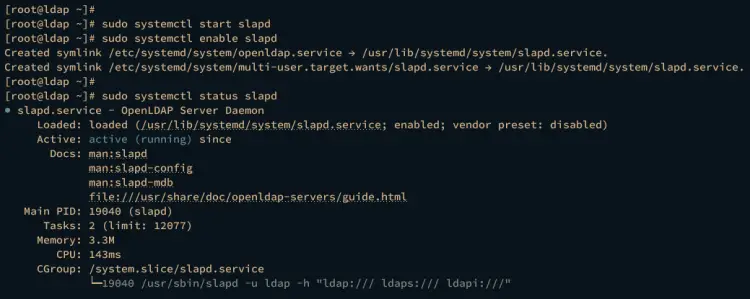
Now run the systemctl command below to start and enable the OpenLDAP service slapd.
sudo systemctl start slapd
sudo systemctl enable slapd
Verify the slapd service using the following command to ensure that the service is running.
sudo systemctl status slapd
If running, you should get an output such as active (running).
Lastly, you will need to open both LDAP and LDAPS services on firewalld to allow client connections.
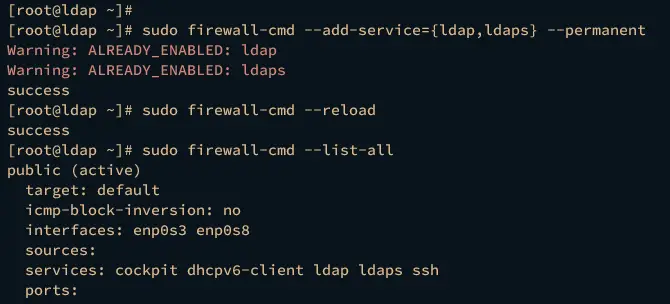
Run the firewall-cmd commands below to add both LDAP and LDAPS services to the firewalld. Then, reload the firewalld to apply the changes.
sudo firewall-cmd --add-service={ldap,ldaps} --permanent
sudo firewall-cmd --reload
Now you can verify the list of firewalld rules using the command below.
sudo firewall-cmd --list-all
If successful, you should see both LDAP and LDAPS services available on the firewalld services list.
Basic OpenLDAP Server Configuration
After installing the OpenLDAP server, you will now configure the OpenLDAP installation. And the first step you must do is to set up an administrator user and import some basic schemas for your OpenLDAP server installation.
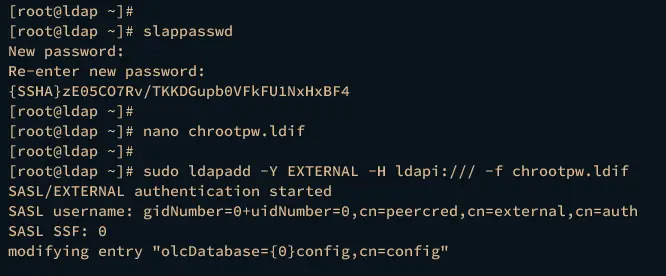
Run the following command to generate the hashed password for your OpenLDAP server. Input your password and repeat, then copy the generated hash password.
slappasswd
Create a new file chrootpw.ldif using the nano editor command below.
nano chrootpw.ldif
Add the following configuration and be sure to replace the value on the olcRootPW parameter with your hashed password. This will change the password for your OpenLDAP server.
# chrootpw.ldif

dn: olcDatabase={0}config,cn=config
changetype: modify
add: olcRootPW
olcRootPW: {SSHA}yK9Dk+Kz9S9CLu3Y+ZtJVAYF+MPIRl1X
Save and exit the file when finished.
Now run the ldapadd command below to apply the configuration to the OpenLDAP server.
sudo ldapadd -Y EXTERNAL -H ldapi:/// -f chrootpw.ldif
If successful, you should get the output like this:
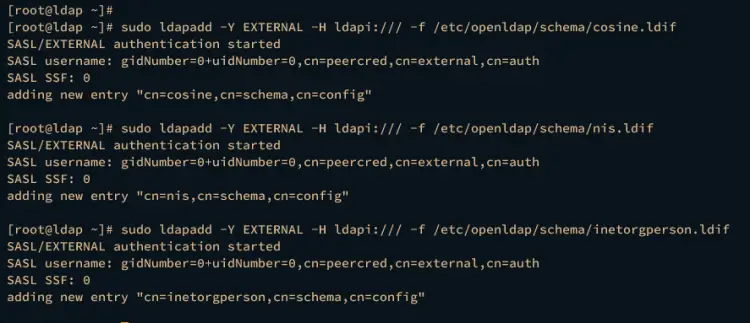
Lastly, run the following command to add some basic schemas to your OpenLDAP server.
sudo ldapadd -Y EXTERNAL -H ldapi:/// -f /etc/openldap/schema/cosine.ldif
sudo ldapadd -Y EXTERNAL -H ldapi:/// -f /etc/openldap/schema/nis.ldif
sudo ldapadd -Y EXTERNAL -H ldapi:/// -f /etc/openldap/schema/inetorgperson.ldif
This will add new entries such as nis, cosine, and inetorgperson to your OpenLDAP server.
Setting Up Domain and Base Domain
Now that the administrator password for the OpenLDAP server is configured, the next step is to set up the domain name for your OpenLDAP server and create some basic domain names for users.
Complete the following steps to set up the domain name and base domain via LDIF file.
Configuring Domain Name
Create a new LDIF file chdomain.ldif using the following nano editor command.
nano chdomain.ldif
Add the following configuration and be sure to change the domain name dc=hwdomain,dc=local with your OpenLDAP server domain name. Also, within the olcRootPW parameter, change it with your hashed password.
This will change the default domain name of your OpenLDAP server with the new domain.
# chdomain.ldif
# replace to your own domain name for [dc=***,dc=***] section
# specify the password generated above for [olcRootPW] section

dn: olcDatabase={1}monitor,cn=config
changetype: modify
replace: olcAccess
olcAccess: {0}to * by dn.base="gidNumber=0+uidNumber=0,cn=peercred,cn=external,cn=auth"
  read by dn.base="cn=Manager,dc=hwdomain,dc=local" read by * none

dn: olcDatabase={2}mdb,cn=config
changetype: modify
replace: olcSuffix
olcSuffix: dc=hwdomain,dc=local

dn: olcDatabase={2}mdb,cn=config
changetype: modify
replace: olcRootDN
olcRootDN: cn=Manager,dc=hwdomain,dc=local

dn: olcDatabase={2}mdb,cn=config
changetype: modify
add: olcRootPW
olcRootPW: {SSHA}yK9Dk+Kz9S9CLu3Y+ZtJVAYF+MPIRl1X

dn: olcDatabase={2}mdb,cn=config
changetype: modify
add: olcAccess
olcAccess: {0}to attrs=userPassword,shadowLastChange by
  dn="cn=Manager,dc=hwdomain,dc=local" write by anonymous auth by self write by * none
olcAccess: {1}to dn.base="" by * read
olcAccess: {2}to * by dn="cn=Manager,dc=hwdomain,dc=local" write by * read
Save the file and exit the editor when finished.
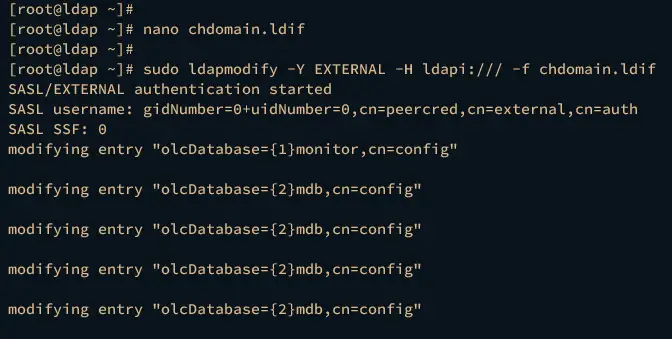
Next, run the ldapmodify command below to apply new configurations to the OpenLDAP server.
sudo ldapmodify -Y EXTERNAL -H ldapi:/// -f chdomain.ldif
Once the changes are applied, run the ldapsearch command below to verify your configuration. If successful, you should see the namingContexts contains the domain name of your OpenLDAP server. In this case, the domain name is ldap.hwdomain.local.
sudo ldapsearch -H ldap:// -x -s base -b "" -LLL "namingContexts"
Configuring Base Domain
Create a new LDIF file basedomain.ldif using nano editor.
nano basedomain.ldif
Insert the following configuration into the file. With this, you will create three different objects oragnizationalUnit Manager, People, and Group.
# basedomain.ldif
# replace to your own domain name for [dc=***,dc=***] section

dn: dc=hwdomain,dc=local
objectClass: top
objectClass: dcObject
objectclass: organization
o: Hwdomain Local
dc: hwdomain

dn: cn=Manager,dc=hwdomain,dc=local
objectClass: organizationalRole
cn: Manager
description: Directory Manager

dn: ou=People,dc=hwdomain,dc=local
objectClass: organizationalUnit
ou: People

dn: ou=Group,dc=hwdomain,dc=local
objectClass: organizationalUnit
ou: Group
Save the file and exit the editor after finishing.
Now run the ldapadd command below to add the new base domain to your OpenLDAP server.
sudo ldapadd -x -D cn=Manager,dc=hwdomain,dc=local -W -f basedomain.ldif
Input the OpenLDAP password when prompted. If successful, you should get an output like this:
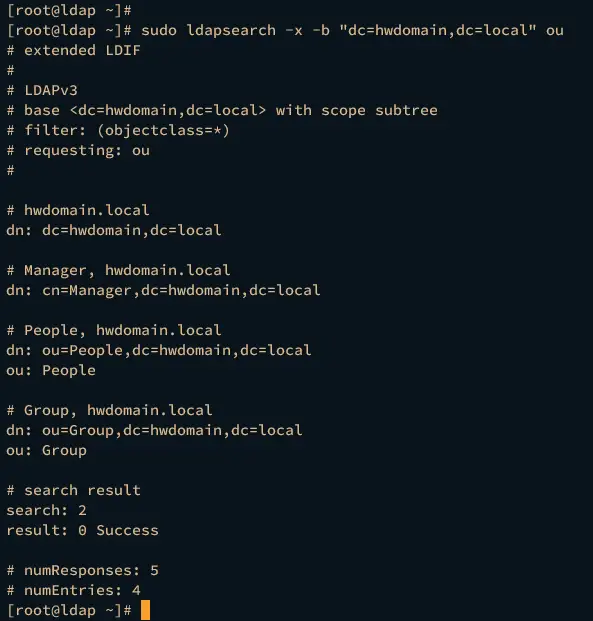
Lastly, you can verify the list of ou on your OpenLDAP server using the following command.
sudo ldapsearch -x -b "dc=hwdomain,dc=local" ou
If the configuration is successful, you should see three different ou Manager, People, and Group.
At this point, you have now completed the installation of the OpenLDAP server on your AlmaLinux machine. In the next step, you will learn how to create an OpenLDAP user via an LDIF file.
Adding New User on OpenLDAP Server
To create new users manually in the OpenLDAP server, you can use the slappasswd command to generate hashed password and create a new LDIF file for your new user. In this step, you will learn how to do it.
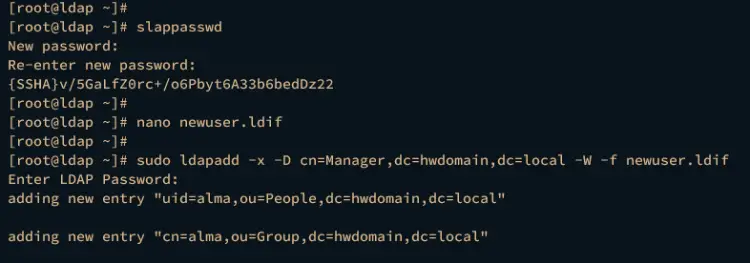
To create a new user, you must generate the password hash first via the slappasswd command below.
slappasswd
Input your password and copy the generated hash.
Now create a new file newuser.ldif using the nano editor command below.
nano newuser.ldif
Insert the following configuration to create a new OpenLDAP user and group. Also, be sure to change the details of the domain name, new user, group gid and uid, and also the password hash.
# newuser.ldif
# Change detail username and path home directory and default domain name

dn: uid=alma,ou=People,dc=hwdomain,dc=local
objectClass: inetOrgPerson
objectClass: posixAccount
objectClass: shadowAccount
cn: alma
sn: temp
userPassword: {SSHA}l/lZ6zZSGgGP1s7pezz6faYX86Tx3Fv/
loginShell: /bin/bash
uidNumber: 2000
gidNumber: 2000
homeDirectory: /home/alma
shadowLastChange: 0
shadowMax: 0
shadowWarning: 0

dn: cn=alma,ou=Group,dc=hwdomain,dc=local
objectClass: posixGroup
cn: alma
gidNumber: 2000
memberUid: alma
Save the file and exit the editor after finishing.
Next, run the ldapadd command below to add a new OpenLDAP user and group. Input your OpenLDAP password when prompted and press ENTER to confirm.
sudo ldapadd -x -D cn=Manager,dc=hwdomain,dc=local -W -f newuser.ldif
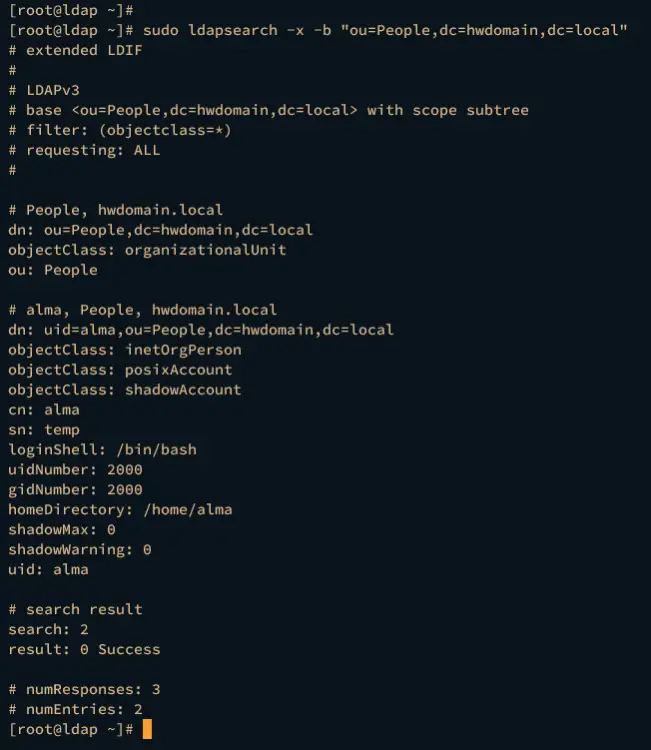
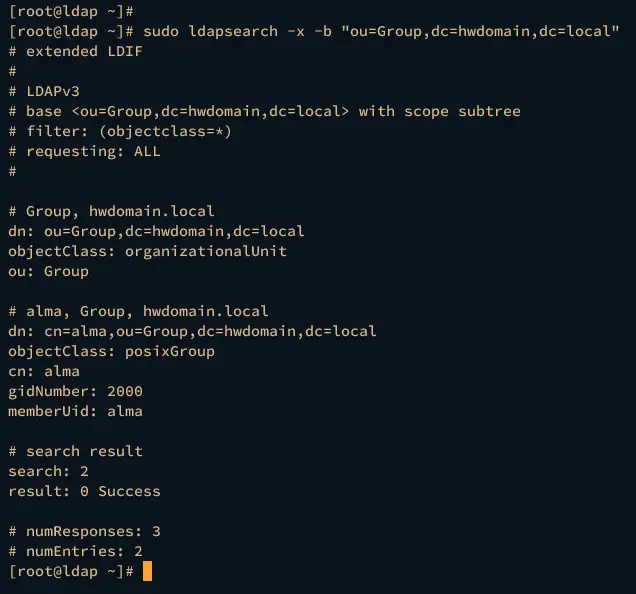
Once the new user and group are added, run the ldapsearch command below to get a list of available users and groups on your OpenLDAP server.
sudo ldapsearch -x -b "ou=People,dc=hwdomain,dc=local"
sudo ldapsearch -x -b "ou=Group,dc=hwdomain,dc=local"
If your configuration is successful, you should see the user and group alma available on the OpenLDAP server.
Below is the user alma available on the OpenLDAP Server.
Below is the group alma availalable on the OpenLDAP Server.
Conclusion
Well done! You've followed all the steps and installed the OpenLDAP server on your AlmaLinux 9 machine. You're now ready to use and integrate it into your applications. Furthermore, it's recommended to set up a secure OpenLDAP server with SSL/TLS and install a web-frontend for your OpenLDAP server via phpOpenLDAP or similar.

