How to Install Nextcloud on Debian 11
This tutorial exists for these OS versions
- Debian 12 (Bookworm)
- Debian 11 (Bullseye)
- Debian 10 (Buster)
- Debian 9 (Stretch)
- Debian 9 (Stretch)
On this page
- Prerequisites
- Get Root and Update Repositories
- Installing Apache Web Server
- Installing and Configuring PHP
- Installing and Configuring MariaDB
- Creating Database and User for Nextcloud
- Download Nextcloud Source Code
- Generating SSL Letsencrypt
- Setup Apache Virtual Host for Nextcloud
- Nextcloud Installation
- Nextcloud Performace Tuning
- Conclusion
Nextcloud is open-source software for creating public and private file storage. It allows you to create your self-hosted services like Dropbox, Google Drive, or Mega.nz. Originally, it's created by the original owncloud developer Frank Karlitschek. In 2016, he forks the Owncloud project and creates a new project with the new name "Nextcloud"
By this time, the Nextcloud project growing rapidly and becoming more than file hosting software, it's more like a file sync and content collaboration platform. Backed with a lot of plugins, Nextcloud becomes such a powerful collaboration software. You can install plugins for project management, video conferencing, collaborative editing, note-taking, email client, etc.
In this guide, you will learn how to install Nextcloud on the latest Debian 11 Bullseye. You will be installing Nextcloud under the LAMP Stack (Linux, Apache2/httpd, MySQL/MariaDB, and PHP).
Prerequisites
- A Debian 11 server. Ensure all packages are updated to the latest version.
- A root user or a user with root privileges. This user will be used for installing new packages and editing system configurations.
Get Root and Update Repositories
First, execute the following command to get the root privileges.
1. If you have 'sudo' installed, execute the sudo command below.
sudo su
Now type the password login for your user.
2. If you don't have the sudo package, execute the 'su' command as below
su
Now type your root password and press 'Enter'.
3. After that, update all your Debian repositories using the apt command below.
apt update
Installing Apache Web Server
After updating Debian repositories, you will be installing an apache web server and enabling some Apache modules for Nextcloud.
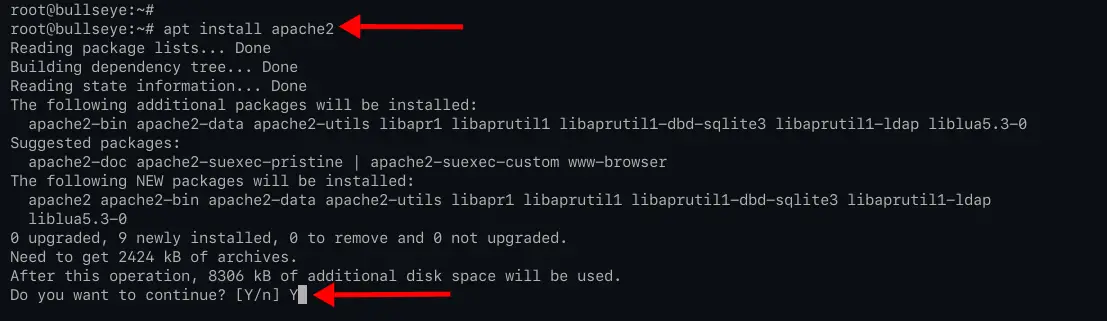
1. Execute the apt command below to install the apache web server.
apt install apache2
Type 'y' and press 'Enter' to continue the installation.
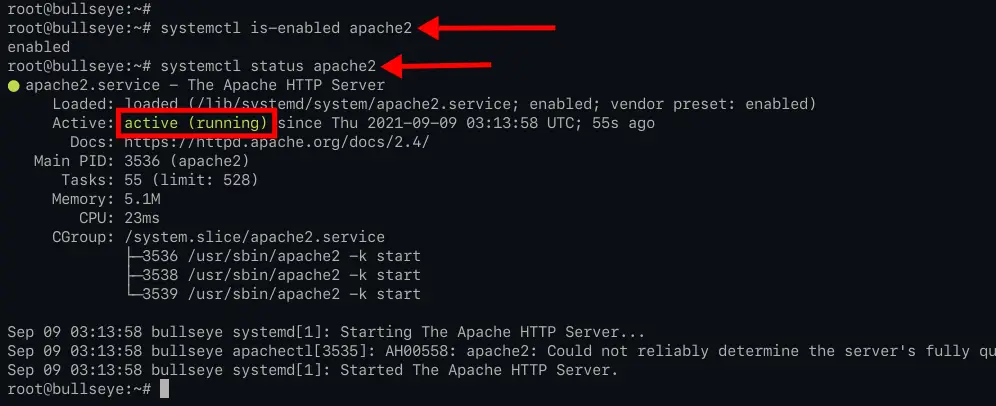
2. If the installation is complete, check the apache service using the following command.
systemctl is-enabled apache2
systemctl status apache2
You will see the output 'enabled', which means the apache service will automatically start at system startup. And the current state of the apache service, it's 'active (running)'.
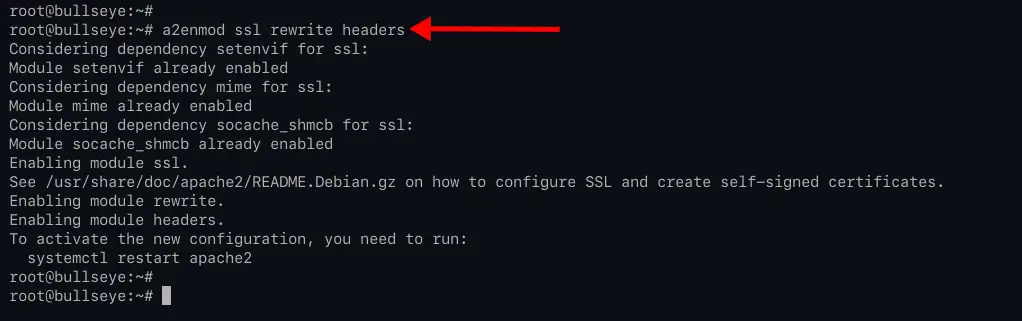
3. Next, enable Apache modules 'ssl, rewrite, and headers' by executing the a2enmod command below.
a2enmod ssl rewrite headers
Below is the output you will get.
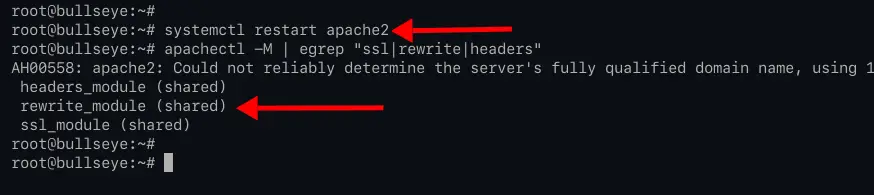
4. After that, execute the following command to restart the apache service.
systemctl restart apache2
New apache modules will be applied, verify those modules using the apachectl command below.
apachectl -M | egrep "ssl|rewrite|headers"
You will see similar output as below.
Installing and Configuring PHP
For this guide, you will be deploying Nextcloud with the latest stable version of PHP 8.0.
By default, the Debian repository provides packages for PHP 8.0. But, Nextcloud requires some additional PHP packages that can be installed from a 3rd-party repository. And you will be adding a new repository to your Debian system.
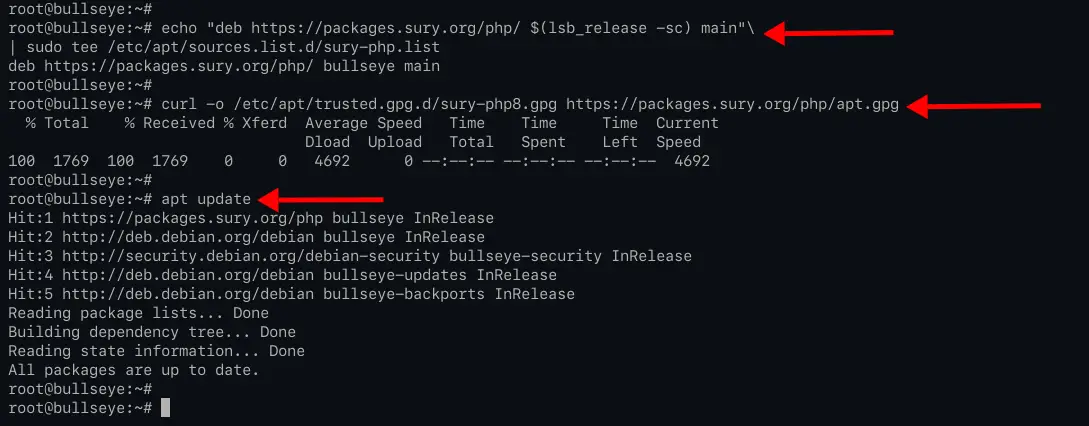
1. Execute the command below to add a PHP repository for the Debian system.
echo "deb https://packages.sury.org/php/ $(lsb_release -sc) main"\
| sudo tee /etc/apt/sources.list.d/sury-php.list
Download the GPG key to the '/etc/apt/trusted.gpg.d' directory.
curl -o /etc/apt/trusted.gpg.d/sury-php8.gpg https://packages.sury.org/php/apt.gpg
Now run the 'apt update' command again to update all repositories.
apt update
2. Install PHP packages and additional PHP modules for Nextcloud using the apt command below.
apt install -y php php-curl php-cli php-mysql php-gd php-common php-xml php-json php-intl php-pear php-imagick php-dev php-common php-mbstring php-zip php-soap php-bz2 php-bcmath php-gmp php-apcu
After that, execute the apt command again for installing some additional packages.
apt install -y libmagickcore-dev
The 'libmagickcore-dev' packages are needed by the php-imagick for SVG image processing on Nextcloud.
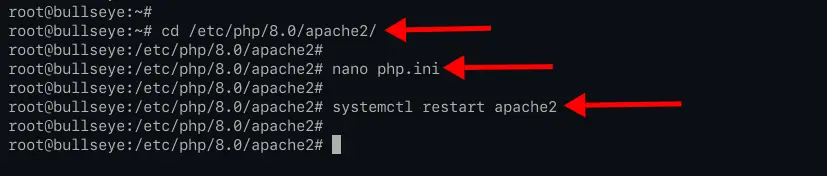
3. If all packages installation is complete, change the working directory to '/etc/php/8.0/apache2' and edit the configuration 'php.ini' using nano.
cd /etc/php/8.0/apache2/
nano php.ini
For the basic nextcloud deployment, change the default options using the following configuration.
file_uploads = On
allow_url_fopen = On
memory_limit = 512M
upload_max_filesize = 500M
post_max_size = 600M
max_execution_time = 300
display_errors = Off
date.timezone = Europe/Amsterdam
output_buffering = Off
Uncomment the 'zend_extension=opcache' option to load the opcache extension.
zend_extension=opcache
Move to the '[opcache]' section and add the following configuration.
[opcache]
...
....
.....
opcache.enable = 1
opcache.interned_strings_buffer = 8
opcache.max_accelerated_files = 10000
opcache.memory_consumption = 128
opcache.save_comments = 1
opcache.revalidate_freq = 1
Save the configuration by pressing the 'Ctrl+x' button and type 'y', then press 'Enter' to exit.
4. Now restart the apache service to apply new changes using the command below.
systemctl restart apache2
Installing and Configuring MariaDB
For this stage, you will be installing the mariadb database server, securing mariadb deployment, and creating a new database and user for Nextcloud.
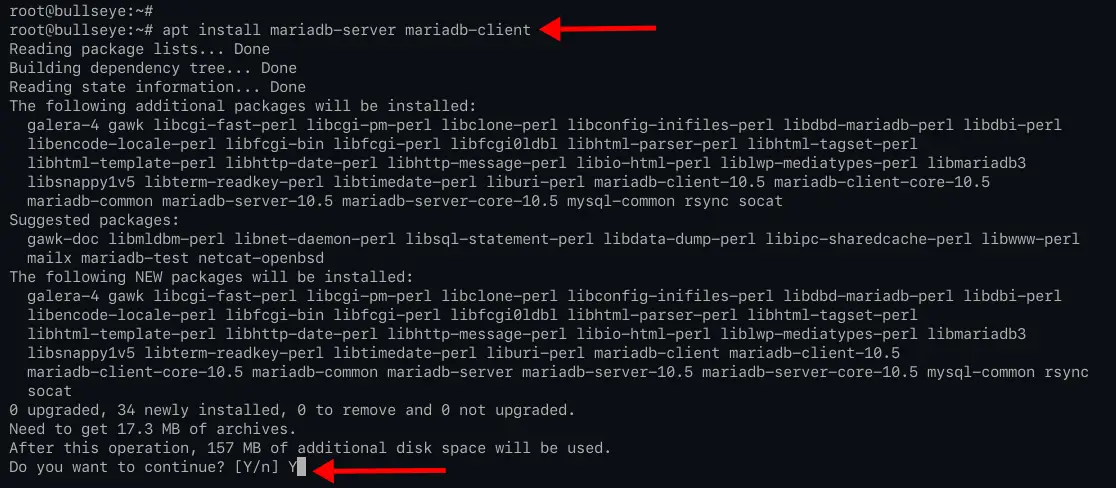
1. To install the mariadb database server, run the command below.
apt install mariadb-server mariadb-client
Type 'y' to confirm and install mariadb packages.
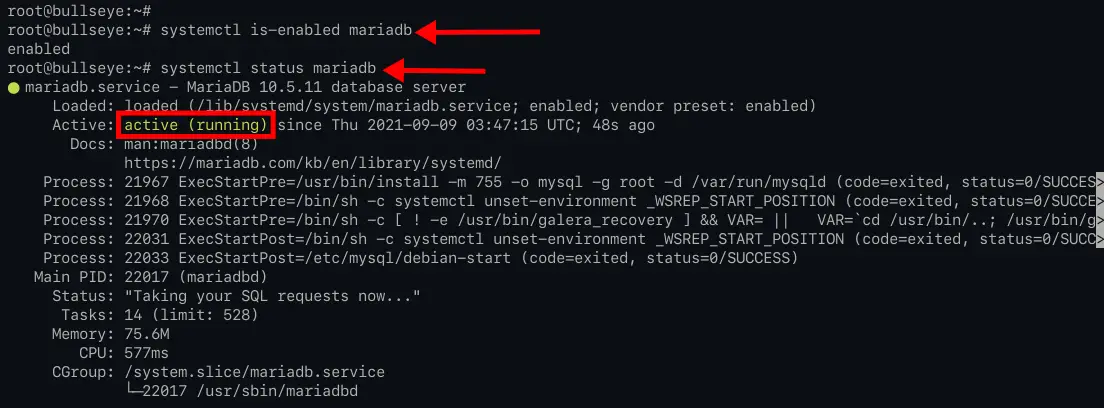
2. Once the installation is complete, check the mariadb service using the following command.
systemctl is-enabled mariadb
systemctl status mariadb
The mariadb service is active and running, and it's enabled to start automatically at system startup.
3. Next, you need to secure your mariadb deployment by setting up the root password for mariadb and remove some default configuration. To do that, you can use the command-line tool 'mysql_secure_installation', which is included on the default mariadb installation.
Execute the "mysql_secure_installation" command below.
mysql_secure_installation
At the first, you will be asked to enter the mariadb root password. Just press 'Enter' to continue.
Enter current password for root (enter for none):
OK, successfully used password, moving on...
Type 'Y' to enable the 'unix_socket' authentication for the user 'root'.
Switch to unix_socket authentication [Y/n] Y
Enabled successfully!
Reloading privilege tables..
 ... Success!
Type your strong mariadb root password and repeat, then press "Enter" to continue.
Change the root password? [Y/n] Y
New password:
Re-enter new password:
Password updated successfully!
Reloading privilege tables..
 ... Success!
Now type "Y" and press "Enter" to remove the default anonymous user from the mariadb server.
By default, a MariaDB installation has an anonymous user, allowing anyone
to log into MariaDB without having to have a user account created for
them.  This is intended only for testing, and to make the installation
go a bit smoother.  You should remove them before moving into a
production environment.

Remove anonymous users? [Y/n] Y
 ... Success!
After that, disable the remote login for the default user 'root'. Type "Y" and press "Enter" to continue.
Normally, root should only be allowed to connect from 'localhost'.  This
ensures that someone cannot guess at the root password from the network.

Disallow root login remotely? [Y/n] Y
 ... Success!
Type "Y" again to remove the default database "test" and press "Enter".
By default, MariaDB comes with a database named 'test' that anyone can
access.  This is also intended only for testing, and should be removed
before moving into a production environment.

Remove test database and access to it? [Y/n] Y
 - Dropping test database...
 ... Success!
 - Removing privileges on test database...
 ... Success!
And the last, type "Y" again to reload all tables privileges to apply a new configuration.
Reloading the privilege tables will ensure that all changes made so far
will take effect immediately.

Reload privilege tables now? [Y/n] Y
 ... Success!
Now the process is complete and you will see the following output.
Cleaning up...

All done!  If you've completed all of the above steps, your MariaDB
installation should now be secure.

Thanks for using MariaDB!
Creating Database and User for Nextcloud
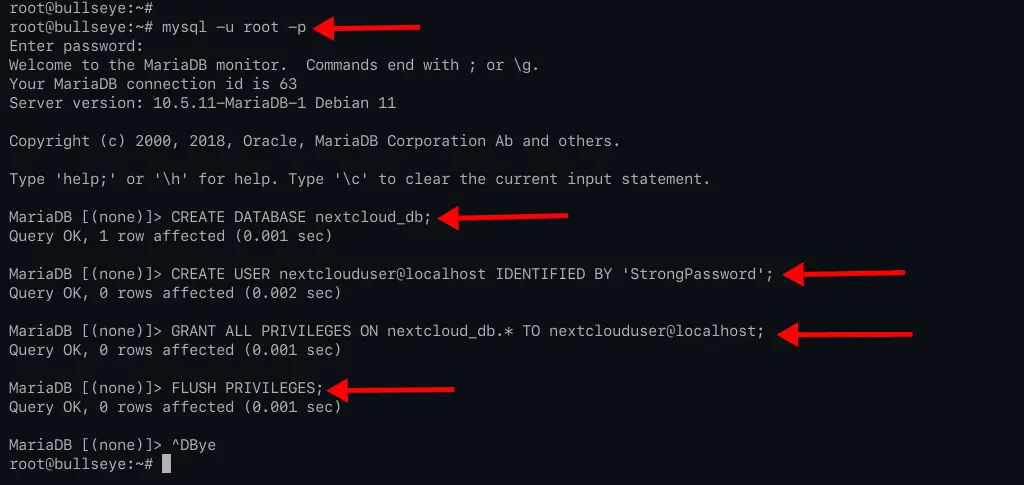
1. log in to the mariadb shell using the mysql command below.
mysql -u root -p
2. Now execute the following mysql query to create a new database "nextcloud_db".
CREATE DATABASE nextcloud_db;
3. Execute the following query to create a new database user "nextclouduser". Change the "strongpassword" with your strong password.
CREATE USER nextclouduser@localhost IDENTIFIED BY 'StrongPassword';
4. Allow the user "nextclouduser" to access and write the "nextcloud_db" using the following query.
GRANT ALL PRIVILEGES ON nextcloud_db.* TO nextclouduser@localhost;
5. Now reload all tables privileges to apply the new database configuration.
FLUSH PRIVILEGES;
Then you can type "quit" and press "Enter" to exit from the mariadb shell.
Download Nextcloud Source Code
1. Change the working directory to "/var/www" and download the latest version of Nextcloud source code using the wget command as below.
cd /var/www/
curl -o nextcloud.zip https://download.nextcloud.com/server/releases/nextcloud-22.1.1.zip

2. Now install the unzip package using the following command.
apt install unzip
3. Next, extract the Nextcloud source code "nextcloud.zip" and you will get a new directory "nextcloud", then change the owner of the "nextcloud" directory to "www-data" user.
unzip nextcloud-22.1.0.zip
chown -R www-data:www-data nextcloud
Now you're ready to generate SSL Letsencrypt and configuring apache virtual host for Nextcloud.
Generating SSL Letsencrypt
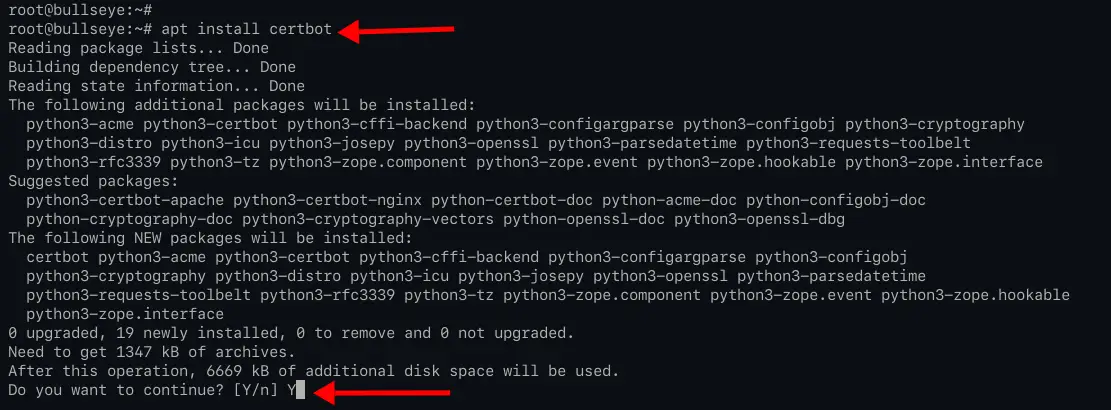
In this stage, you will be installing the certbot tool and generate the SSL certificates for the Nextcloud installation. You will be generating SSL Letsencrypts with the webroot plugin.
1. Execute the following command to install the certbot tool for generating SSL Letsencrypt.
apt install certbot
Type 'y' and press 'Enter' to continue the installation.
2. Once the installation is complete, create a new directory for letsencrypt authorization using the following commands.
mkdir -p /var/lib/letsencrypt/.well-known
chgrp www-data /var/lib/letsencrypt
chmod g+s /var/lib/letsencrypt
3. Next, change the working directory to the "/etc/apache2/conf-available/" and create a new configuration "well-known.conf" using nano.
cd /etc/apache2/conf-available/
nano well-known.conf
Copy and paste the following configuration.
Alias /.well-known/acme-challenge/ "/var/lib/letsencrypt/.well-known/acme-challenge/"
<Directory "/var/lib/letsencrypt/">
    AllowOverride None
    Options MultiViews Indexes SymLinksIfOwnerMatch IncludesNoExec
    Require method GET POST OPTIONS
</Directory>
Press "Ctrl+x" and type "y" and press 'Enter' to save the configuration and exit.
Now activate the new configuration by creating a symlink of the 'well-known.conf' file to the directory 'conf-enabled' using the 'ln' command below.
ln -s /etc/apache2/conf-available/well-known.conf /etc/apache2/conf-enabled/
4. Now execute the following commands to verify the apache configuration and restart the apache service.
apachectl configtest
systemctl restart apache2
If you've no error, you're ready to generate SSL Letsencrypt with the webroot plugin.

5. Before generating SSL Letsencrypt, ensure your domain name is resolved to the server IP address. After that, you can generate SSL Letsencrypt with the webroot plugin by running the certbot command below. Also, change the email address and domain name to your own.
sudo certbot certonly --agree-tos --email [email protected] --webroot -w /var/lib/letsencrypt/ -d files.domain-name.io
When the process is complete, your SSL certificates are available at the "/etc/letsencrypt/live/files.domain-name.io/" directory.
Setup Apache Virtual Host for Nextcloud
In this step, you will be adding a new apache/httpd virtual host configuration for Nextcloud.
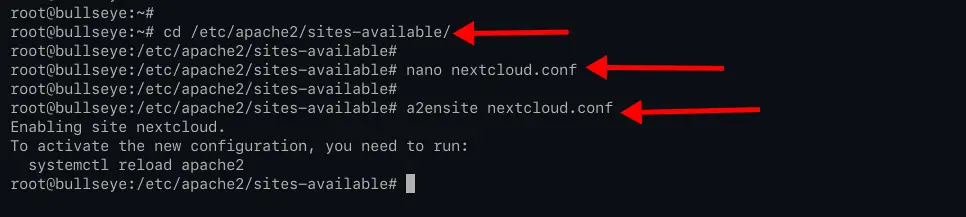
1. Change the working directory to "/etc/apache2/sites-available/" and create new configuration "nextcloud.conf" using nano.
cd /etc/apache2/sites-available/
nano nextcloud.conf
Change the detail domain name and SSL path directory to your own and paste the configuration to the "nextcloud.conf" file.
<VirtualHost *:80>
    ServerName files.domain-name.io
    ServerAlias www.files.domain-name.io

    # auto redirect HTTP to HTTPS
    Redirect permanent / https://files.domain-name.io/
</VirtualHost>

<VirtualHost *:443>
    ServerName files.domain-name.io
    ServerAlias www.files.domain-name.io

    DocumentRoot /var/www/nextcloud/

    Protocols h2 http/1.1

    # auto redirect www to non-www
    <If "%{HTTP_HOST} == 'www.files.domain-name.io'">
        Redirect permanent / https://files.domain-name.io/
    </If>

    # log files
    ErrorLog /var/log/apache2/files.domain-name.io-error.log
    CustomLog /var/log/apache2/files.domain-name.io-access.log combined

    SSLEngine On
    SSLCertificateFile /etc/letsencrypt/live/files.domain-name.io/fullchain.pem
    SSLCertificateKeyFile /etc/letsencrypt/live/files.domain-name.io/privkey.pem

    # HSTS
    <IfModule mod_headers.c>
        Header always set Strict-Transport-Security "max-age=15552000; includeSubDomains"
    </IfModule>

    <Directory /var/www/nextcloud/>
        Options +FollowSymlinks
        AllowOverride All

        <IfModule mod_dav.c>
            Dav off
        </IfModule>

        SetEnv HOME /var/www/nextcloud
        SetEnv HTTP_HOME /var/www/nextcloud
    </Directory>
</VirtualHost>
Press "Ctrl+x" and type "Y", then press 'Enter' to save the configuration and exit.
2. Now activate the 'nextcloud.conf' virtual host configuration by executing the following command.
a2ensite nextcloud.conf
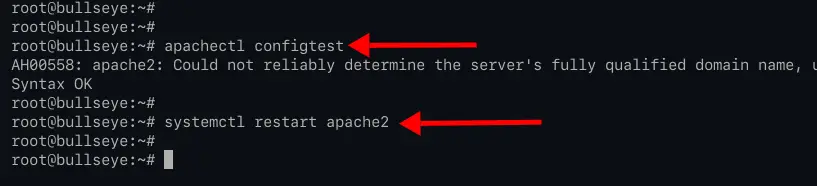
3. Now verify the new apache configuration and make sure you have no error, then restart the apache service.
apachectl configtest
systemctl restart apache2
Nextcloud Installation
If all related server configuration is complete, you can access your Nextcloud installation with the web browser.
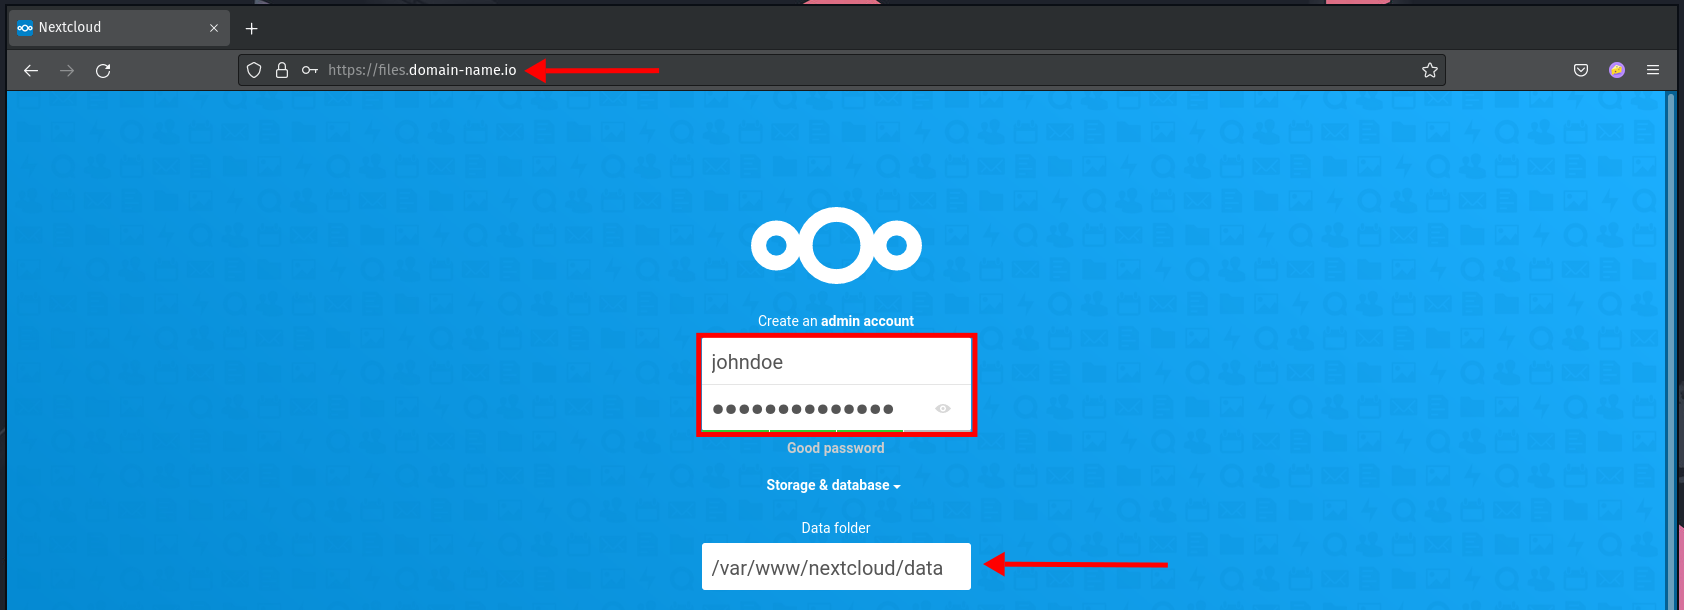
1. Open your web browser and type the URL address of your Nextcloud installation.
https://files.domain-name.io
Create your first and admin user for Nextcloud and the data directory is writable by the user 'www-data'.
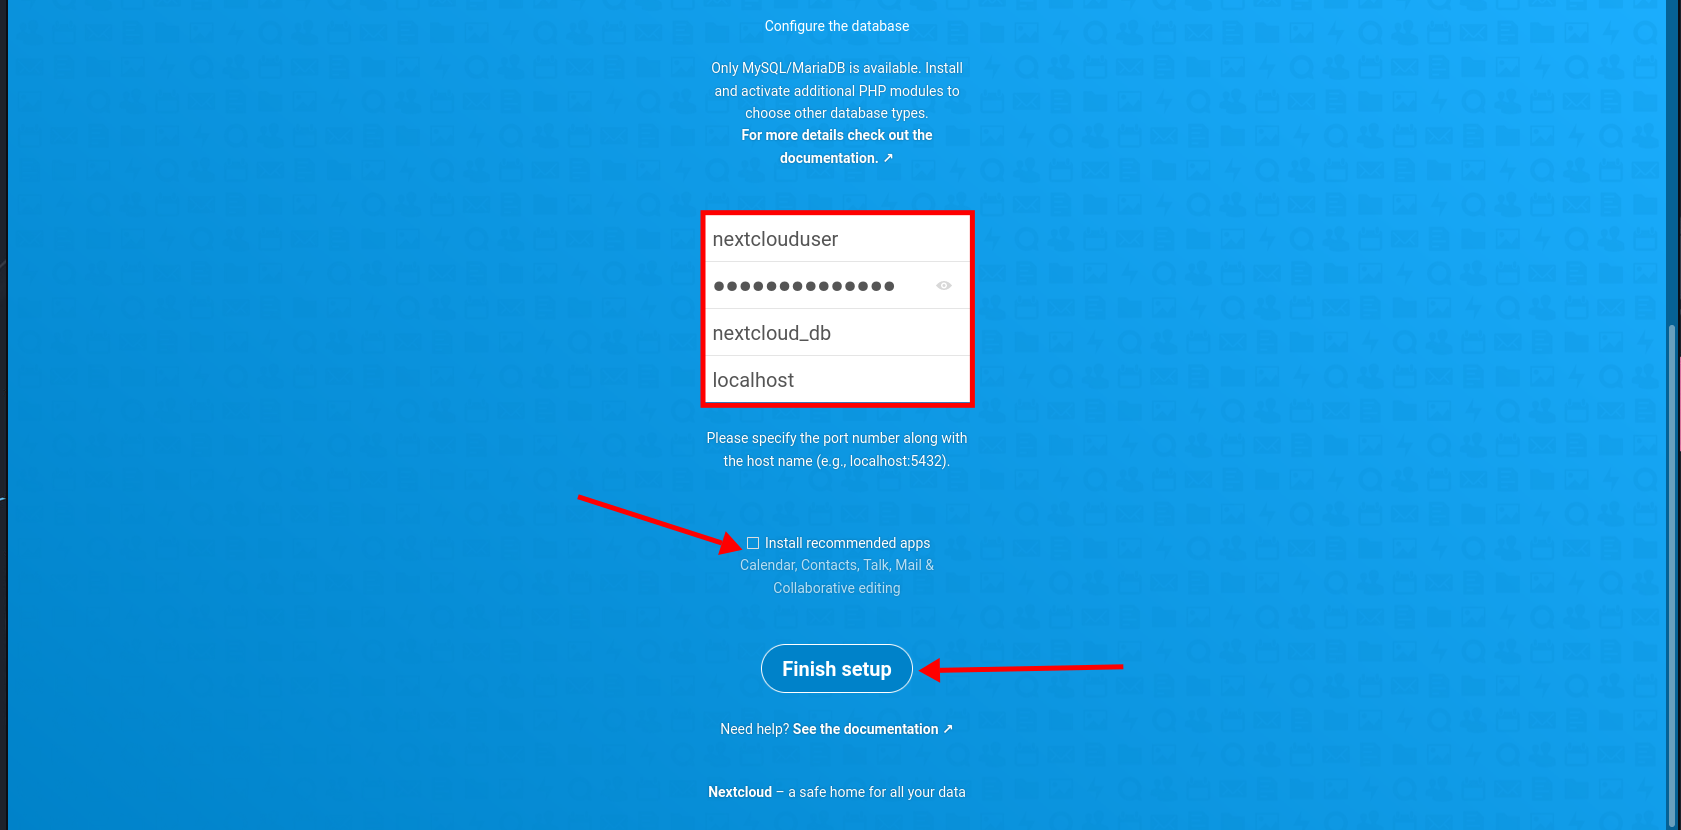
2. Scroll the page to the bottom, type details database name, user, and the password. For the option 'Install recommended apps', uncheck it to make installation faster. Then click the 'Finish setup' button to install Nextcloud.
3. If the installation is successful, you will see the Nextcloud dashboard as below.
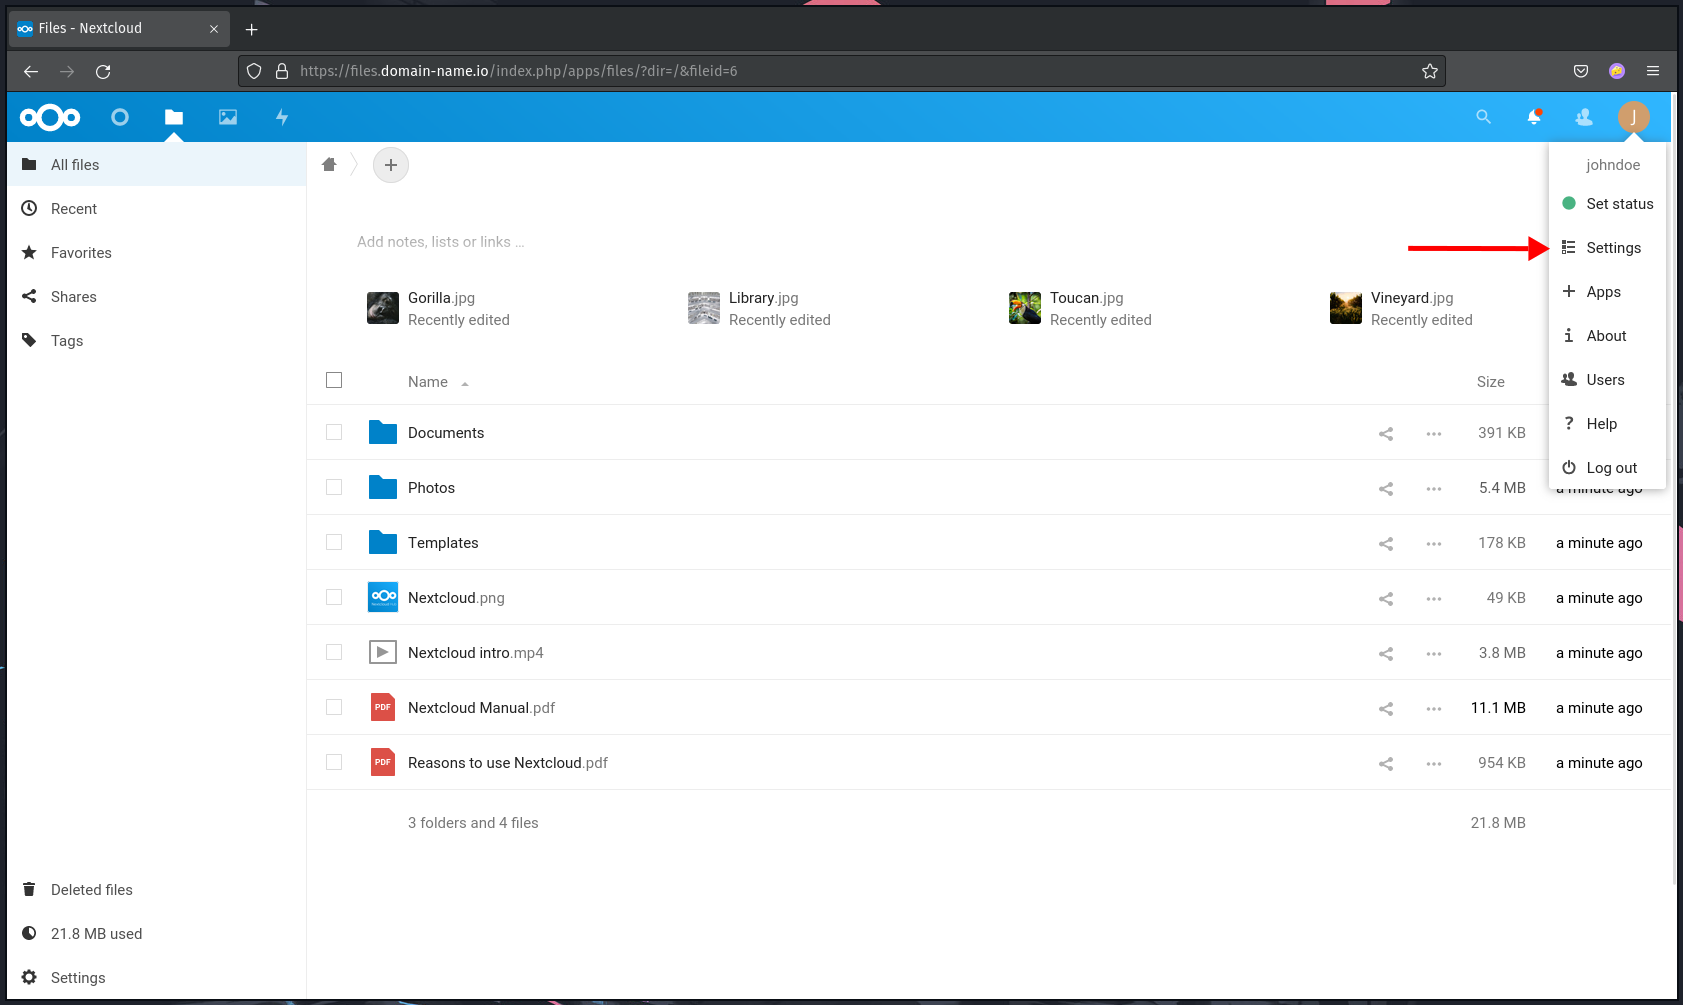
4. Now click the user icon at the top right and click the menu 'Settings'. At the 'Administration' section, click 'Overview'.
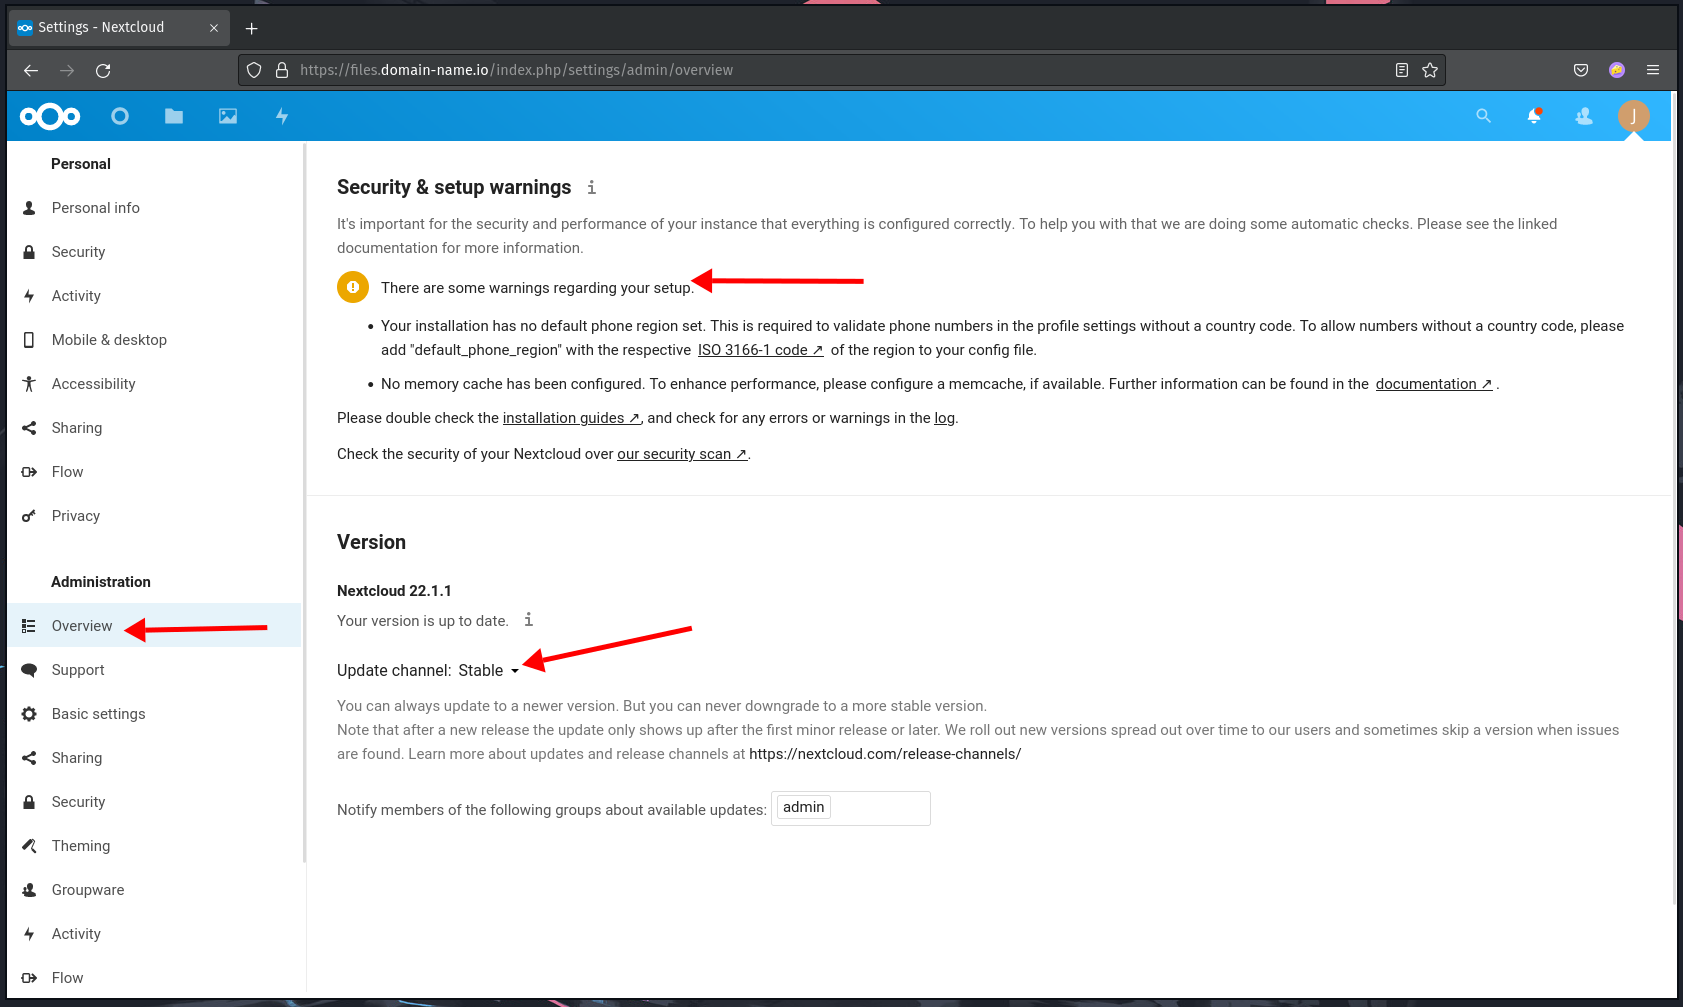
- At the 'Security and setup warnings' section, you will some recommendation that you need to do, depends on your installation environment.
- At the 'Versions' section, you will see the current branch of your Nextcloud installation.
5. Next, click the menu 'System' at the bottom of the 'Administration' section.
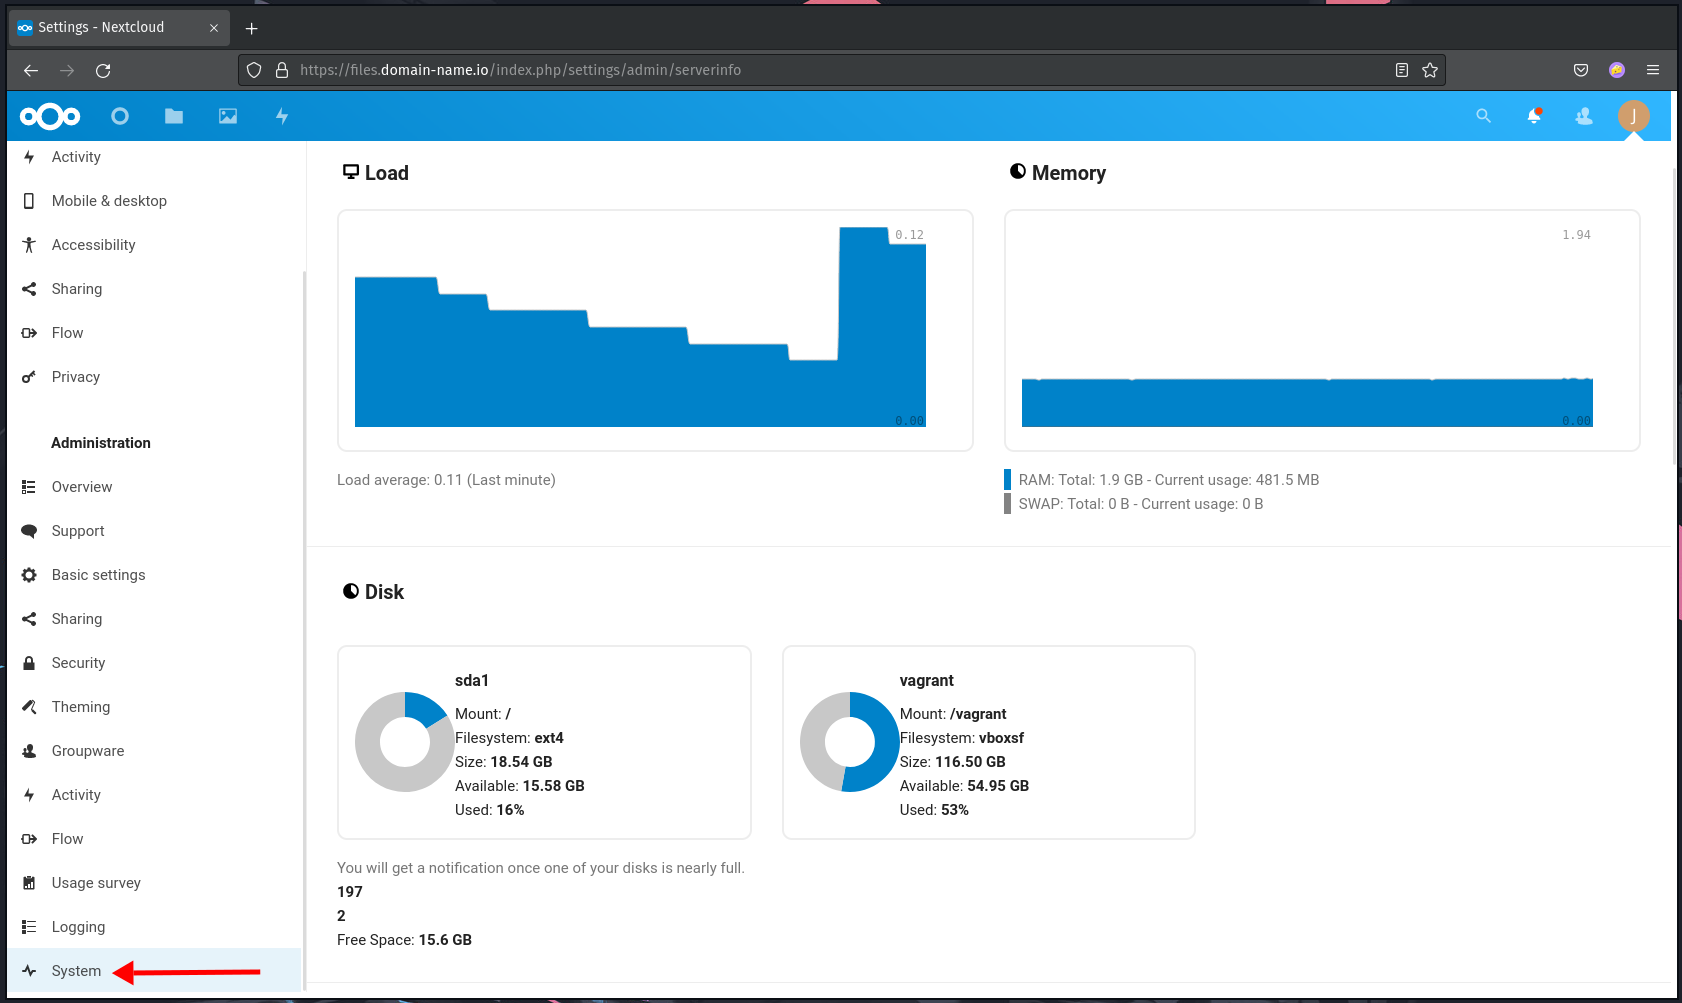
You will see details of your environment, system load, disk space status, memory status, network status, etc.
6. As said before, the nextcloud has become more than just file sync. With the support of additional apps/plugins, it's become a collaboration suit.
At the profile icon top right, click the menu 'Apps', and you will see nextcloud apps store as below.
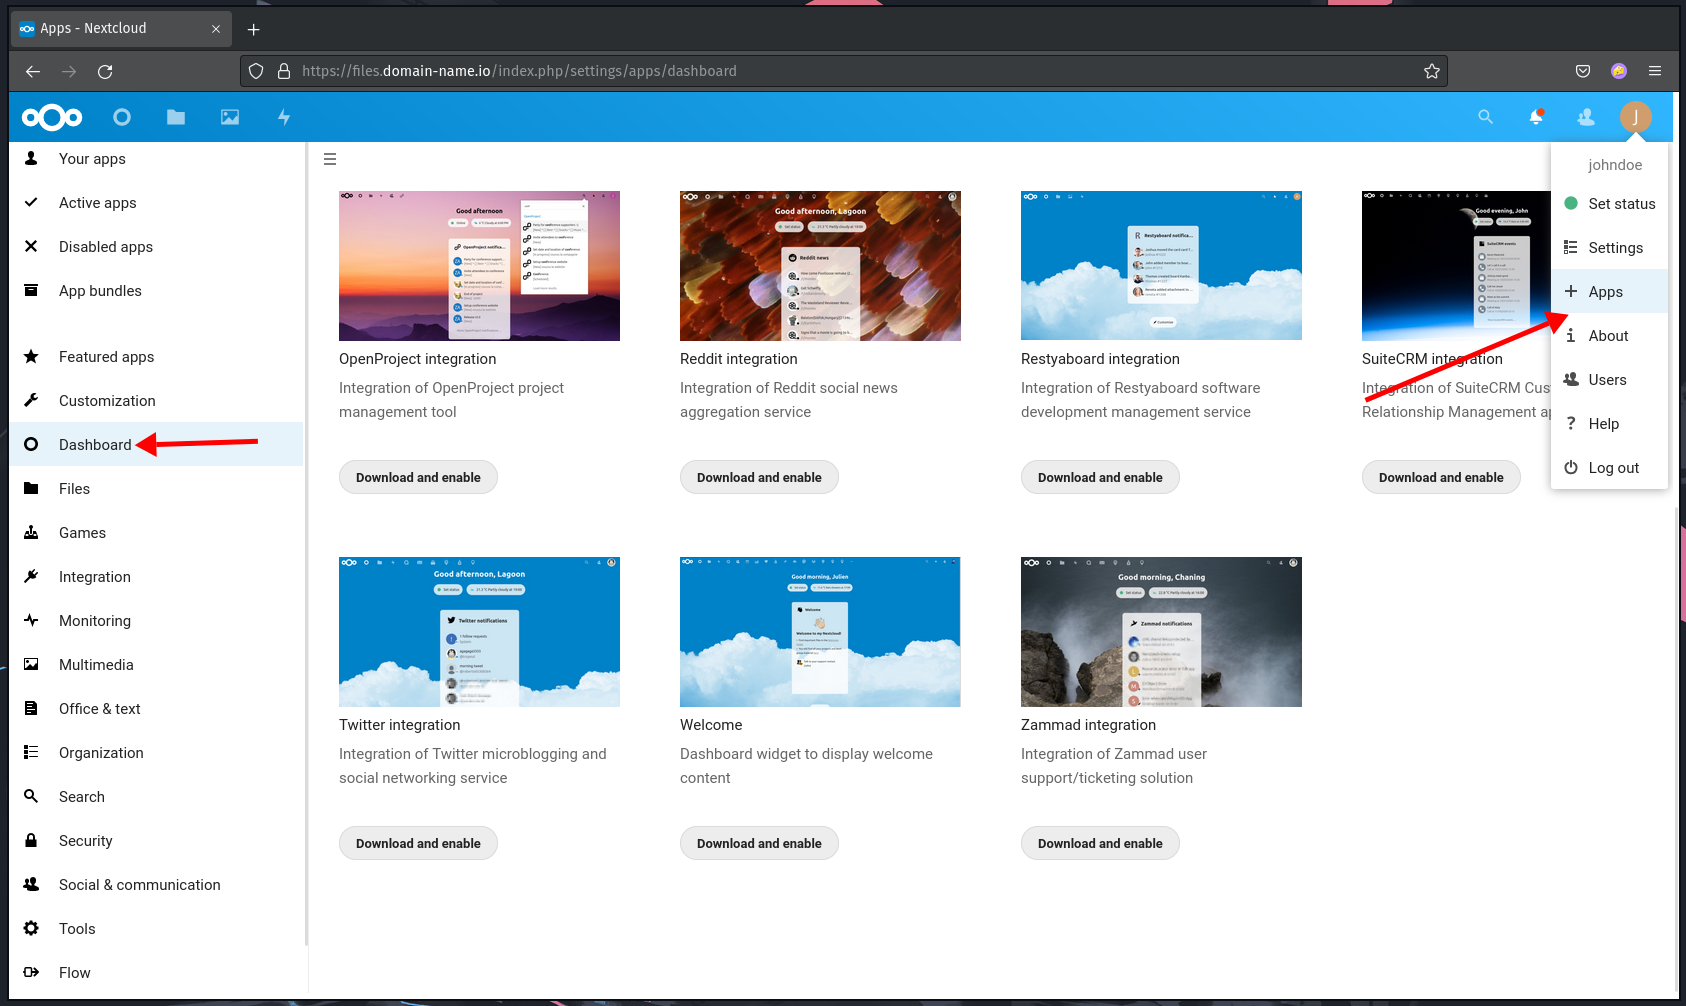
Choose the apps you want to install, then click the button 'Download and enable' to install new apps.
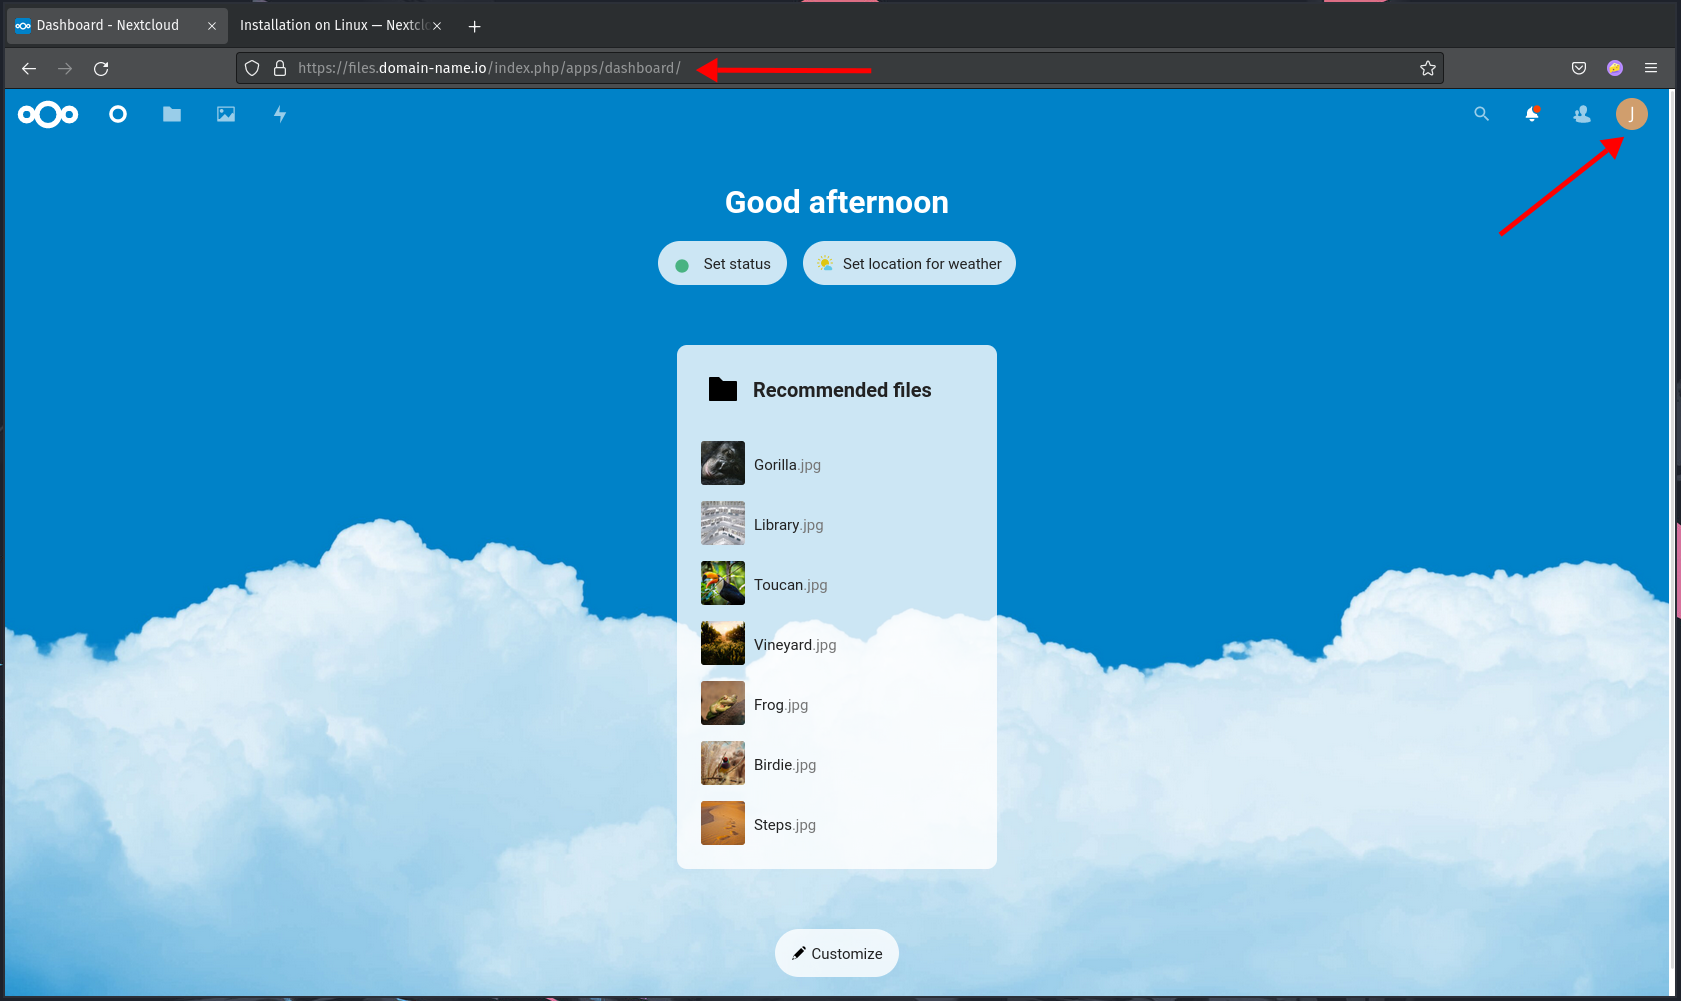
7. Below is the default view of the Nextcloud user dashboard. You can extend the functionality of your dashboard by installing additional plugins.
Nextcloud Performace Tuning
After installed Nextcloud, you can do some steps further to increase the Nextcloud performance by enabling the local memory cache and setting up a cronjob for Nextcloud itself.
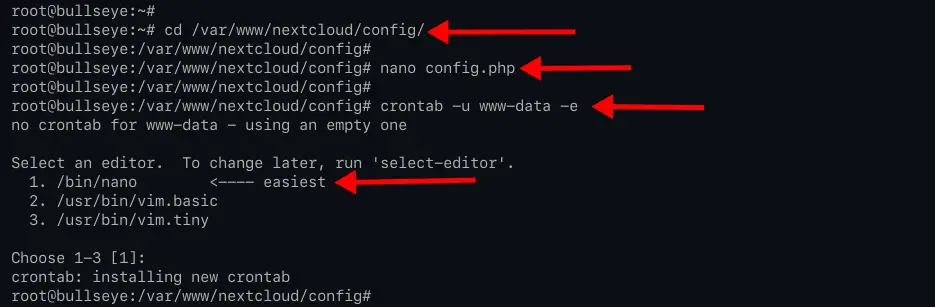
1. At the top PHP installation section, you already set up the PHP for caching. To enable caching on Nextcloud, edit the Nextcloud configuration "config.php".
Change the working directory to "/var/www/nextcloud/config" and edit the configuration "config.php" using nano editor.
cd /var/www/nextcloud/config/
nano config.php
Add following configuration inside the 'array ( .. );' bracket as below
<?php
$CONFIG = array (
....
  # Additional configuration
  'memcache.local' => '\OC\Memcache\APCu',
);
Now press the "Ctrl+x" button and type "y", then press 'Enter' to save the configuration and exit.
2. A Nextcloud system needs to run some background tasks on regular basis and without any user/admin interaction. To do that, you can use the cronjob for task scheduler Nextcloud tasks.
On the Debian Linux system, the default apache installation is running under the user is "www-data". Create a new cronjob for user "www-data" using the command below.
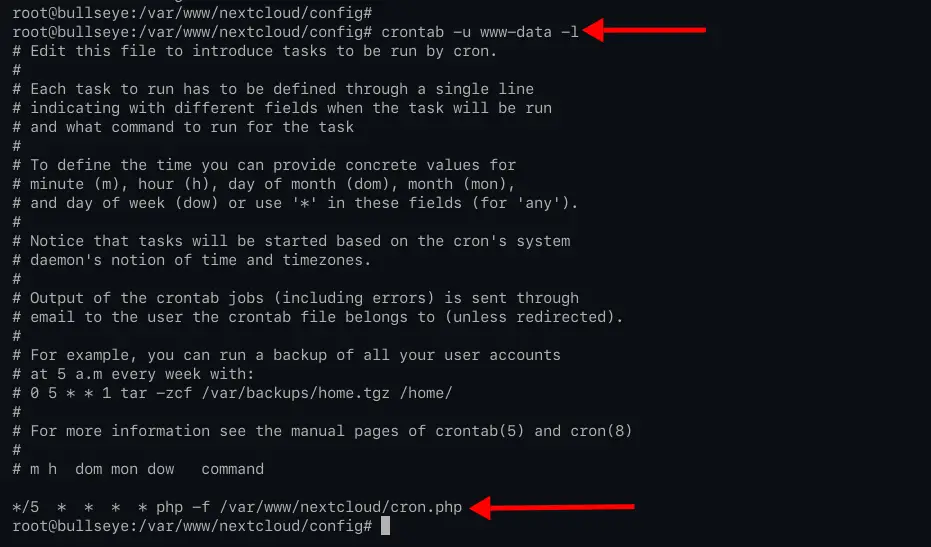
crontab -u www-data -e
If you've multiple editors on your system, choose the editor as your comfortable use. For this guide, we will be using a nano editor.
Add the following configuration.
*/5 * * * * php -f /var/www/nextcloud/cron.php
Save the configuration and exit.
Cronjob configuration you must know:
- This cronjob configuration allows user "www-data" to execute the PHP script "/var/www/nextcloud/cron.php" every 5 minutes.
To verify the cronjob configuration, you can execute the following command.
crontab -u www-data -l
If your configuration is a success, you will get the configuration on top as your output. Otherwise, you will get a blank result.
Conclusion
Congratulation! You have successfully installed Nextcloud on Debian 11 Bullseye. The Nextcloud server is running under the LAMP Stack with SSL enabled. Also, your Nextcloud installation is running with memory caching enabled with PHP APC and opcache extensions.

