How to Install Mosquitto MQTT Message Broker on Debian 11
Eclipse Mosquitto is a free and open-source message broker implementation of the MQTT protocol. The Mosquitto implements the MQTT version 3.1.0, 3.1.1, and version 5.0. Mosquitto is a lightweight message broker that is suitable for multiple types of deployment and uses.
Mosquitto is a message broker that uses the publish/subscribe model to deliver messages. It uses low bandwidth and provides ease of implementation, which means suitable for deployments for small devices and IoT (Internet of Things), mobile devices, embedded computers, and microcontrollers.
In this tutorial, we'll walk through the process of installing and configuring Mosquitto MQTT Message Broker onto a Debian 11 server, setting up authentication, Securing Mosquitto via SSL/TLS certificates, and also enabling WebSockets on Mosquitto.
Prerequisites
To begin, you must have the following requirements to complete this tutorial:
- A Debian 11 server - This demo uses a Debian server with the hostname 'mosquitto-server'.
- A non-root user with root/administrator privileges.
Installing Mosquitto Server and Client
Mosquitto is an open-source MQTT Message Broker that is available and can be installed on multiple Platforms such as Windows, Linux, BSD, and macOS. For the Debian Linux distribution, Mosquitto is available on the default Debian repository, which allows you easily install it via the APT.
In this step, you will go over the installation process of the Mosquitto server and client on the Debian server. You'll also go over the basic usage of the Mosquitto command line (mosquitto_sub and mosquitto_pub) to verify the Mosquitto server installation.
First, update and refresh your Debian package index via the apt command below.
sudo apt update
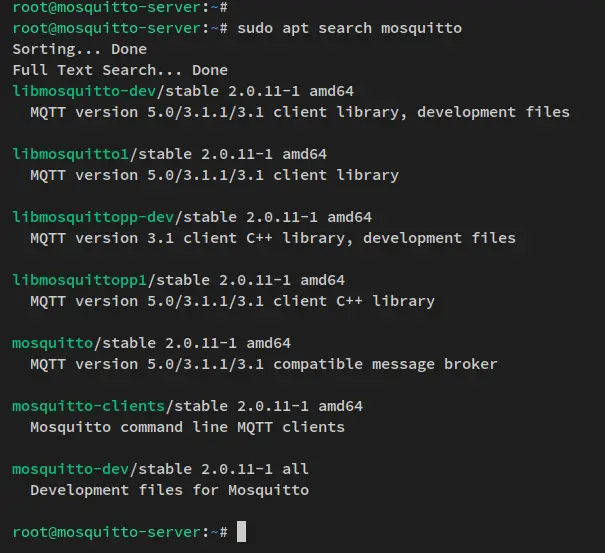
Search the 'mosquitto' package using the following apt command.
sudo apt search mosquitto
You should see some of the Mosquitto packages that are available by default on the Debian repository, which includes the Mosquitto server application and client.
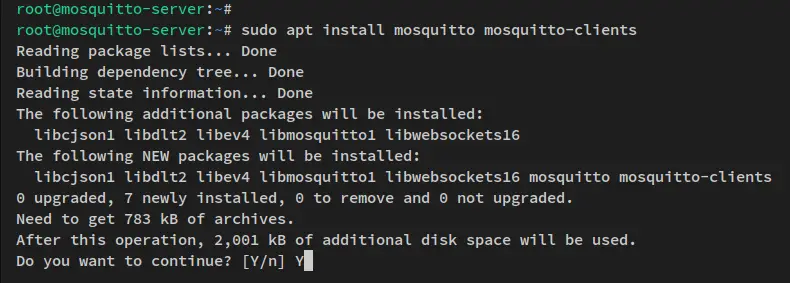
Now run the apt command below to install Mosquitto packages. When prompted, input y to confirm and press ENTER to proceed.
sudo apt install mosquitto mosquitto-clients
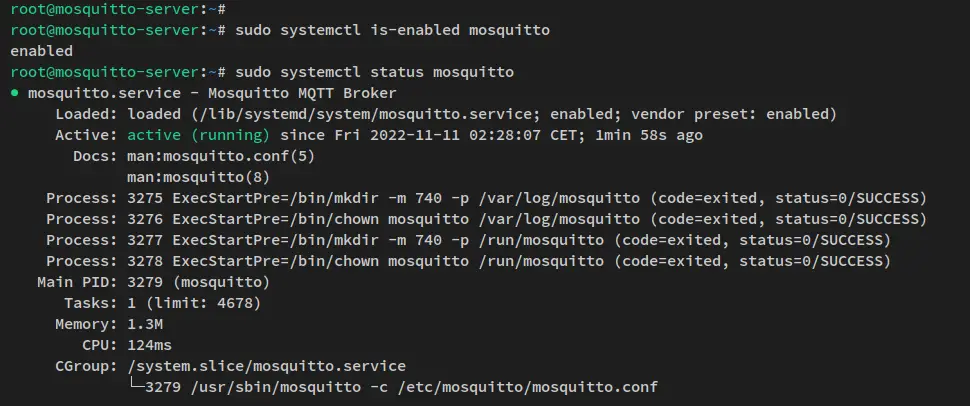
After Mosquitto is installed, verify the Mosquitto service via the following systemctl command.
sudo systemctl is-enabled mosquitto
sudo systemctl status mosquitto
You'll then see the Mosquitto service enabled and will be run automatically upon the bootup. And the current status of Mosquitto service is running.
Now that the Mosquitto server running, you'll next go over the verification of Mosquitto via the client command line 'mosquitto_sub' and 'mosquitto-pub'.
In a simple way, the 'mosquitto_sub' is the command-line tool for receiving messages (Subscriber) from the 'mosquitto_pub' (Publisher).
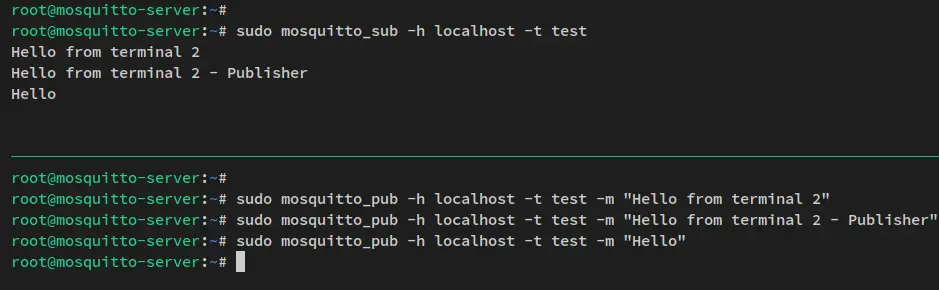
Run the following 'mosqitto_sub' command to receive some messages on the topic 'test'.
sudo mosquitto_sub -h localhost -t test
Next, open a new terminal session of your server and run the following 'mosquitto_pub' command to send some messages to the topic 'test'
sudo mosquitto_pub -h localhost -t test -m "Hello from terminal 2"
sudo mosquitto_pub -h localhost -t test -m "Hello from terminal 2 - Publisher"
sudo mosquitto_pub -h localhost -t test -m "Hello"
You'll then see published messages via the 'mosquitto_pub' on the receiver 'mosquitto_sub', which means the Mosquitto server and client installation are successful.
Setting up Authentication on Mosquitto
The default Mosquitto installation comes without authentication. To secure the deployment (especially in production), you should enable the authentication on the Mosquitto server. You can create and define a user on Mosquitto and secure Mosquitto Sub and Pub via username/password authentication.
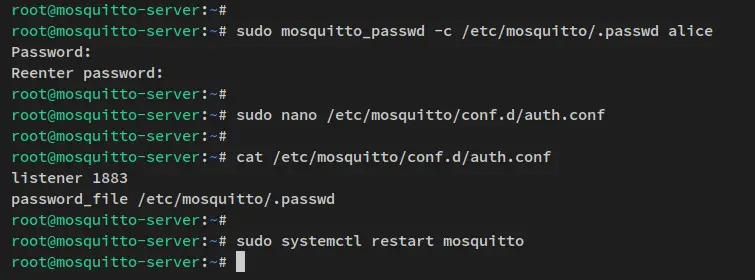
Run the following command to create a new Mosquitto user and password. This demo uses the user 'alice' and the password will be generated and hashed in the file '/etc/mosquitto/.passwd'.
sudo mosquitto_passwd -c /etc/mosquitto/.passwd alice
Input the password for the Mosquitto user 'alice' and repeat the password.
After the username/password created, create a new Mosquitto configuration '/etc/mosquitto/conf.d/auth.conf' using the following nano editor command.
sudo nano /etc/mosquitto/conf.d/auth.conf
Add the following configuration to the file. This will run the Mosquitto on port '1883', disable anonymous access, and define the password file to '/etc/mosquitto/.passwd'.
listener 1883
allow_anonymous false
password_file /etc/mosquitto/.passwd
Save the file and exit the editor when you are finished.
Next, restart the Mosquitto service to apply new changes. The Mosquitto server should now be running with authentication enabled.
sudo systemctl restart mosquitto
To verify the authentication Mosquitto server, you can use the 'mosquitto_sub' and 'mosquitto_pub' commands.
When you did not provide the username/password during the pub/sub process, you will be declined and the connection will be refused. But, if you have provided the username/password for the authentication and you have the correct credentials, you will be able to send and receive messages via the Mosquitto Subscriber and Publisher.
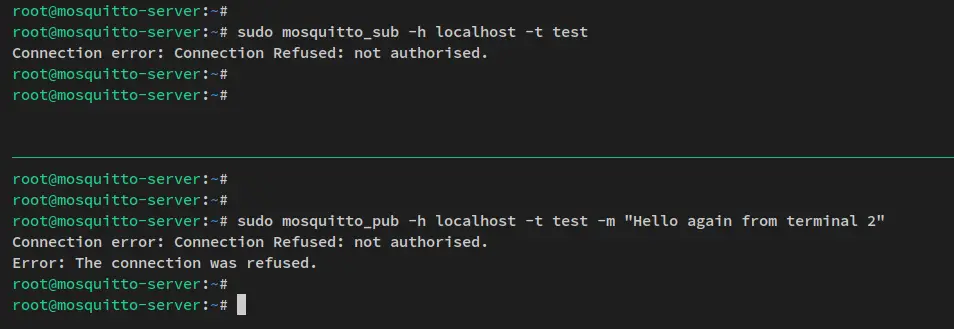
Run the following command to verify the Pub and Sub on Mosquitto without authentication.
# session - Mosquitto Subscriber
sudo mosquitto_sub -h localhost -t test

# session - Mosquitto Publisher
sudo mosquitto_pub -h localhost -t test -m "Hello again from terminal 2"
You'll then see that without authentication, both connections to the Mosquitto server will be refused because it's unauthorized, and you will not be able to send and receive messages.
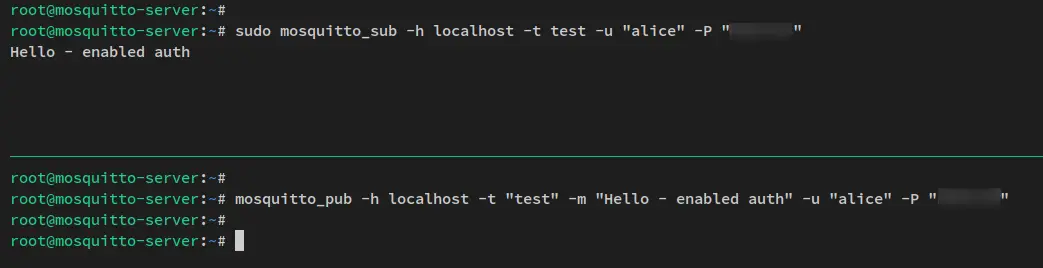
Next, run the following command to verify the Pub and Sub of Mosquitto with the user and password.
# session - Mosquitto Subscriber
sudo mosquitto_sub -h localhost -t test -u "alice" -P "p4ssw0rd"

# session - Mosquitto Publisher
sudo mosquitto_pub -h localhost -t "test" -m "Hello - enabled auth" -u "alice" -P "p4ssw0rd"
When the Mosquitto credentials are correct, you will be connected to both Mosquitto Subscriber and Publisher, and you can send and receive messages via the Mosquitto command line.
With the Mosquitto server running and authentication enabled, you should now have a secure message broker. But, to get more security, you can also add the authorization via SSL/TLS certificates on your local Mosquitto data transfer and connections.
Securing Mosquitto with SSL/TLS Certificates
Although the Mosquitto server is secured via authentication, there are still a few steps you must go to secure the Mosquitto deployment. This includes the implementation of SSL/TLS certificates that will encrypt data transfer between the Mosquitto server and applications.
Before you get started, ensure that you have SSL/TLS certificates generated for your local environment.
To start, run the following openssl command to generate the dhparam certificate. This will generate the DHPARAM certificate to '/etc/mosquitto/certs/dhparam.pem'.
sudo openssl dhparam -out /etc/mosquitto/certs/dhparam.pem 2048

Now change the ownership of the Mosquitto certs directory to the user 'mosquitto' via the chmod command below.
sudo chown -R mosquitto: /etc/mosquitto/certs
Next, create a new additional configuration '/etc/mosquitto/conf.d/ssl.conf' using the following nano editor command. With this, you will enable a secure connection on the Mosquitto server via SSL/TLS certificates.
sudo nano /etc/mosquitto/conf.d/ssl.conf
Add the following configuration to the file. This will run the Mosquitto on port '8883' with TLS enabled on top of it. So, be sure to change the path of SSL/TLS certificates.
listener 8883

certfile /etc/letsencrypt/live/msqt.howtoforge.local/fullchain.pem
cafile /etc/letsencrypt/live/msqt.howtoforge.local/chain.pem
keyfile /etc/letsencrypt/live/msqt.howtoforge.local/privkey.pem
dhparamfile /etc/mosquitto/certs/dhparam.pem
Save the file and exit the editor when you are finished.
Now run the following systemctl command to restart the Mosquitto service and apply new changes. Now the Mosquitto server will be run with secure TLS enabled.
sudo systemctl restart mosquitto
With the SSL/TLS enabled, you'll then verify the configuration by sending messages to the Mosquitte Subscriber via a secure connection.
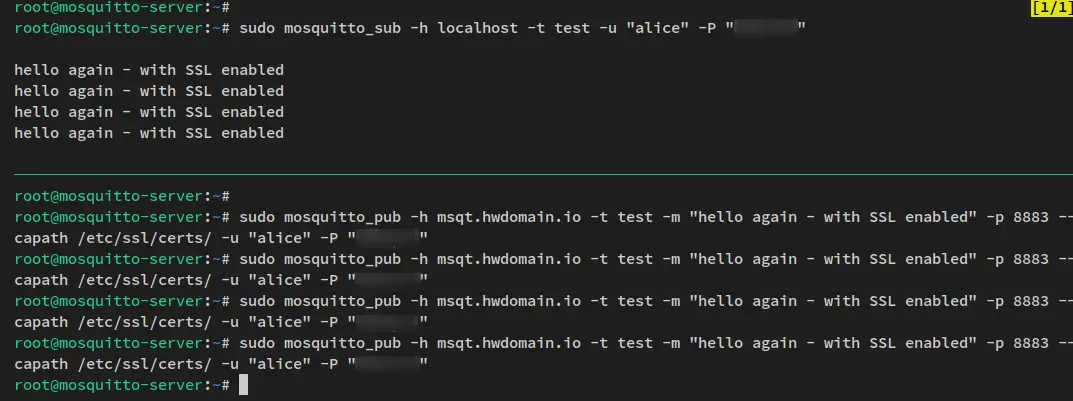
Run the following 'mosquitto_sub' command to open the Mosquitte Subscriber on your current terminal session.
sudo mosquitto_sub -h localhost -t test -u "alice" -P "p4ssw0rd"
Next, open a new session, connect to the server, then run the following command to send messages to the Mosquitto server. With this, you'll connect to the Mosquitto server 'msqt.howtoforge.local' via SSL/TLS connection that runs on port '8883'.
sudo mosquitto_pub -h msqt.howtoforge.local -t test -m "hello again - with SSL enabled" -p 8883 --capath /etc/ssl/certs/ -u "alice" -P "p4ssw0rd"
You should now get messages on the Mosquitto Subscriber shell. The Mosquitto Producer sends messages to the Mosquitto Subscriber via a secure SSL/TLS connection that runs on port 8883.
Enabling WebSockets on Mosquitto
At this point, you have installed the Mosquitto server and secured the installation enabling the username/password authentication and the SSL/TLS secure connection. You'll then learn how to enable WebSockets over MQTT on the Mosquitto server.
WebSocket is a stateful communication protocol that provides a persistent full-duplex channel between the server and the client by reusing the same connection that was opened at the beginning of the communication (during the opening handshake).
To start, create a new configuration '/etc/mosquitto/conf.d/websockets.conf' using the following nano editor command.
sudo nano /etc/mosquitto/conf.d/websockets.conf
Add the following configuration to the file. This will enable the WebSockets protocol and secure it via SSL/TLS certificates. The WebSockets will be run on port 8083.
listener 8083
protocol websockets
certfile /etc/letsencrypt/live/msqt.howtoforge.local/fullchain.pem
cafile /etc/letsencrypt/live/msqt.howtoforge.local/chain.pem
keyfile /etc/letsencrypt/live/msqt.howtoforge.local/privkey.pem
Save the file and exit the editor when you are finished.
Next, run the following systemctl command to restart the Mosquitto service and apply new changes. The Mosquitto server will now be running with WebSockets enabled on top of a secure SSL/TLS connection.
sudo systemctl restart mosquitto
To verify the WebSockets configuration, you can connect to the Mosquitto via a third-party tool such as 'MQTT Explorer' which is available for major operating systems such as Linux, Windows, and macOS.
Below is the MQTT Explorer with WebSockets connection.
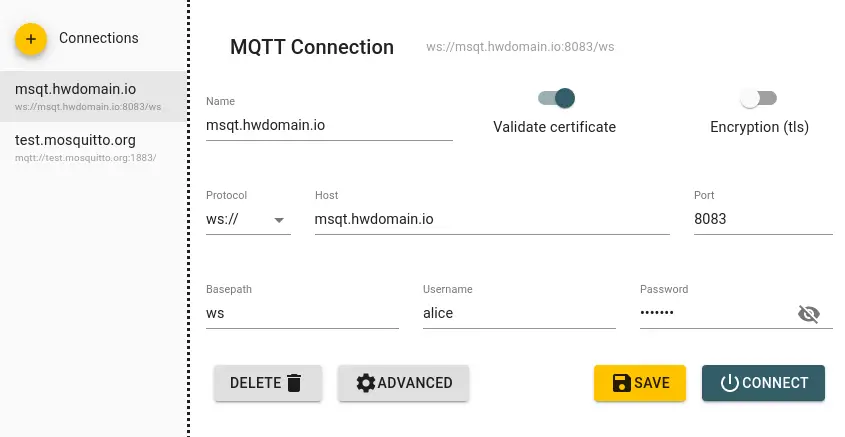
When connected, you should see the following dashboard.

Conclusion
In this guide, you learned how to install Mosquitto MQTT Message Broker on a Debian 11 server. You also learned how to secure the Mosquitto server by enabling username/password authentication, and securing Mosquitto data transfer and connection via SSL/TLS certificates. In addition to that, you enabled the WebSockets protocol on the Mosquitto server that allows you to establish connections between Subscriber and Producer in asynchronous.
From here, you can now leverage the Mosquitto installation by creating a High Availability Mosquitto Cluster or setting up the Mosquitto administration dashboard via Cedalo Management Center.

