How to Install Mattermost with Nginx proxy and free Let's Encrypt SSL on Ubuntu 24.04
This tutorial exists for these OS versions
- Ubuntu 24.04 (Noble Numbat)
- Ubuntu 22.04 (Jammy Jellyfish)
- Ubuntu 20.04 (Focal Fossa)
On this page
Mattermost is an open-source alternative to Slack and Microsoft Teams. It allows you to self-host online chat with multiple features such as file sharing, search, automation, and third-party integrations.
Mattermost is a collaboration platform designed as an internal chat for organizations and companies. It combines messaging systems, automation, integrations, and security for critical workflows.
In this tutorial, you'll learn how to install Mattermost on Ubuntu 24.04 server. You'll install Mattermost with PostgreSQL as the database and Nginx as a reverse proxy. You'll also secure Mattermost with HTTPS, and then create your first workspace with Mattermost.
Prerequisites
To begin with this tutorial, make sure you have the following:
- An Ubuntu 24.04 server
- A non-root user with administrator privileges
- A domain name pointed to server IP address
Installing dependencies
To install Mattermost, you must install dependencies on your server, including the PostgreSQL database server, Nginx web server, and Certbot.
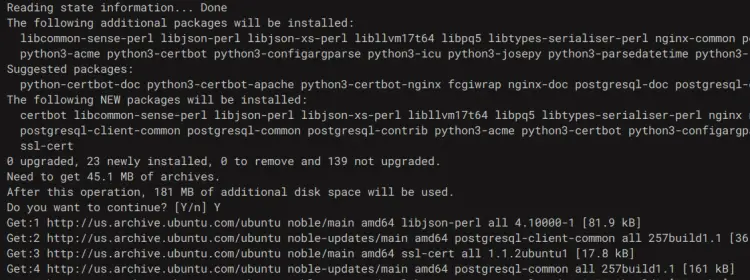
First, run the 'apt' command below to update your Ubuntu package index and install dependencies such as PostgreSQL, Nginx web server, and Certbot. The PostgreSQL server will be used as a default database for Mattermost, and Nginx will be used as a reverse proxy.
sudo apt update && sudo apt install postgresql postgresql-contrib nginx certbot
Enter 'Y' to confirm the installation.
After the installation, check the PostgreSQL service status to ensure it is running.
sudo systemctl is-enabled postgresql
sudo systemctl status postgresql
You can see below the PostgreSQL server is enabled and running.
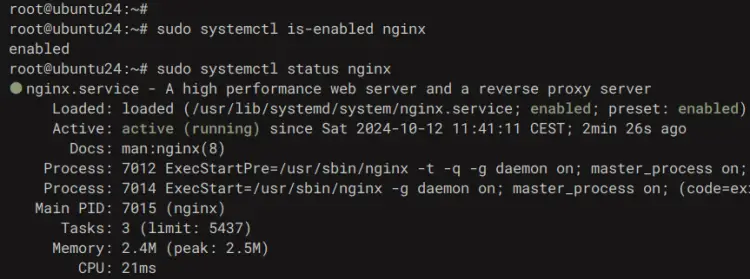
Now check the Nginx web server status using the command below. You'll see Nginx also running and enabled on your Ubuntu system.
sudo systemctl is-enabled nginx
sudo systemctl status nginx
Setting up PostgreSQL database and user
After installing dependencies, you'll create a PostgreSQL database and user for Mattermost using the 'psql' or PostgreSQL shell. Lastly, you'll also check authentication to PostgreSQL with your new user.
Log in to the PostgreSQL shell with the 'psql' command below.
sudo -u postgres psql
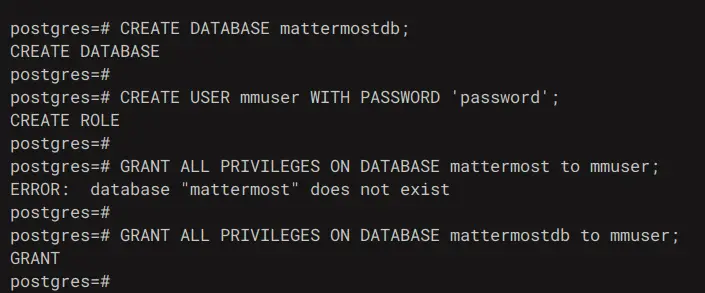
Now run the following queries to create a new database 'mattermostdb' and a new user 'mmuser' with the password 'password'.
CREATE DATABASE mattermostdb;
CREATE USER mmuser WITH PASSWORD 'password';
GRANT ALL PRIVILEGES ON DATABASE mattermostdb to mmuser;
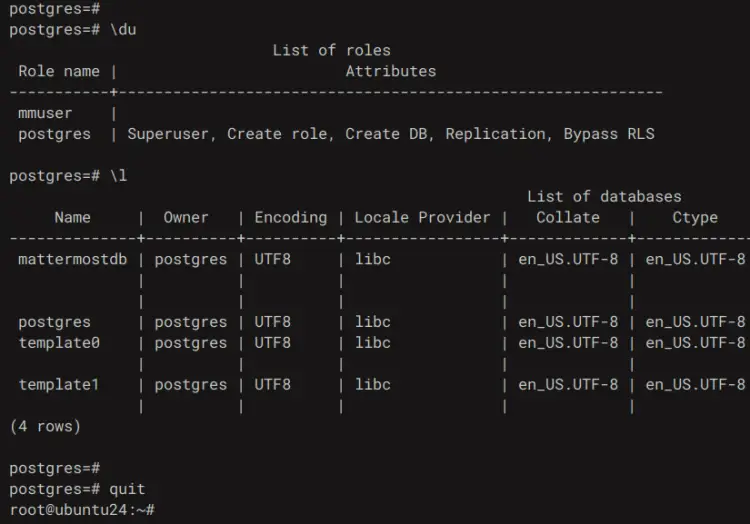
Once you've created the database and user, run the query below to list available databases and users in your PostgreSQL server.
\du
\l
In the following output, you can see the database 'mattermostdb' and user 'mmuser' are available on the PostgreSQL server.
Now type 'quit' to exit from the PostgreSQL.
Next, run the 'psql' command below to log in to the database 'mattermostdb' as user 'mmuser'. Enter your password when prompted.
sudo -u postgres psql --host=localhost --dbname=mattermostdb --username=mmuser --password
Finally, verify your connection by running the '\conninfo' query below. Ensure you're logged in as user 'mmuser' to the database 'mattermostdb'.
\conninfo
Downloading Mattermost
With the database ready, now you'll download Mattermost, create a data directory, set up the Mattermost domain name and the PostgreSQL as the database, and then you'll set up proper permission and ownership for Mattermost.
First, run the 'useradd' command below to create a new 'mattermost' user on your system.
sudo useradd --system --user-group mattermost
Download the Mattermost binary file using the 'wget' command below. Then, extract the Mattermost with the 'tar' command.
wget https://releases.mattermost.com/10.0.1/mattermost-10.0.1-linux-amd64.tar.gz
tar -xf mattermost-10.0.1-linux-amd64.tar.gz
Now move the extracted directory to the '/opt/mattermost' with the command below.
mv mattermost /opt/
Next, create a new data directory '/var/mattermost/data' for storing user data.
sudo mkdir -p /opt/mattermost/data
After that, edit the default configuration '/opt/mattermost/config/config.json' with the 'nano' editor.
sudo nano /opt/mattermost/config/config.json
Within the 'ServiceSettings' section, input your domain name to the 'SiteURL' line.
"ServiceSettings": {
 "SiteURL": "mattermost.howtoforge.local",
On the 'SqlSettings' section, change the details database with your PostgreSQL database details.
"SqlSettings": {
 "DriverName": "postgres",
 "DataSource": "postgres://mmuser:password@localhost/mattermostdb?sslmode=disable\u0026connect_timeout=10\u0026binary_parameters=yes",
Save the file and exit when finished.
Lastly, execute the following commands to change the ownership of the '/opt/mattermost' directory to the user 'mattermost' and enable write access into that directory.
sudo chown -R mattermost:mattermost /opt/mattermost
sudo chmod -R g+w /opt/mattermost
Additionally, for testing purposes, you can start Mattermost manually with the command below.
cd /opt/mattermost
sudo -u mattermost ./bin/mattermost
Running Mattermost as a systemd service
In this section, you'll be creating a new systemd service file for Mattermost. With this, Mattermost will be running in the background and you can easily manage it via the 'systemctl' command.
Create a new systemd service file '/etc/systemd/system/mattermost.service' with the 'nano' editor.
sudo nano /etc/systemd/system/mattermost.service
Insert the following configuration into the file.
[Unit]
Description=Mattermost
After=network.target
After=postgresql.service
BindsTo=postgresql.service

[Service]
Type=notify
ExecStart=/opt/mattermost/bin/mattermost
TimeoutStartSec=3600
KillMode=mixed
Restart=always
RestartSec=10
WorkingDirectory=/opt/mattermost
User=mattermost
Group=mattermost
LimitNOFILE=49152

[Install]
WantedBy=multi-user.target
Save the file and exit the editor when finished.
Now run the 'systemctl' command below to reload the systemd manager.
sudo systemctl daemon-reload
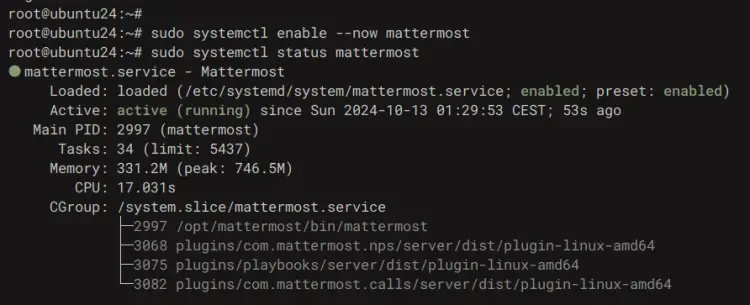
Lastly, start and enable the 'mattermost' service using the following command, and then check it to ensure it is running.
sudo systemctl enable --now mattermost
sudo systemctl status mattermost
If Mattermost running, you'll see the following output on your screen.
Setting up Nginx as a reverse proxy
At this point, Mattermost is up and running, and now you'll be generating SSL/TLS certificates for Mattermost via Certbot, and then setting up Nginx as a reverse proxy. So make sure you've your domain name pointed to a server IP address.
Before setting up Nginx, run the 'certbot' command below to generate SSL/TLS certificates for your Mattermost installation. Make sure to change the email address and domain name with your details.
sudo systemctl stop nginx
sudo certbot certonly --standalone --agree-tos --no-eff-email --staple-ocsp --preferred-challenges http -m [email protected] -d mattermost.howtoforge.local
Now open the default Nginx config file '/etc/nginx/nginx.conf' using 'nano'.
sudo nano /etc/nginx/nginx.conf
Insert the following line before 'include /etc/nginx/conf.d/*.conf;' line.
server_names_hash_bucket_size 64;
include /etc/nginx/conf.d/*.conf;
Save and exit the file when finished.
Next, create a new Nginx server block configuration '/etc/nginx/sites-available/mattermost' with the following 'nano' editor.
sudo nano /etc/nginx/sites-available/mattermost
Insert the following configuration and make sure to change the domain name with your information.
upstream backend {
server 127.0.0.1:8065;
keepalive 32;
}

server {
listen 80 default_server;
server_name mattermost.howtoforge.local;
return 301 https://$server_name$request_uri;
}

server {
listen 443 ssl http2;
listen [::]:443 ssl http2;
server_name mattermost.howtoforge.local;

http2_push_preload on; # Enable HTTP/2 Server Push

ssl_certificate /etc/letsencrypt/live/mattermost.howtoforge.local/fullchain.pem;
ssl_certificate_key /etc/letsencrypt/live/mattermost.howtoforge.local/privkey.pem;
ssl_session_timeout 1d;

# Enable TLS versions (TLSv1.3 is required upcoming HTTP/3 QUIC).
ssl_protocols TLSv1.2 TLSv1.3;

# Enable TLSv1.3's 0-RTT. Use $ssl_early_data when reverse proxying to
# prevent replay attacks.
#
# @see: https://nginx.org/en/docs/http/ngx_http_ssl_module.html#ssl_early_data
ssl_early_data on;

ssl_ciphers 'ECDHE-ECDSA-AES256-GCM-SHA384:ECDHE-RSA-AES256-GCM-SHA384:ECDHE-ECDSA-CHACHA20-POLY1305:ECDHE-RSA-CHACHA20-POLY1305:ECDHE-ECDSA-AES256-SHA384:ECDHE-RSA-AES256-SHA384';
ssl_prefer_server_ciphers on;
ssl_session_cache shared:SSL:50m;
# HSTS (ngx_http_headers_module is required) (15768000 seconds = six months)
add_header Strict-Transport-Security max-age=15768000;
# OCSP Stapling ---
# fetch OCSP records from URL in ssl_certificate and cache them
ssl_stapling on;
ssl_stapling_verify on;

add_header X-Early-Data $tls1_3_early_data;

location ~ /api/v[0-9]+/(users/)?websocket$ {
proxy_set_header Upgrade $http_upgrade;
proxy_set_header Connection "upgrade";
client_max_body_size 50M;
proxy_set_header Host $host;
proxy_set_header X-Real-IP $remote_addr;
proxy_set_header X-Forwarded-For $proxy_add_x_forwarded_for;
proxy_set_header X-Forwarded-Proto $scheme;
proxy_set_header X-Frame-Options SAMEORIGIN;
proxy_buffers 256 16k;
proxy_buffer_size 16k;
client_body_timeout 60s;
send_timeout 300s;
lingering_timeout 5s;
proxy_connect_timeout 90s;
proxy_send_timeout 300s;
proxy_read_timeout 90s;
proxy_http_version 1.1;
proxy_pass http://backend;
}

location / {
client_max_body_size 100M;
proxy_set_header Connection "";
proxy_set_header Host $host;
proxy_set_header X-Real-IP $remote_addr;
proxy_set_header X-Forwarded-For $proxy_add_x_forwarded_for;
proxy_set_header X-Forwarded-Proto $scheme;
proxy_set_header X-Frame-Options SAMEORIGIN;
proxy_buffers 256 16k;
proxy_buffer_size 16k;
proxy_read_timeout 600s;
proxy_http_version 1.1;
proxy_pass http://backend;
}
}

# This block is useful for debugging TLS v1.3. Please feel free to remove this
# and use the '$ssl_early_data' variable exposed by NGINX directly should you
# wish to do so.
map $ssl_early_data $tls1_3_early_data {
"~." $ssl_early_data;
default "";
}
Save the file and exit the editor.
Now run the command below to activate the 'mattermost' server block and verify your Nginx syntax. If you've proper Nginx syntax, you'll see a message such as 'syntax is ok - test is successful'.
sudo ln -s /etc/nginx/sites-available/mattermost /etc/nginx/sites-enabled/
sudo nginx -t
Lastly, run the 'systemctl' command below to start again the Nginx web server. With this, Mattermost installation will be ready with HTTPS also enabled.
sudo systemctl start nginx
Accessing Mattermost
Open your web browser and visit your domain name https://mattermost.howtoforge.local/. From here, you can create your first workspace in Mattermost.
- Click on the 'View in Browser' to set up Mattermost.
- Enter details of your account and click 'Create Account'.
- Enter your organization name and click 'Continue'.
- Click 'Finish setup' to complete the configuration.
Now you'll see the following dashboard of your workspace.
Conclusion
Congratulations! You've completed the installation of Mattermost on the Ubuntu 24.04 server. Mattermost is running with PostgreSQL as the database and Nginx as a reverse proxy. You've also secured Mattermost with the SSL from Let's Encrypt.

