How to Install Let's Chat on Ubuntu 22.04
Let's Chat is a free, open-source, and persistent messaging application that runs on Node.js and MongoDB. It is designed for small, intimate teams that offer a rich set of features such as LDAP/Kerberos authentication, a REST-like API, and XMPP support. Using Let's Chat, you can send all kinds of messages and also find interest group chats, voice stickers, and cool emojis.
In this post, we will show you how to install Let's Chat with Nginx as a reverse proxy on Ubuntu 22.04.
Prerequisites
- A server running Ubuntu 22.04.
- A root password is configured on the server.
Install Node.JS
Before starting, you will need to install Node.js on your server. To install the latest version of Node.js, you will need to add the Node Source repository to APT.
First, install all the required dependencies with the following command:
apt install dirmngr gnupg apt-transport-https ca-certificates software-properties-common -y
Once all the dependencies are installed, add the Node.js repository to APT
curl -sL https://deb.nodesource.com/setup_18.x | bash -
Once the repository is added, you can install the Node.js with the following command:
apt-get install nodejs -y
After the successfull installation, verify the Node.js version with the following command:
node -v
You will get the following output:
v18.7.0
Install MongoDB Database
You will also require a MongoDB database to be installed on your server.
First, download and install the libssl package with the following command:
wget http://archive.ubuntu.com/ubuntu/pool/main/o/openssl/libssl1.1_1.1.1f-1ubuntu2_amd64.deb
dpkg -i libssl1.1_1.1.1f-1ubuntu2_amd64.deb
Next, add the MongoDB GPG key and repository using the following command:
wget -qO - https://www.mongodb.org/static/pgp/server-4.4.asc | apt-key add -
echo "deb [ arch=amd64,arm64 ] https://repo.mongodb.org/apt/ubuntu focal/mongodb-org/4.4 multiverse" | tee /etc/apt/sources.list.d/mongodb-org-4.4.list
Next, update the repository cache with the following command:
apt update
Once your repository is updated, install the MongoDB using the following command:
apt install -y mongodb-org
Once the MongoDB package is installed, start and enable the MongoDB service with the following command:
systemctl start mongod
systemctl enable mongod
You can check the status of the MongoDB service with the following command:
systemctl status mongod
You should see the following output:
? mongod.service - MongoDB Database Server
     Loaded: loaded (/lib/systemd/system/mongod.service; disabled; vendor preset: enabled)
     Active: active (running) since Sun 2022-07-31 04:00:08 UTC; 6s ago
       Docs: https://docs.mongodb.org/manual
   Main PID: 42274 (mongod)
     Memory: 61.1M
        CPU: 1.014s
     CGroup: /system.slice/mongod.service
             ??42274 /usr/bin/mongod --config /etc/mongod.conf

Jul 31 04:00:08 ubuntu2204 systemd[1]: Started MongoDB Database Server.
Install Let's Chat
First, you will need to download the latest version of Let's Chat from the Git Hub repository. You can download it with the following command:
git clone https://github.com/sdelements/lets-chat.git
Once the download is completed, change the directory to the downloaded directory and install all required dependencies using the following command:
cd lets-chat
npm install
Next, copy the sample configuration file and start the Let's Chat server with the following command:
cp settings.yml.sample settings.yml
npm start
You should see the following output:
> [email protected] start
> node app.js

(node:42373) DeprecationWarning: `open()` is deprecated in mongoose >= 4.11.0, use `openUri()` instead, or set the `useMongoClient` option if using `connect()` or `createConnection()`. See http://mongoosejs.com/docs/4.x/docs/connections.html#use-mongo-client
(Use `node --trace-deprecation ...` to show where the warning was created)

???     ?????????????????????????     ??????????  ??? ?????? ?????????
???     ?????????????????????????    ???????????  ????????????????????
???     ??????     ???   ????????    ???     ????????????????   ???
???     ??????     ???   ????????    ???     ????????????????   ???
????????????????   ???   ????????    ???????????  ??????  ???   ???
????????????????   ???   ????????     ??????????  ??????  ???   ???

Release 0.4.8
Press the CTRL + C to stop the Let's Chat service.
Create a Systemd Service File for Let's Chat
Next, you will need to create a systemd service file for Let's Chat. You can create it with the following command:
nano /etc/systemd/system/letschat.service
Add the following lines:
[Unit]
Description=Let's Chat Server
Wants=mongodb.service
After=network.target mongod.service

[Service]
Type=simple
WorkingDirectory=/root/lets-chat
ExecStart=/usr/bin/npm start
User=root
Group=root
Restart=always
RestartSec=9

[Install]
WantedBy=multi-user.target
Save and close the file, then reload the systemd daemon with the following command:
systemctl daemon-reload
Next, start and enable the Let's Chat service with the following command:
systemctl start letschat
systemctl enable letschat
Next, check the status of the Let's Chat with the following command:
systemctl status letschat
You should see the following output:
? letschat.service - Let's Chat Server
     Loaded: loaded (/etc/systemd/system/letschat.service; disabled; vendor preset: enabled)
     Active: active (running) since Sun 2022-07-31 04:02:34 UTC; 4s ago
   Main PID: 42429 (npm start)
      Tasks: 23 (limit: 2242)
     Memory: 157.9M
        CPU: 4.457s
     CGroup: /system.slice/letschat.service
             ??42429 "npm start" "" "" "" "" "" "" "" "" "" "" "" "" "" ""
             ??42440 sh /tmp/start-b5e830e4.sh
             ??42441 letschat "" "" ""

Jul 31 04:02:34 ubuntu2204 npm[42429]: > node app.js
Jul 31 04:02:38 ubuntu2204 npm[42441]: (node:42441) DeprecationWarning: `open()` is deprecated in mongoose >= 4.11.0, use `openUri()` instead>
Jul 31 04:02:38 ubuntu2204 npm[42441]: (Use `node --trace-deprecation ...` to show where the warning was created)
Jul 31 04:02:38 ubuntu2204 npm[42441]: ???     ?????????????????????????     ??????????  ??? ?????? ?????????
Jul 31 04:02:38 ubuntu2204 npm[42441]: ???     ?????????????????????????    ???????????  ????????????????????
Jul 31 04:02:38 ubuntu2204 npm[42441]: ???     ??????     ???   ????????    ???     ????????????????   ???
Jul 31 04:02:38 ubuntu2204 npm[42441]: ???     ??????     ???   ????????    ???     ????????????????   ???
Jul 31 04:02:38 ubuntu2204 npm[42441]: ????????????????   ???   ????????    ???????????  ??????  ???   ???
Jul 31 04:02:38 ubuntu2204 npm[42441]: ????????????????   ???   ????????     ??????????  ??????  ???   ???
Jul 31 04:02:38 ubuntu2204 npm[42441]: Release 0.4.8
At this point, the Let's Chat service is started and listens on port 5000. You can check ti with the following command:
ss -antpl | grep 5000
You should see the following output:
LISTEN 0 511 127.0.0.1:5000 0.0.0.0:* users:(("letschat",pid=42441,fd=20))
Configure Nginx for Let's Chat
Next, you will need to install and configure Nginx as a reverse proxy for Let's Chat. So you can access the Let's Chat via port 80.
First, install the Nginx server package with the following command:
apt install nginx -y
Next, create an Nginx virtual host configuration file:
nano /etc/nginx/conf.d/letschat.conf
Add the following configurations:
server {
server_name letschat.example.com;
listen 80;

access_log /var/log/nginx/lets_chat-access.log;
error_log /var/log/nginx/lets_chat-error.log;

location / {
proxy_set_header   X-Real-IP $remote_addr;
proxy_set_header   Host      $host;
proxy_http_version 1.1;
proxy_set_header   Upgrade $http_upgrade;
proxy_set_header   Connection 'upgrade';
proxy_cache_bypass $http_upgrade;
proxy_pass         http://127.0.0.1:5000;
}

}
Save and close the file, then verify the Nginx for any syntax error:
nginx -t
You should see the following output:
nginx: the configuration file /etc/nginx/nginx.conf syntax is ok
nginx: configuration file /etc/nginx/nginx.conf test is successful
Finally, restart the Nginx service to apply the configuration changes:
systemctl restart nginx
You can also check the status of the Nginx using the following command:
systemctl status nginx
You should see the Nginx status in the following output:
? nginx.service - A high performance web server and a reverse proxy server
     Loaded: loaded (/lib/systemd/system/nginx.service; enabled; vendor preset: enabled)
     Active: active (running) since Sun 2022-07-31 04:04:23 UTC; 5s ago
       Docs: man:nginx(8)
    Process: 43193 ExecStartPre=/usr/sbin/nginx -t -q -g daemon on; master_process on; (code=exited, status=0/SUCCESS)
    Process: 43194 ExecStart=/usr/sbin/nginx -g daemon on; master_process on; (code=exited, status=0/SUCCESS)
   Main PID: 43195 (nginx)
      Tasks: 2 (limit: 2242)
     Memory: 2.5M
        CPU: 35ms
     CGroup: /system.slice/nginx.service
             ??43195 "nginx: master process /usr/sbin/nginx -g daemon on; master_process on;"
             ??43196 "nginx: worker process" "" "" "" "" "" "" "" "" "" "" "" "" "" "" "" "" "" "" "" "" "" "" "" "" "" "" ""

Jul 31 04:04:23 ubuntu2204 systemd[1]: Starting A high performance web server and a reverse proxy server...
Jul 31 04:04:23 ubuntu2204 systemd[1]: Started A high performance web server and a reverse proxy server.
Access Let's Chat Web Interface
Now, open your web browser and access the Let's Chat web interface using the URL http://letschat.example.com.
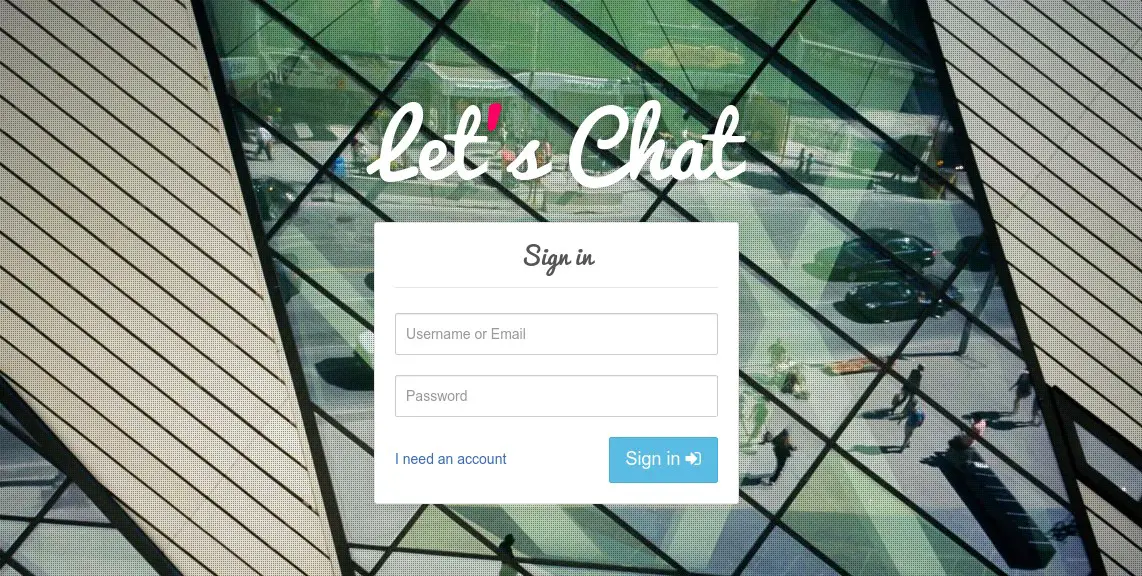
You will need to click on “I need an account” button to create an account. You should see the following page:
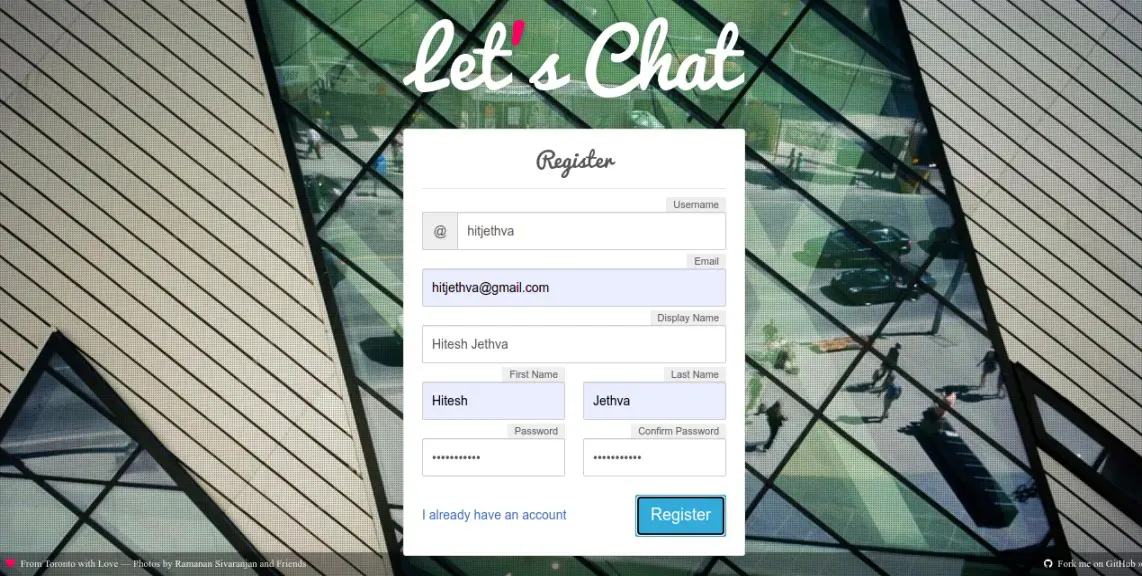
Provide your username, password, email address, and click on the Register button. Once you are registered successfully, you should get the following screen:
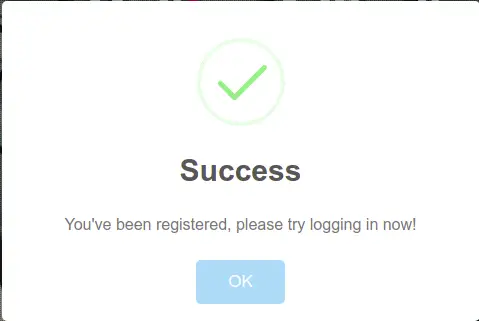
Click on the OK button. You will be redirected to the Let's Chat login screen:
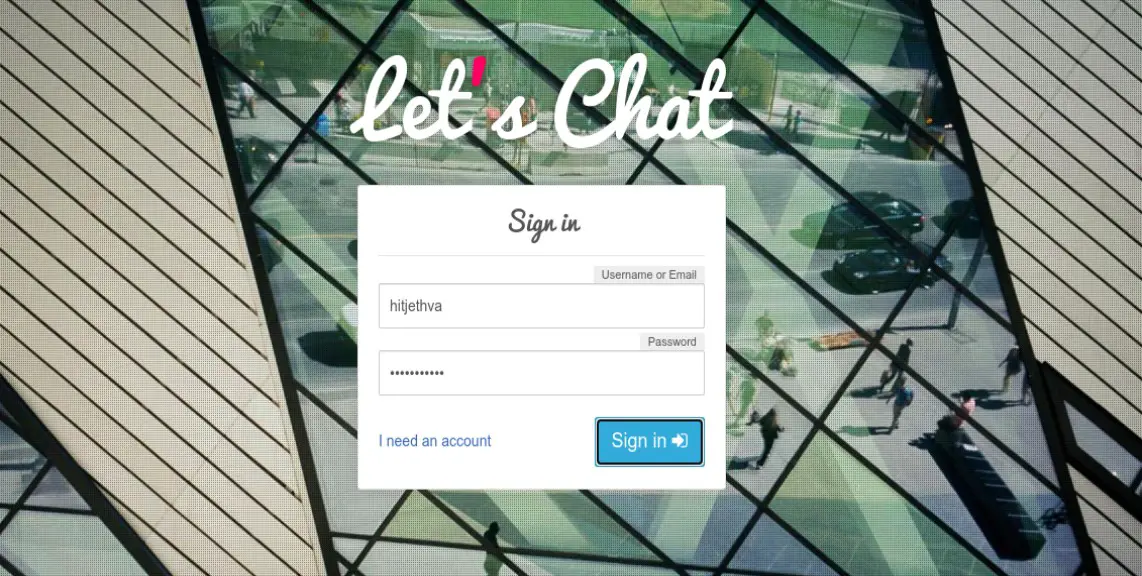
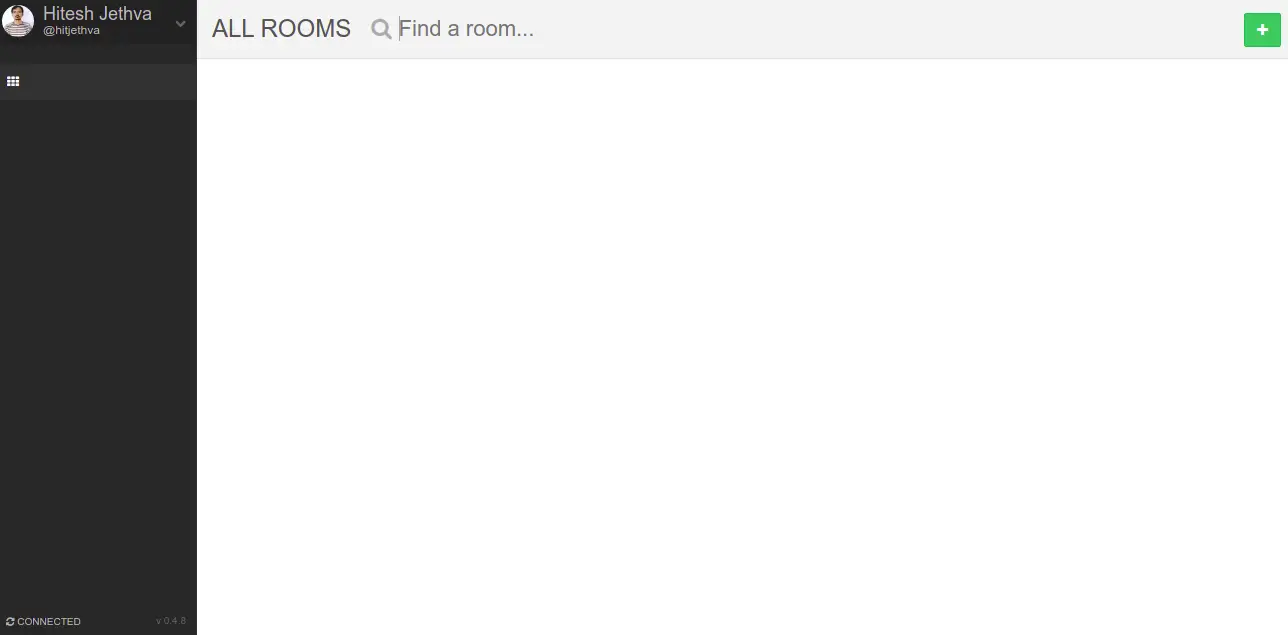
Provide your Let's Chat username and password, and click on the Sign In button. You should see the Let's Chat dashboard in the following screen:
Conclusion
Congratulations! you have successfully installed Let's Chat server with Nginx as a reverse proxy on Ubuntu 22.04. You can now deploy Let's Chat in your work environment and start communicating with other team members. Feel free to ask me if you have any questions.

