How to Install Icecast 2 Media Streaming Server on Ubuntu 18.04 LTS
Icecast is a free, open source and most popular media streaming server that supports Ogg, Opus, WebM, MP3, and many more. Using Icecast, you can create your own Internet radio stations or stream your media from the server and access it from anywhere over the internet. It supports lots of media format including, AAC, OGG, WMA, FLAC, APE and much more.
In this tutorial, we will learn how to install Icecast Media Streaming server on Ubuntu 18.04 LTS server.
Requirements
- A server running Ubuntu 18.04.
- A root password is setup to your server.
Getting Started
Before starting, you will need to update your system with the latest version. You can do this by running the following command:
apt-get update -y
 apt-get upgrade -y
Once your server is updated, restart your server to apply the changes.
Install Icecast
By default, Icecast is available in the Ubuntu 18.04 default repository. You can install it by running the following command:
apt-get install icecast2 -y
During the installation, you will need to answer some questions as shown below:
Choose Yes and press Enter. You should see the following page:
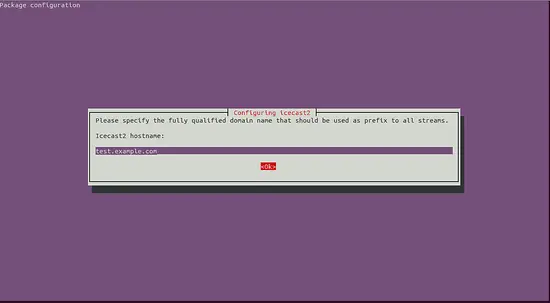
Now, provide your domain name and click on the ok button. You should see the following page:
Now, provide admin password and click on the ok button to start the installation.
Once the instalation has been completed successfully, start Icecast service and enable it to start on boot time with the following command:
systemctl start icecast2
 systemctl enable icecast2
You can check the status of Icecast with the following command:
systemctl status icecast2
You should see the following output:
? icecast2.service - LSB: Icecast2 streaming media server
   Loaded: loaded (/etc/init.d/icecast2; generated)
   Active: active (running) since Tue 2019-04-16 15:35:30 UTC; 44s ago
     Docs: man:systemd-sysv-generator(8)
    Tasks: 1 (limit: 1113)
   CGroup: /system.slice/icecast2.service
           ??3166 /usr/bin/icecast2 -b -c /etc/icecast2/icecast.xml

Apr 16 15:35:28 ubuntu1804 systemd[1]: Starting LSB: Icecast2 streaming media server...
Apr 16 15:35:29 ubuntu1804 icecast2[3142]:  * Starting streaming media server icecast2
Apr 16 15:35:30 ubuntu1804 icecast2[3142]: [2019-04-16  15:35:30] WARN CONFIG/_parse_root Warning,  not configured, using default val
Apr 16 15:35:30 ubuntu1804 icecast2[3142]: [2019-04-16  15:35:30] WARN CONFIG/_parse_root Warning,  not configured, using default val
Apr 16 15:35:30 ubuntu1804 icecast2[3142]: [2019-04-16  15:35:30] WARN CONFIG/_parse_root Warning,  contact not configured, using defaul
Apr 16 15:35:30 ubuntu1804 icecast2[3142]: [2019-04-16  15:35:30] EROR connection/connection_setup_sockets Could not create listener socket on
Apr 16 15:35:30 ubuntu1804 icecast2[3142]: [2019-04-16  15:35:30] EROR connection/connection_setup_sockets No listening sockets established
Apr 16 15:35:30 ubuntu1804 icecast2[3142]:    ...done.
Apr 16 15:35:30 ubuntu1804 systemd[1]: Started LSB: Icecast2 streaming media server.
Access Icecast Web Interface
Icecast is now installed and listening on port 8000. Open your web browser and type the URL http://test.example.com:8000. You will be redirected to the Icecast dashboard as shown below:
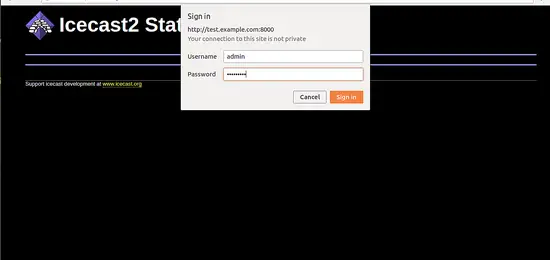
Now, click on the Administration. You will be asked to provide admin username and password as shown below:
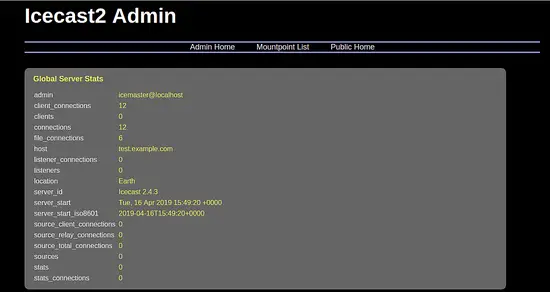
Provide username and password as admin / admin@123 and click on the Sign In button. You should see the following page:
Congratulations! you have successfully installed Icecast on Ubuntu 18.04 server. You can now stream your media on your server and access it from anywhere.


