How to Install ERPNext on Rocky Linux 9
On this page
- Prerequistes
- Setting up User
- Installing Python 3.10
- Installing and Configuring MariaDB Server
- Installing Dependencies from Rocky Linux Repository
- Installing Nodejs 16 and Yarn
- Installing Wkhtmltopdf
- Installing Frappeframework via the bench
- Setup New Application in Frappe
- Installing ERPNext via bench
- Setting up Deployment for ERPNext
- Configuring ERPNext
- Securing with SSL/TLS Certificates via Certbot and Letsencrypt
- Conclusion
ERPNext is an open-source Enterprise ERP (Enterprise Resource Planning) system that can be implemented in your business. ERPNext can be implemented in multiple types of industries, such as manufacturing, distribution, retail, trading, services, education, non-profits, and healthcare. Also, it provides modules like accounting, CRM, sales, purchasing, website, e-commerce, point of sale, manufacturing, warehouse, project management, inventory, and services.
ERPNext is an Enterprise ERP platform licensed under GNU General Public Licence v3. It's mainly written in Python and JavaScript, developed by Frappe Technologies Pvt. ERPNext is an application written under the frappe framework, an open-source web framework in Python and Javascript.
ERPNext is created as an alternative to services like NetSuite from oracle, QAD, Tython, OpenBrave, and Odoo. For functionality, ERPNext is similar to Odoo (formerly OpenERP).
In this tutorial, you will install the ERPNext on a Rocky Linux 9 server and then secure your installation with SSL/TLS certificates via Certbot and Letsencrypt. You'll also learn how to install dependencies for ERPNext such as Python 3.10 from source, Redis that will be used as session manager, Nginx as the web server and reverse proxy, Supervisor as the process manager, Fail2ban for protecting against brute force, MariaDB as the database server, Node.js and Yarn for building and compiling static files.
The ERPNext is an application built on top of the frappe framework, so you'll also install frappe framework in the process via frappe-bench.
Prerequistes
You will need some following requirements to complete this tutorial:
- One Debian 11 server - This example uses a Debian server with the hostname 'erpnext-rocky'.
- A non-root user with sudo/root administrator privileges. You will run all commands in this guide as a non-root user.
- A domain name pointed to the server IP address.
- An SELinux running with permissive mode.
Now let's get started and install ERPNext.
Setting up User
The first task in this tutorial is to create a new dedicated user that will be used to run the ERPNext application. You'll also use this new user to run all commands for package installation and configuration.
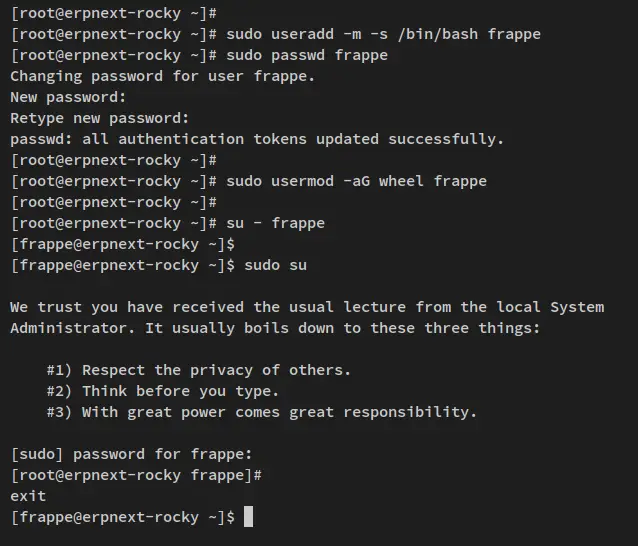
Run the below command to create a new user 'frappe'. Then, set up the password for the 'frappe' user, input the new strong password, and repeat the password.
sudo useradd -m -s /bin/bash frappe
sudo passwd frappe
Now run the below command to add the 'frappe' user to the 'wheel' group. This will allow the 'frappe' user to execute the sudo command become the root user or run the command as root privileges.
sudo usermod -aG wheel frappe
Lastly, log in as the 'frappe' user to verify and ensure that your user is created. Then, run the sudo su command to get the root privileges.
sudo - frappe
sudo su
Input your password for the 'frappe' user. If successful, your prompt will become such as 'root@hostname:/home/frappe...'.
Now type exit or press Ctrl+d to exit from the root shell.
Installing Python 3.10
ERPNext is a web application created using the frappe web framework based on Python. At the time of this writing, the latest version of the frappe framework and ERPNext required at least Python 3.10.
In this step, you will install Python 3.10 manually from the source on the Rocky Linux 9 server.
To begin, run the below dnf command to install some basic dependencies for compiling Python 3.10.
sudo dnf install gcc openssl-devel bzip2-devel libffi-devel zlib-devel wget make
Input y when prompted and press ENTER to proceed.
Next, download the Python 3.10 source code via the wget command below.
wget https://www.python.org/ftp/python/3.10.9/Python-3.10.9.tgz
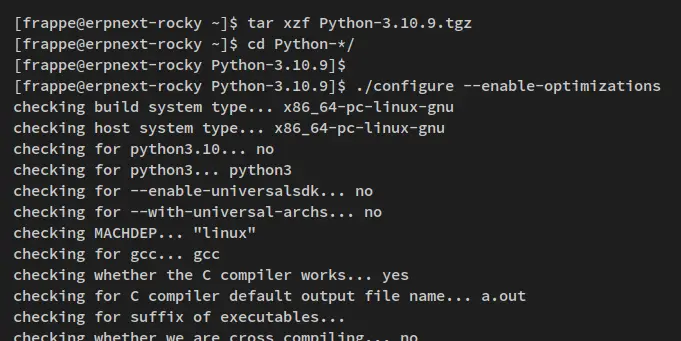
After Python 3.10 is downloaded, extract the Python source code and move your working directory into it.
tar xzf Python-3.10.9.tgz
cd Python-*/
Next, run the below command to start compiling Python 3.10. Then install it to your system. This will install Python 3.10 binary files to the '/usr/local/bin' directory.
./configure --enable-optimizations
nproc
sudo make -j2
sudo make altinstall
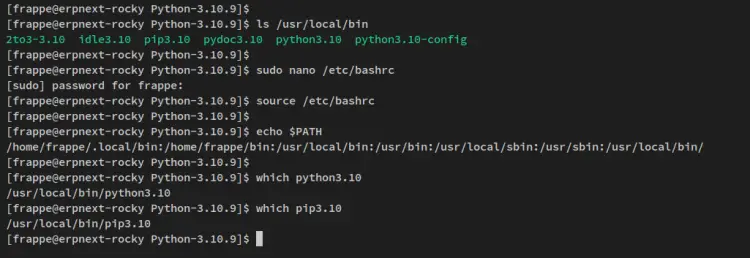
Run the below command to verify Python 3.10 binary files. You should see multiple Python binary files, which include Pip3.10.
ls /usr/local/bin
Next, to ensure that you can run the new version of Python commands, you should add the '/usr/local/bin' directory to the system PATH and the visudo secure_path.
Run the below nano editor command to open a new file '/etc/bashrc'.
sudo nano /etc/bashrc
Add the following line to the file.
export PATH=$PATH:/usr/local/bin/
Save and exit when finished.
Now run the below command to reload the '/etc/bashrc' config file. Then verify the system PATH.
source /etc/bashrc
echo $PATH
You should now see the directory '/usr/local/bin' is added to the system PATH environment variable.
Next, run the below command to add and modify the sudoers configuration file.
sudo visudo
Add the directory '/usr/local/bin' to the 'Defaults secure_path:' option as below.
Defaults secure_path=....:/usr/local/bin
Save the file and exit the editor when finished.
Now run the Python3.10 and Pip3.10 binary via the sudo command as below.
sudo python3.10 --version
sudo pip3.10 --version
You should receive an output similar to this - Python 3.10 is installed from the source code to your Rocky Linux server.
In the next step, you'll install and configure the MariaDB Server for ERPNext.
Installing and Configuring MariaDB Server
On the default installation, the ERPNext will be using MySQL/MariaDB as the database server. The ERPNext required a specific version of MySQL/MariaDB for the installation. And the time of this writing, the latest version of ERPNext required MariaDB 10.6.
In this step, you'll install the MariaDB Server 10.6 from the official MariaDB repository. Then, you'll add configurations to your MariaDB Server and secure the MariaDB Server deployment.
Run the below command to add the MariaDB repository v10.6.
sudo curl -LsS https://r.mariadb.com/downloads/mariadb_repo_setup | sudo bash -s -- --mariadb-server-version="mariadb-10.6"
You'll receive the output something like this.
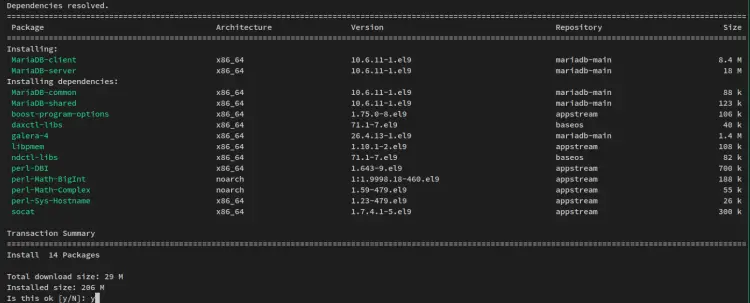
Next, run the dnf command below to install the MariaDB packages. Input y when prompted for the confirmation and press ENTER to proceed.
sudo dnf install MariaDB-server MariaDB-client
Also, when asked to accept the GPG key of the MariaDB repository, input y, and press ENTER.
After MariaDB Server is installed, run the below systemctl command utility to start and enable the MariaDB service.
sudo systemctl start mariadb
sudo systemctl enable mariadb
Now verify the MariaDB service via the below command. You should see that the MariaDB service is running and should be enabled, which means it will start automatically upon the bootup.
sudo systemctl status mariadb
With the MariaDB Server is running, you'll then start configuring the MariaDB as required for the ERPNext.
Open the MariaDB config file '/etc/my.cnf.d/server.cnf' using the below nano editor command.
sudo nano /etc/my.cnf.d/server.cnf
Add the following lines to the '[mysqld]' section. This will enable the barracuda format on your MariaDB. Also, you'll set up the default character-set to utf8mb4.
[mysqld]
innodb-file-format=barracuda
innodb-file-per-table=1
innodb-large-prefix=1
character-set-client-handshake = FALSE
character-set-server = utf8mb4
collation-server = utf8mb4_unicode_ci
Save and exit the file when finished.
Next, open another MariaDB config file '/etc/my.cnf.d/mysql-clients.cnf' using the below nano editor command.
sudo nano /etc/my.cnf.d/mysql-clients.cnf
Add the following line to the '[mysql]' section. This will always set the character-set for the client to utf8mb4.
[mysql]
default-character-set = utf8mb4
Save the file and exit the editor.
Now run the below systemctl command to restart the MariaDB service and apply the changes.
sudo systemctl restart mariadb
Run the below command 'mariadb-secure-installation' to secure your MariaDB deployment. You'll then be asked for the configuration of the MariaDB root password, so be sure to input and repeat the new password. For the rest configurations, input Y to confirm and press ENTER.
sudo mariadb-secure-installation
With this, you've now finished the MariaDB Server installation and configuration. In the next step, you will install Redis, Nginx, and Supervisor on your Rocky Linux machine.
Installing Dependencies from Rocky Linux Repository
In this step, you'll some dependencies for the ERPNxt installation, this included the installation of Redis which will be used as session management, Nginx as the web server, Supervisor as the process management, and the Fail2ban which protects your ERPNext against brute-force attacks.
Most of the packages that you will be installing here are available by default on the Rocky Linux AppStream repository. But also you must ensure that the third-party repository such as EPEL is available on your system.
Run the below dnf command to install Redis, Nginx, Supervisor, and Fail2ban to your Rocky Linux system.
sudo dnf install redis nginx supervisor fail2ban
When prompted for confirmation, input Y and press ENTER to proceed.
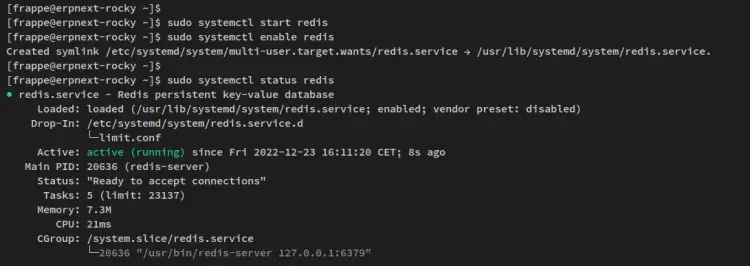
Now after the package installation is finished, run the below systemctl commands to start and enable services. Then verify each service to ensure that it's running.
Start and enable the Redis service, then verify Redis to ensure it's running.
sudo systemctl start redis
sudo systemctl enable redis

sudo systemctl status redis
You'll receive an output similar to this.
Next, start and enabled the Nginx service, then verify Nginx to ensure that the service is running.
sudo systemctl start nginx
sudo systemctl enable nginx

sudo systemctl status nginx
You'll receive the output something like this.
After that, start the Supervisor service and enable it. Then, verify the Supervisor service to ensure that it's running.
sudo systemctl start supervisord
sudo systemctl enable supervisord

sudo systemctl status supervisord
Below is the output you should get on your terminal screen.
And lastly, for the Fail2ban service, start and enable it via the systemctl command utility below. Then, verify the Fail2ban service to ensure that the service is running.
sudo systemctl start fail2ban
sudo systemctl enable fail2ban

sudo systemctl status fail2ban
You should now see the Fail2ban service status is running.
Now after completing this section, and verified that Redis, Nginx, Supervisor, and Fail2ban services is running. Move to the next section for installing the Node.js and Yarn package manager.
Installing Nodejs 16 and Yarn
The latest version of ERPNext is v14, which is required at least the Node.js 16 and Yarn package manager. In this step, you'll set up the Nodesource repository for Node.js v16 and add the Yarn repository for RHEL distribution. Then, you'll install both Node.js and yarn via DNF.
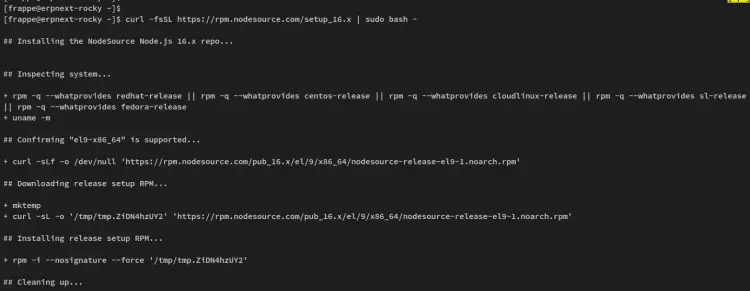
First, run the below command to add the Nodesource repository for the Node.js v16 for the RHEL distributions.
curl -fsSL https://rpm.nodesource.com/setup_16.x | sudo bash -
You should receive the output something like this - The script will automatically detect the version of the current RHEL distribution and add the Nodesource repository.
For the Yarn repository, run the below command to download the repository and add it to your system.
curl -sL https://dl.yarnpkg.com/rpm/yarn.repo | sudo tee /etc/yum.repos.d/yarn.repo
Below is the output you should receive on your terminal.
Now that both Nodesource and Yarn repository is added to your Rocky Linux system, it's time to install the Node.js and Yarn package manager via DNF.
Run the below dnf command to install Node.js and Yarn to your system. Input y when prompted for the confirmation and press ENTER to proceed.
sudo dnf install gcc-c++ make nodejs yarn
The Node.js and Yarn installation should begin.
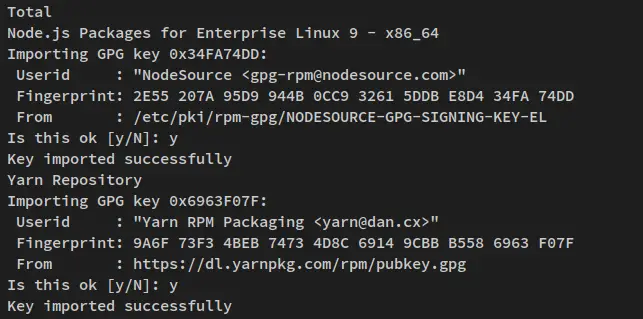
Also, when prompted about the GPG key for both repositories, input y and press ENTER to add the GPG key to your system.
Now that the Node.js and Yarn package manager is installed, you'll next install the Wkhtmltopdf package via RPM file.
Installing Wkhtmltopdf
In this step, you'll install the Wkhtmltopdf package that will be used by ERPNext to generate PDF reports. The Wkhtmltopdf can download and installed manually via .deb file or .rpm file.
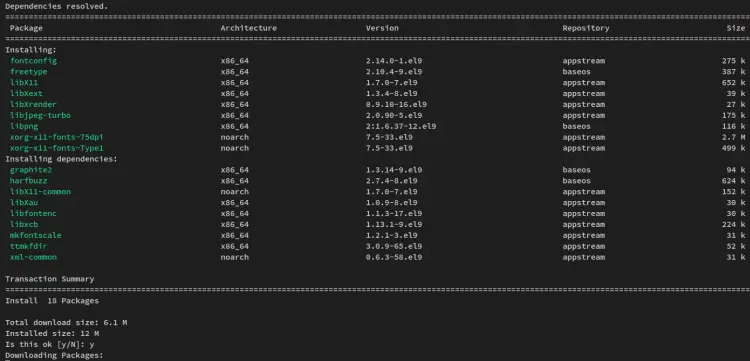
First, run the below dnf command to install dependencies for the Wkhtmltopdf package.
sudo dnf install fontconfig freetype libX11 libXext libXrender libjpeg libpng xorg-x11-fonts-75dpi xorg-x11-fonts-Type1
Input y when prompted and press ENTER to proceed.
Next, run the below rpm command to download and install the Wkhtmltopdf package to your Rocky Linux system.
sudo rpm -Uvh https://github.com/wkhtmltopdf/packaging/releases/download/0.12.6.1-2/wkhtmltox-0.12.6.1-2.almalinux9.x86_64.rpm
After the Wkhtmltopdf is installed, run the below commands to verify the installation.
The Wkhtmltopdf package provides two command line tools, the wkhtmltopdf command is used to convert an HTML page to PDF, while the wkhtmltoimage converts the HTML page to various image formats.
which wkhtmltopdf
which wkhtmltoimage
wkhtmltopdf --version
wkhtmltoimage --version
You'll receive the output similar to this - The Wkhtmltopdf package v0.12 is installed on your Rocky Linux system.
At this point, you've finished the installation of package dependencies for ERPNext and frappeframework. This included the Python3.10, Redis, Nginx, Supervisor, Fail2ban, MariaDB Server, and the Wkhtmltopdf packages.
In the next section, you'll start the ERPNext installation. But first, you'll install and set up the frappeframework.
Installing Frappeframework via the bench
ERPNext is an open-source ERP software that was created with frappeframework, which is written in Python and JavaScript. The ERPNext will be running within the frappeframework, so you must install the frappeframework on your system, then you can install the ERPNext.
So first, you must install the bench. Then, install the frappeframework via the bench. Lastly, you will install the ERPNext application within the frappeframework.
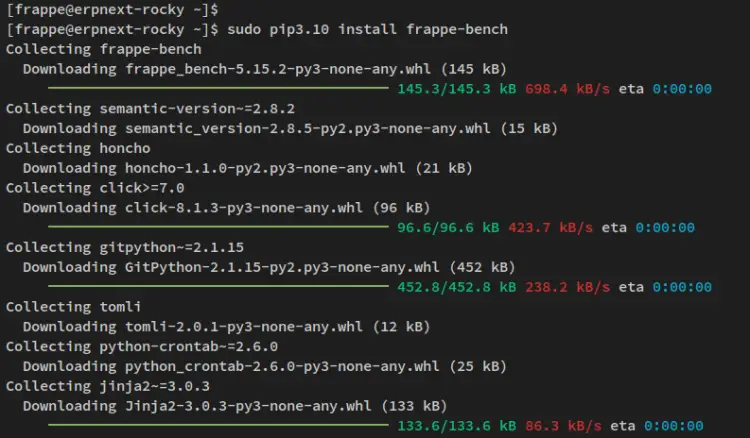
Run the below pip3.10 command to install 'bench' from the PyPI repository.
sudo pip3.10 install frappe-bench
You'll receive an output similar to this during the bench installation.
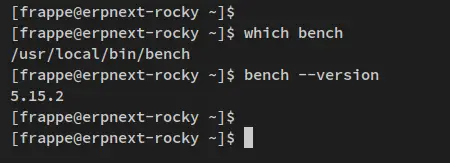
After the bench is installed, run the below command to verify it.
which bench
bench --version
You'll receive the binary path 'bench' command and the current version of the bench you've installed.
With the bench installed, you will then install the frappe framework via the bench command.
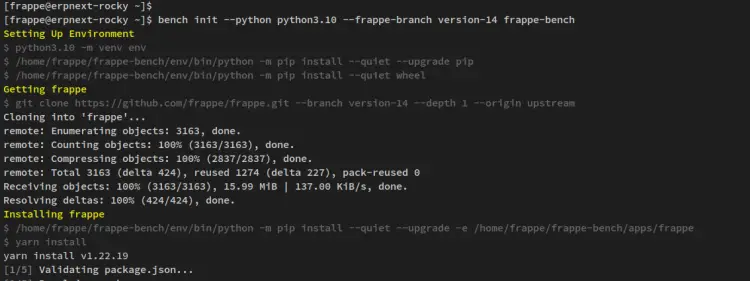
Run the below 'bench' command to install the frappe framework on your current working directory. Also, you'll specify the Python version that will be used to Python 3.10, specify the frappe framework version to v14. The target installation directory is 'frappe-bench'.
bench init --python python3.10 --frappe-branch version-14 frappe-bench
You'll receive an output similar to this during the frappeframework installation.
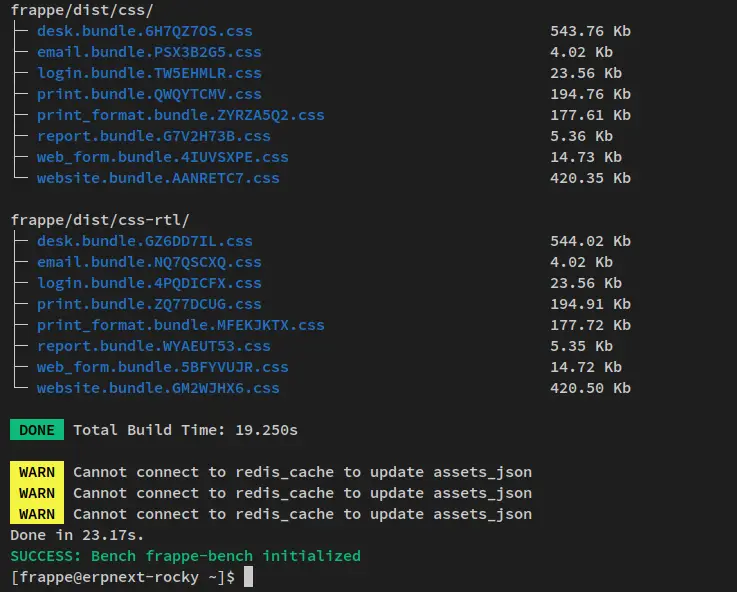
After the frappe framework installation is finished, you should receive the following output.
Lastly, run the below command to allow other users to read and execute to the frappe framework installation directory '/home/frappe/frappe-bench'. This is needed so the Nginx web server can read and execute the flap framework.
sudo chmod -R o+rx /home/frappe/frappe-bench
or
sudo chmod -R o+rx /home/frappe
With the frappe framework installed, you'll be ready to install and set up the ERPNext.
Setup New Application in Frappe
Before installing ERPNext, you must create a new site/project on the frappe framework. In this step, you'll create a new site/project and switch the environment into the new project via the bench.
First, move your working directory to 'frappe-bench' via the cd command.
cd ~/frappe-bench
Run the bench command below to create a new site/project for the ERPNext. In this example, you'll create a new site 'erp.howtoforge.local', which is the target domain name of the ERPNext installation. Also, during the setup process, you'll be asked to configure the Administrator password for your project, so input your password and repeat. This password will be used to log in to your ERPNext application.
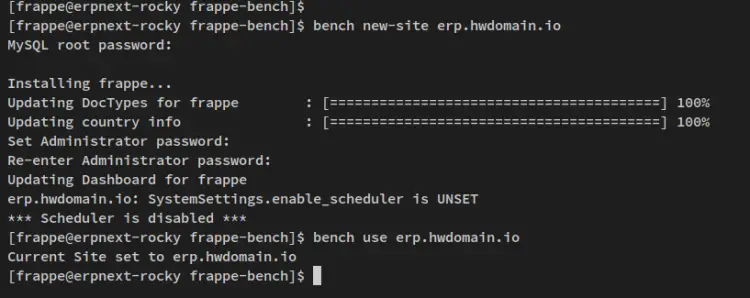
bench new-site erp.howtoforge.local
Lastly, run the below command to switch to the new site/project 'erp.howtoforge.local'.
bench use erp.howtoforge.local
Below is the output during the site/project creation and after you switched to the new site/project.
Installing ERPNext via bench
In this step, you'll start the installation of ERPNext inside the frappe framework project you've created.
First, run the below command to download the apps 'payments' and the 'erpnext'. In this example, you'll download the ERPNexxt v14.
bench get-app payments
bench get-app --branch version-14 erpnext
Below is a similar output you'll receive during the 'payments' download process.
And below is the download process of the ERPNext application.
Next, run the below command to install the ERPNext application to the site/project 'erp.howtoforge.local'.
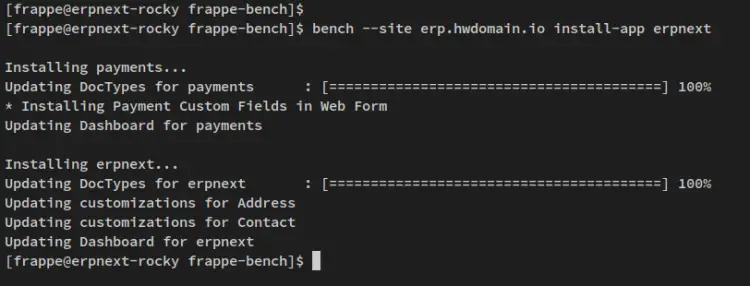
bench --site erp.howtoforge.local install-app erpnext
You'll receive an output similar to this - Also you should see the application 'payments' is automatically installed as the dependency for the ERPNext application.
Lastly, run the bench command below to enable the scheduler and disable the maintenance mode on the ERPNext site/project 'erp.howtoforge.local'.
bench --site erp.howtoforge.local enable-scheduler
bench --site erp.howtoforge.local set-maintenance-mode off
At this point, the ERPNext installation is finished. In the next steps, you will set up the Nginx web server and Supervisor for the ERPNext deployment in production, which can be configured via bench command.
Setting up Deployment for ERPNext
First, run the below command to start configuring frappe framework and ERPNext for the production environment. This will install Ansible and set up the ERPNext deployment automatically via Ansible.
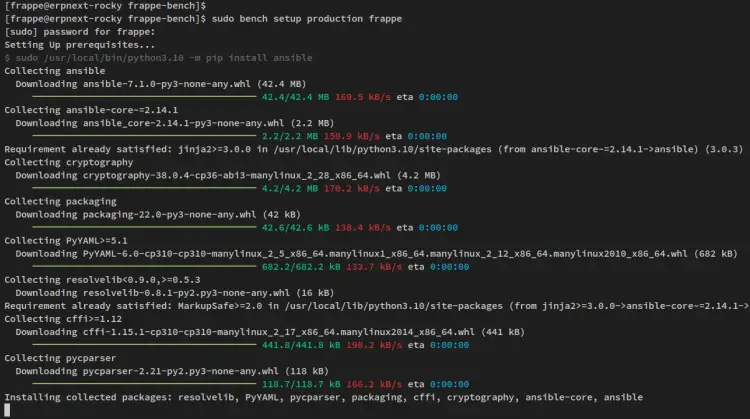
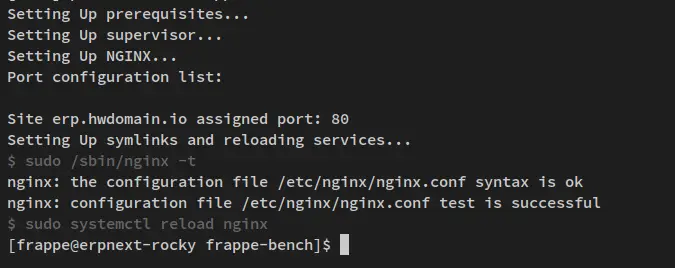
sudo bench setup production frappe
Below is the output during the Ansible installation.
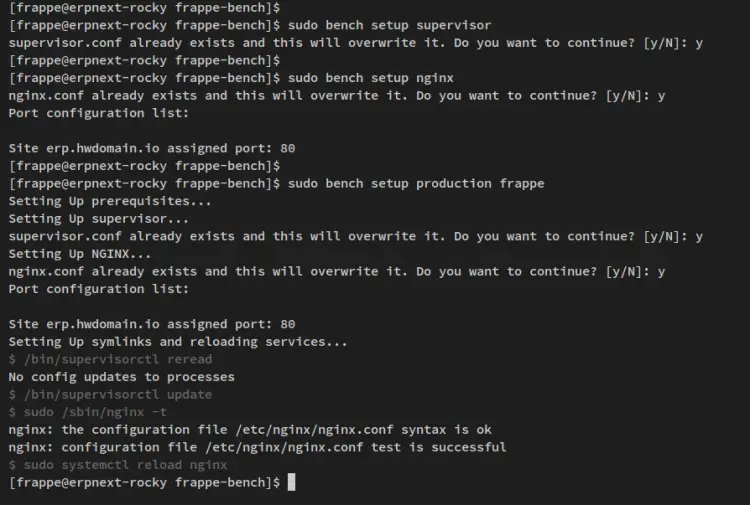
Below is the output when the configuration is finished.
Next, run the below bench command to set up Nginx and Supervisor for the ERPNext. When asked to overwrite the current settings, input y to confirm and press ENTER.
sudo bench setup supervisor
sudo bench setup nginx
After that, run the bench command below again to ensure that the configurations of Supervisor and Nginx are installed.
sudo bench setup production frappe
Input y to overwrite the current settings and press ENTR to proceed.
Next, open the Supervisor configuration '/etc/supervisor.conf' via the following nano editor command.
sudo nano /etc/supervisor.conf
Ensure you have the following line in the '[include]' section. If not, you can change the format to '*.conf' as below.
[include]
file = /etc/supervisord.d/*.conf
Save and exit the file when finished.
Now run the below systemctl command utility to restart the Supervisor service and apply the changes.
sudo systemctl restart supervisord
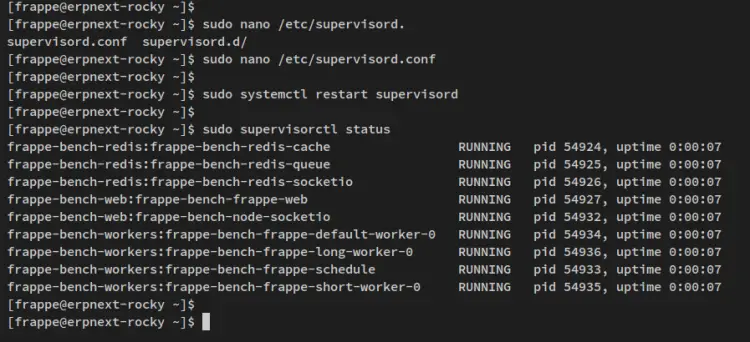
Lastly, run the below 'supervisorctl' command with sudo privileges. This will verify all processes and services that is used by frappe framework and ERPNext.
sudo supervisorctl status
If your ERPNext installation was successful, you should receive the output similar to the following - All services for ERPNext are running.
At this point, you have the ERPNext installation finished and it's running with Nginx as the web server and Supervisor for the process manager. You can now access your ERPNext installation via your domain name and the web browser.
Configuring ERPNext
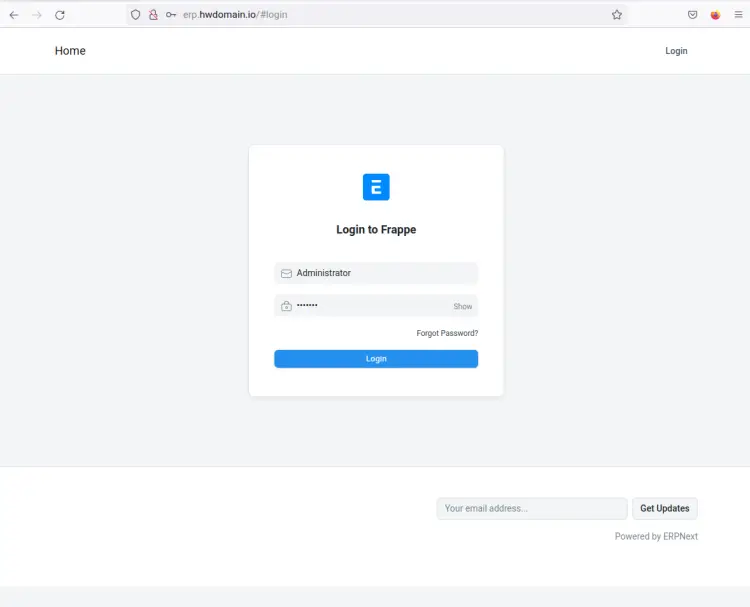
Open up your web browser and visit the domain name of your ERPNext installation (i.e: http://erp.howtoforge.local/). You'll then see the frappe framework login page.
Input the default user 'Administrator' and input the password you've used during site/project creation.
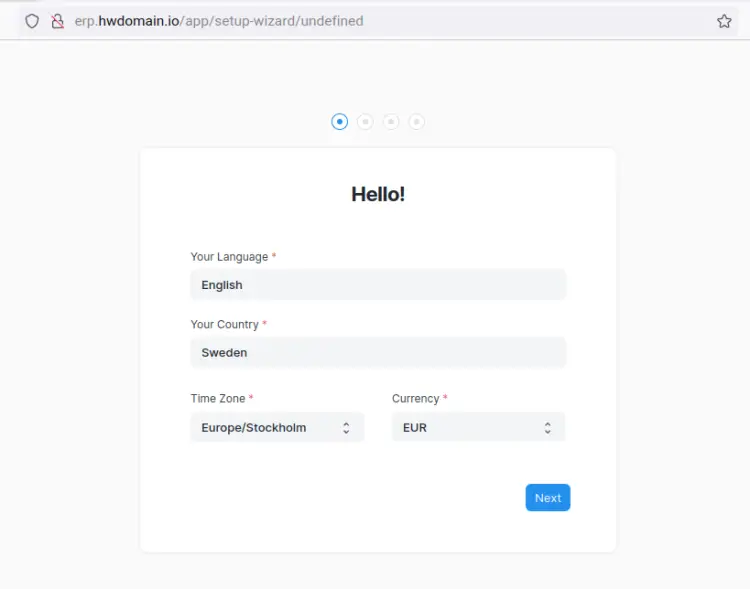
Now select the default language, timezone, and currency. Then click Next.
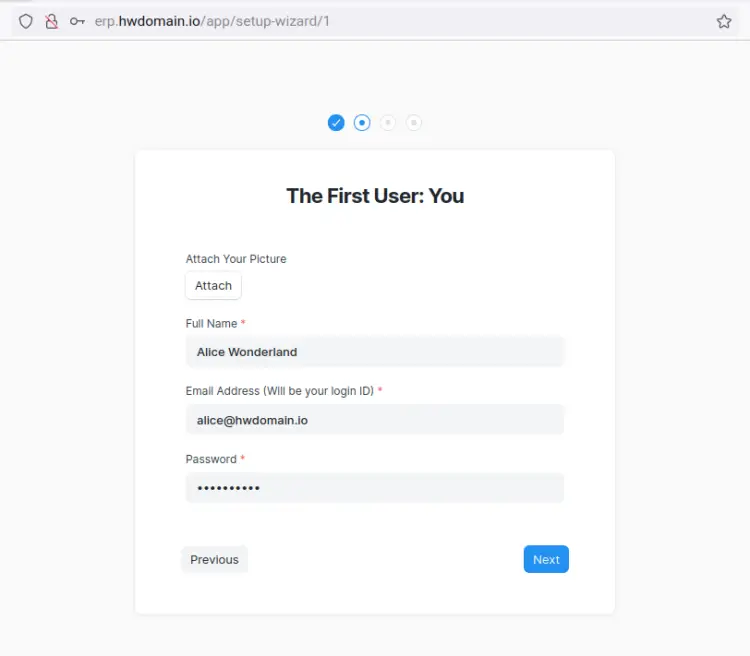
Input the new admin user for your ERPNext installation. Input your full name, email address, and password, then click Next.
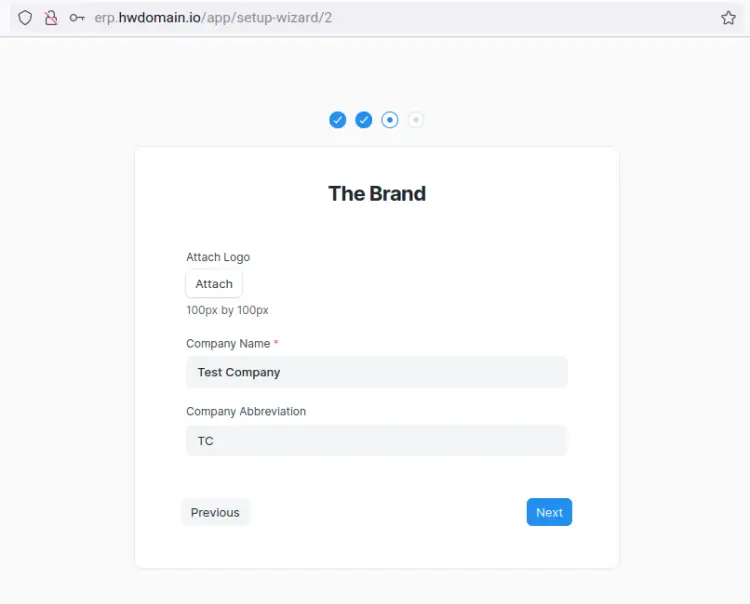
Input the company name and upload your company logo, then click Next.
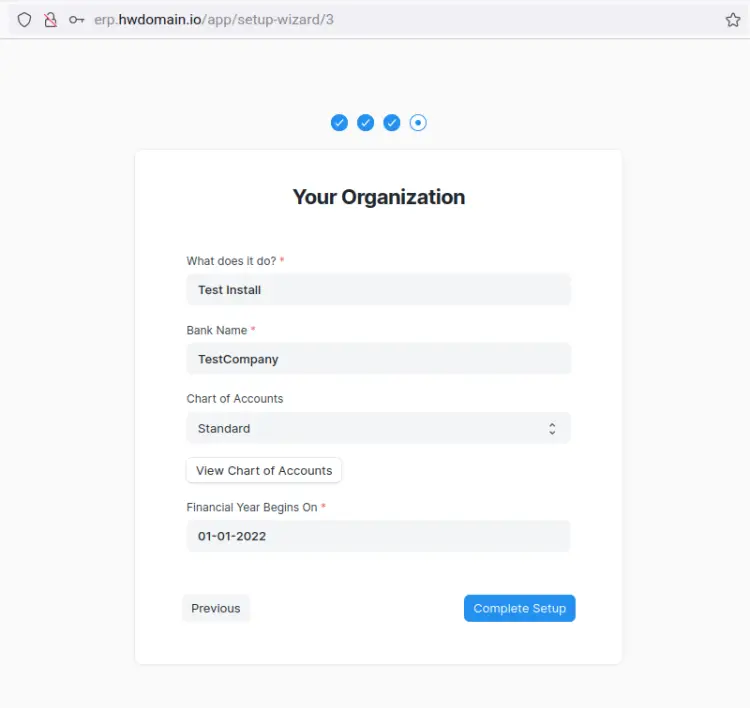
Input details about your organization and click Complete Setup.
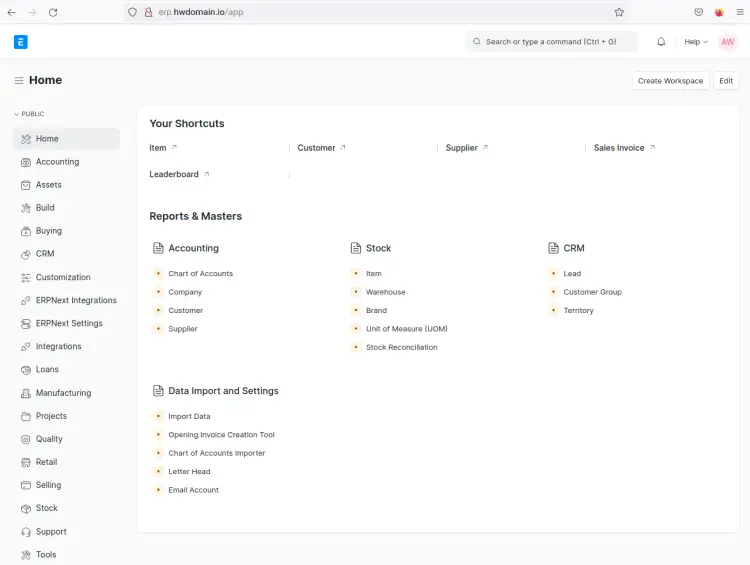
You should now see the administration dashboard of your ERPNext installation.
Securing with SSL/TLS Certificates via Certbot and Letsencrypt
In this final step, you will secure ERPNext with SSL/TLS certificates via the Certbot tool and Letsencrypt. Before you start, ensure that your domain name is pointed to your server IP address, and ensure that you have a valid email address that will be used to register to Letsencrypt.
Install the Certbot tool and the Certbot Nginx plugin via the dnf command below. When prompted, input y to confirm and press ENTER to proceed.
sudo dnf install certbot python3-certbot-nginx
After certbot is installed, run the below certbot command to generate SSL certificates for your ERPNext domain name. Be sure to change the domain name and the email address in the below command.
sudo certbot --nginx --agree-tos --no-eff-email --redirect --hsts --staple-ocsp --email [email protected] -d erp.howtoforge.local
With this, the ERPNext installation is now secured with SSL/TLS certificates via Certbot and Letsencrypt. You've also configured the auto-redirect HTTP to HTTPS on your ERPNext domain name, which Certbot automatically handles.
Conclusion
In this tutorial, you have learned how to install ERPNext an open-source ERP software, on a Rocky Linux 9 server. You've also learned the installation of some dependencies such as Python 3.10, which is installed manually by compiling the source code and installing it. Other dependencies that you've also installed are MariaDB Server, Nginx, Supervisor, Redis, and Fail2ban.
You've also learned how to install the frappe framework and installed the ERPNext on top of it. Then, you've learned the basic configuration of ERPNext as the ERP software.
Lastly, you've also deployed the ERPNext for production by configuring Nginx as the web server and Supervisor as the process manager. You've also secured ERPNext deployment via Certbot and Letsencrypt.

