How to Install Craft CMS on Rocky Linux 9
On this page
- Prerequisites
- Step 1 - Configure Firewall
- Step 2 - Install Nginx
- Step 3 - Install PHP and extensions
- Step 4 - Configure PHP-FPM
- Step 5 - Install Composer
- Step 6 - Install and Configure PostgreSQL
- Step 7 - Install and Configure Redis
- Step 8 - Install Craft CMS
- Step 9 - Install SSL
- Step 10 - Configure SELinux
- Step 11 - Configure Nginx
- Step 12 - Access Craft CMS
- Step 13 - Backup and Restore Craft CMS
- Step 14 - Update Craft CMS
- Conclusion
Craft CMS is an open-source content management system for creating websites. It is a secure and scalable CMS with an extensive plugin ecosystem and high-quality free and paid plugins. It has an intuitive, user-friendly control panel for content creation and administrative tasks. It is built on the Yii PHP framework. The Twig template engine powers its templating system. It can work with both MySQL and PostgreSQL databases for storage and uses the Redis database for caching and session storage.
In this tutorial, you will learn how to install Craft CMS on a Debian 12 server. You will also learn how to enable Redis to work with it and how to backup and restore a site made using Craft CMS.
Prerequisites
-
A server running Rocky Linux 9 with a minimum of 1 GB of RAM.
-
A non-root user with sudo privileges.
-
A Fully Qualified Domain Name (FQDN) like
craftcms.example.compointing to your server. -
An SMTP account with an email service like Amazon SES or Mailgun.
-
Everything is updated.
$ sudo dnf update
-
A few essential packages are required for the tutorial and Craft CMS to run. Some of these will already be on your server.
$ sudo dnf install wget curl nano unzip yum-utils policycoreutils-python-utils -y
Step 1 - Configure Firewall
The first step is to configure the firewall. Rocky Linux uses Firewalld Firewall. Check the firewall's status.
$ sudo firewall-cmd --state
running
The firewall works with different zones, and the public zone is the default one that we will use. List all the services and ports active on the firewall.
$ sudo firewall-cmd --permanent --list-services
It should show the following output.
cockpit dhcpv6-client ssh
Allow HTTP and HTTPS ports.
$ sudo firewall-cmd --permanent --add-service=http
$ sudo firewall-cmd --permanent --add-service=https
Recheck the status of the firewall.
$ sudo firewall-cmd --permanent --list-services
You should see a similar output.
cockpit dhcpv6-client http https ssh
Reload the firewall to enable the changes.
$ sudo firewall-cmd --reload
Step 2 - Install Nginx
Rocky Linux 9 ships with an older version of Nginx. You need to use the official Nginx repository to install the latest version.
Create and open the file /etc/yum.repos.d/nginx.repo for editing.
$ sudo nano /etc/yum.repos.d/nginx.repo
Paste the following code in it.
[nginx-stable]
name=nginx stable repo
baseurl=http://nginx.org/packages/centos/$releasever/$basearch/
gpgcheck=1
enabled=1
gpgkey=https://nginx.org/keys/nginx_signing.key
module_hotfixes=true

[nginx-mainline]
name=nginx mainline repo
baseurl=http://nginx.org/packages/mainline/centos/$releasever/$basearch/
gpgcheck=1
enabled=0
gpgkey=https://nginx.org/keys/nginx_signing.key
module_hotfixes=true
Once you are finished, save the file by pressing Ctrl + X and entering Y when prompted.
Install Nginx.
$ sudo dnf install nginx -y
Verify the installation.
$ nginx -v
nginx version: nginx/1.24.0
Enable and start the Nginx server service.
$ sudo systemctl enable nginx --now
Check the service status.
$ sudo systemctl status nginx
? nginx.service - nginx - high performance web server
     Loaded: loaded (/usr/lib/systemd/system/nginx.service; enabled; preset: disabled)
     Active: active (running) since Mon 2023-12-04 14:01:19 UTC; 3s ago
       Docs: http://nginx.org/en/docs/
    Process: 59396 ExecStart=/usr/sbin/nginx -c /etc/nginx/nginx.conf (code=exited, status=0/SUCCESS)
   Main PID: 59397 (nginx)
      Tasks: 2 (limit: 10866)
     Memory: 1.9M
        CPU: 10ms
     CGroup: /system.slice/nginx.service
             ??59397 "nginx: master process /usr/sbin/nginx -c /etc/nginx/nginx.conf"
             ??59398 "nginx: worker process"
Step 3 - Install PHP and extensions
Rocky Linux 9 ships with PHP 8.1 by default. To always stay on the latest version of PHP or if you want to install multiple versions of PHP, we need to use the REMI repository.
The first step is to grab the Epel repository.
$ sudo dnf install epel-release -y
Next, install the Remi repository.
$ sudo dnf install https://rpms.remirepo.net/enterprise/remi-release-9.rpm
Check for available PHP streams.
$ dnf module list php -y
Name    Stream              Profiles                                      Summary
php     8.1                 common [d], devel, minimal                    PHP scripting language

Remi's Modular repository for Enterprise Linux 9 - x86_64
Name    Stream              Profiles                                      Summary
php     remi-7.4            common [d], devel, minimal                    PHP scripting language
php     remi-8.0            common [d], devel, minimal                    PHP scripting language
php     remi-8.1            common [d], devel, minimal                    PHP scripting language
php     remi-8.2            common [d], devel, minimal                    PHP scripting language
php     remi-8.3            common [d], devel, minimal                    PHP scripting language

Hint: [d]efault, [e]nabled, [x]disabled, [i]nstalled
The default version is 8.1. At the time of writing this tutorial, Craft CMS is compatible with PHP 8.2. Therefore, enable Remi's PHP 8.2 repository.
$ sudo dnf module reset php -y
$ sudo dnf module enable php:remi-8.2
Install PHP and its extensions required by Craft CMS.
$ sudo dnf install php php-cli php-common php-json php-gmp php-fpm php-xmlrpc php-bcmath php-imagick php-curl php-zip php-gd php-mysql php-xml php-mbstring php-xmlrpc php-intl php-pgsql
Check the version of PHP installed.
$ php --version
PHP 8.2.13 (cli) (built: Nov 21 2023 09:55:59) (NTS gcc x86_64)
Copyright (c) The PHP Group
Zend Engine v4.2.13, Copyright (c) Zend Technologies
    with Zend OPcache v8.2.13, Copyright (c), by Zend Technologies
Enable and start the PHP-FPM service.
$ sudo systemctl enable php-fpm --now
Check the status of the PHP service.
$ sudo systemctl status php-fpm
? php-fpm.service - The PHP FastCGI Process Manager
     Loaded: loaded (/usr/lib/systemd/system/php-fpm.service; enabled; preset: disabled)
     Active: active (running) since Mon 2023-12-04 14:05:58 UTC; 6s ago
   Main PID: 61410 (php-fpm)
     Status: "Ready to handle connections"
      Tasks: 6 (limit: 10866)
     Memory: 16.6M
        CPU: 96ms
     CGroup: /system.slice/php-fpm.service
             ??61410 "php-fpm: master process (/etc/php-fpm.conf)"
             ??61411 "php-fpm: pool www"
             ??61412 "php-fpm: pool www"
             ??61413 "php-fpm: pool www"
             ??61414 "php-fpm: pool www"
             ??61415 "php-fpm: pool www"
Step 4 - Configure PHP-FPM
Open php.ini for editing.
$ sudo nano /etc/php.ini
To set file upload sizes, change the values of the upload_max_filesize and post_max_size variables. This value decides the file size you can upload to Craft CMS. For our purposes, we are setting it at 128 MB. You can set it to your liking.
$ sudo sed -i 's/upload_max_filesize = 2M/upload_max_filesize = 128M/' /etc/php.ini
$ sudo sed -i 's/post_max_size = 8M/post_max_size = 128M/' /etc/php.ini
Configure PHP's memory limit depending on your server resources and requirements.
$ sudo sed -i 's/memory_limit = 128M/memory_limit = 256M/' /etc/php.ini
Open the file /etc/php-fpm.d/www.conf.
$ sudo nano /etc/php-fpm.d/www.conf
We need to set the Unix user/group of PHP processes to nginx. Find the user=www-data and group=www-data lines in the file and change them to nginx.
...
; Unix user/group of processes
; Note: The user is mandatory. If the group is not set, the default user's group
;       will be used.
; RPM: apache user chosen to provide access to the same directories as httpd
user = nginx
; RPM: Keep a group allowed to write in log dir.
group = nginx
...
Find the listen.owner = nobody, listen.group = nobody, listen.mode = 0660 lines in the file and change them as follows after uncommenting them.
; Set permissions for unix socket, if one is used. In Linux, read/write
; permissions must be set in order to allow connections from a web server. Many
; BSD-derived systems allow connections regardless of permissions. The owner
; and group can be specified either by name or by their numeric IDs.
; Default Values: user and group are set as the running user
;                 mode is set to 0660
listen.owner = nginx
listen.group = nginx
listen.mode = 0660
Save the file by pressing Ctrl + X and entering Y when prompted.
Restart the PHP-fpm process. Make sure you have Nginx installed before restarting the PHP service otherwise, it will fail since it won't be able to find the nginx group.
$ sudo systemctl restart php-fpm
Change the group of the PHP sessions directory to Nginx.
$ sudo chgrp -R nginx /var/lib/php/session
Step 5 - Install Composer
Composer acts as a dependency manager for PHP. It is also the dependency manager of the Laravel PHP framework, which is what powers Craft CMS.
Download the Composer installation script.
$ php -r "copy('https://getcomposer.org/installer', 'composer-setup.php');"
Verify the downloaded installer.
$ php -r "if (hash_file('sha384', 'composer-setup.php') === 'e21205b207c3ff031906575712edab6f13eb0b361f2085f1f1237b7126d785e826a450292b6cfd1d64d92e6563bbde02') { echo 'Installer verified'; } else { echo 'Installer corrupt'; unlink('composer-setup.php'); } echo PHP_EOL;"
You will receive the following output.
Installer verified
Run the installation script to download the latest version of Composer.
$ php composer-setup.php
Remove the installation script.
$ php -r "unlink('composer-setup.php');"
Move the downloaded binary file to the /usr/local/bin directory.
$ sudo mv composer.phar /usr/local/bin/composer
Confirm the installation.
$ composer --version
Composer version 2.6.5 2023-10-06 10:11:52
Step 6 - Install and Configure PostgreSQL
Rocky Linux 9 ships with PostgreSQL 13 by default. We will be using PostgreSQL 16 instead from its official repository.
Install the PostgreSQL RPM repository.
$ sudo dnf install -y https://download.postgresql.org/pub/repos/yum/reporpms/EL-9-x86_64/pgdg-redhat-repo-latest.noarch.rpm
Disable the built-in PostgreSQL module.
$ sudo dnf -qy module disable postgresql
Now, you can install PostgreSQL using the command below.
$ sudo dnf install -y postgresql16-server postgresql16-contrib
The postgresql-contrib package contains some extra utilities.
Verify the version.
$ psql --version
psql (PostgreSQL) 16.1
Initialize the PostgreSQL database.
$ sudo /usr/pgsql-16/bin/postgresql-16-setup initdb
Initializing database ... OK
Enable the PostgreSQL service.
$ sudo systemctl enable postgresql-16
Start the PostgreSQL service.
$ sudo systemctl start postgresql-16
Check the status of the PostgreSQL service.
$ sudo systemctl status postgresql-16
? postgresql-16.service - PostgreSQL 16 database server
     Loaded: loaded (/usr/lib/systemd/system/postgresql-16.service; enabled; preset: disabled)
     Active: active (running) since Mon 2023-12-04 22:28:34 UTC; 2s ago
       Docs: https://www.postgresql.org/docs/16/static/
    Process: 72143 ExecStartPre=/usr/pgsql-16/bin/postgresql-16-check-db-dir ${PGDATA} (code=exited, status=0/SUCCESS)
   Main PID: 72148 (postgres)
      Tasks: 7 (limit: 10866)
     Memory: 17.4M
        CPU: 45ms
     CGroup: /system.slice/postgresql-16.service
             ??72148 /usr/pgsql-16/bin/postgres -D /var/lib/pgsql/16/data/
             ??72149 "postgres: logger "
             ??72150 "postgres: checkpointer "
             ??72151 "postgres: background writer "
             ??72153 "postgres: walwriter "
             ??72154 "postgres: autovacuum launcher "
             ??72155 "postgres: logical replication launcher "

Dec 04 22:28:33 craftcms.nspeaks.com systemd[1]: Starting PostgreSQL 16 database server...
Dec 04 22:28:33 craftcms.nspeaks.com postgres[72148]: 2023-12-04 22:28:33.999 UTC [72148] LOG:  redirecting log output to logging collector process
Dec 04 22:28:33 craftcms.nspeaks.com postgres[72148]: 2023-12-04 22:28:33.999 UTC [72148] HINT:  Future log output will appear in directory "log".
Dec 04 22:28:34 craftcms.nspeaks.com systemd[1]: Started PostgreSQL 16 database server.
You can see that the service is enabled and running by default.
Launch the PostgreSQL shell.
$ sudo -i -u postgres psql
Create the Craft CMS database.
postgres=# CREATE DATABASE craftcms;
Create the Craft CMS user and choose a strong password.
postgres-# CREATE USER craftuser WITH PASSWORD 'Your_Password';
Change the database owner to the Craft CMS user.
postgres-# ALTER DATABASE craftcms OWNER TO craftuser;
Grant all privileges on the database to the Craft CMS user.
postgres-# GRANT ALL PRIVILEGES ON DATABASE craftcms TO craftuser;
Exit the shell.
postgres-# \q
Verify that your credentials work.
$ psql --username craftuser --password --host localhost craftcms
Password:
psql (16.1)
Type "help" for help.

craftcms=>
Exit the shell by typing \q.
Step 7 - Install and Configure Redis
Rocky Linux 9 ships with Redis 6.2 by default. We will however be using Redis 7.0 which we will install using the Remi Repository.
Since we have installed the Remi repository while installing PHP, we can skip that part. List all the available Redis modules.
$ sudo dnf module list redis
Rocky Linux 9 - AppStream
Name                                       Stream             Profiles                       Summary
redis                                      7                  common [d]                     Redis persistent key-value database

Remi's Modular repository for Enterprise Linux 9 - x86_64
Name                                       Stream             Profiles                       Summary
redis                                      remi-5.0           common [d]                     Redis persistent key-value database
redis                                      remi-6.0           common [d]                     Redis persistent key-value database
redis                                      remi-6.2           common [d]                     Redis persistent key-value database
redis                                      remi-7.0           common [d]                     Redis persistent key-value database
redis                                      remi-7.2           common [d]                     Redis persistent key-value database

Hint: [d]efault, [e]nabled, [x]disabled, [i]nstalled
Enable the latest Redis 7.2 module.
$ sudo dnf module enable -y redis:remi-7.2
Install Redis.
$ sudo dnf install redis
Verify the version.
$ redis-server --version
Redis server v=7.2.3 sha=00000000:0 malloc=jemalloc-5.3.0 bits=64 build=7bd3173e4e30c3e4
Enable the Redis service.
$ sudo systemctl enable redis
Start the Redis service.
$ sudo systemctl start redis
Check the status of the service.
$ sudo systemctl status redis
? redis.service - Redis persistent key-value database
     Loaded: loaded (/usr/lib/systemd/system/redis.service; enabled; preset: disabled)
    Drop-In: /etc/systemd/system/redis.service.d
             ??limit.conf
     Active: active (running) since Mon 2023-12-04 22:36:25 UTC; 1min 32s ago
   Main PID: 72877 (redis-server)
     Status: "Ready to accept connections"
      Tasks: 5 (limit: 10866)
     Memory: 7.5M
        CPU: 176ms
     CGroup: /system.slice/redis.service
             ??72877 "/usr/bin/redis-server 127.0.0.1:6379"

Dec 04 22:36:25 craftcms.nspeaks.com systemd[1]: Starting Redis persistent key-value database...
Dec 04 22:36:25 craftcms.nspeaks.com systemd[1]: Started Redis persistent key-value database.
The next step is to add authentication to the Redis server. Since Redis v6.0, the best way to add authentication is to use ACL (Access Control Lists). Open the /etc/redis/redis.conf file for editing.
$ sudo nano /etc/redis/redis.conf
Find the line # aclfile /etc/redis/users.acl entry and uncomment it by removing the hash (#) in front of it.
aclfile /etc/redis/users.acl
Save the file by pressing Ctrl + X and entering Y when prompted.
Next, create and open the /etc/redis/users.acl file for editing.
$ sudo nano /etc/redis/users.acl
Add the following line to it.
user navjot on +@all ~* >yourpassword
Save the file by pressing Ctrl + X and entering Y when prompted.
Restart the Redis server to implement the change.
$ sudo systemctl restart redis
Open the Redis shell.
$ redis-cli
Use the PING command. It will give an authentication error.
127.0.0.1:6379> PING
(error) NOAUTH Authentication required.
Use the AUTH command to log in.
127.0.0.1:6379> AUTH navjot yourpassword
OK
Use the PING command again.
127.0.0.1:6379> PING
OK
Exit the shell.
127.0.0.1:6379> exit
You will also need to install the PHP Redis extension.
$ sudo apt install php-redis
Step 8 - Install Craft CMS
Before installing Craft CMS, you can check if you meet all the server requirements for running it using the following command.
$ curl -Lsf https://raw.githubusercontent.com/craftcms/server-check/HEAD/check.sh | bash
You will get the following output.
Running Craft Server Check…

Craft CMS Requirement Checker

This script checks if your web server configuration meets the requirements for running a Craft CMS installation.
It checks if the server is running the right version of PHP, if appropriate PHP extensions have been loaded,
and if php.ini file settings are correct.


Results:
--------

PHP 8.2+: OK

BCMath extension: OK

ctype extension: OK

cURL extension: OK

DOM extension: OK

Fileinfo extension: OK

GD extension or ImageMagick extension: OK

iconv extension: OK

Intl extension: OK

JSON extension: OK

Multibyte String extension (with Function Overloading disabled): OK

OPcache extension (with save_comments): OK

OpenSSL extension: OK

PCRE extension (with UTF-8 support): OK

PDO extension: OK

Reflection extension: OK

SPL extension: OK

Zip extension: OK

ignore_user_abort(): OK

password_hash(): OK

proc_close(): OK

proc_get_status(): OK

proc_open(): OK

proc_terminate(): OK

allow_url_fopen: OK

ini_set calls: OK

Memory Limit: OK

------------------------------------------
Errors: 0   Warnings: 0   Total checks: 27
Once everything is okay, you can proceed. Create the web root directory.
$ sudo mkdir /var/www/html/craftcms -p
Set the currently logged-in user as the owner of this directory.
$ sudo chown -R $USER:$USER /var/www/html/craftcms
Switch to the directory.
$ cd /var/www/html/craftcms
Download and Install Craft CMS using Composer. The dot (.) at the end of the command means that the installation should be performed in the current directory.
$ composer create-project craftcms/craft .
During installation, you will be asked for several details regarding the database, and administrator account. site URL and its language as shown below.
> @php craft setup/welcome

   ______ .______          ___       _______ .___________.
  /      ||   _  \        /   \     |   ____||           |
 |  ,----'|  |_)  |      /  ^  \    |  |__   `---|  |----`
 |  |     |      /      /  /_\  \   |   __|      |  |
 |  `----.|  |\  \----./  _____  \  |  |         |  |
  \______|| _| `._____/__/     \__\ |__|         |__|

     A       N   E   W       I   N   S   T   A   L   L
               ______ .___  ___.      _______.
              /      ||   \/   |     /       |
             |  ,----'|  \  /  |    |   (----`
             |  |     |  |\/|  |     \   \
             |  `----.|  |  |  | .----)   |
              \______||__|  |__| |_______/


Generating an application ID ... done (CraftCMS--923f03f1-9bea-4c3d-a7ca-1466645ce75d)
Generating a security key ... done (iMdcUi6wQyf9MshEda__vZcCwILbclxz)


Welcome to Craft CMS!

Are you ready to begin the setup? (yes|no) [no]:yes
Which database driver are you using? (mysql or pgsql) [mysql] pgsql
Database server name or IP address: [127.0.0.1]
Database port: [5432]
Database username: [root] craftuser
Database password:
Database name: craftcms
Database table prefix:
Testing database credentials ... success!
Using default schema "public".
Saving database credentials to your .env file ... done

Install Craft now? (yes|no) [yes]:yes

Username: [admin] navjot
Email: [email protected]
Password:
Confirm:
Site name: Howtoforge Tutorials
Site URL: https://craftcms.example.com
Site language: [en-US]
*** installing Craft
Make Redis work with Craft CMS
Install the yiisoft/yii2-redis package.
$ composer require --prefer-dist yiisoft/yii2-redis:"~2.0.0"
Open the /var/www/html/craftcms/config/app.php file for editing.
$ nano config/app.php
You will see the following content in it.
use craft\helpers\App;

return [
    'id' => App::env('CRAFT_APP_ID') ?: 'CraftCMS',
];
Change it as follows.
use craft\helpers\App;

return [
    'id' => App::env('CRAFT_APP_ID') ?: 'CraftCMS',
    'components' => [
        'cache' => function() {
            $config = [
                'class' => yii\redis\Cache::class,
                'keyPrefix' => Craft::$app->id,
                'defaultDuration' => Craft::$app->config->general->cacheDuration,

                // Full Redis connection details:
                'redis' => [
                    'hostname' => App::env('REDIS_HOSTNAME') ?: 'localhost',
                    'port' => 6379,
                    'username' => App::env('REDIS_USERNAME') ?: null,
                    'password' => App::env('REDIS_PASSWORD') ?: null,
                ],
            ];

            return Craft::createObject($config);
        },
    ],
];
Save the file by pressing Ctrl + X and entering Y when prompted. This enables Redis as cache storage for Craft CMS. You can also use Redis for storing PHP session data, job queue, and as a mutex driver. You can find the configuration for it in Craft CMS's documentation.
You also need to add the Redis configuration to the .env file.
$ nano .env
Add the following code at the end of the file.
REDIS_HOSTNAME=localhost
REDIS_USERNAME=navjot
REDIS_PASSWORD=yourpassword
Choose the options as shown above. Once finished, change the group of the directory to nginx. This way both the currently logged-in user and Nginx will have access to Craft CMS.
$ sudo chgrp -R nginx /var/www/html/craftcms
Give nginx group permission to write to the directory.
$ sudo chmod -R g+w /var/www/html/craftcms
From here on, you won't need to change permissions again and can do all the operations without using root privileges.
Step 9 - Install SSL
We need to install Certbot to generate the SSL certificate. We will use the Snapd package installer for that. Since Rocky Linux doesn't ship with it, install the Snapd installer. It requires the EPEL (Extra Packages for Enterprise Linux) repository to work. But since we already installed it in step 3, we can directly move ahead.
Install Snapd.
$ sudo dnf install -y snapd
Enable and Start the Snap service.
$ sudo systemctl enable snapd --now
Install the Snap core package, and ensure that your version of Snapd is up to date.
$ sudo snap install core && sudo snap refresh core
Create necessary links for Snapd to work.
$ sudo ln -s /var/lib/snapd/snap /snap
$ echo 'export PATH=$PATH:/var/lib/snapd/snap/bin' | sudo tee -a /etc/profile.d/snapd.sh
Install Certbot.
$ sudo snap install --classic certbot
Use the following command to ensure that the Certbot command can be run by creating a symbolic link to the /usr/bin directory.
$ sudo ln -s /snap/bin/certbot /usr/bin/certbot
Verify if Certbot is functioning correctly.
$ certbot --version
certbot 2.7.4
Run the following command to generate an SSL Certificate.
$ sudo certbot certonly --nginx --agree-tos --no-eff-email --staple-ocsp --preferred-challenges http -m [email protected] -d craftcms.example.com
The above command will download a certificate to the /etc/letsencrypt/live/craftcms.example.com directory on your server.
Generate a Diffie-Hellman group certificate.
$ sudo openssl dhparam -dsaparam -out /etc/ssl/certs/dhparam.pem 4096
Check the Certbot renewal scheduler service.
$ sudo systemctl list-timers
You will find snap.certbot.renew.service as one of the services scheduled to run.
NEXT                        LEFT         LAST                        PASSED     UNIT                      ACTIVATES
---------------------------------------------------------------------------------------------------------------------------
Mon 2023-12-04 23:38:47 UTC 18min left Mon 2023-12-04 22:19:02 UTC 1h 0min ago dnf-makecache.timer          dnf-makecache.service
Tue 2023-12-05 00:00:00 UTC 40min left -                           -           logrotate.timer              logrotate.service
Tue 2023-12-05 09:36:00 UTC 10h left   -                           -           snap.certbot.renew.timer     snap.certbot.renew.service
Do a dry run of the process to check whether the SSL renewal is working fine.
$ sudo certbot renew --dry-run
If you see no errors, you are all set. Your certificate will renew automatically.
Step 10 - Configure SELinux
Change the file security context for Craft CMS.
$ sudo semanage fcontext -a -t httpd_sys_rw_content_t "/var/www/html/craftcms(/.*)?"
Apply the policy.
$ sudo restorecon -Rv /var/www/html/craftcms/
Apply the policy to allow Nginx to give access to PostgreSQL.
$ sudo setsebool -P httpd_can_network_connect_db 1
Apply the policy to allow connections to be made to outside hosts.
$ sudo setsebool -P httpd_can_network_connect 1
With MariaDB 10.11, you will face another issue which is that SELinux prevents PHP-FPM from connecting to MariaDB. That can be solved by installing an SELinux module. The first step is to create a type enforcement file.
Create the file my-phpfpm.te in your home directory and open it for editing.
$ cd ~
$ nano my-phpfpm.te
Paste the following code in it.
module my-phpfpm 1.0;

require {
        type unconfined_service_t;
        type httpd_t;
        type httpd_sys_content_t;
        class dir write;
        class unix_stream_socket connectto;
}

#============= httpd_t ==============

#!!!! This avc is allowed in the current policy
allow httpd_t httpd_sys_content_t:dir write;

#!!!! This avc is allowed in the current policy
allow httpd_t unconfined_service_t:unix_stream_socket connectto;
Save the file by pressing Ctrl + X and entering Y when prompted.
The next step is to convert it into a policy module using the following command. Don't modify the filename in the command otherwise, it won't work. The module is named my-phpfpm and the file name should be the same as the module name.
$ sudo checkmodule -M -m -o my-phpfpm.mod my-phpfpm.te
Next, we need to compile the policy module to create a policy package.
$ sudo semodule_package -o my-phpfpm.pp -m my-phpfpm.mod
The final step is to load the policy package using the semodule command which installs the policy to be used.
$ sudo semodule -i my-phpfpm.pp
Step 11 - Configure Nginx
Open the file /etc/nginx/nginx.conf for editing.
$ sudo nano /etc/nginx/nginx.conf
Add the following line before the line include /etc/nginx/conf.d/*.conf;.
server_names_hash_bucket_size 64;
Save the file by pressing Ctrl + X and entering Y when prompted.
Create and open the file /etc/nginx/conf.d/craftcms.conf for editing.
$ sudo nano /etc/nginx/conf.d/craftcms.conf
Paste the following code in it. Replace craftcms.example.com with your domain name. Make sure the value of the client_max_body_size is set to 128MB which is what we set for Craft CMS while configuring PHP earlier.
server {

    listen 443 ssl http2;
    listen [::]:443 ssl http2;

    server_name craftcms.example.com;
    root /var/www/html/craftcms/web;

    index index.php;
    client_max_body_size 128M;

    access_log  /var/log/nginx/craftcms.access.log;
    error_log   /var/log/nginx/craftcms.error.log;

    ssl_certificate      /etc/letsencrypt/live/craftcms.example.com/fullchain.pem;
    ssl_certificate_key  /etc/letsencrypt/live/craftcms.example.com/privkey.pem;
    ssl_trusted_certificate /etc/letsencrypt/live/craftcms.example.com/chain.pem;

    ssl_session_timeout  5m;
    ssl_session_cache shared:MozSSL:10m;
    ssl_session_tickets off;

    ssl_protocols TLSv1.2 TLSv1.3;
    ssl_prefer_server_ciphers on;
    ssl_ciphers ECDHE-ECDSA-AES128-GCM-SHA256:ECDHE-RSA-AES128-GCM-SHA256:ECDHE-ECDSA-AES256-GCM-SHA384:ECDHE-RSA-AES256-GCM-SHA384:ECDHE-ECDSA-CHACHA20-POLY1305:ECDHE-RSA-CHACHA20-POLY1305:DHE-RSA-AES128-GCM-SHA256:DHE-RSA-AES256-GCM-SHA384;
    ssl_ecdh_curve X25519:prime256v1:secp384r1:secp521r1;
    ssl_stapling on;
    ssl_stapling_verify on;
    ssl_dhparam /etc/ssl/certs/dhparam.pem;

    location / {
        try_files $uri/index.html $uri $uri/ /index.php?$query_string;
    }

    location ~ [^/]\.php(/|$) {
        try_files $uri $uri/ /index.php?$query_string;
        fastcgi_index index.php;
        fastcgi_split_path_info ^(.+\.php)(/.+)$;
        fastcgi_keep_conn on;
        include fastcgi_params;
        fastcgi_pass unix:/run/php-fpm/www.sock;
        fastcgi_param SCRIPT_FILENAME $document_root$fastcgi_script_name;
        fastcgi_param PATH_INFO $fastcgi_path_info;
        fastcgi_param HTTP_PROXY "";
    }
}
# enforce HTTPS
server {
    listen 80;
    listen [::]:80;
    server_name  craftcms.example.com;
    return 301   https://$host$request_uri;
}
Save the file by pressing Ctrl + X and entering Y when prompted.
Verify your Nginx configuration.
$ sudo nginx -t
Restart the Nginx server.
$ sudo systemctl restart nginx
Step 12 - Access Craft CMS
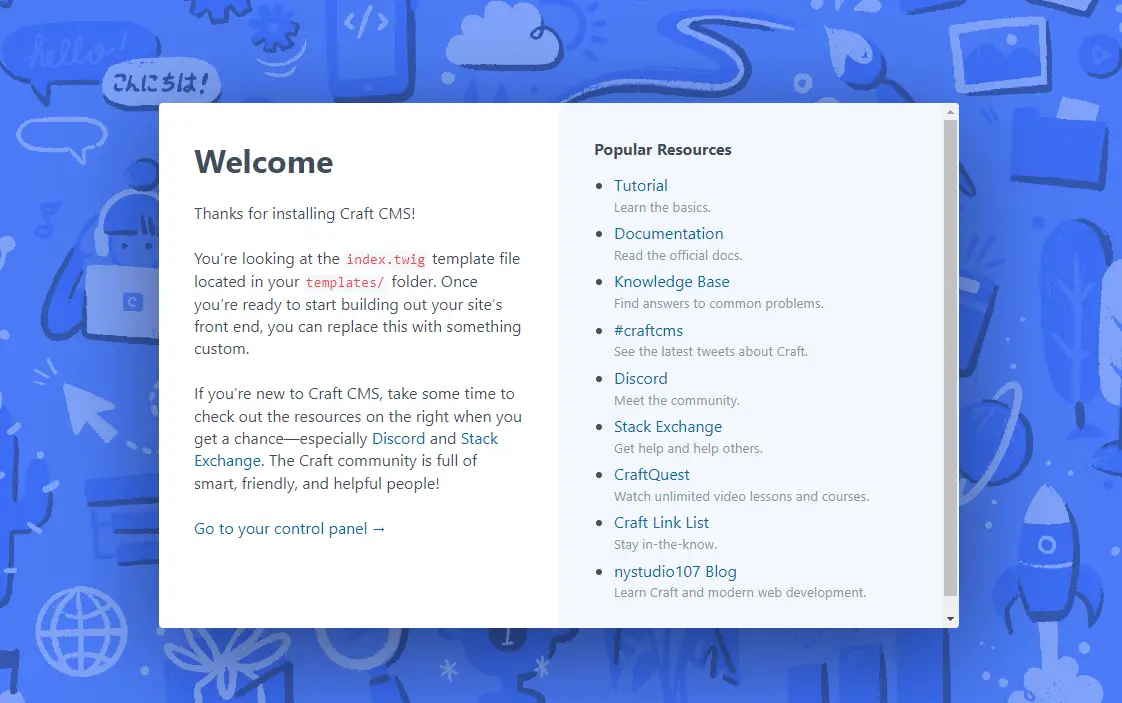
Open the URL https://craftcms.example.com in your browser and you will be taken to the following page.
To access the administration page, visit the URL https://craftcms.example.com/admin and you will be taken to the login page.
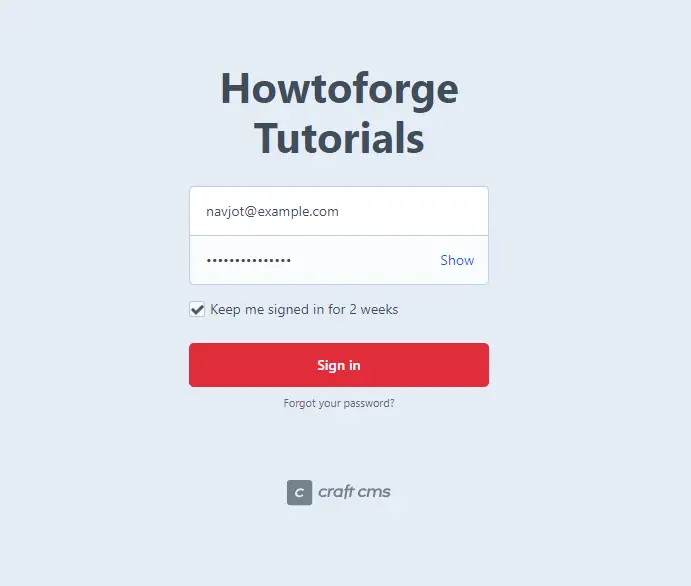
Enter your administration credentials and click the Sign in key to log in. You will be taken to the following dashboard.
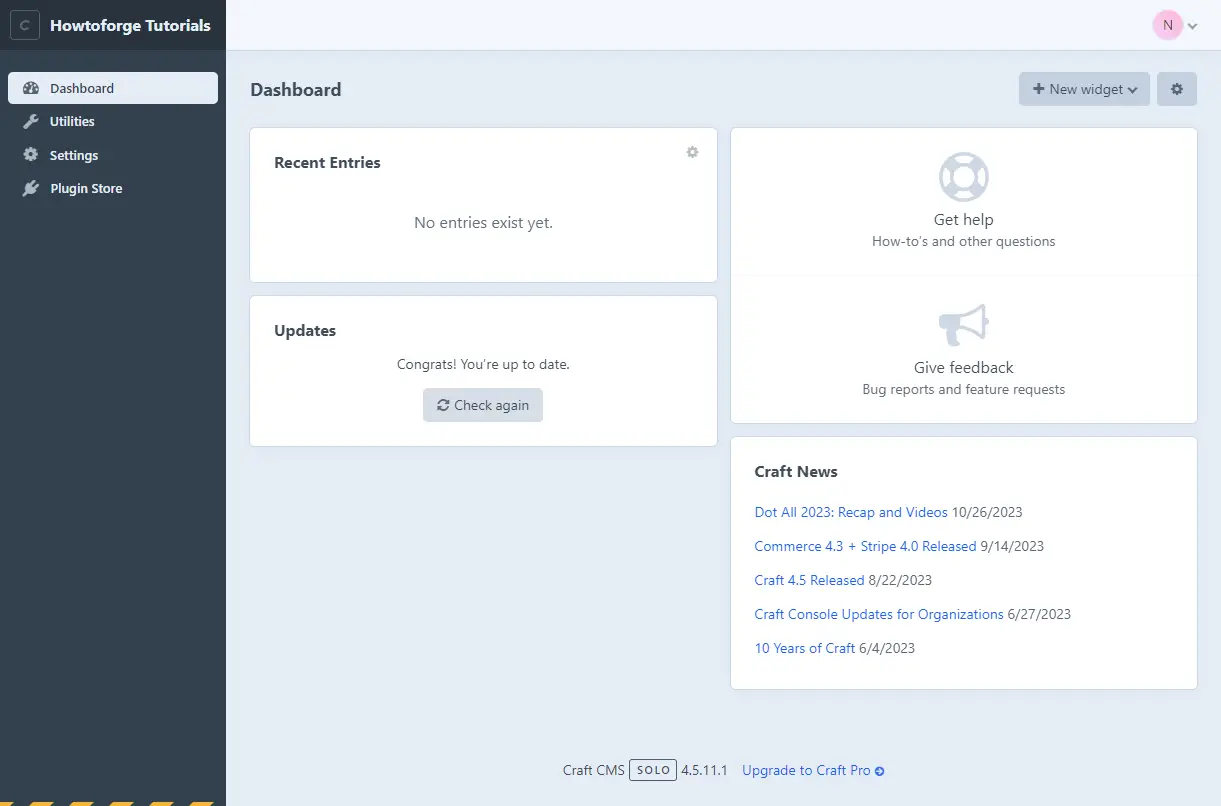
You can now start using Craft CMS for building your website.
Step 13 - Backup and Restore Craft CMS
You can back up Craft CMS's database from inside the admin panel by visiting Admin Dashboard >> Utilities >> Database Backup.
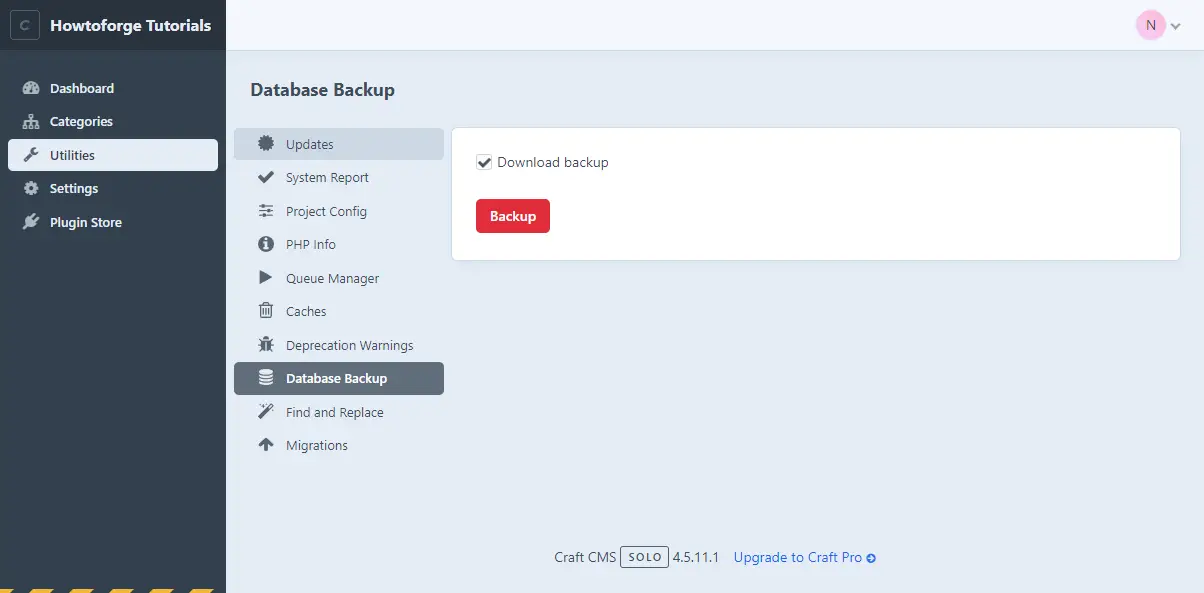
Click the Backup button to download your database backup. You can also create the backup using the terminal. Run the following command to create the backup. Enter your password when prompted.
$ mysqldump -u craftcmsuser -p craftcms > ~/craftcms.database.sql
You can also create the database backup using the Craft CMS command-line utility. The advantage of this utility is that you don't need to pass your database credentials. Read more about the Craft CMS command console utility here.
$ cd /var/www/html/craftcms
$ php craft db/backup ~/
Backing up the database ... done
Backup file: /home/navjot/howtoforge-tutorials--2023-12-03-065138--v4.5.11.1.sql (200.019 KB)
If you don't specify any location in the above command, the backup file will be written to the /var/www/html/craftcms/storage/backups directory.
To backup the files, copy and save the entire /var/www/html/craftcms folder.
$ cd /var/www/html
$ tar -zcf ~/craftcms.tar.gz craftcms
To restore it on a new server, extract the files to the /var/www/html folder.
$ tar -xzf craftcms.tar.gz -C /var/www/html/
Create a database with the same credentials on the new server and restore the database using the following command. Enter your password when prompted.
$ mysqlimport -u craftcmsuser -p craftcms craftcms.database.sql
Step 14 - Update Craft CMS
There are two ways to update Craft CMS. One is from inside the administration panel. When an update is available, you will receive a notice. Click on the notice to upgrade. Craft CMS will automatically backup the database before performing an update.
You can also update it via the terminal.
To check all the available updates, run the following command.
$ cd /var/www/html/craftcms/
$ php craft update
If an update is available, run the following command to apply it.
$ php craft update all
Conclusion
This concludes our tutorial where you learned how to install Craft CMS software on a Debian 12 server. If you have any questions, post them in the comments below.

