How to Install Containerd Container Runtime on Ubuntu 22.04
Containerd is a high-level container runtime that supports OCI Image Spec and OCI Runtime Spec (Open Container Initiative). Containerd is created with an emphasis on simplicity, robustness, and portability for container deployment and lifecycle. It's designed to be easily embadlable to latge system such as Docker and Kubernetes. Under the hood, the new Docker version uses the Containerd for managing container lifecycle. And for Kubernetes, you can use Containerd as your container runtime via the CRI to manage containers lifecycle on the Kubernetes Cluster.
This tutorial will go over how to install the Containerd Container Runtime on an Ubuntu 22.04 server. This tutorial will go over two different methods for installing Containerd, manually by downloading the binary package or and installing Containerd via the APT repository. By the end of this tutorial, you will have the container environment for your development, you can also use this as part of the Kubernetes cluster installation.
Prerequisites
To follow this tutorial, you will need the following requirements:
- One Ubuntu 22.04 server - This example will use the server with the hostname "server-ubuntu".
- A non-root user with root/sudo administrative privileges.
Installing Containerd Manually
In the first step, you will learn to install the Containerd Container Runtime manually via binary package. This means you will also need to install some components for Containerd itself, including the runc and CNI (Container Network Interface) plugin.
Both Containerd and all of its components are available on its GitHub repository and ready to install.
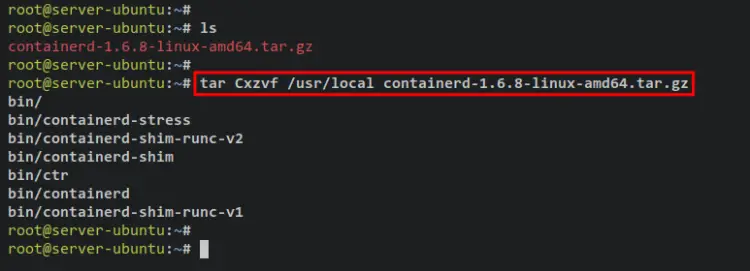
To install Containerd, check the Containerd GitHub release page to get the latest version. Then, copy the link and download the binary package of Containerd using "wget". After that, extract the file to the "/usr/local" directory.
At the time of this writing, the latest version of Containerd is v1.6.8. Download it using the "wget" command to your Ubuntu server and extract it to the "/usr/local" directory via the "tar" command.
wget https://github.com/containerd/containerd/releases/download/v1.6.8/containerd-1.6.8-linux-amd64.tar.gz
tar Cxzvf /usr/local containerd-1.6.8-linux-amd64.tar.gz
Runc is a command-line tool that is used to spawn containers on Linux systems according to OCI (Open Container Initiative) specification. To install runc, you will need to visit the official runc GitHub release page and grab the latest version of runc and download it using the wget command.
At the time of this writing, the latest version of runc is v1.1.3. Download it using the wget command and install it as below.
wget https://github.com/opencontainers/runc/releases/download/v1.1.3/runc.amd64
sudo install -m 755 runc.amd64 /usr/local/sbin/runc
Now check the runc binary file using the below command. You should see the runc binary file is available in the "/usr/local/sbin" directory.
which runc
Now you will need to install the CNI (Container Network Interface) plugin for the Containerd Container Runtime. The CNI plugin provides a networking functionality for Containers on the Linux system.
Before downloading the CNI plugin, be sure to visit the official GitHub release page to grab the latest version of the CNI plugin.
At the time of this writing, the latest version of the CNI plugin is v1.1.1. Download it using the wget command as below.
wget https://github.com/containernetworking/plugins/releases/download/v1.1.1/cni-plugins-linux-amd64-v1.1.1.tgz
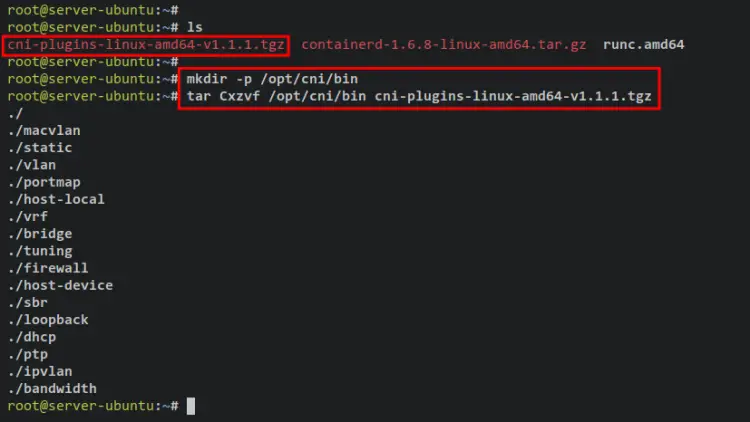
Next, create a new directory "/opt/cni/bin" that will be used as the target installation directory of the CNI plugin. Then, extract the CNI plugin into it via the tar command.
mkdir -p /opt/cni/bin
tar Cxzvf /opt/cni/bin cni-plugins-linux-amd64-v1.1.1.tgz
After you have installed all three Containerd Container Runtime components, you will start configuring the Containerd.
Run the following command to create a new directory "/etc/containerd". Then, generate the default Containerd configuration using the "containerd" command as below.
sudo mkdir -p /etc/containerd/
containerd config default | sudo tee /etc/containerd/config.toml
Now run the following command to enable the "SystemdCgroup" for the Containerd container runtime. This command will replace the option "SystemdCgroup = false" to "SystemdCgroup = true" on the Containerd config file "/etc/containerd/config.toml.
sudo sed -i 's/SystemdCgroup \= false/SystemdCgroup \= true/g' /etc/containerd/config.toml
Now run the following command to download the systemd service file for Containerd to the "/etc/systemd/system" directory.
sudo curl -L https://raw.githubusercontent.com/containerd/containerd/main/containerd.service -o /etc/systemd/system/containerd.service
Then, reload the systemd manager to apply a new service file.
sudo systemctl daemon-reload
Lastly, start and enable the "containerd" service using the following systemctl command. If your installation is successful, you will see there is no error message found during the "containerd" service starting the process.
sudo systemctl start containerd
sudo systemctl enable containerd
Check and verify the 'containerd" service using the below command. You should see the 'containerd" service is currently at the status of "running" and it's enabled", which means will automatically run at system boot.
sudo systemctl status containerd
Installing Containerd via APT Docker Repository
Now you will learn how to install the Containerd Container Runtime via the APT Docker repository.
First, run the following command to install some package dependencies. When prompted to confirm the installation, input Y and press ENTER.
sudo apt install \
    ca-certificates \
    curl \
    gnupg \
    lsb-release
Next, run the following command to create a new directory and download the GPG key for the Docker repository.
sudo mkdir -p /etc/apt/keyrings
curl -fsSL https://download.docker.com/linux/ubuntu/gpg | sudo gpg --dearmor -o /etc/apt/keyrings/docker.gpg
Add the Docker repository to your system using the below command.
echo \
  "deb [arch=$(dpkg --print-architecture) signed-by=/etc/apt/keyrings/docker.gpg] https://download.docker.com/linux/ubuntu \
  $(lsb_release -cs) stable" | sudo tee /etc/apt/sources.list.d/docker.list > /dev/null
Now run the following apt command to update and refresh the package index for your Ubuntu system. Then, install the package "containerd.io" as the Containerd Container Runtime. The installation will automatically begin.
sudo apt update
sudo apt install containerd.io
After installation is finished, start and enable the "containerd" service using the below systemctl command.
sudo systemctl start containerd
sudo systemctl enable containerd
Then, check and verify the "containerd" service using the following command. You should see the "containerd" service is active and running.
sudo systemctl status containerd
Next, you will generate a new config file for the Containerd Container Runtime.
Run the following command to backend the default configuration provides by the Docker repository. Then, generate a new configuration file using the "containerd" command as below.
sudo mv etc/containerd/config.toml etc/containerd/config.toml.orig
containerd config default | sudo tee /etc/containerd/config.toml
Now run the command below to enable the "SystemdCgroup" for the Containerd.
sudo sed -i 's/SystemdCgroup \= false/SystemdCgroup \= true/g' /etc/containerd/config.toml
Next, you will also need to install the CNI (Container Network Interface) plugin for the Containerd installation via the APT Docker repository.
Run the wget command below to download the CNI plugin.
wget https://github.com/containernetworking/plugins/releases/download/v1.1.1/cni-plugins-linux-amd64-v1.1.1.tgz
Now create a new directory "/opt/cni/bin" using the below command. Then, extract the CNI plugin via the tar command as below.
mkdir -p /opt/cni/bin
tar Cxzvf /opt/cni/bin cni-plugins-linux-amd64-v1.1.1.tgz
Lastly, run the command below to restart the Containerd service and apply new changes.
sudo systemctl restart containerd
At this point, the Containerd container runtime is now running with the CNI plugin and the SystemdCgroup.
Communicating with Containerd via nerdctl
ContaiNERD CTL is a command-line tool for managing containers for the Containerd container runtime. It's compatible with Docker CLI for Docker and has the same UI/UX as the "docker" command.
The nrdctl command-line also supports Docker Compose via the "nerdctl compose" command, also supports container rootless mode, lazy-pulling image via OverlayBD and Stargz, supports encrypted images, and P2P image distribution via IPFS.
Run the following command to download the "nerctl" binary file. Then, extract it via tar command to the "/usr/local/bin" directory.
wget https://github.com/containerd/nerdctl/releases/download/v0.22.2/nerdctl-0.22.2-linux-amd64.tar.gz
sudo tar Cxzvf /usr/local/bin nerdctl-0.22.2-linux-amd64.tar.gz
Now check the nerdctl binary file using the following command.
which nerdctl
Next, you will learn how to run a container with Containerd container runtime via the "nerdctl" command. The "nerdctl" command-line tool is Docker Compatible, so the command for managing containers is similar to the Docker command.
Run the new container with the name "nginx" using the "nerdctl" command below. The "nginx" container will be running on the port '80' for both container and the host, and it's based on the image "nginx:alpine".
sudo nerdctl run -d --name nginx -p 80:80 nginx:alpine
Now check the currently running container on your system using the below "nerdctl" command. And you should see the "nginx" container running.
sudo nerdctl ps
Next, check and verify the list of available container images on your system using the below command. You should see the "nginx:alpine" image downloaded.
sudo nerdctl images
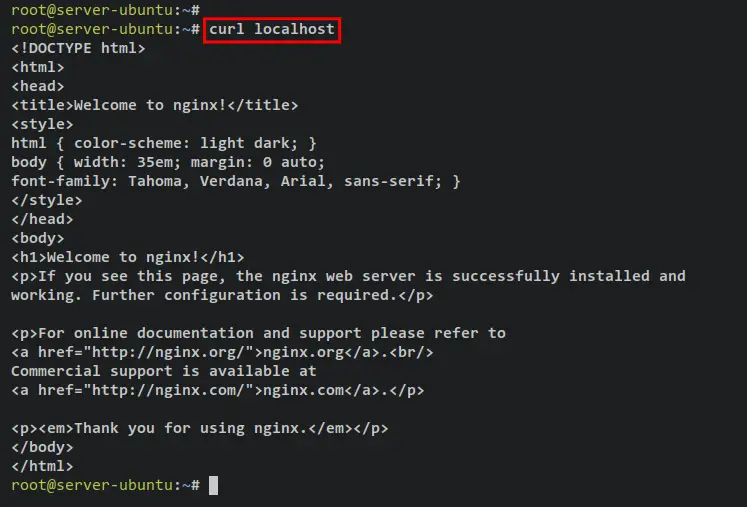
Lastly, run the curl command below to check the "nginx" container. And you should see the default index.html page of the "nginx" container.
curl localhost
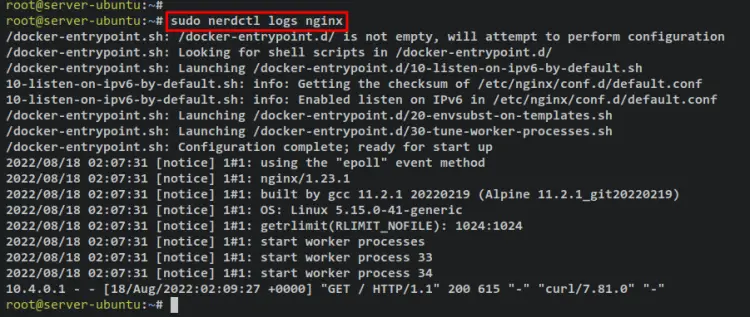
Additionally, you can also check and verify logs of the "nginx" container using the following "nerdctl" command.
sudo nerdctl logs nginx
Conclusion
Throughout this tutorial, you have learned two methods for installing Containerd container runtime. You've learned how to install Containerd manually by downloading the Container binary package and installing Containerd via the APT Docker repository.
In the end, you have now learned how to install the nerdctl command-line tool and the basic usage of nerdctl for managing containers that running under the Containerd container runtime environment. You now also be able to set up the Kubernetes cluster using the Containerd container runtime.


